
One of the most common questions I get is, "How can I send form submissions directly to my own app or database?" The answer is Webhooks, and it’s easier to set up than you might think.
This guide will walk you through creating a form in Poper and connecting it to any external API. This lets you instantly send new leads, sign-ups, or feedback right where you need them. Let’s get it done.
Step 1: Create Your Form For your website
First things first, you'll need a form. Once you’ve signed up and added your website's domain in the Poper dashboard, click the "New Popup" button. Don't worry about the name—you can easily switch it to an embeddable form later.
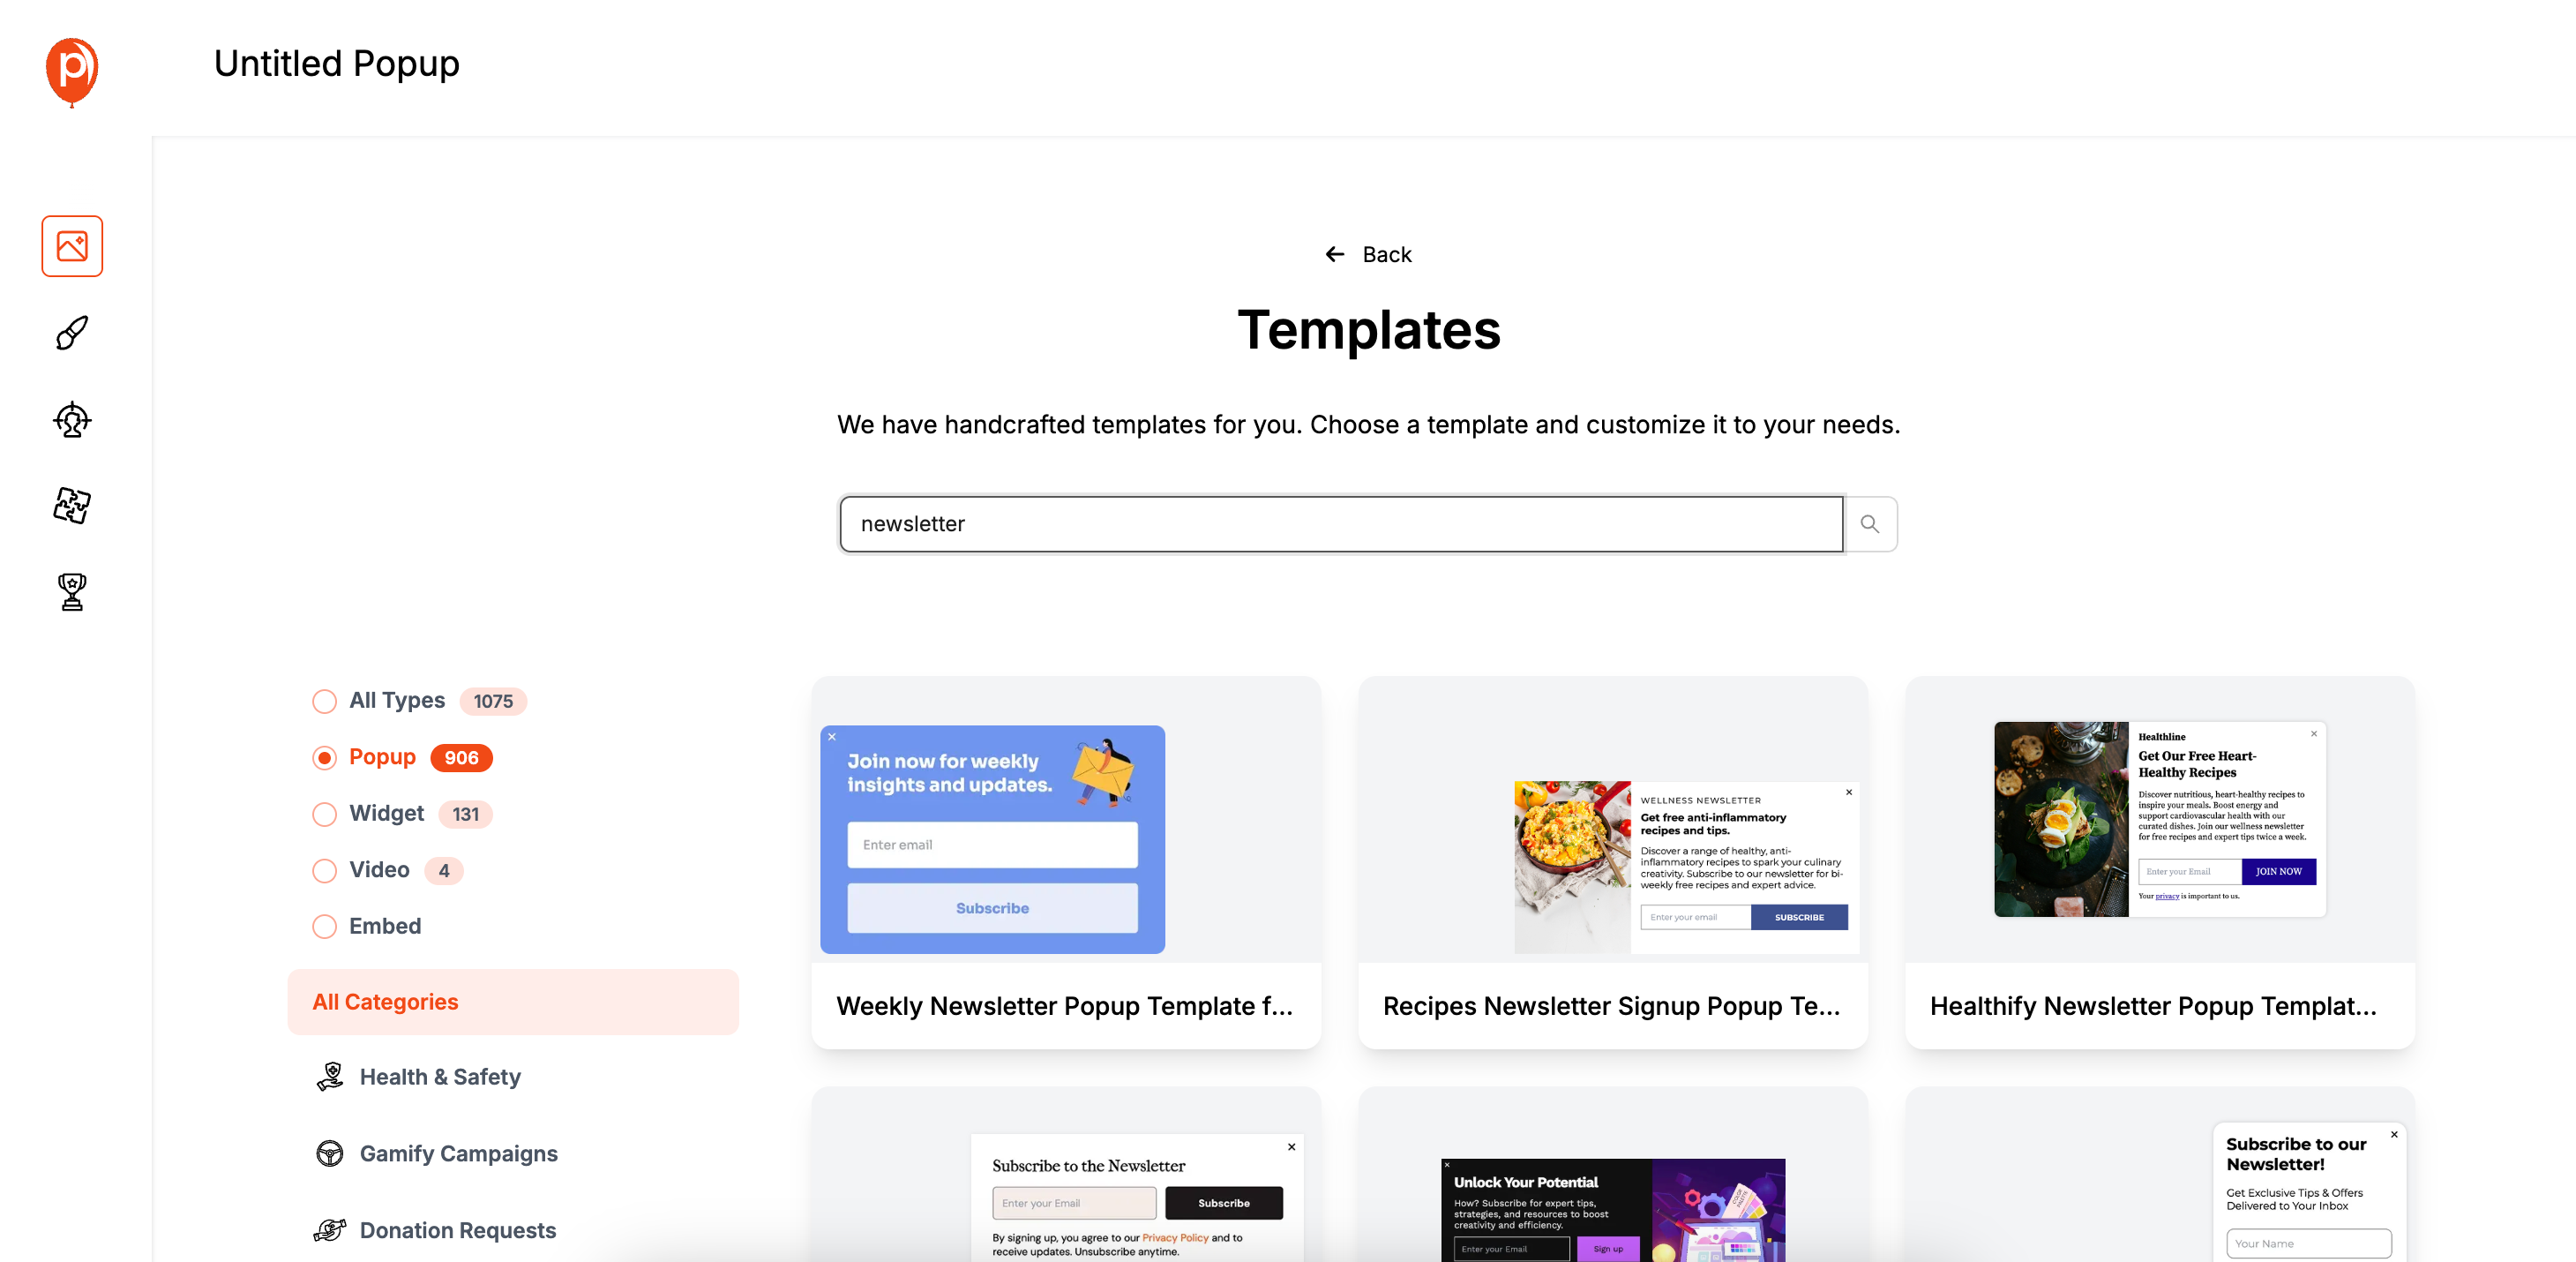
I recommend starting with a template. In the template library, search for "Newsletter" or "Sign Up." These are great starting points because they already have the essential fields. Picking a template saves time and gives you a professional design right away.
Step 2: Design Your Form and Add Fields
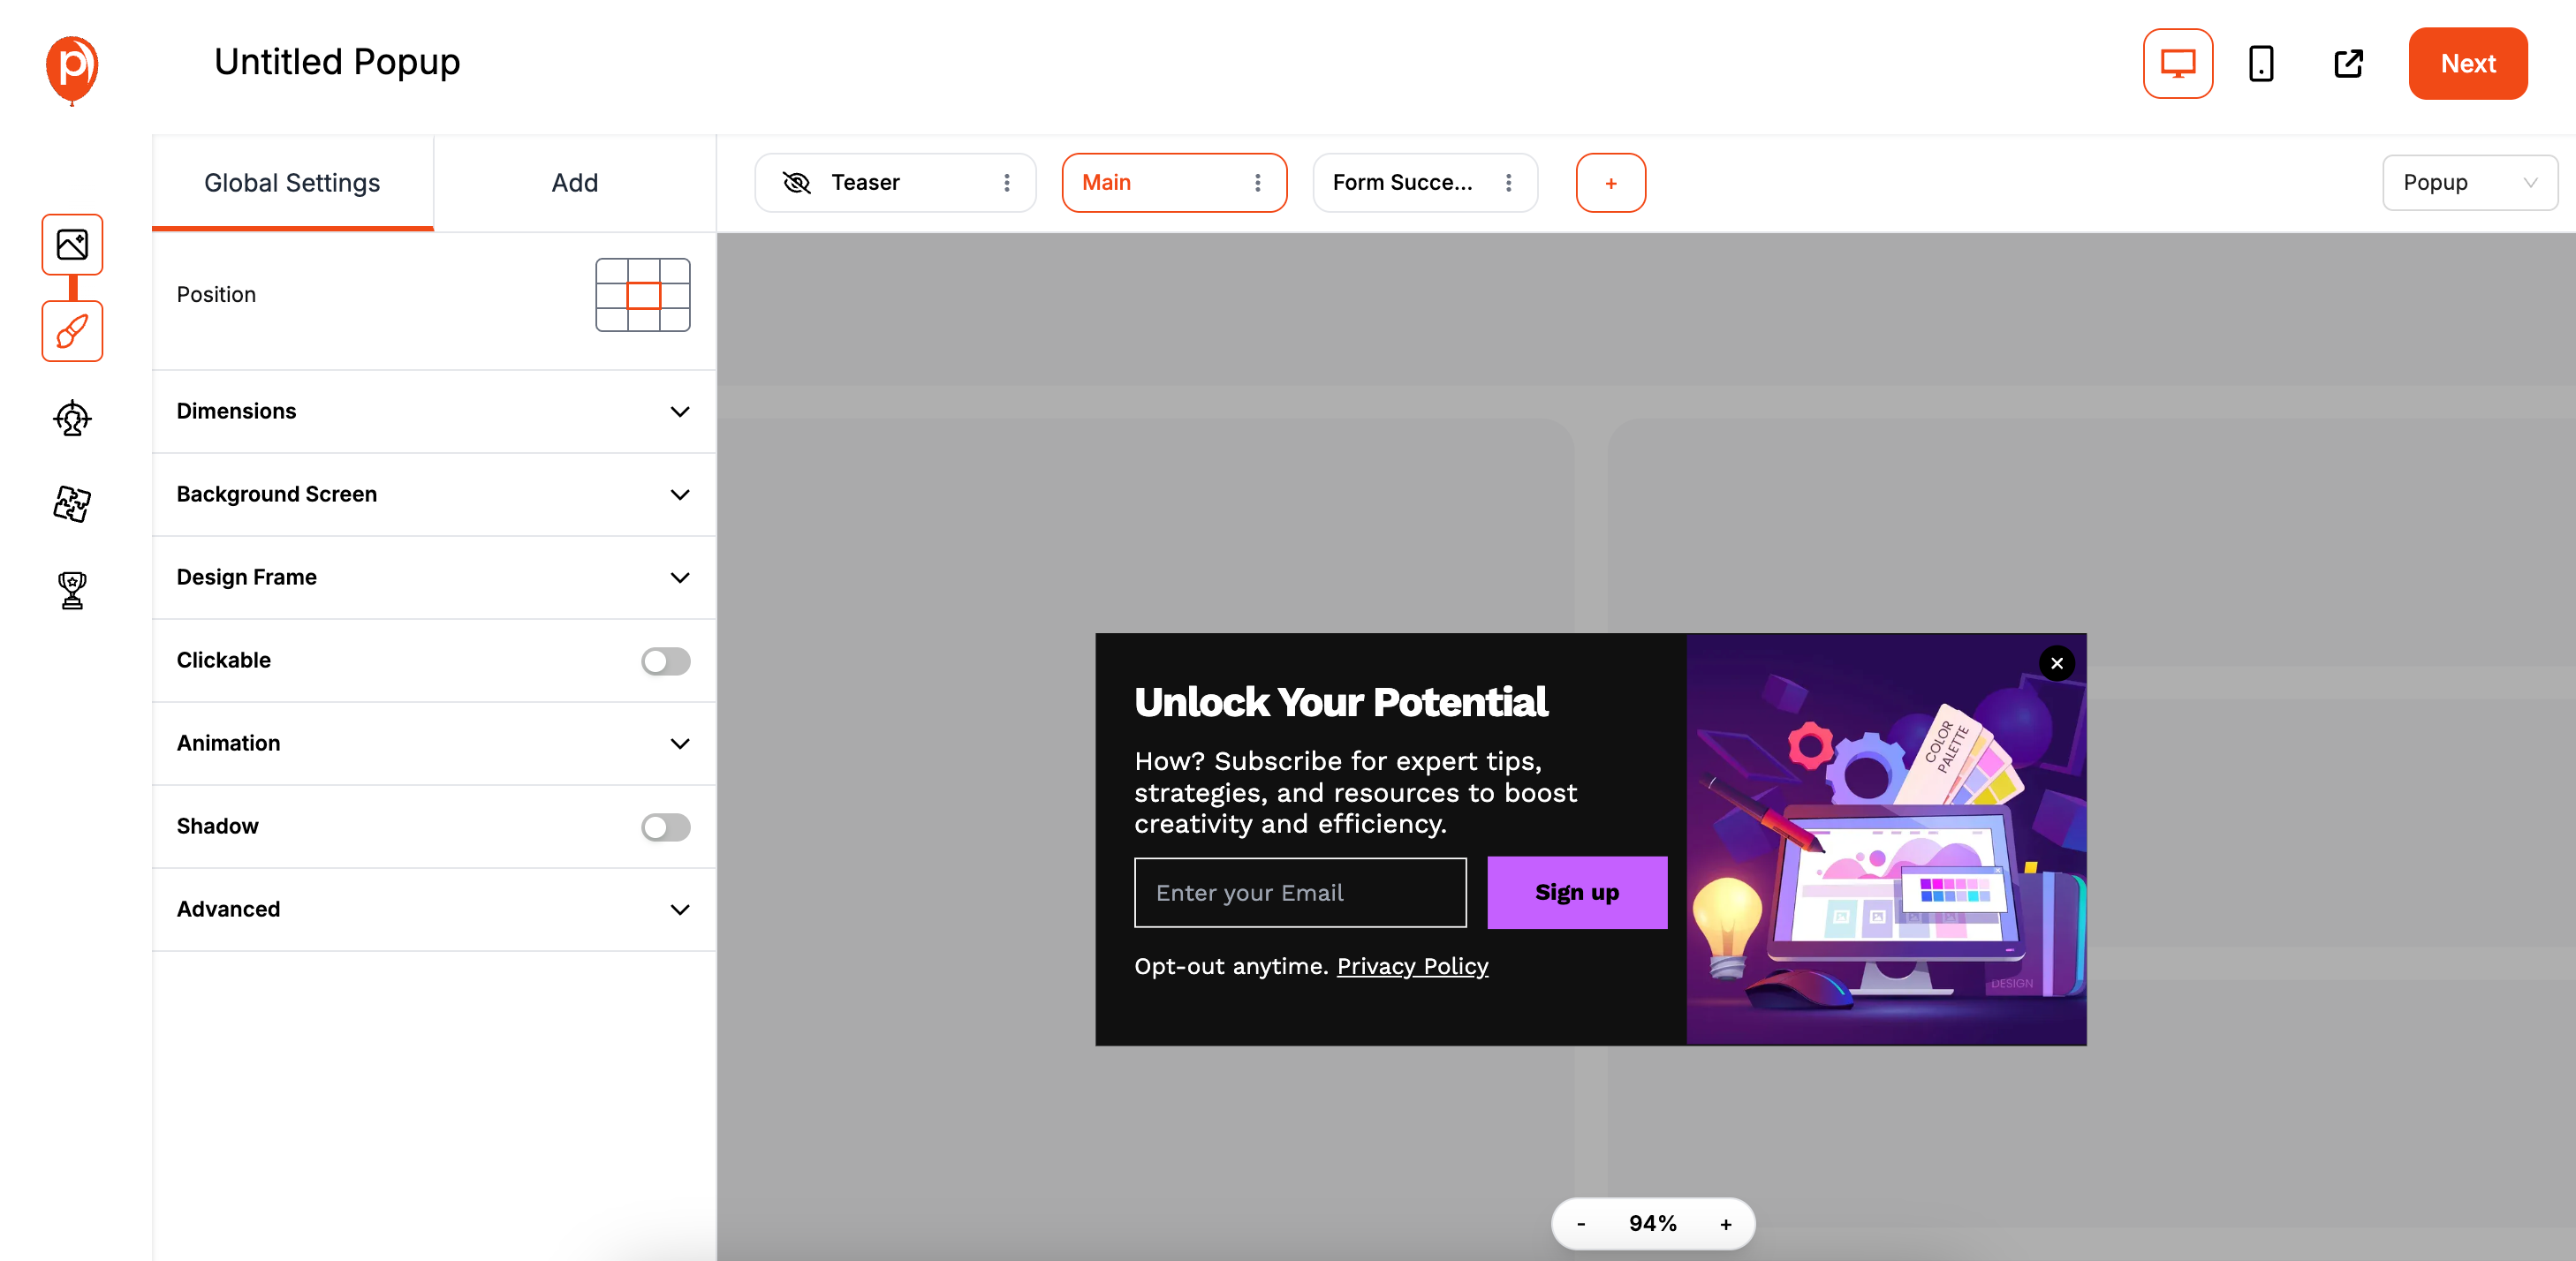
This opens our editor, where you can make the form your own. Adjust the colors and fonts to match your brand.
If you need to collect more information, like a phone number or company name, just head to the "Add" tab to drag in new fields.
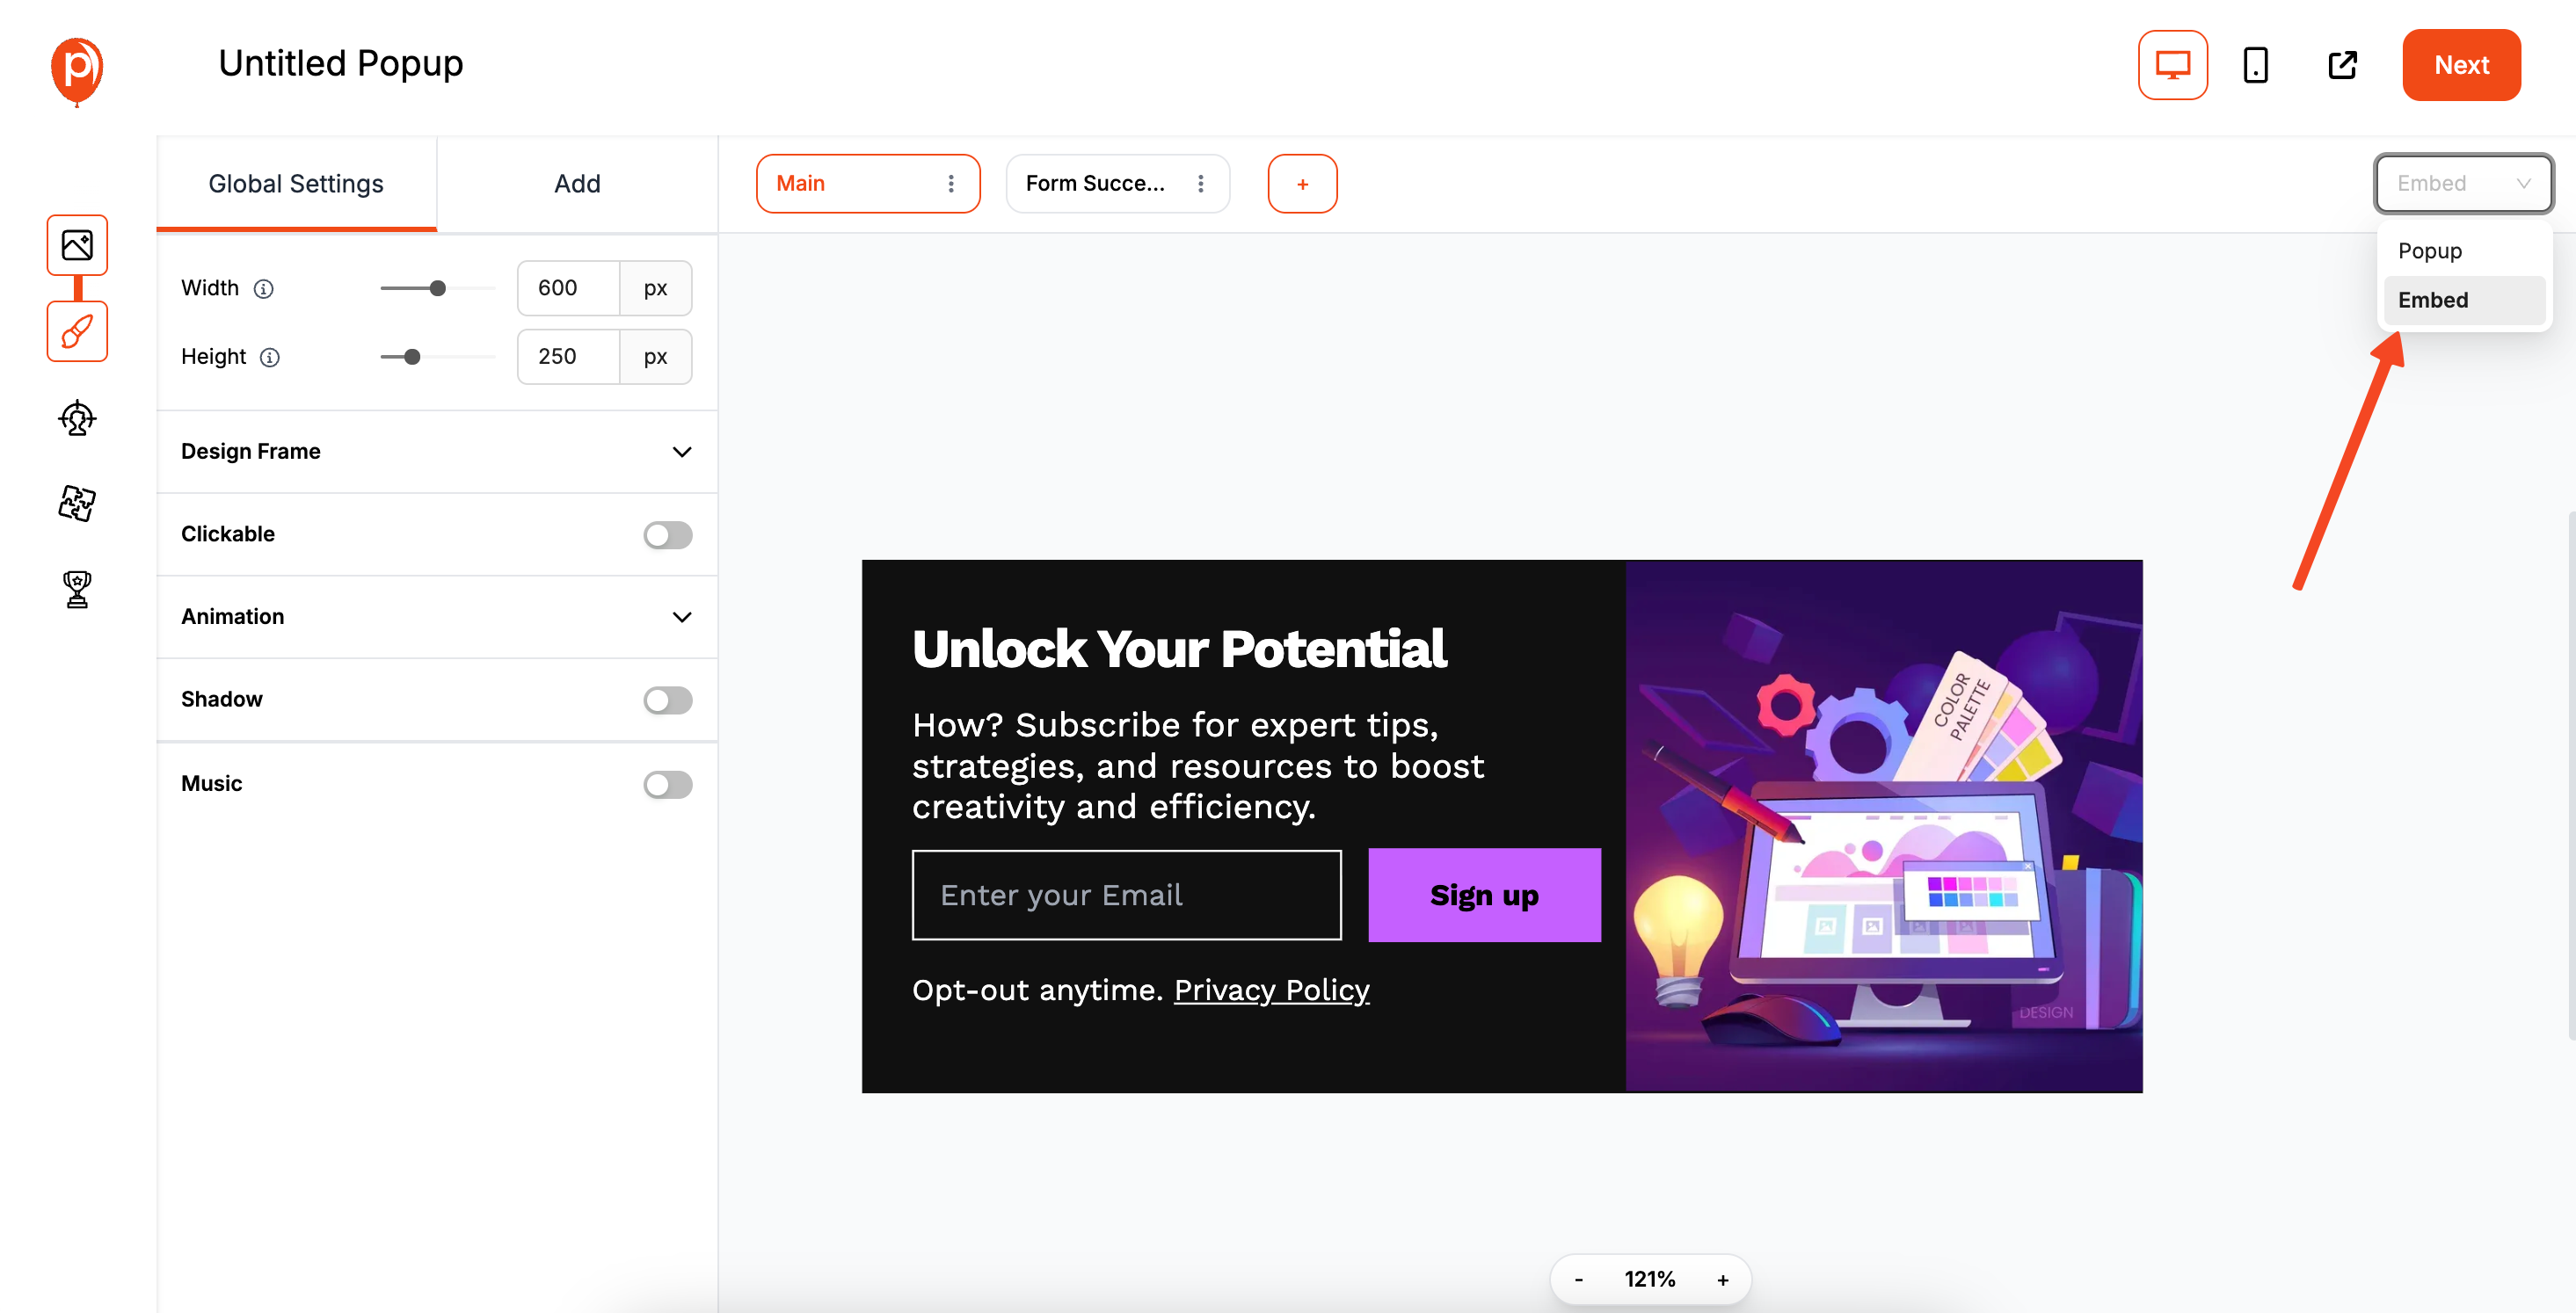
Once you’re happy with the design, look for the switch in the top right corner to change the campaign type from "Popup" to "Embed."
This turns your campaign into a form you can place permanently on a page, which is perfect for API connections.
Step 3: Choose Your Embed Position and Targeting
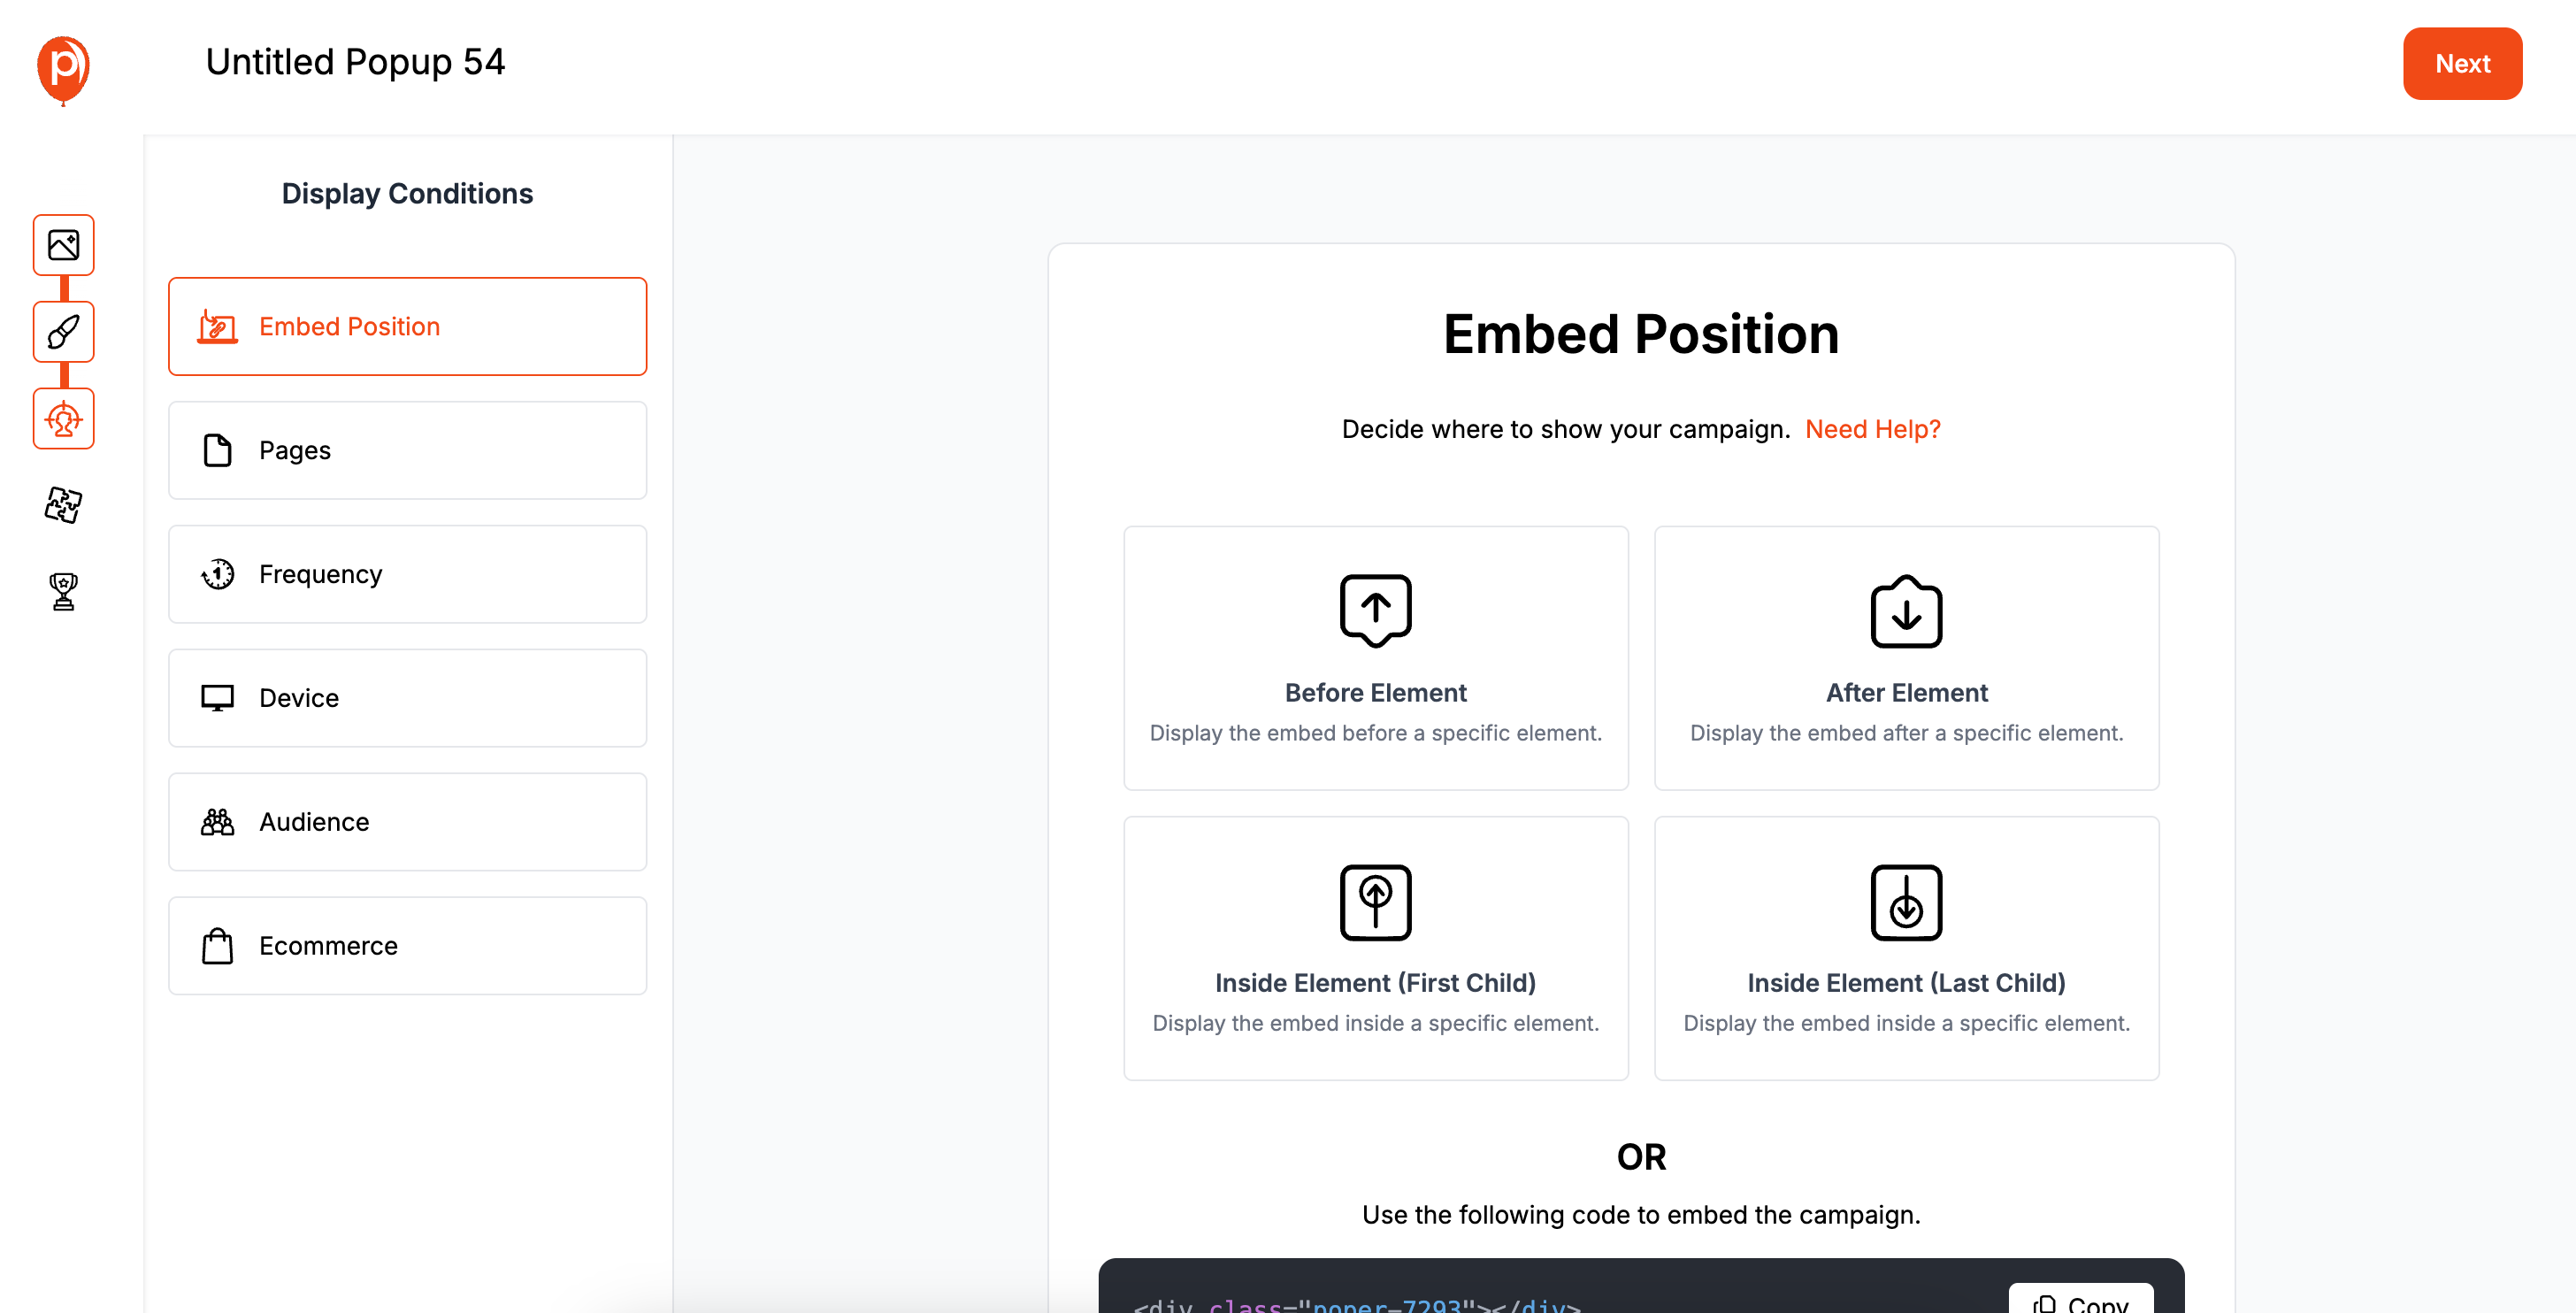
After clicking "Next," you'll land on the "Embed Position" screen. Here, you decide where on your site the form should appear. You can place it within your content, as a sidebar, or anywhere else you'd like.
On this same screen, you can also set up targeting rules. This is incredibly useful if you only want to show the form to visitors from a specific ad campaign or geographic location. It ensures the right people see your form at the right time. After Creating a Form To Connect to an API, you need to do to Next step.
Step 4: Connect to Your API with a Webhook
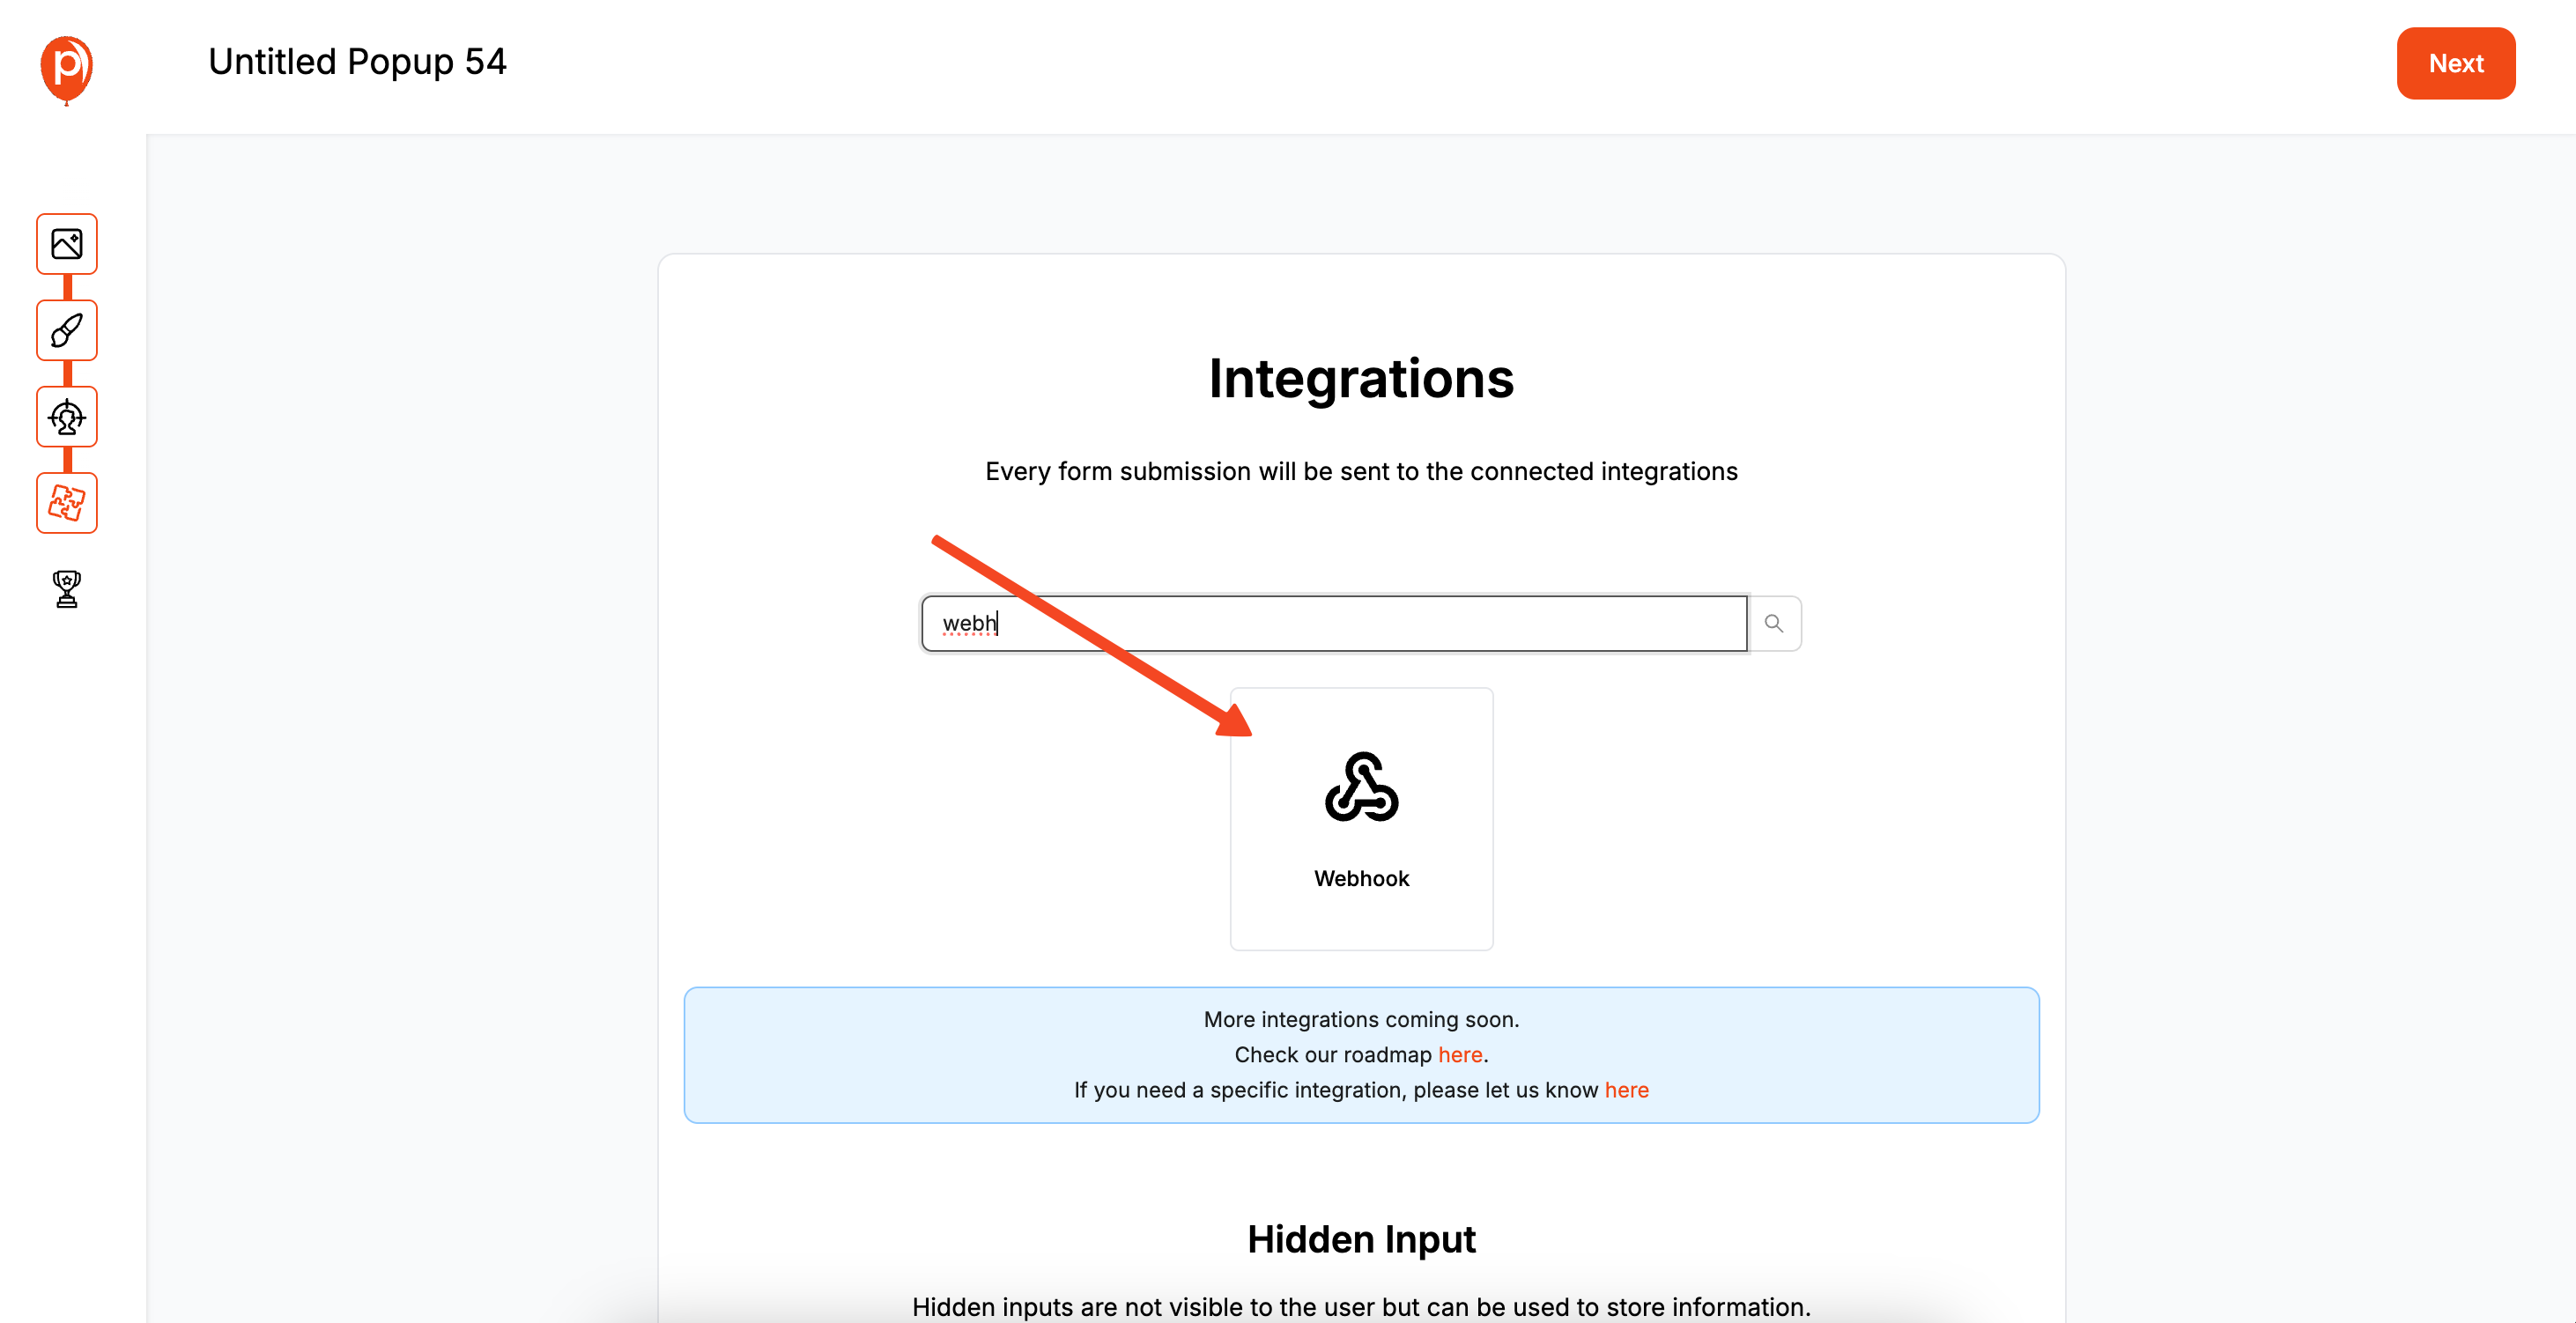
Now for the magic. Click "Next" to go to the "Integrations" page. This is where you connect Poper to your other tools. From the list, select "Webhook."
A webhook is simply a way for Poper to send a real-time notification to your API every time someone submits the form.
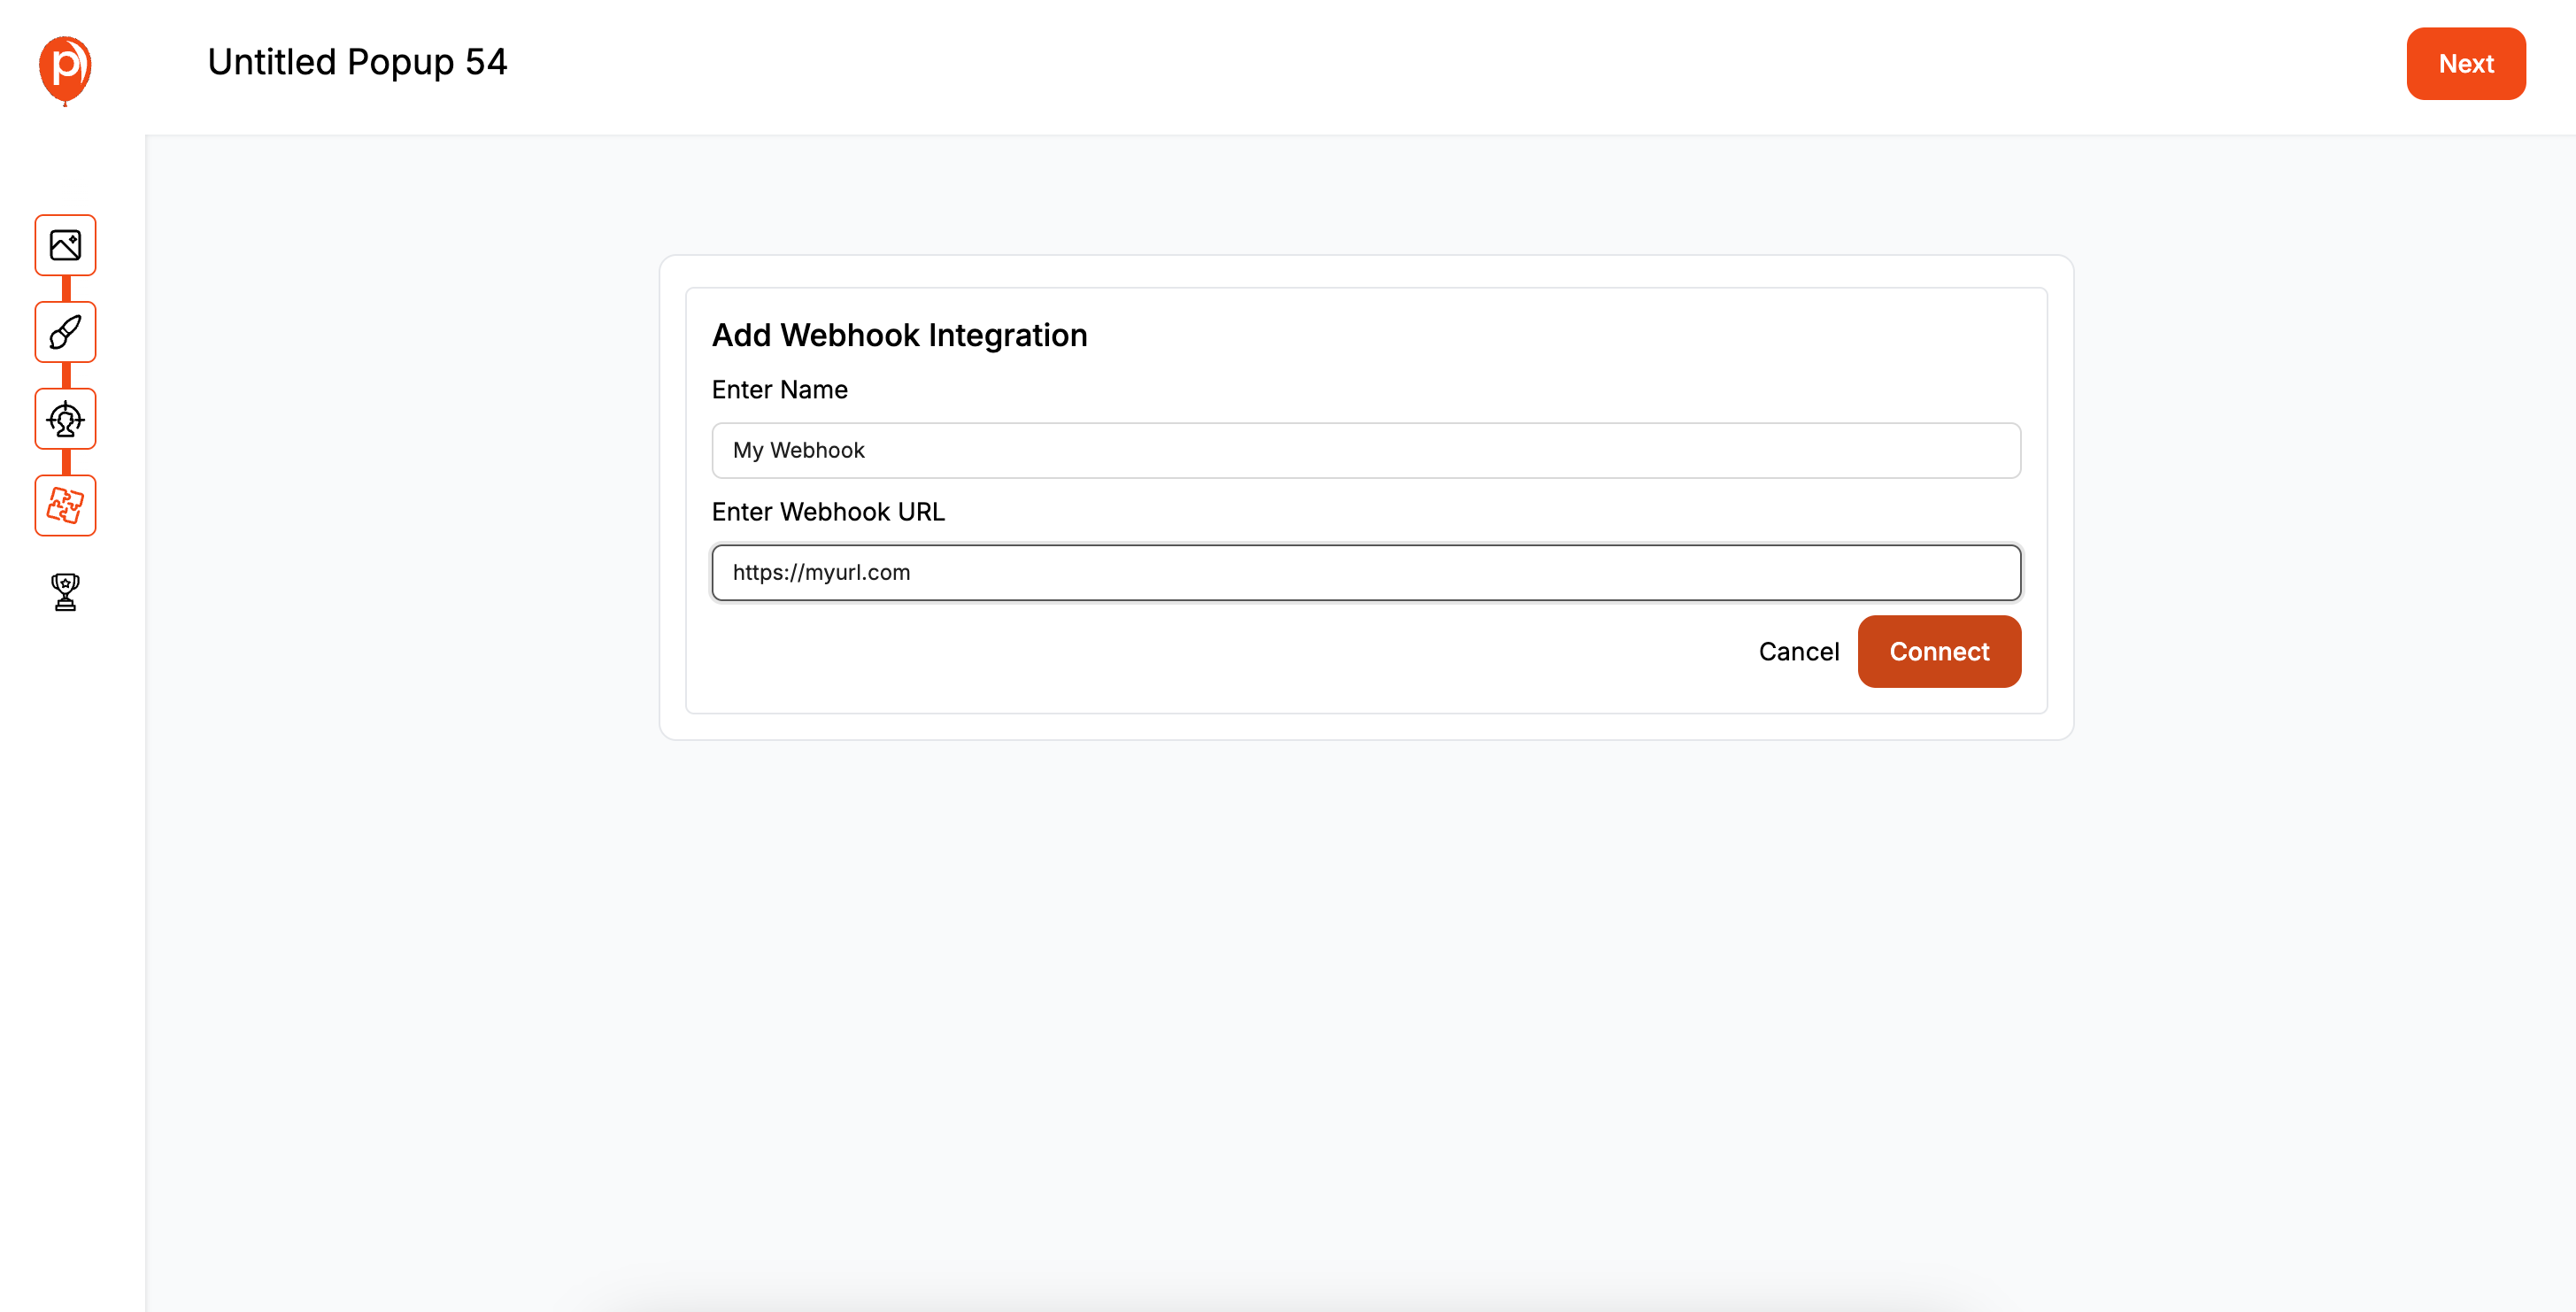
You'll be asked for an "Account Name" (just a label for your own reference, like "My CRM") and the "Webhook URL." This URL is the endpoint from your own application that is ready to receive data. For more technical details on the data format, you can check out our Webhooks Integration guide.
Step 5: Save and Publish Your Campaign

Once you've entered your webhook URL, click through to the final step and hit "Save & Publish." Your form is now live and ready to send data, but first, we need to get Poper installed on your website.
Step 6: Install the Poper Snippet on Your Site
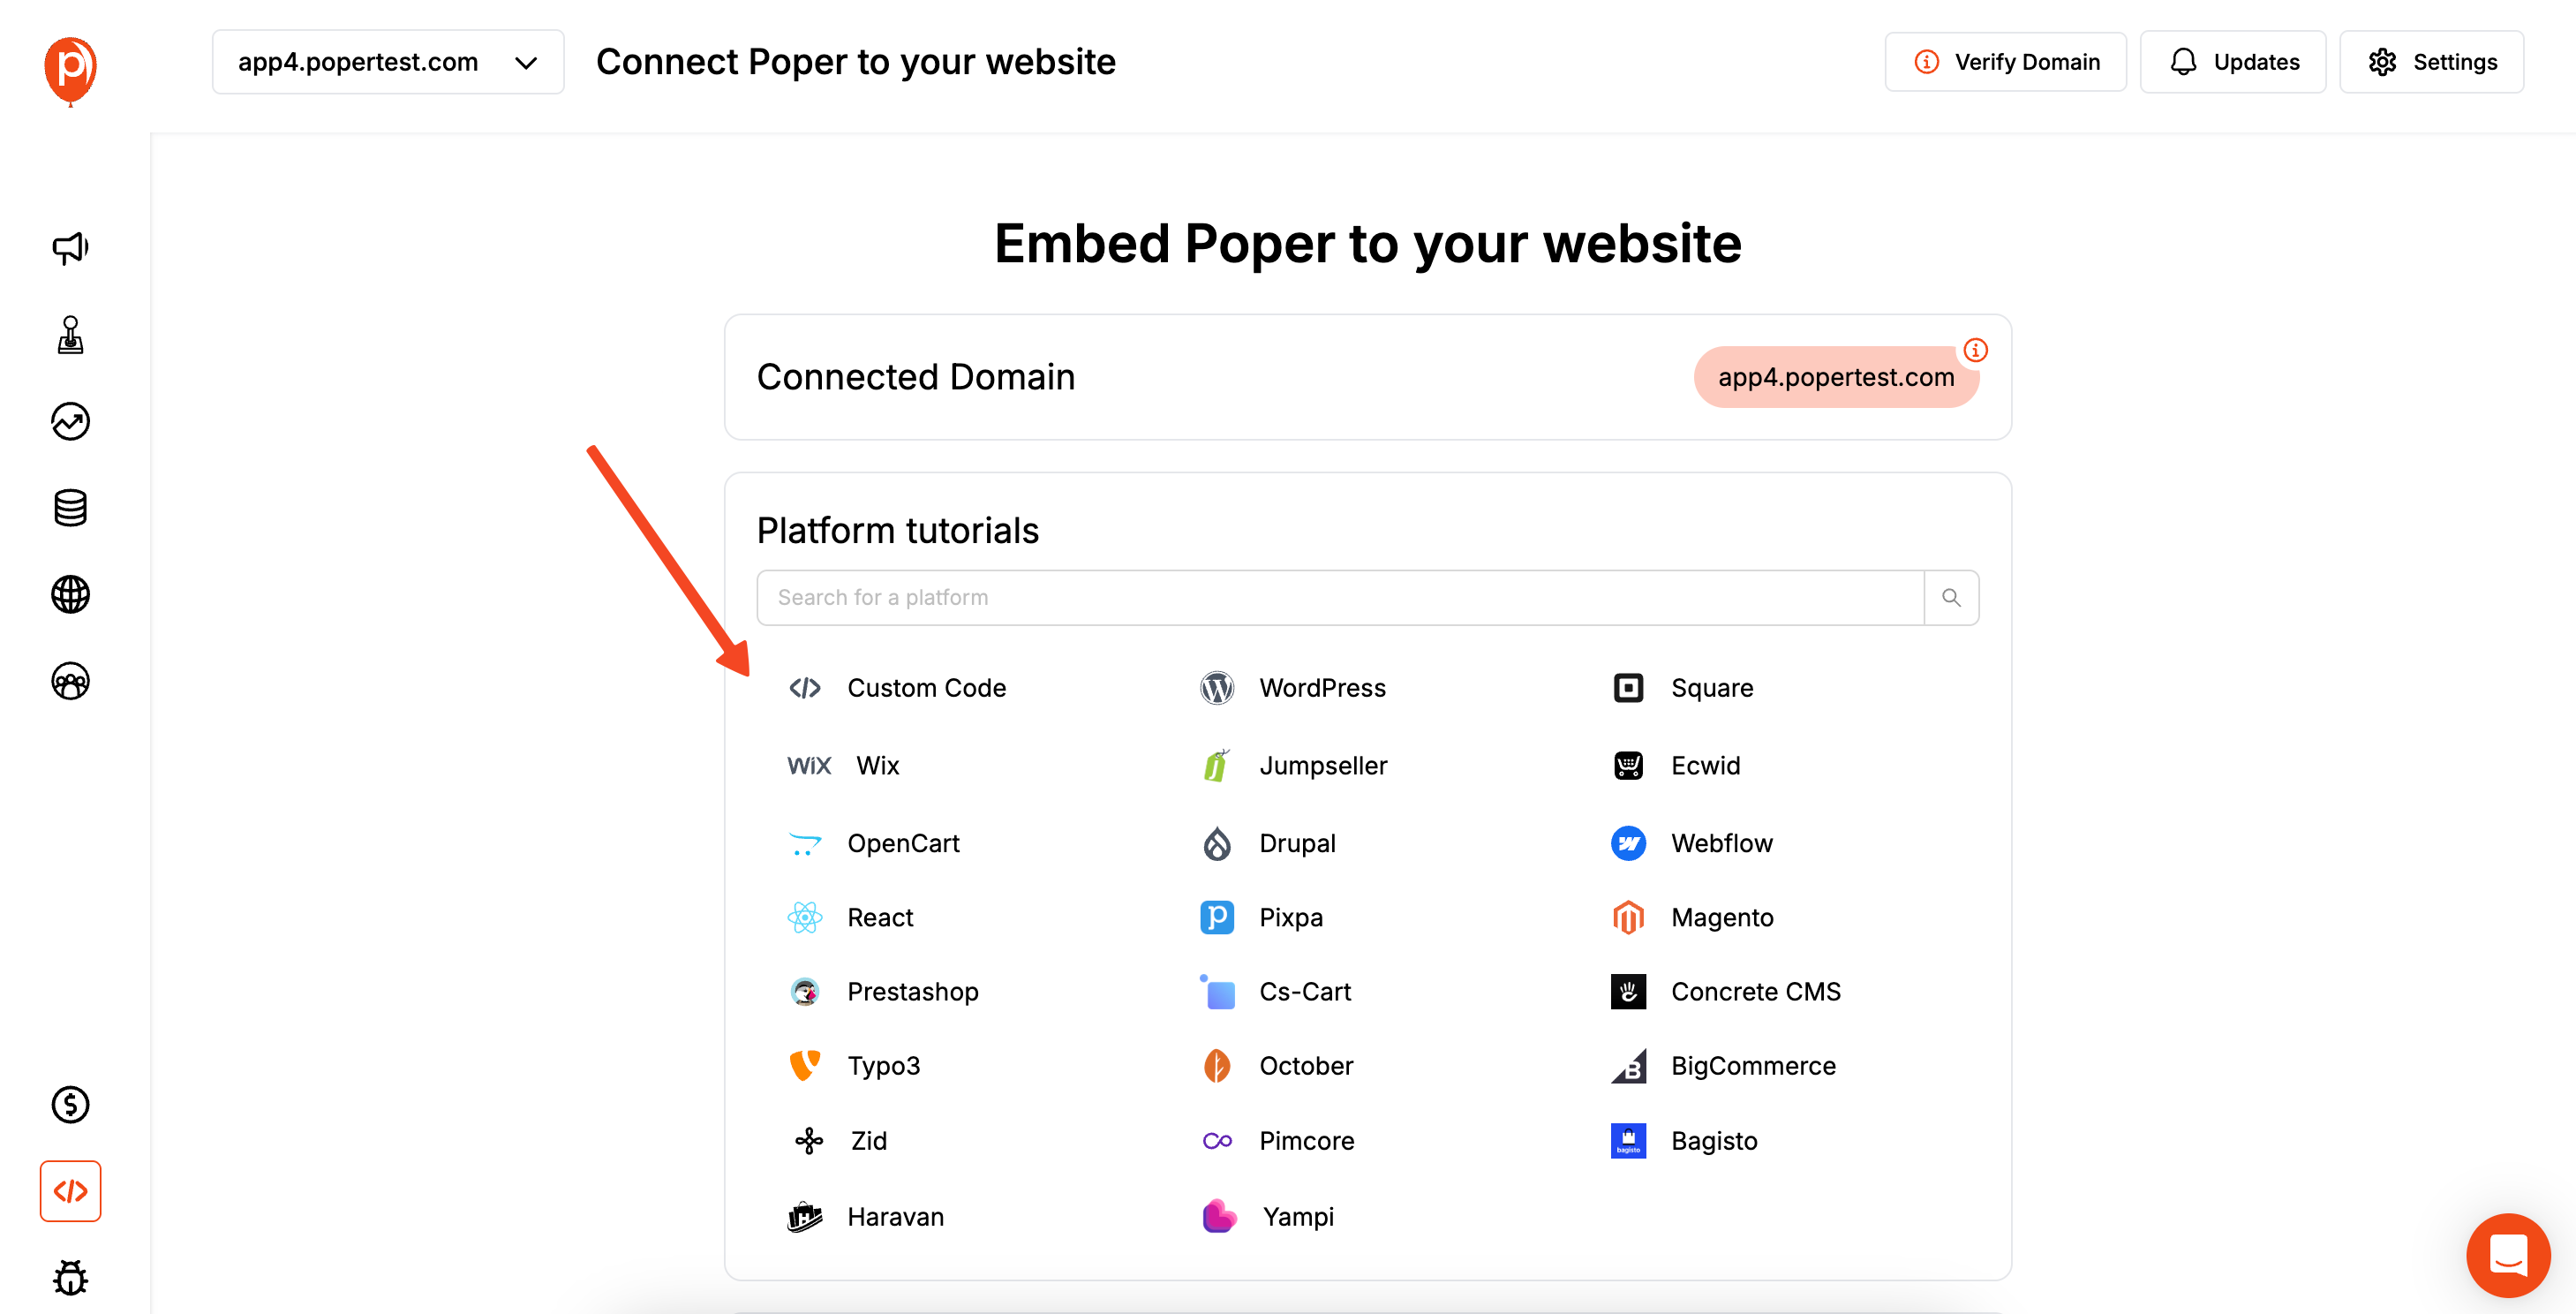
If you haven't already, it's time to install Poper on your website. It’s a one-time setup. From the main Poper dashboard, find the "Code" section in the left navigation menu.
Select the platform your website is built on (like WordPress, Shopify, or plain HTML) and follow the simple instructions. It usually involves copying a small piece of code and pasting it into your site's header.
Step 7: Test Your Connection
With the code installed and your campaign published, it’s time to test. Go to the page on your website where the form is embedded, fill it out with some test information, and click submit.
Now, check your system. You should see the data you just submitted appear almost instantly via the webhook. If it works, you’re all set! Every new submission will now be sent directly to your API, no manual work required.
Conclusion
Creating a form to connect to an API is a gateway to building powerful, interactive web experiences.
The developer approach using the JavaScript Fetch API provides complete control and is a fundamental skill for building custom web applications. It requires a solid understanding of both frontend and backend security principles.
The low-code approach using a tool like Poper with Webhooks empowers marketers and business owners to achieve the same result without writing any code. It abstracts away the complexity of the API request, allowing you to focus on building a beautiful form and defining its behavior.
By choosing the right method for your skill level and project needs, you can effectively send data from any website form to virtually any application or service.
Frequently Asked Questions (FAQ)
What is JSON?
JSON (JavaScript Object Notation) is a standard text-based format for representing structured data. When your form is submitted, its data (e.g., name: "John Doe", email: "john@example.com") is typically converted into a JSON object to be sent to the API.
What is the difference between a POST and a GET request?
* POST: Used to send data to a server to create or update a resource. Form submissions that create new records (like a new contact) use POST. The data is sent in the body of the request.
* GET: Used to request data from a server. The data is typically passed in the URL as query parameters.What is a Webhook?
A Webhook is essentially a URL that is configured to receive data. When an event happens (like a form submission in Poper), the system automatically sends an HTTP request (usually a POST request) with the event data to the Webhook URL you provided. It's a simple way for different applications to "talk" to each other.
How do I test my API endpoint before connecting a form to it?
You can use a tool like Postman or Insomnia. These applications allow you to manually send POST requests to your API endpoint with sample JSON data to ensure it's working correctly before you hook up your live web form.

