If you have a website, you've almost certainly encountered them: small banners or popups asking you to "Accept Cookies." An accept cookies popup, often called a cookie consent notice or banner, has become a non-negotiable element of modern websites. It's a critical tool for transparency, user trust, and legal compliance.
But what's the best way to create one? This ultimate guide will cover everything you need to know, from the legal basics to the practical implementation. We'll explore:
Why You Need a Cookie Consent Popup (The Legal Stuff: GDPR & CCPA)
Method 1: Building a Cookie Popup with Code (HTML, CSS, & JavaScript)
Method 2: Using WordPress Consent Plugins
Method 3: Using a Dedicated Popup/Consent Tool like Poper for any website.
Why You Need an "Accept Cookies" Popup: GDPR & CCPA
Before the "how," it's crucial to understand the "why." Data privacy laws around the world require websites to be transparent about how they collect and use visitor data. Cookies are small text files stored on a user's browser that can track activity, remember preferences, and enable website functionality.
GDPR (General Data Protection Regulation): This EU law requires websites to get explicit, informed consent from users in the European Union before placing any non-essential cookies on their devices.
CCPA (California Consumer Privacy Act): This California law gives consumers the right to know what data is being collected about them and to opt-out of the sale of their personal information.
In short, you likely need a cookie consent notice if your website:
Has visitors from the European Union or California.
Uses analytics tools like Google Analytics.
Runs ads (e.g., Google AdSense, Facebook Pixel).
Uses any third-party services that place cookies.
Disclaimer: This guide provides general information and is not legal advice. Consult with a legal professional to ensure full compliance for your specific situation.
Best Practices for a User-Friendly Cookie Popup
Use Clear and Simple Language: Avoid legal jargon.
Link to Your Privacy/Cookie Policy: Give users easy access to more detailed information.
Provide Clear Choices: An "Accept" button is standard. Depending on the level of compliance needed, you may also need a "Decline" or "Customize Settings" option.
Don't Block Content (If Possible): A banner at the bottom or top of the screen is generally less intrusive than a full-screen popup that blocks the entire page.
Make it Easy to Close: The notice should not be difficult to dismiss.
Method 1: The Quick & Simple Cookie Consent Generator
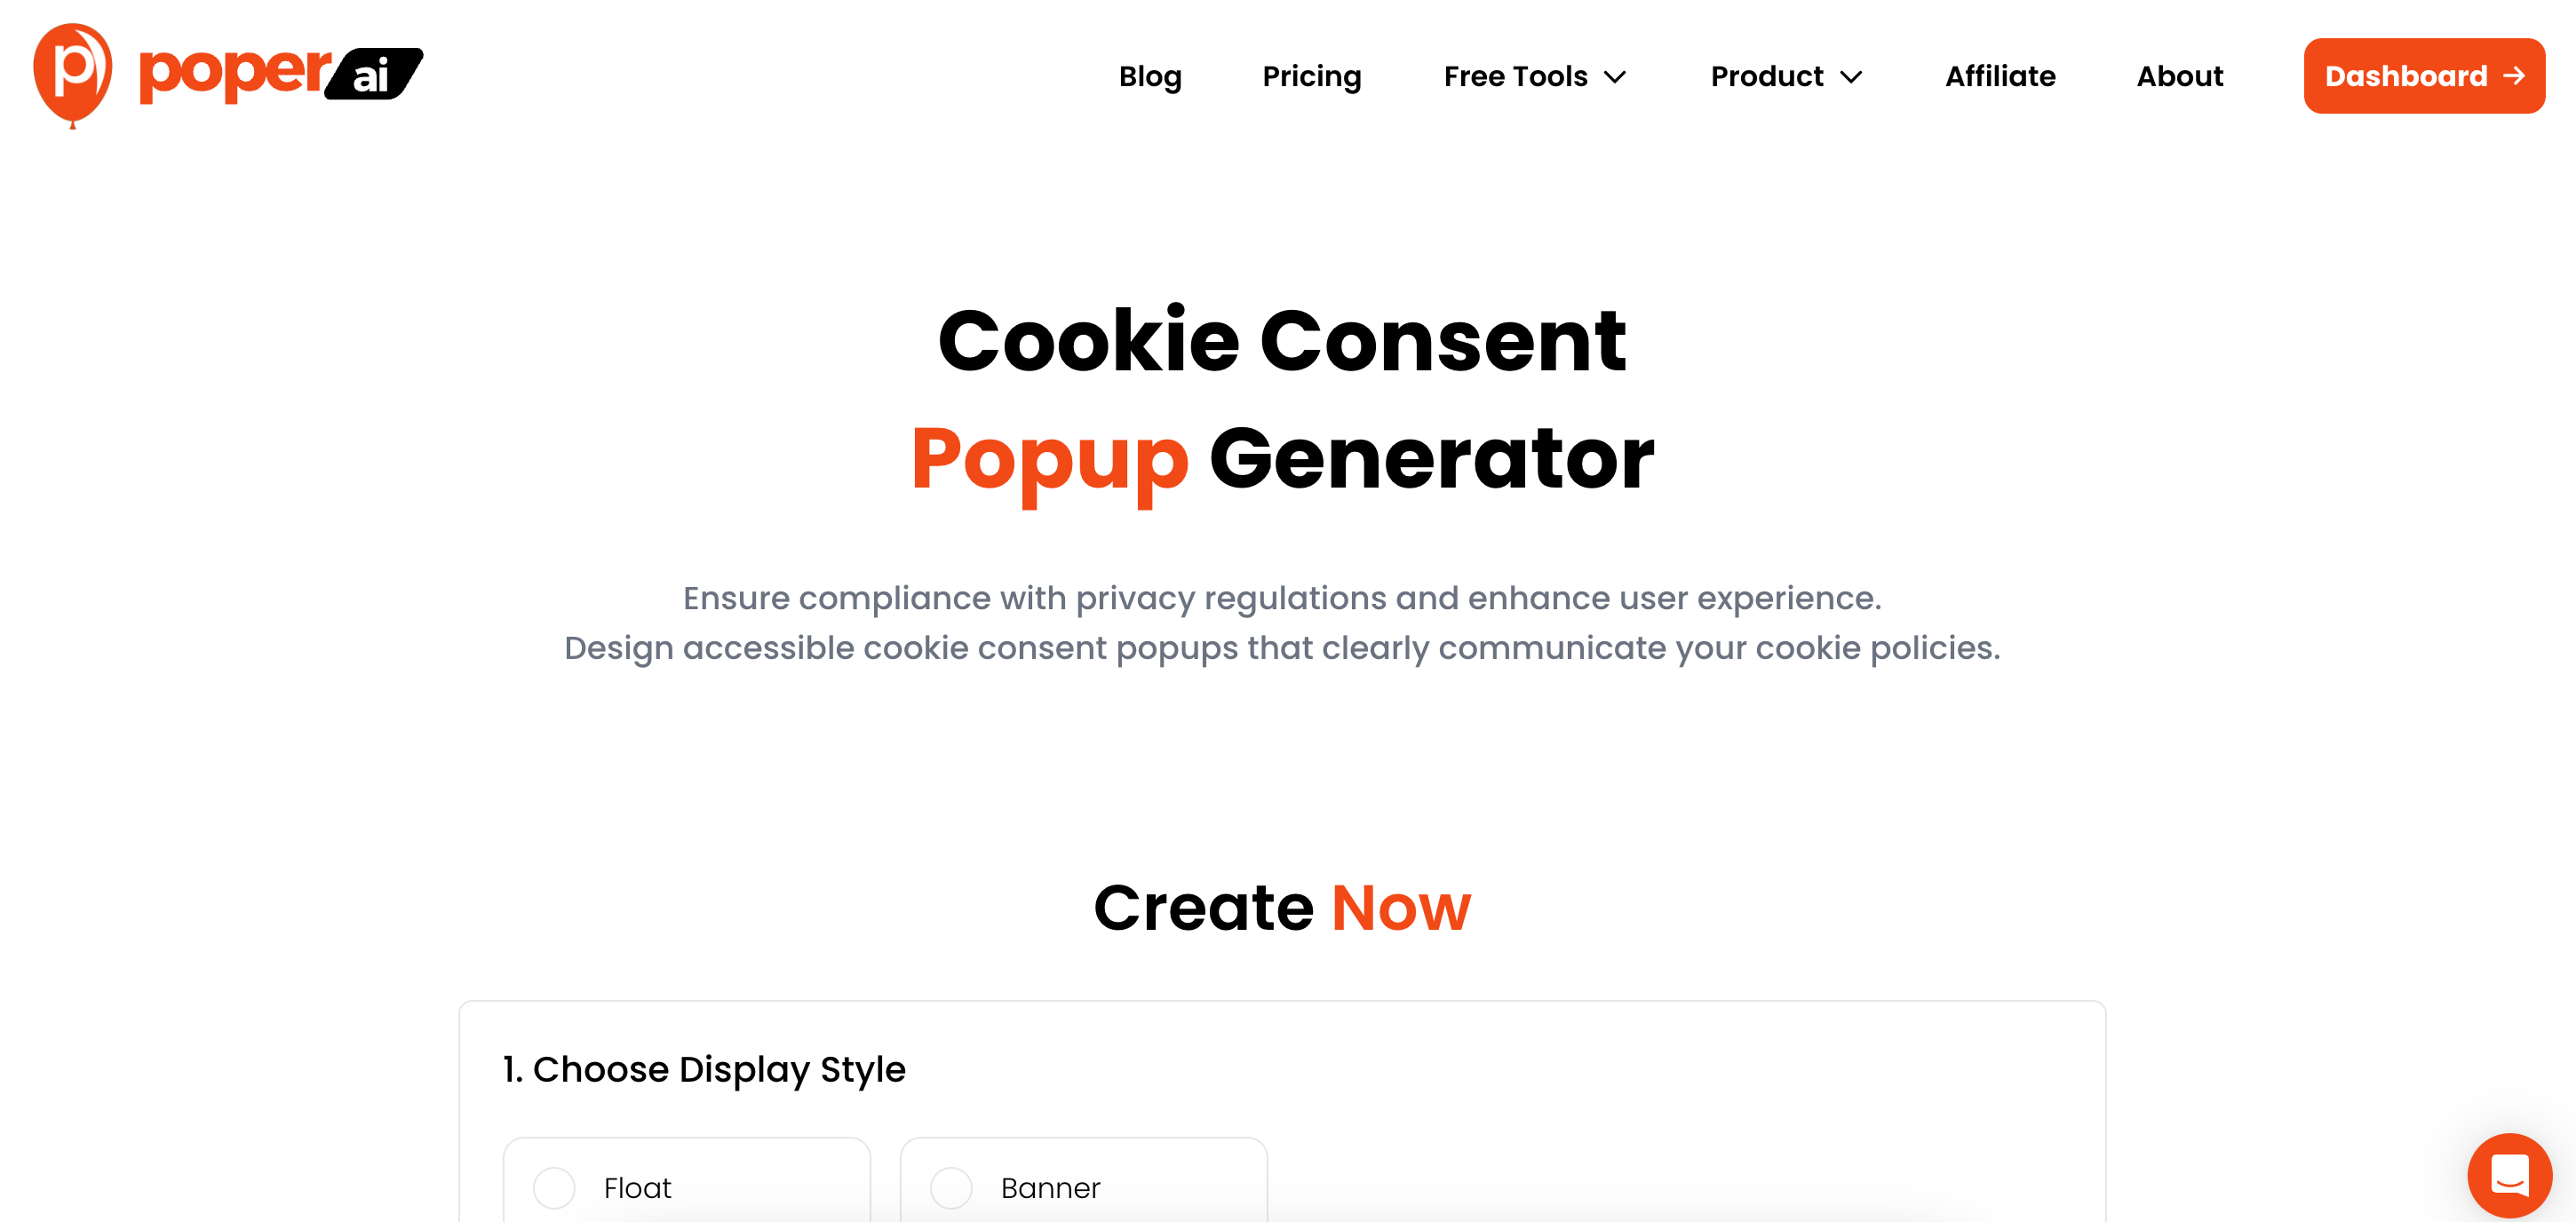
If you need a straightforward cookie notice right now, this is the method for you. I built this tool to be fast, simple, and effective without any complex settings.
Step 1: Choose Your Display Type
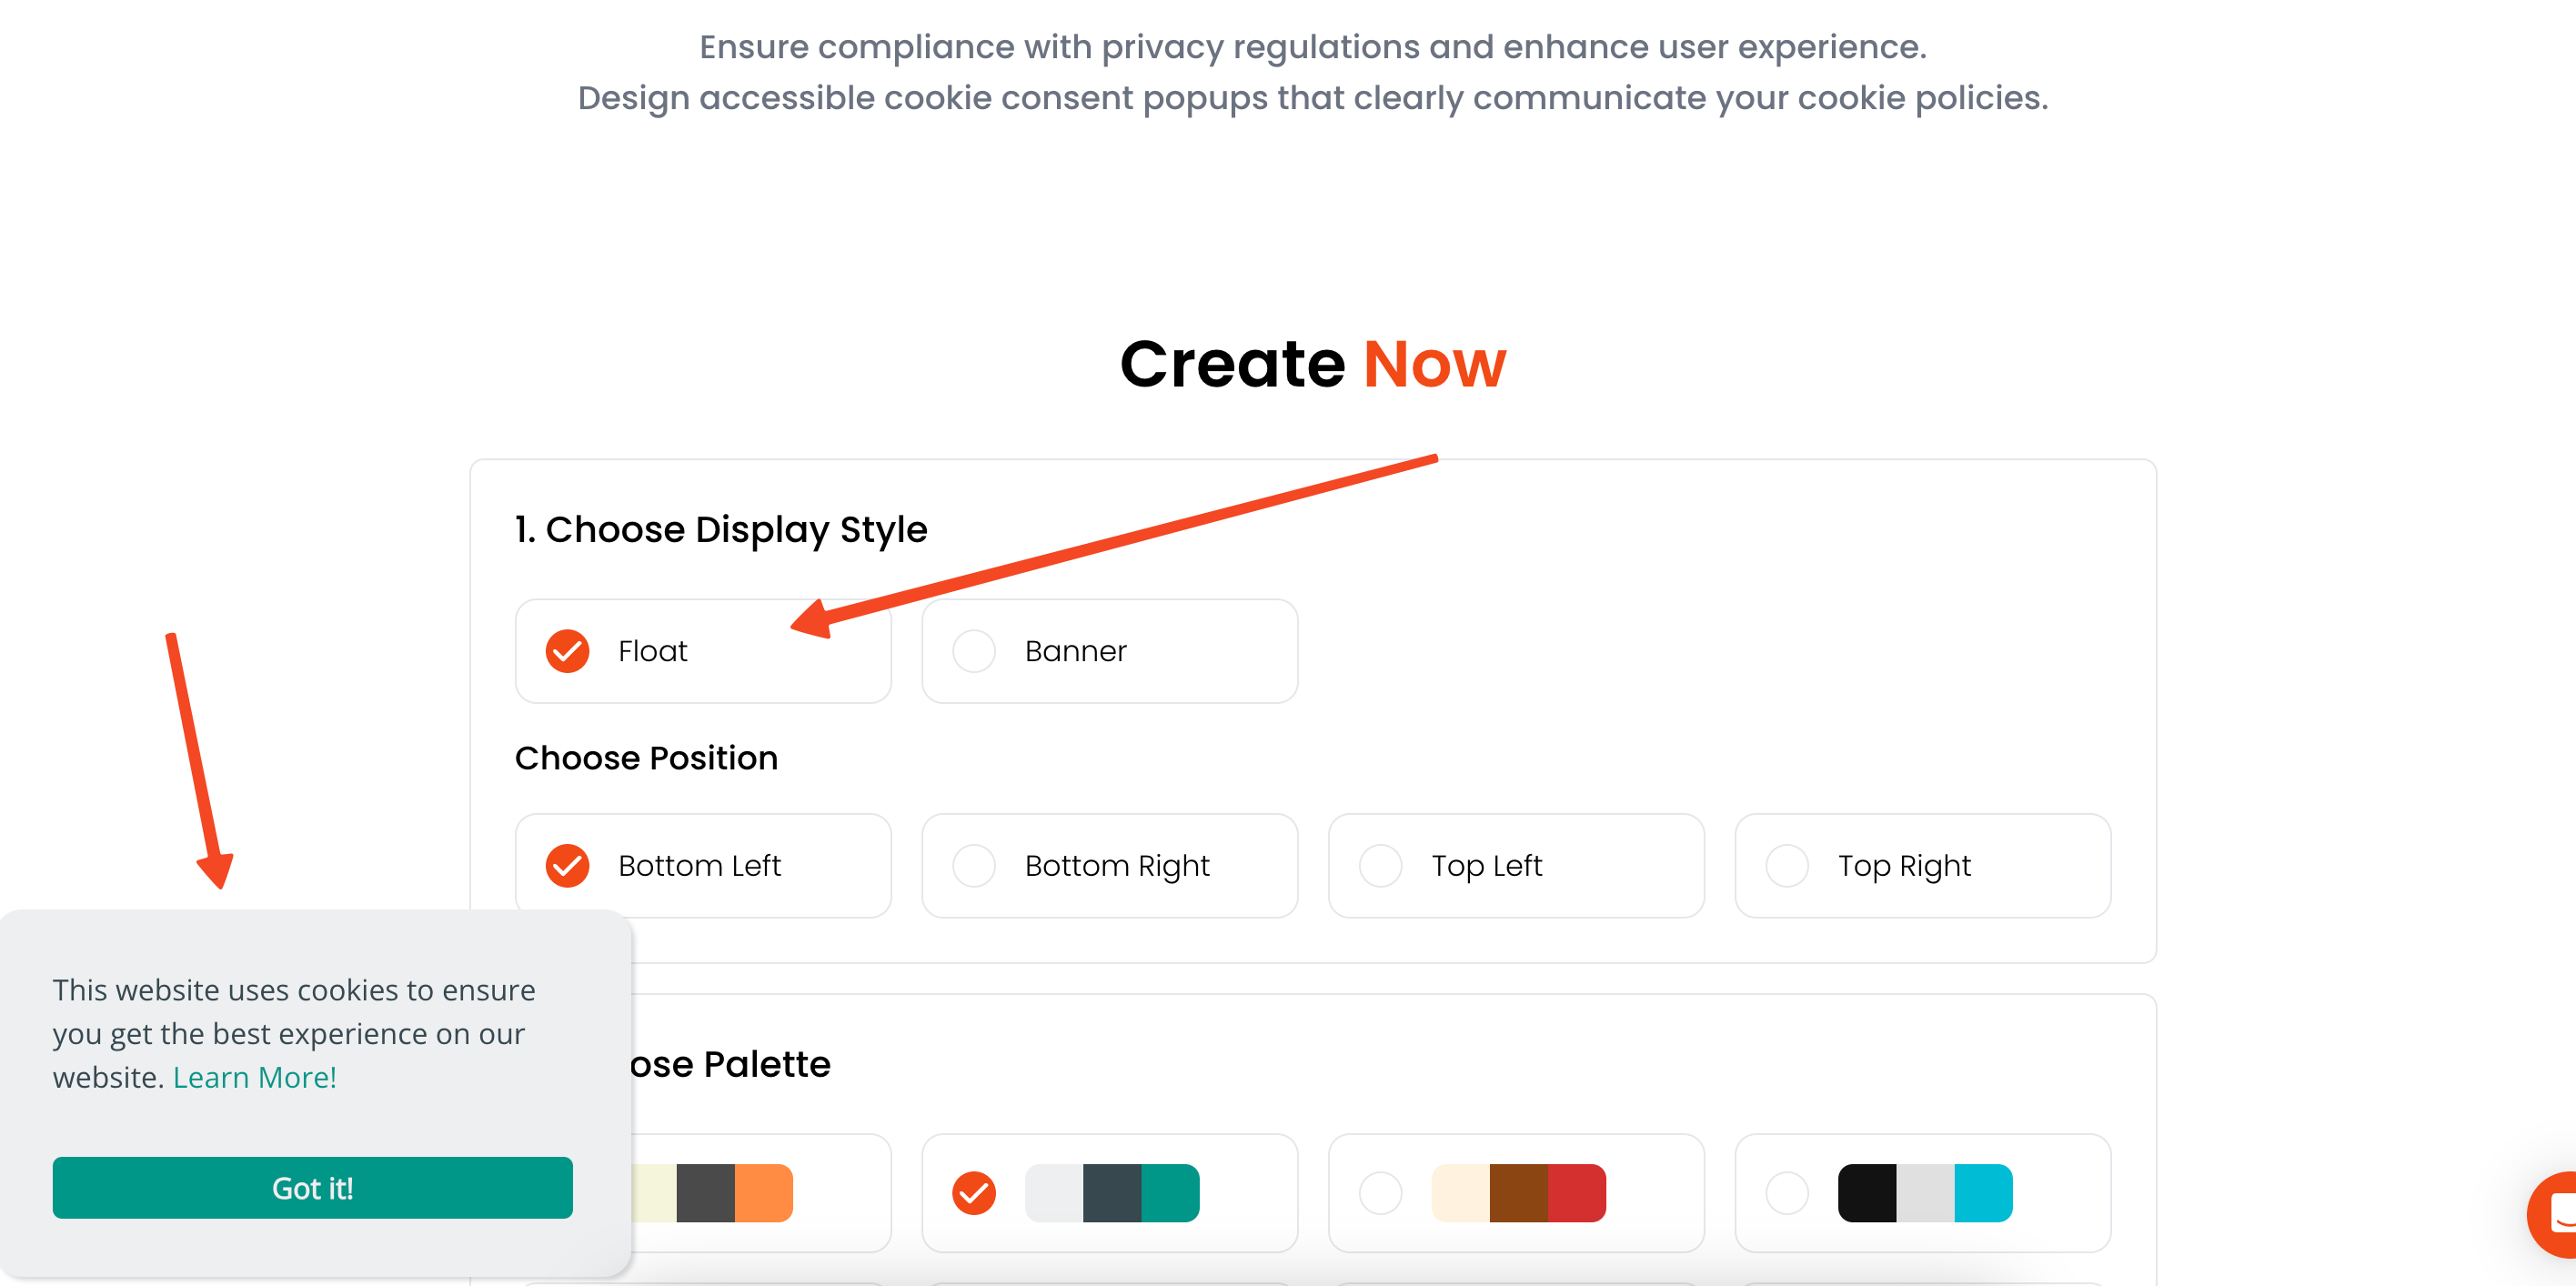
First, decide how you want the notice to appear. You can choose a Banner or a Float. A Banner is a clean bar that sits at the top or bottom of the screen, which is great for being noticeable without blocking content. For more ways to implement banner popups, see floating bar popup strategies.
A Float is a more traditional popup box that appears in a corner of the screen. I find this works well if you want to give the notice a bit more prominence. There's no wrong choice; just pick what feels right for your site's layout.
Step 2: Style Your Notice to Match Your Brand
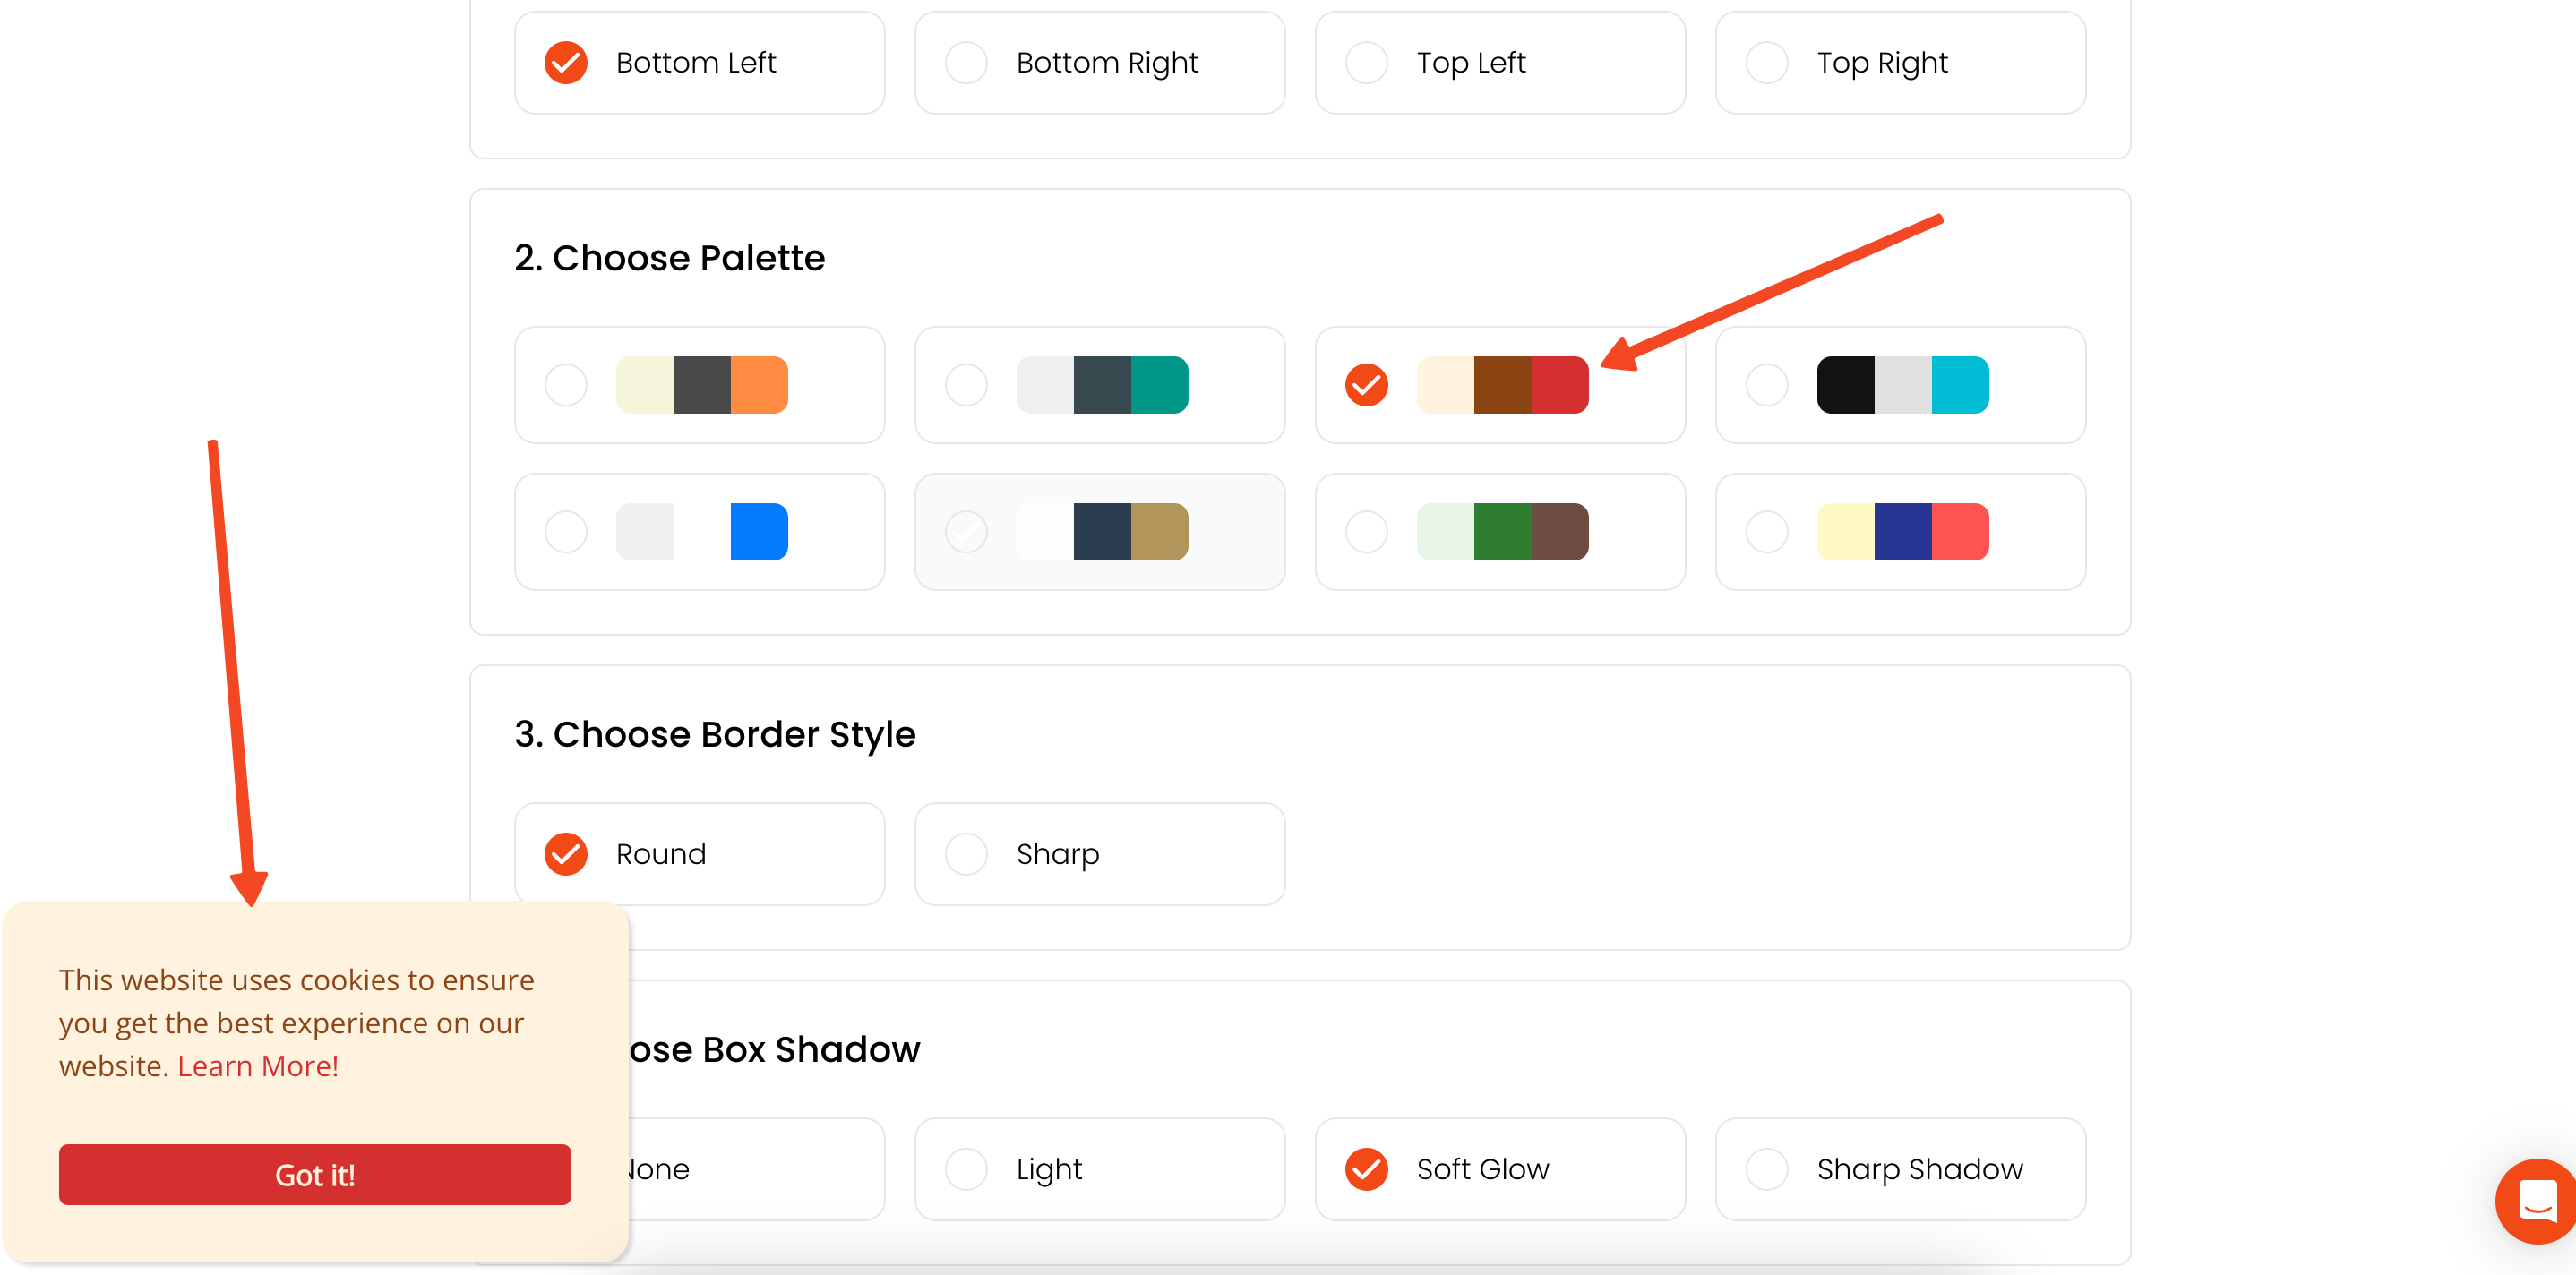
Next, let's make the notice look like it belongs on your website. You can select a color palette that matches your brand’s design, making the experience feel seamless for your visitors. Trust is key, and brand consistency helps build it.
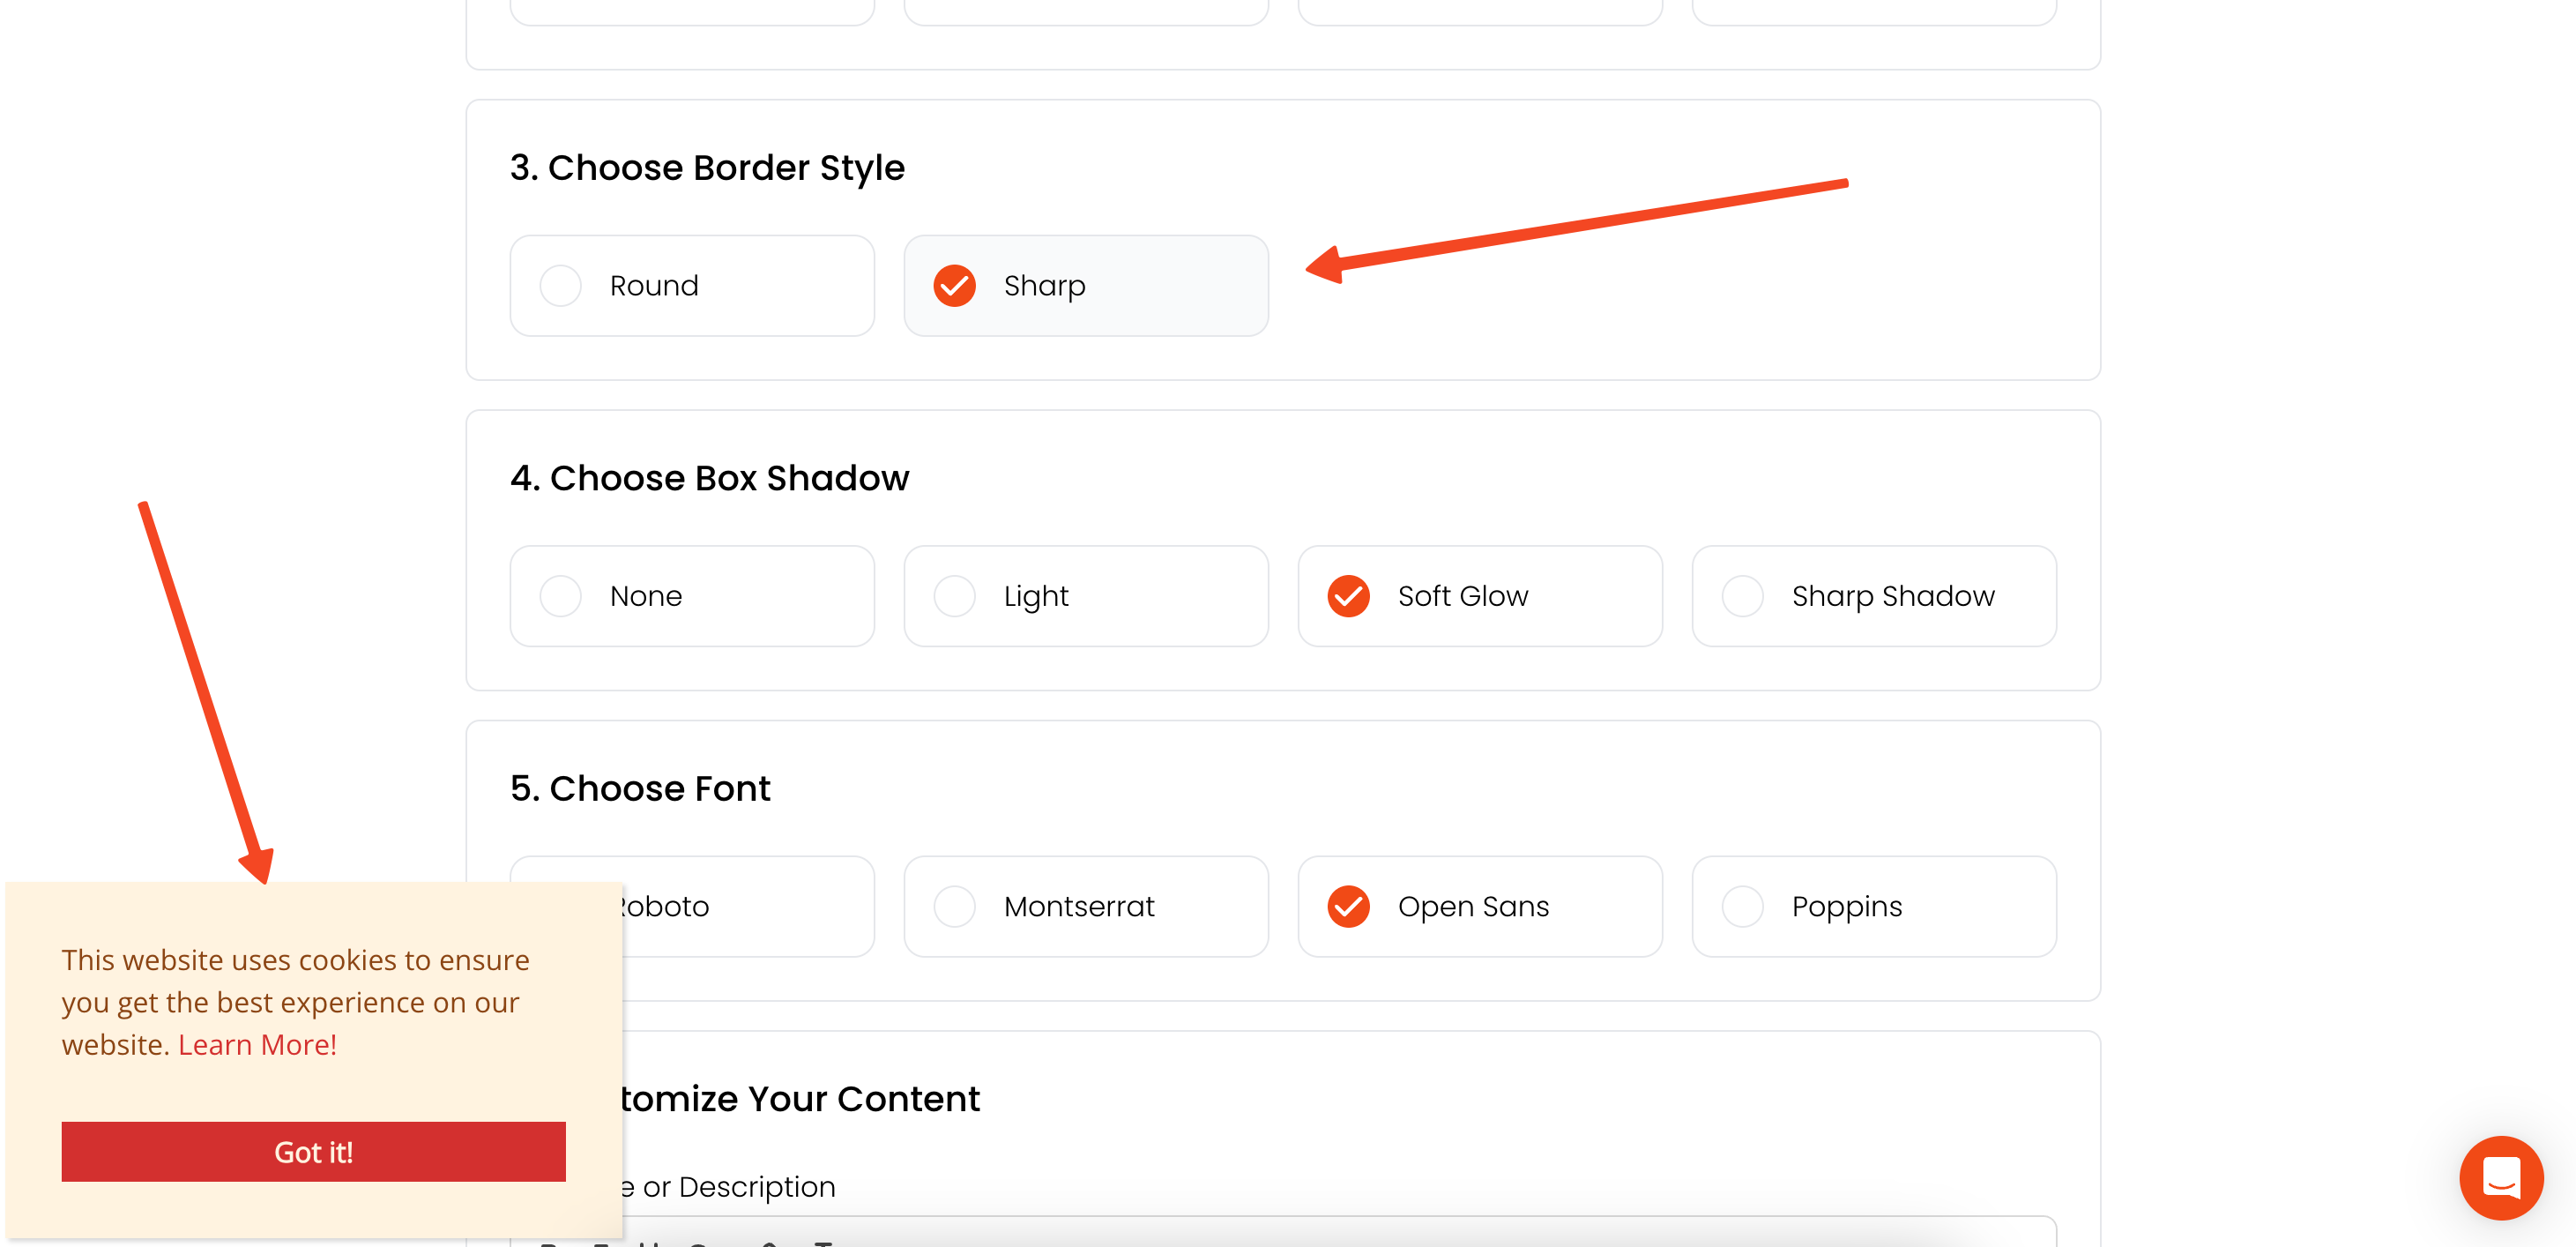
You can also adjust the border style to be rounded or sharp and add a subtle shadow to make it pop. Finally, pick a font that matches your site's typography for a truly polished look.
Step 3: Customize Your Consent Message
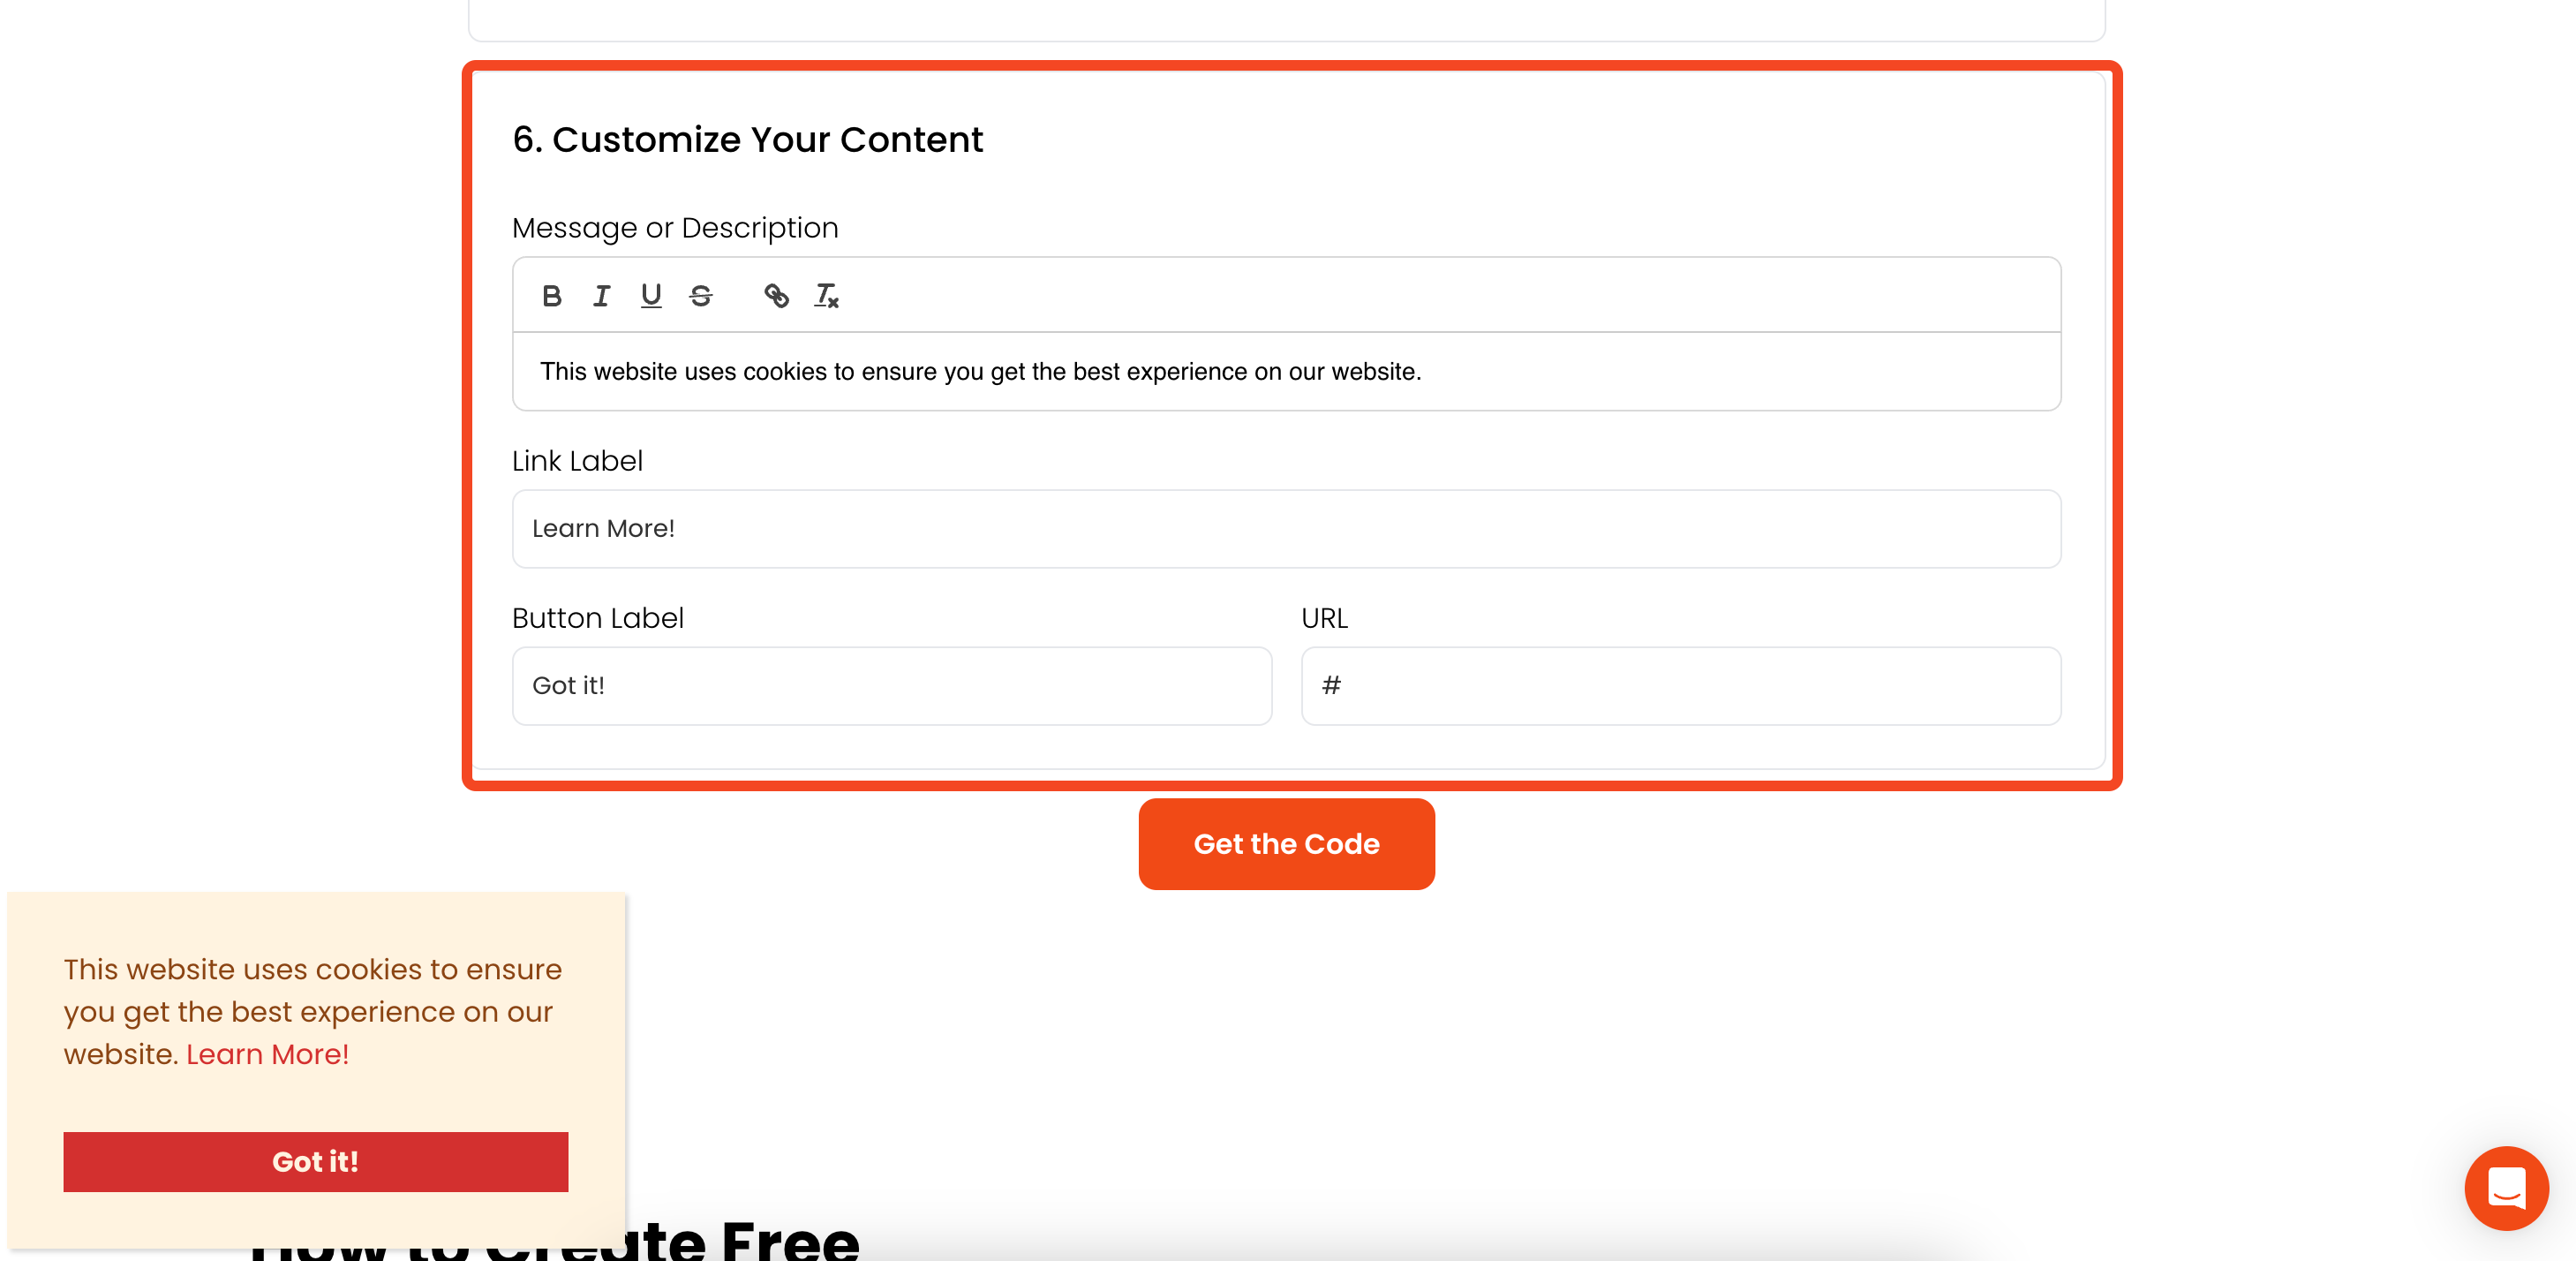
Now for the words. I’ve pre-filled the content with a standard message, like "This website uses cookies to ensure you get the best experience on our website." You can easily change this to match your tone.
Be sure to fill in the Link Label, Button Label, and URL. The URL should point directly to your Privacy Policy page. This is essential for compliance and for giving your users the information they need.
Step 4: Get and Install Your Code
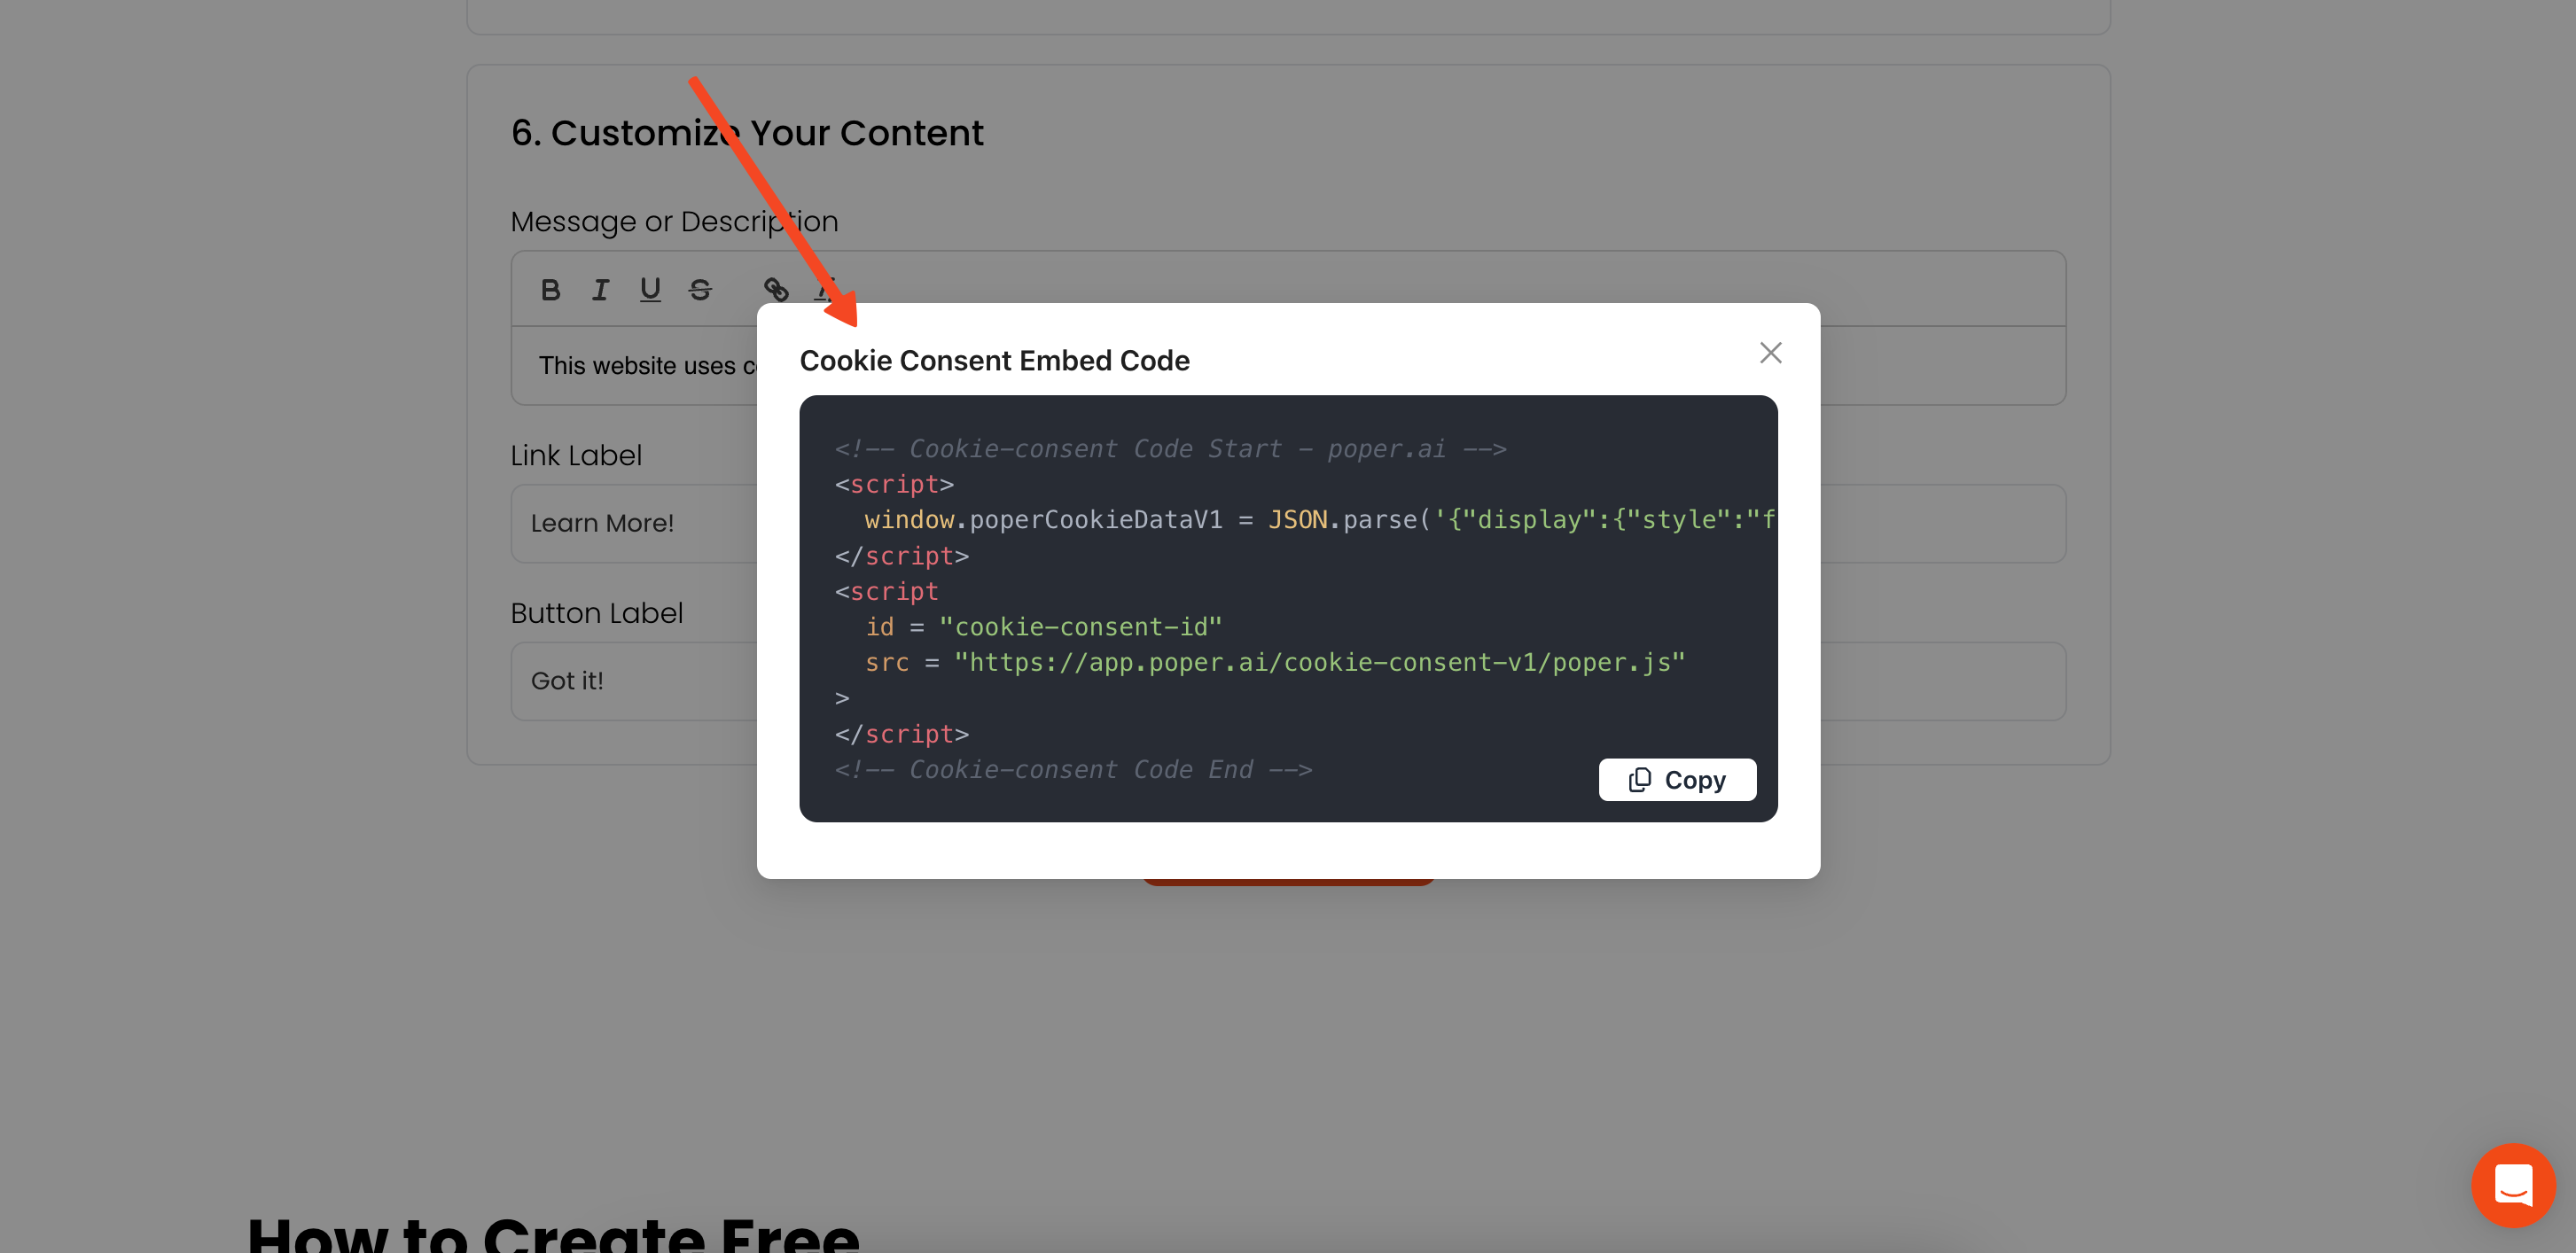
Once you’re happy with your design and text, just click Get Code. Copy the small piece of code it gives you.
To make it work, you’ll need to add this code to the <header> section of your website’s HTML. Most website builders have a section for this, often called "Code Injection" or "Custom Code." Paste it in, save, and you're all set!
Method 2: Using a Full Popup Template for More Control
If you want to customize the design further or control exactly when and where your notice appears, using a Poper template is the perfect solution.
Step 1: Choose the Cookie Consent Template
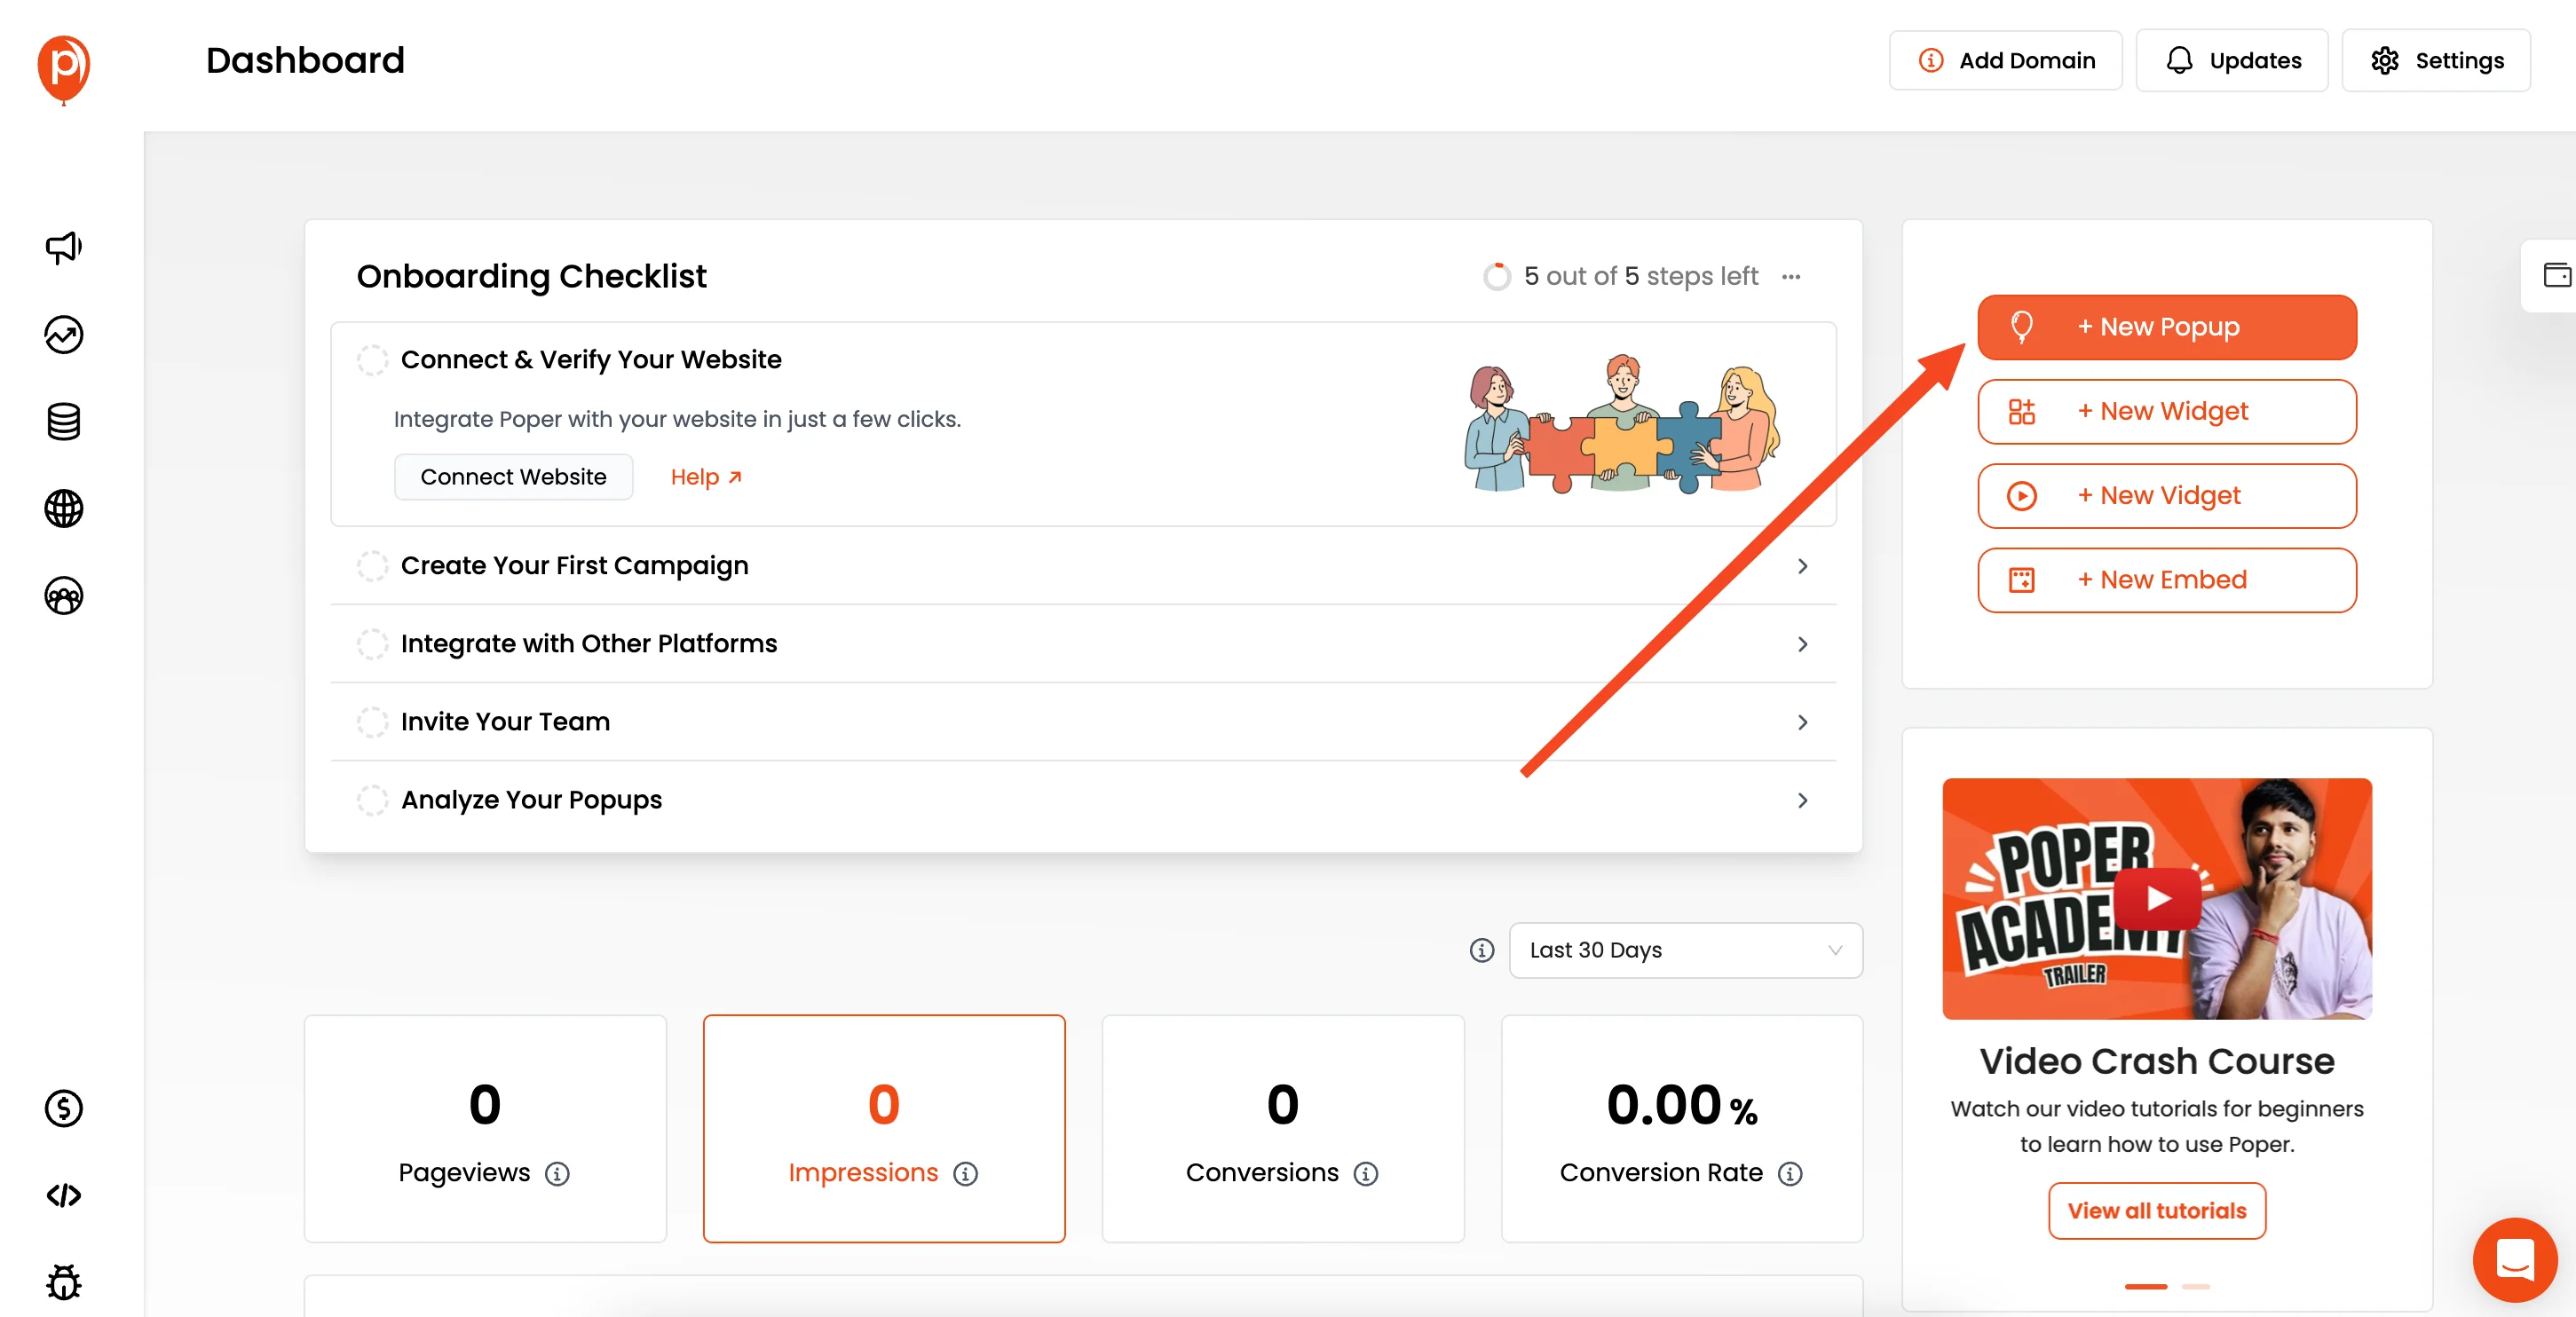
From your Poper dashboard, click the "New Popup" button and select "Choose from templates." In the template library, use the search bar and type "Consent" to quickly find our pre-made cookie consent designs.
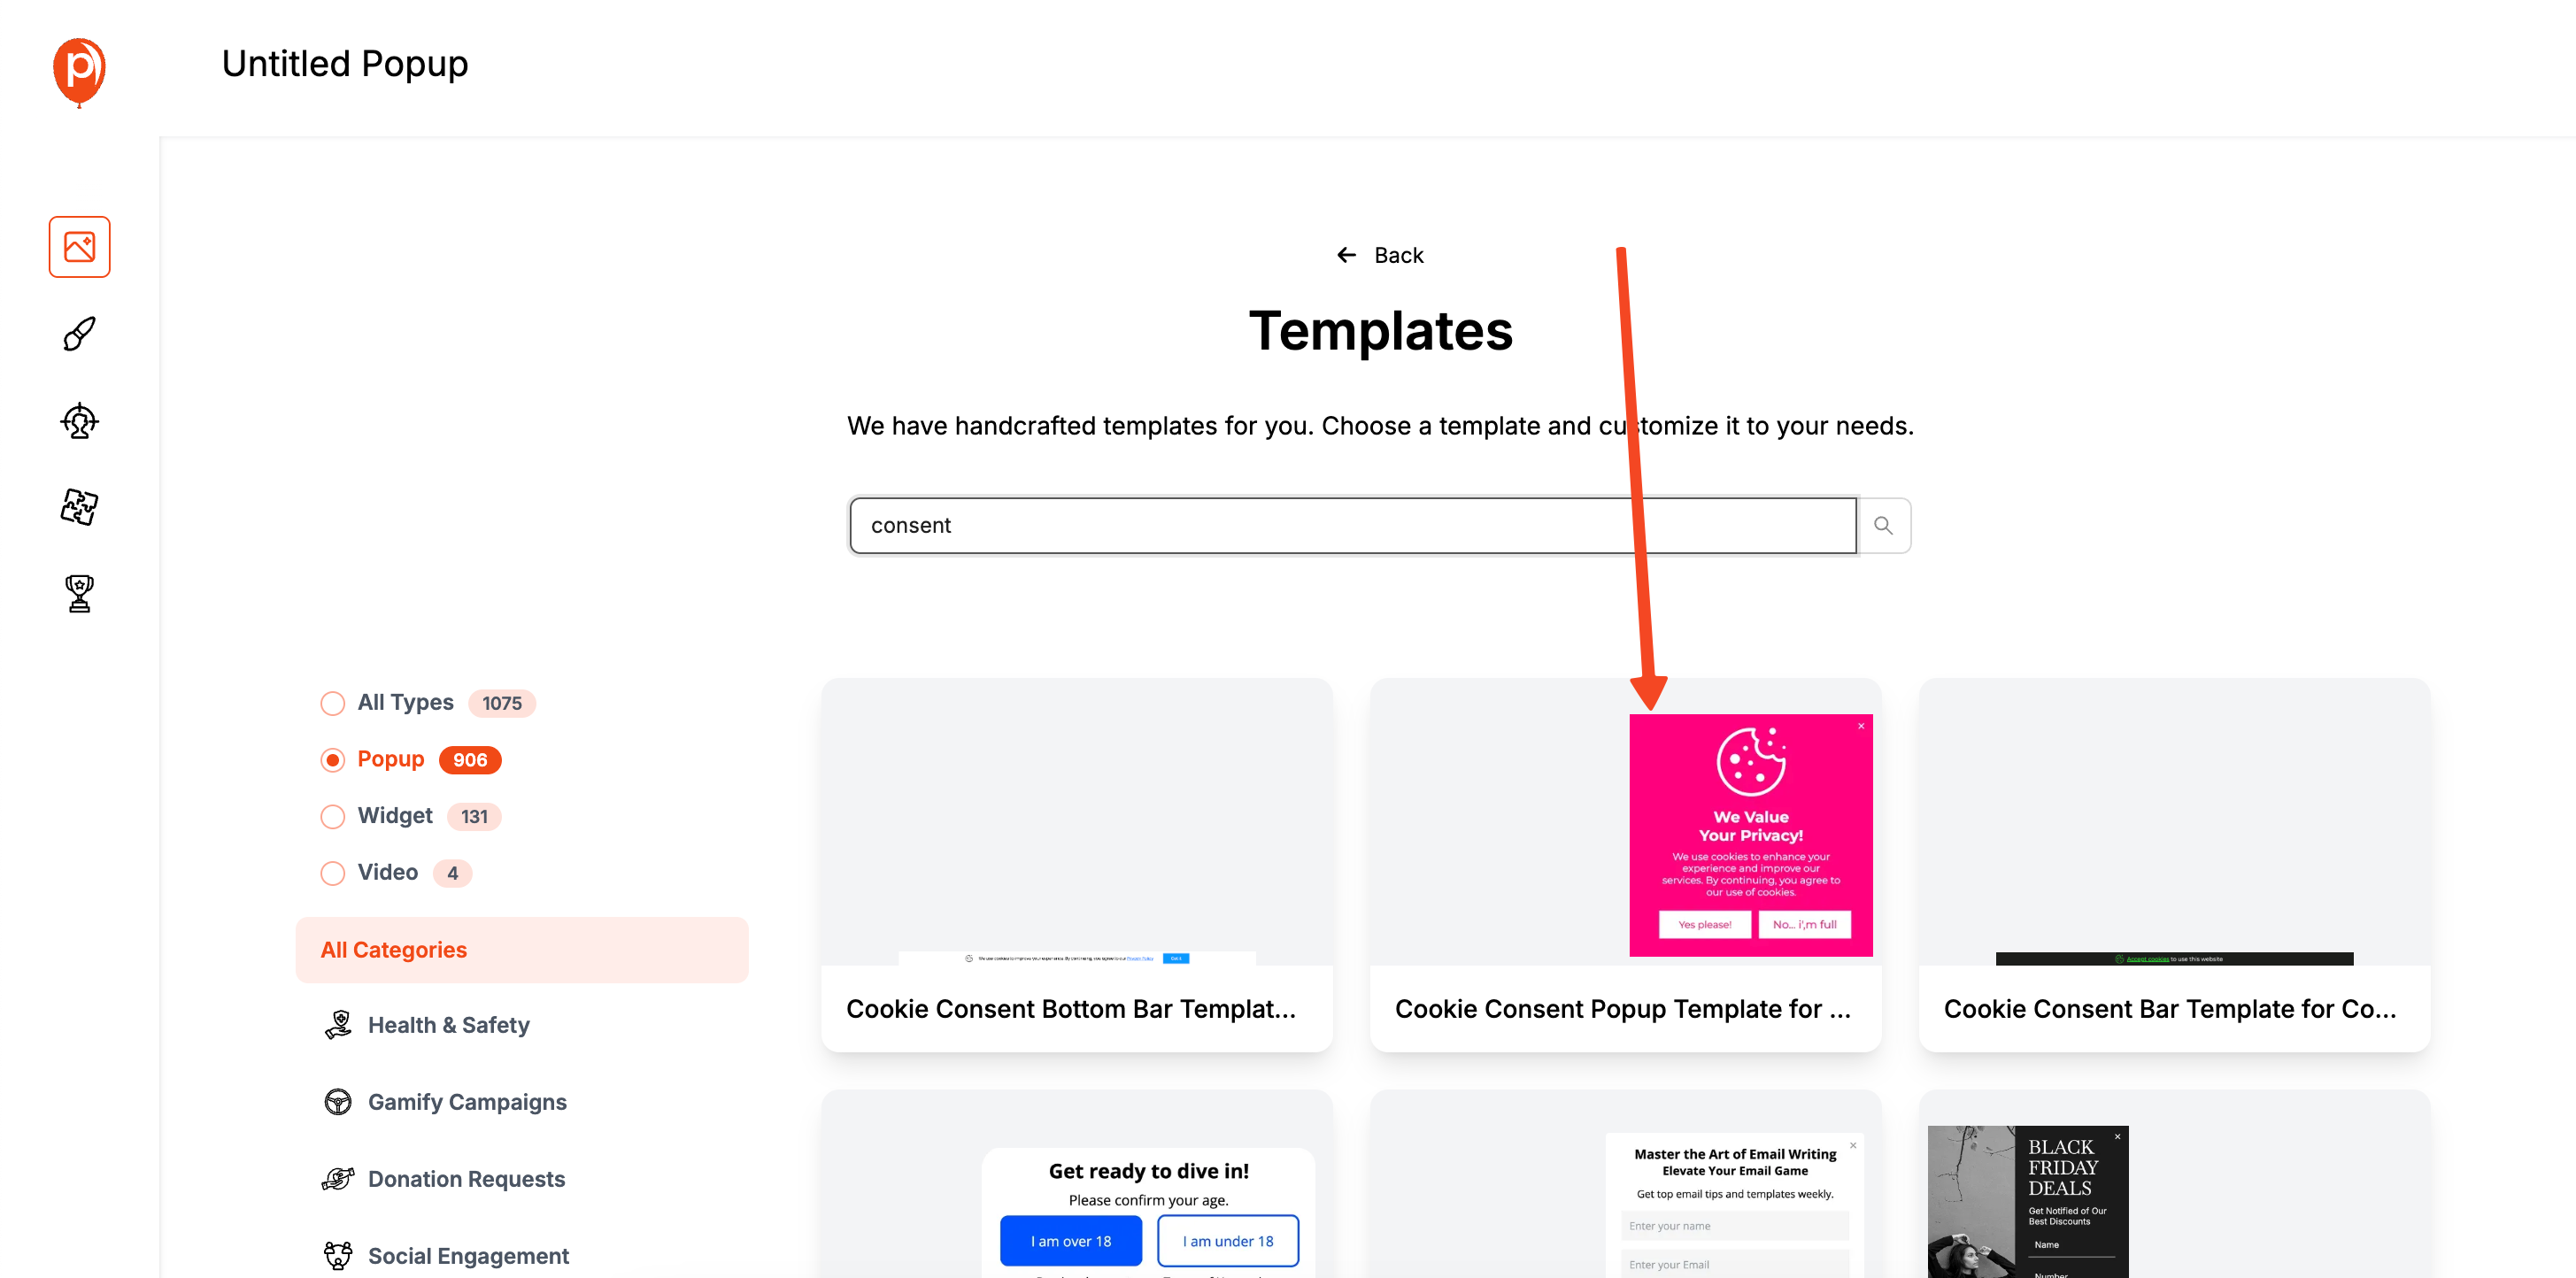
I created these templates to give you a professional starting point. Pick the one you like best, and we’ll head to the editor.
Step 2: Customize the Design in the Editor
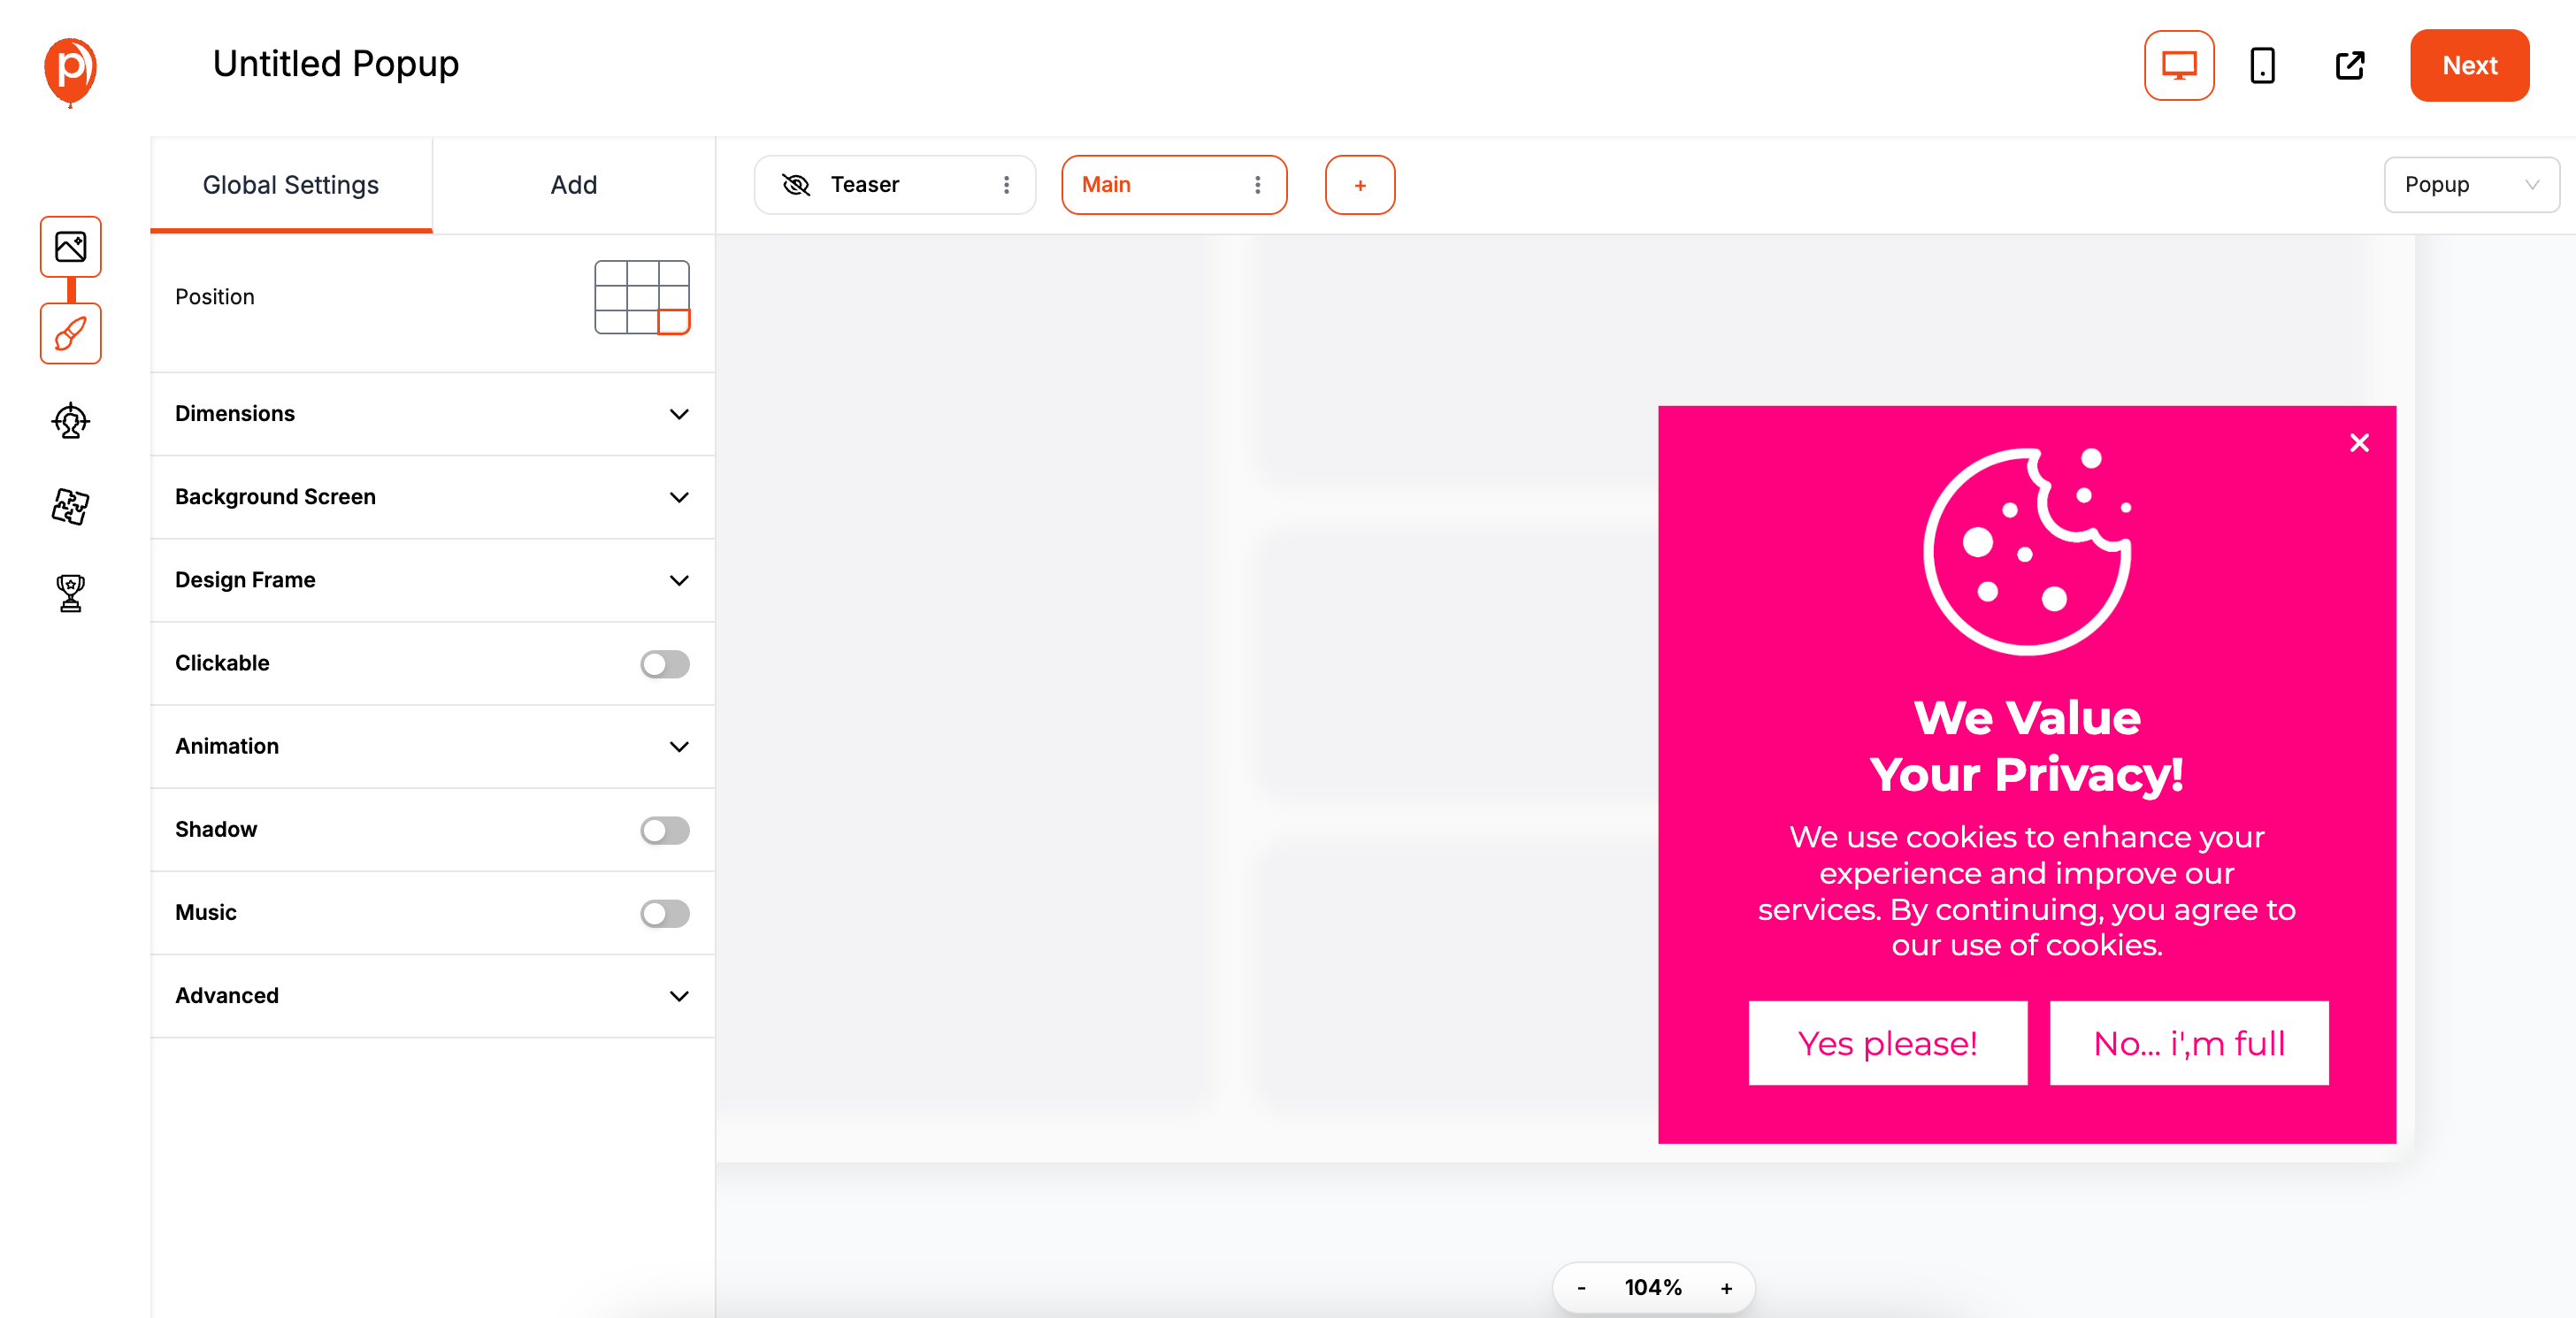
This will open our full popup editor, where you have complete creative freedom. You can change the colors, fonts, spacing, and button styles to perfectly match your brand identity.
My advice is to keep it clean and simple. Your goal is to inform and get consent, not to distract. A clear message and an obvious "Accept" button are usually all you need.
Step 3: Set Your Display Conditions
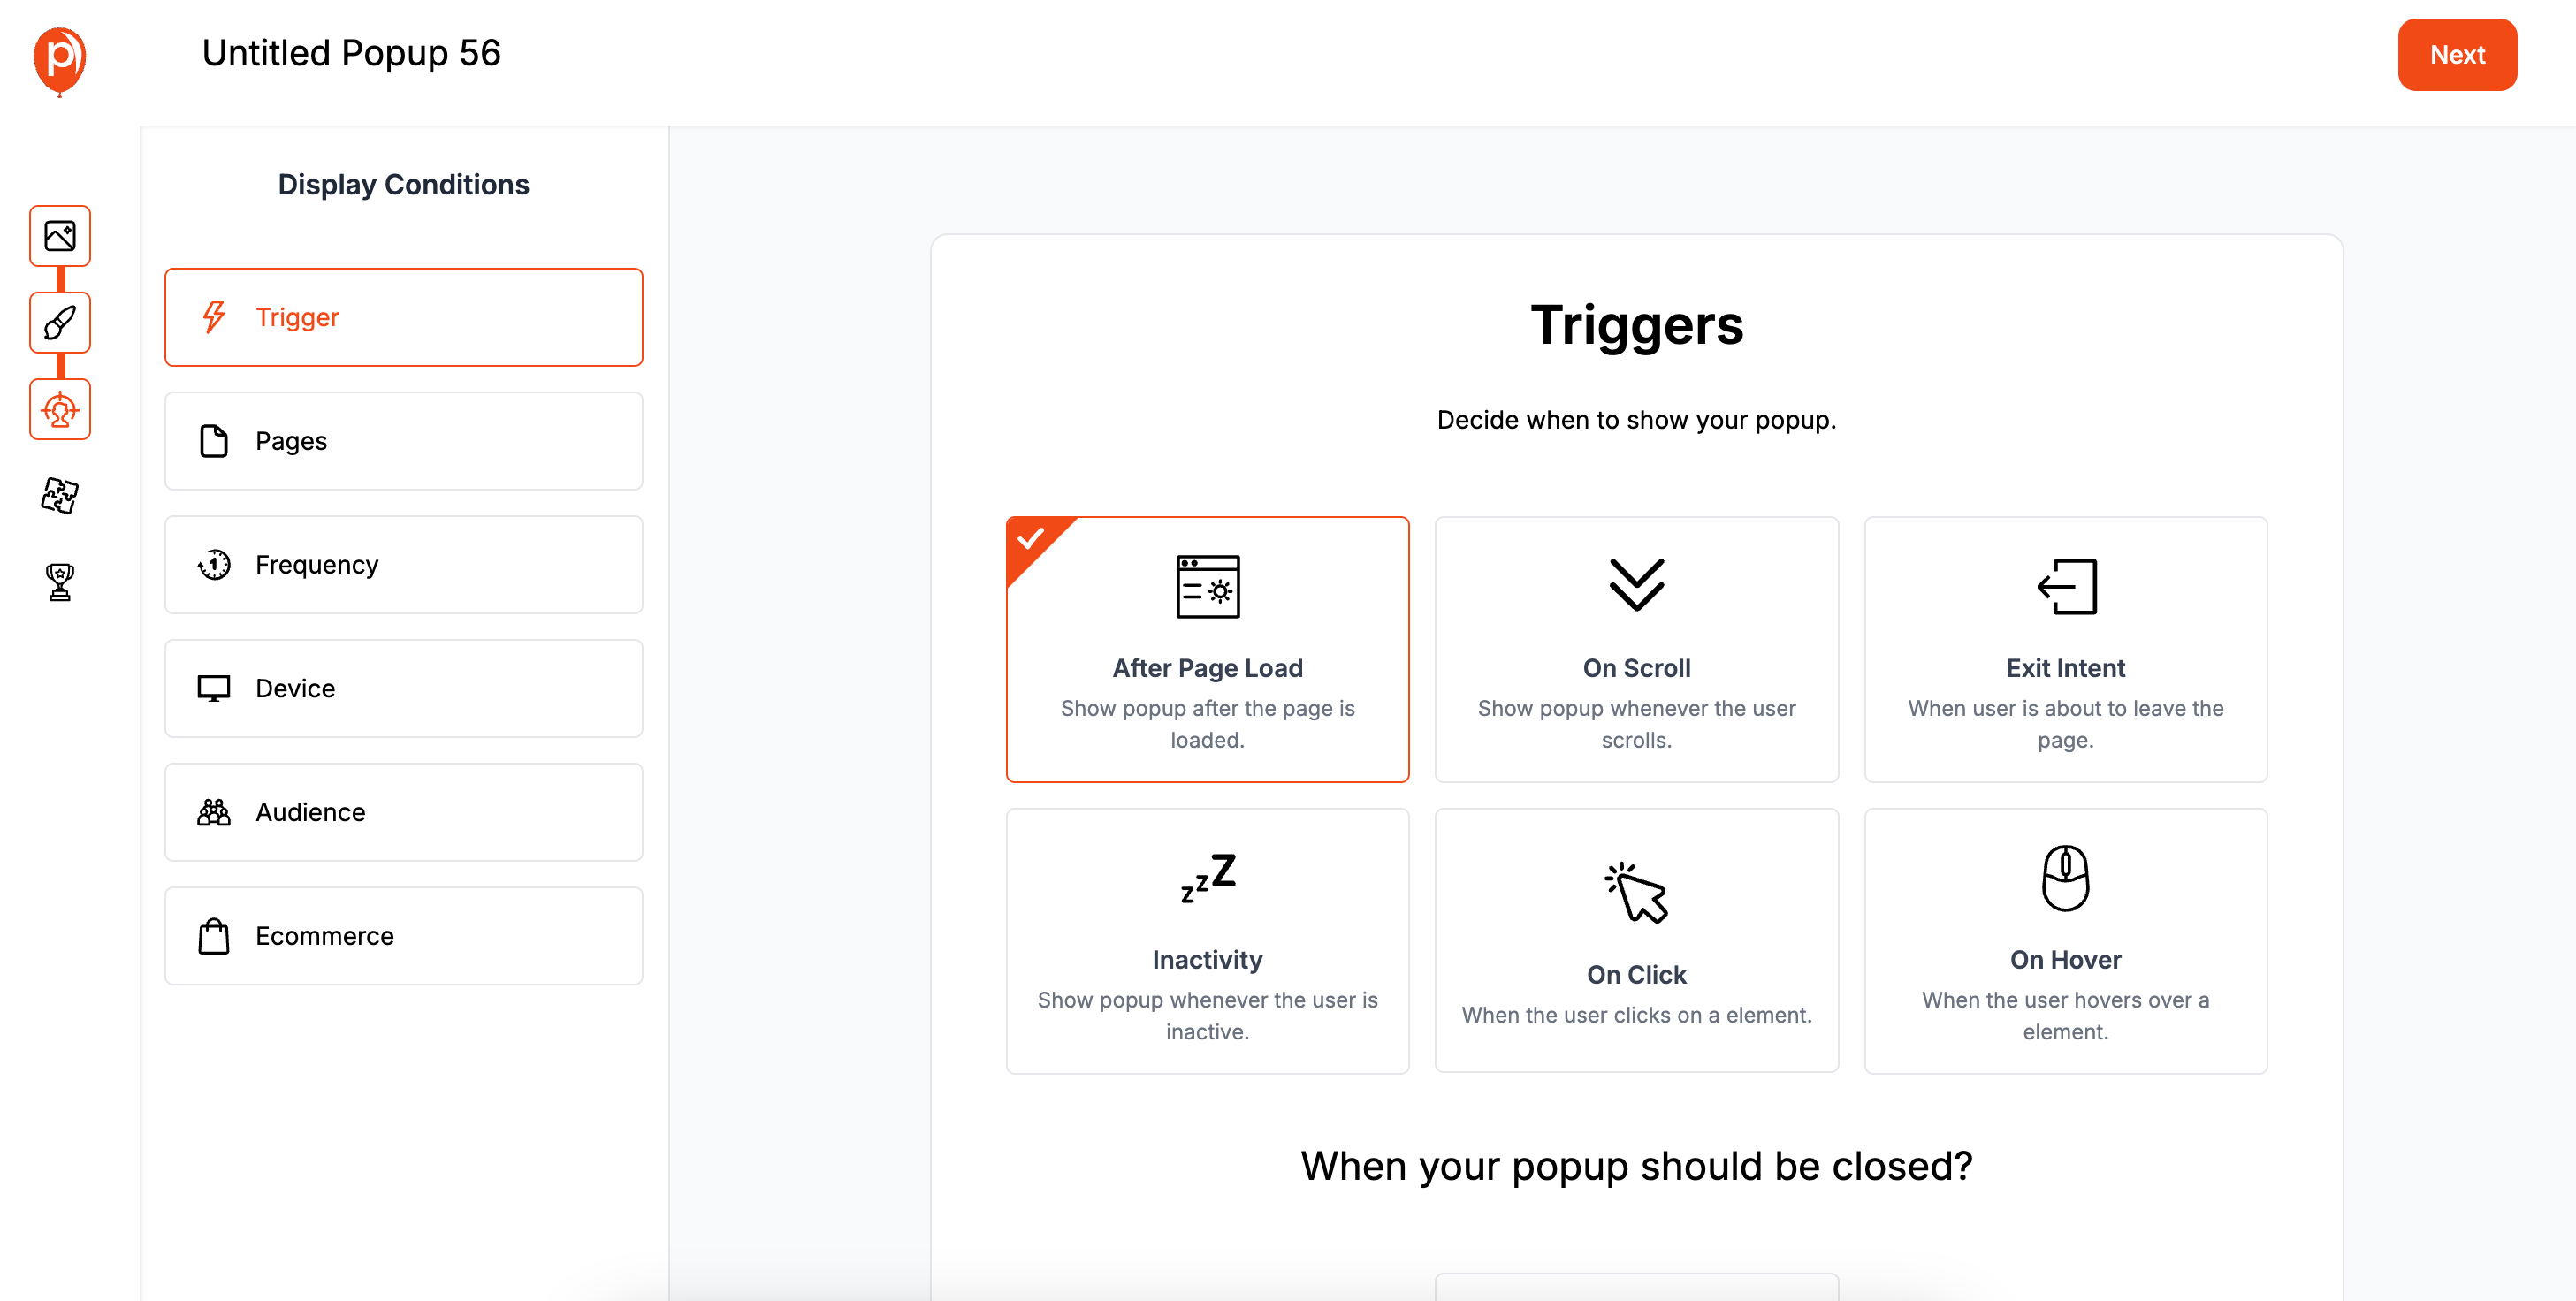
This is the most important step for a good user experience. In the Display Conditions screen, you need to decide how the notice behaves. For a cookie notice, you'll want it to appear immediately when a visitor lands on your site.
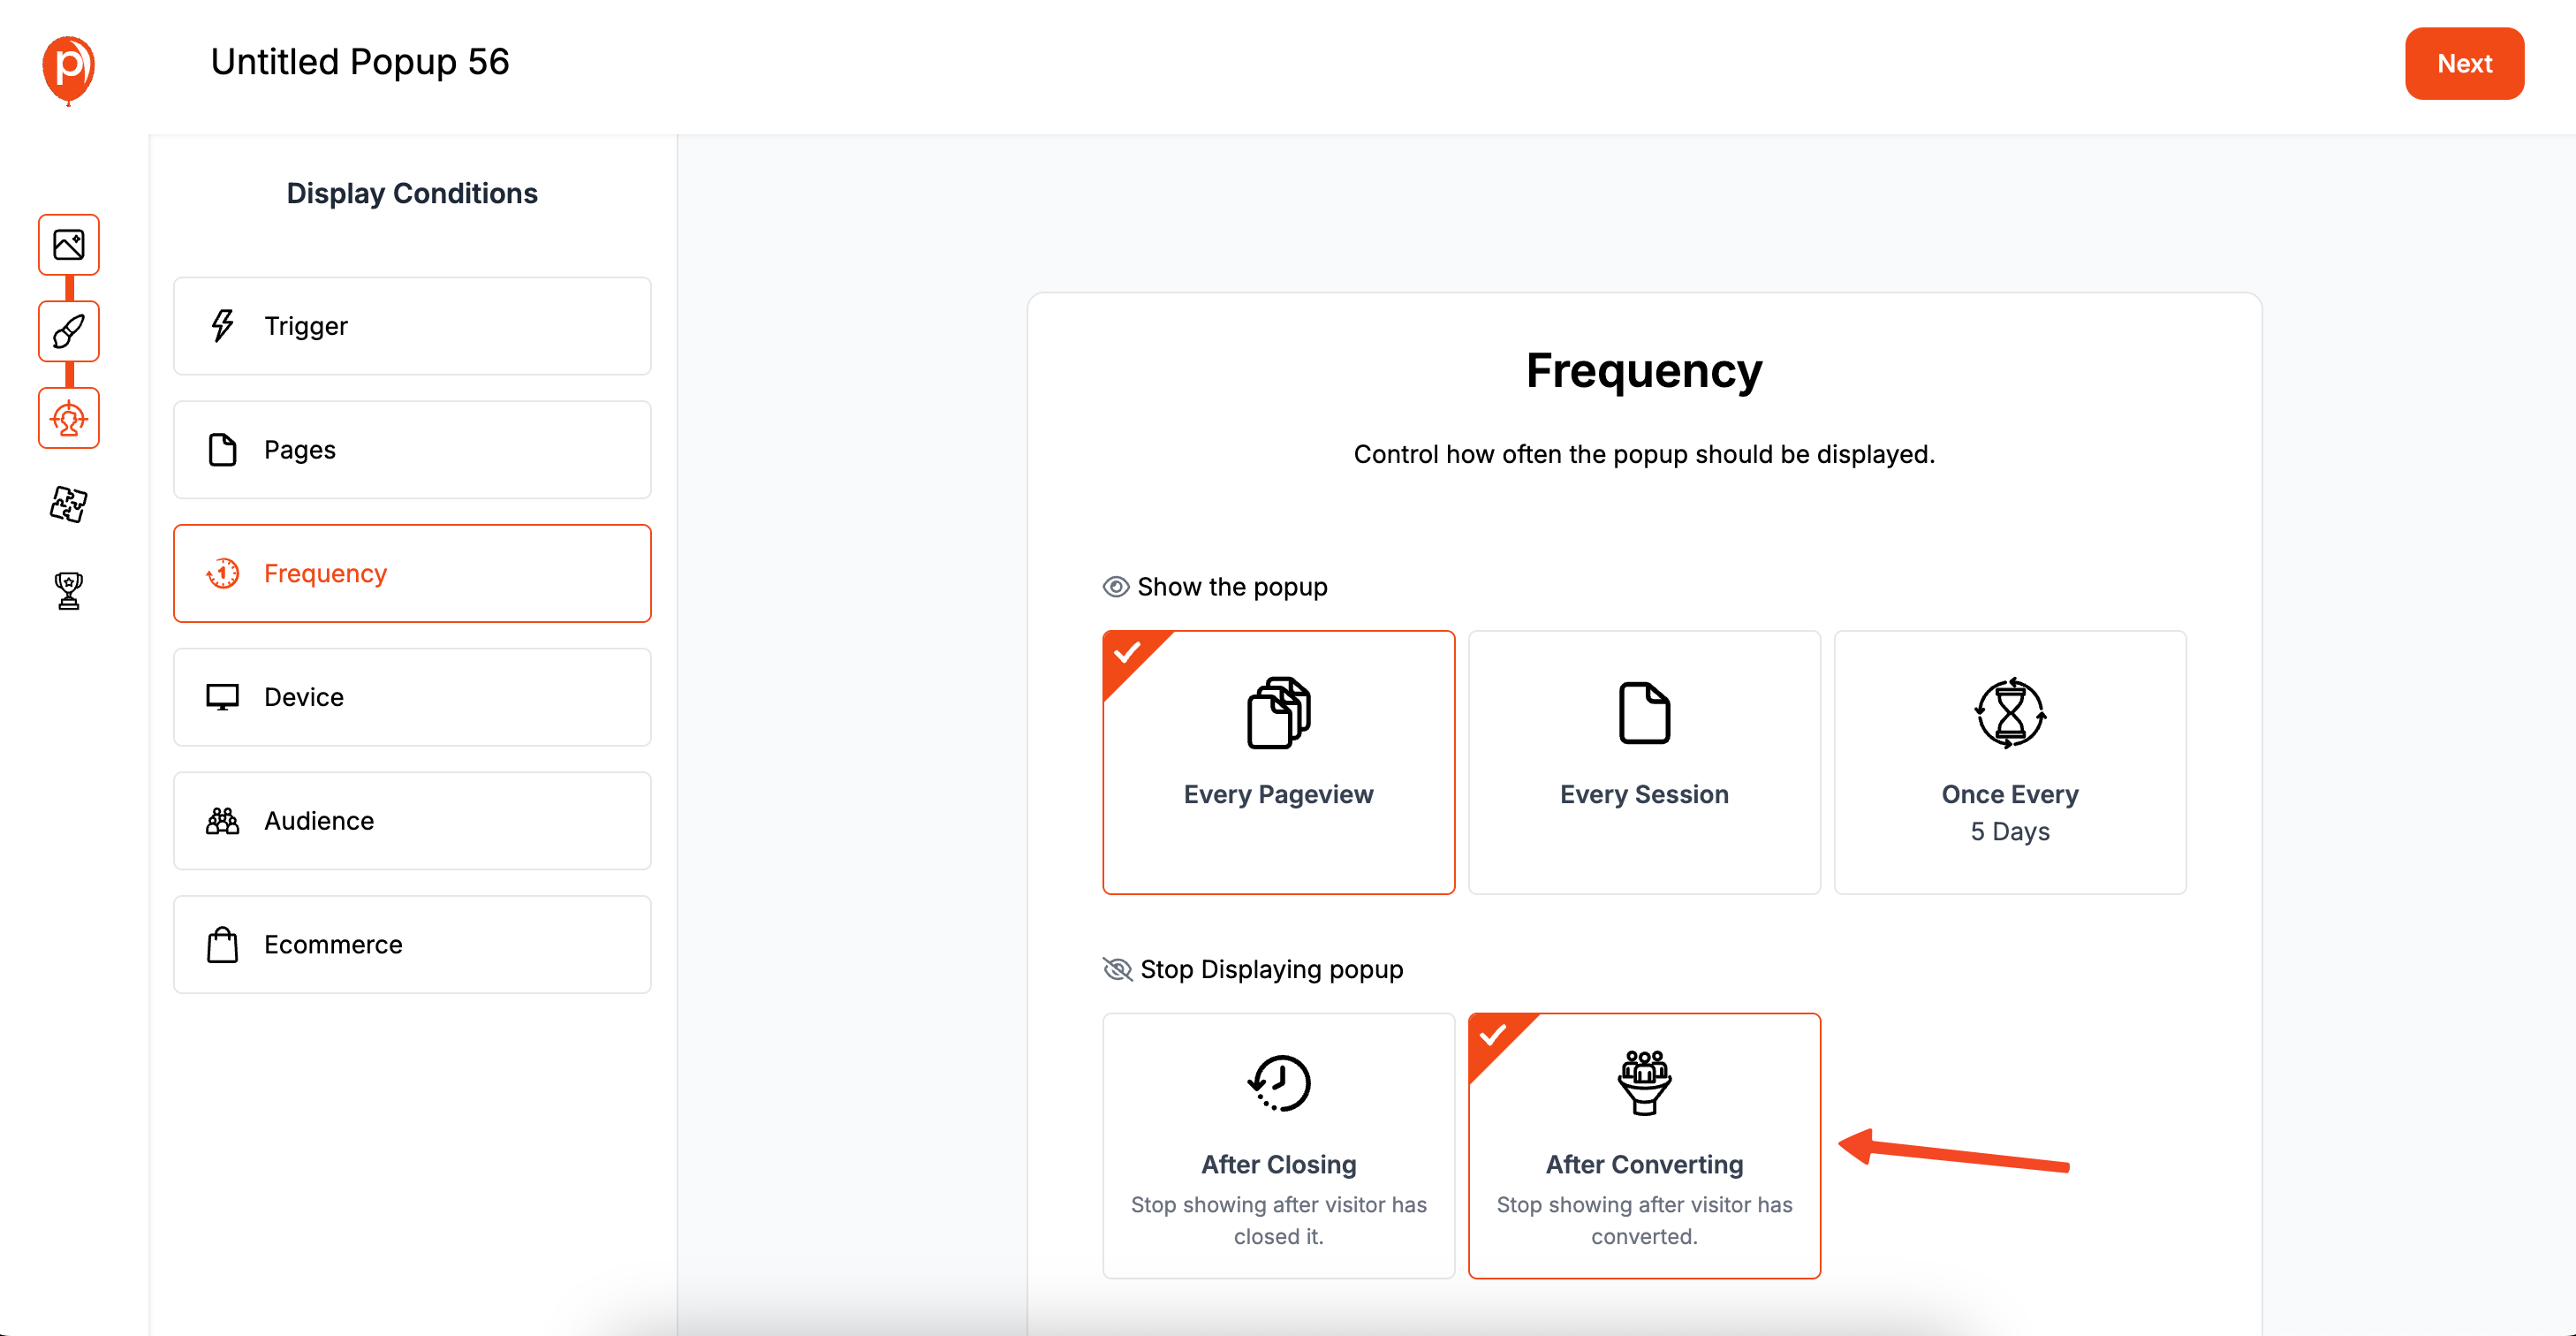
Under the Frequency settings, find the option that says “Stop Displaying once the user converts.” This is critical. It ensures that once a visitor clicks your "Accept" button, they will never see the notice again. We built this feature specifically to help you avoid annoying your audience.
Step 4: Save & Publish Your Popup
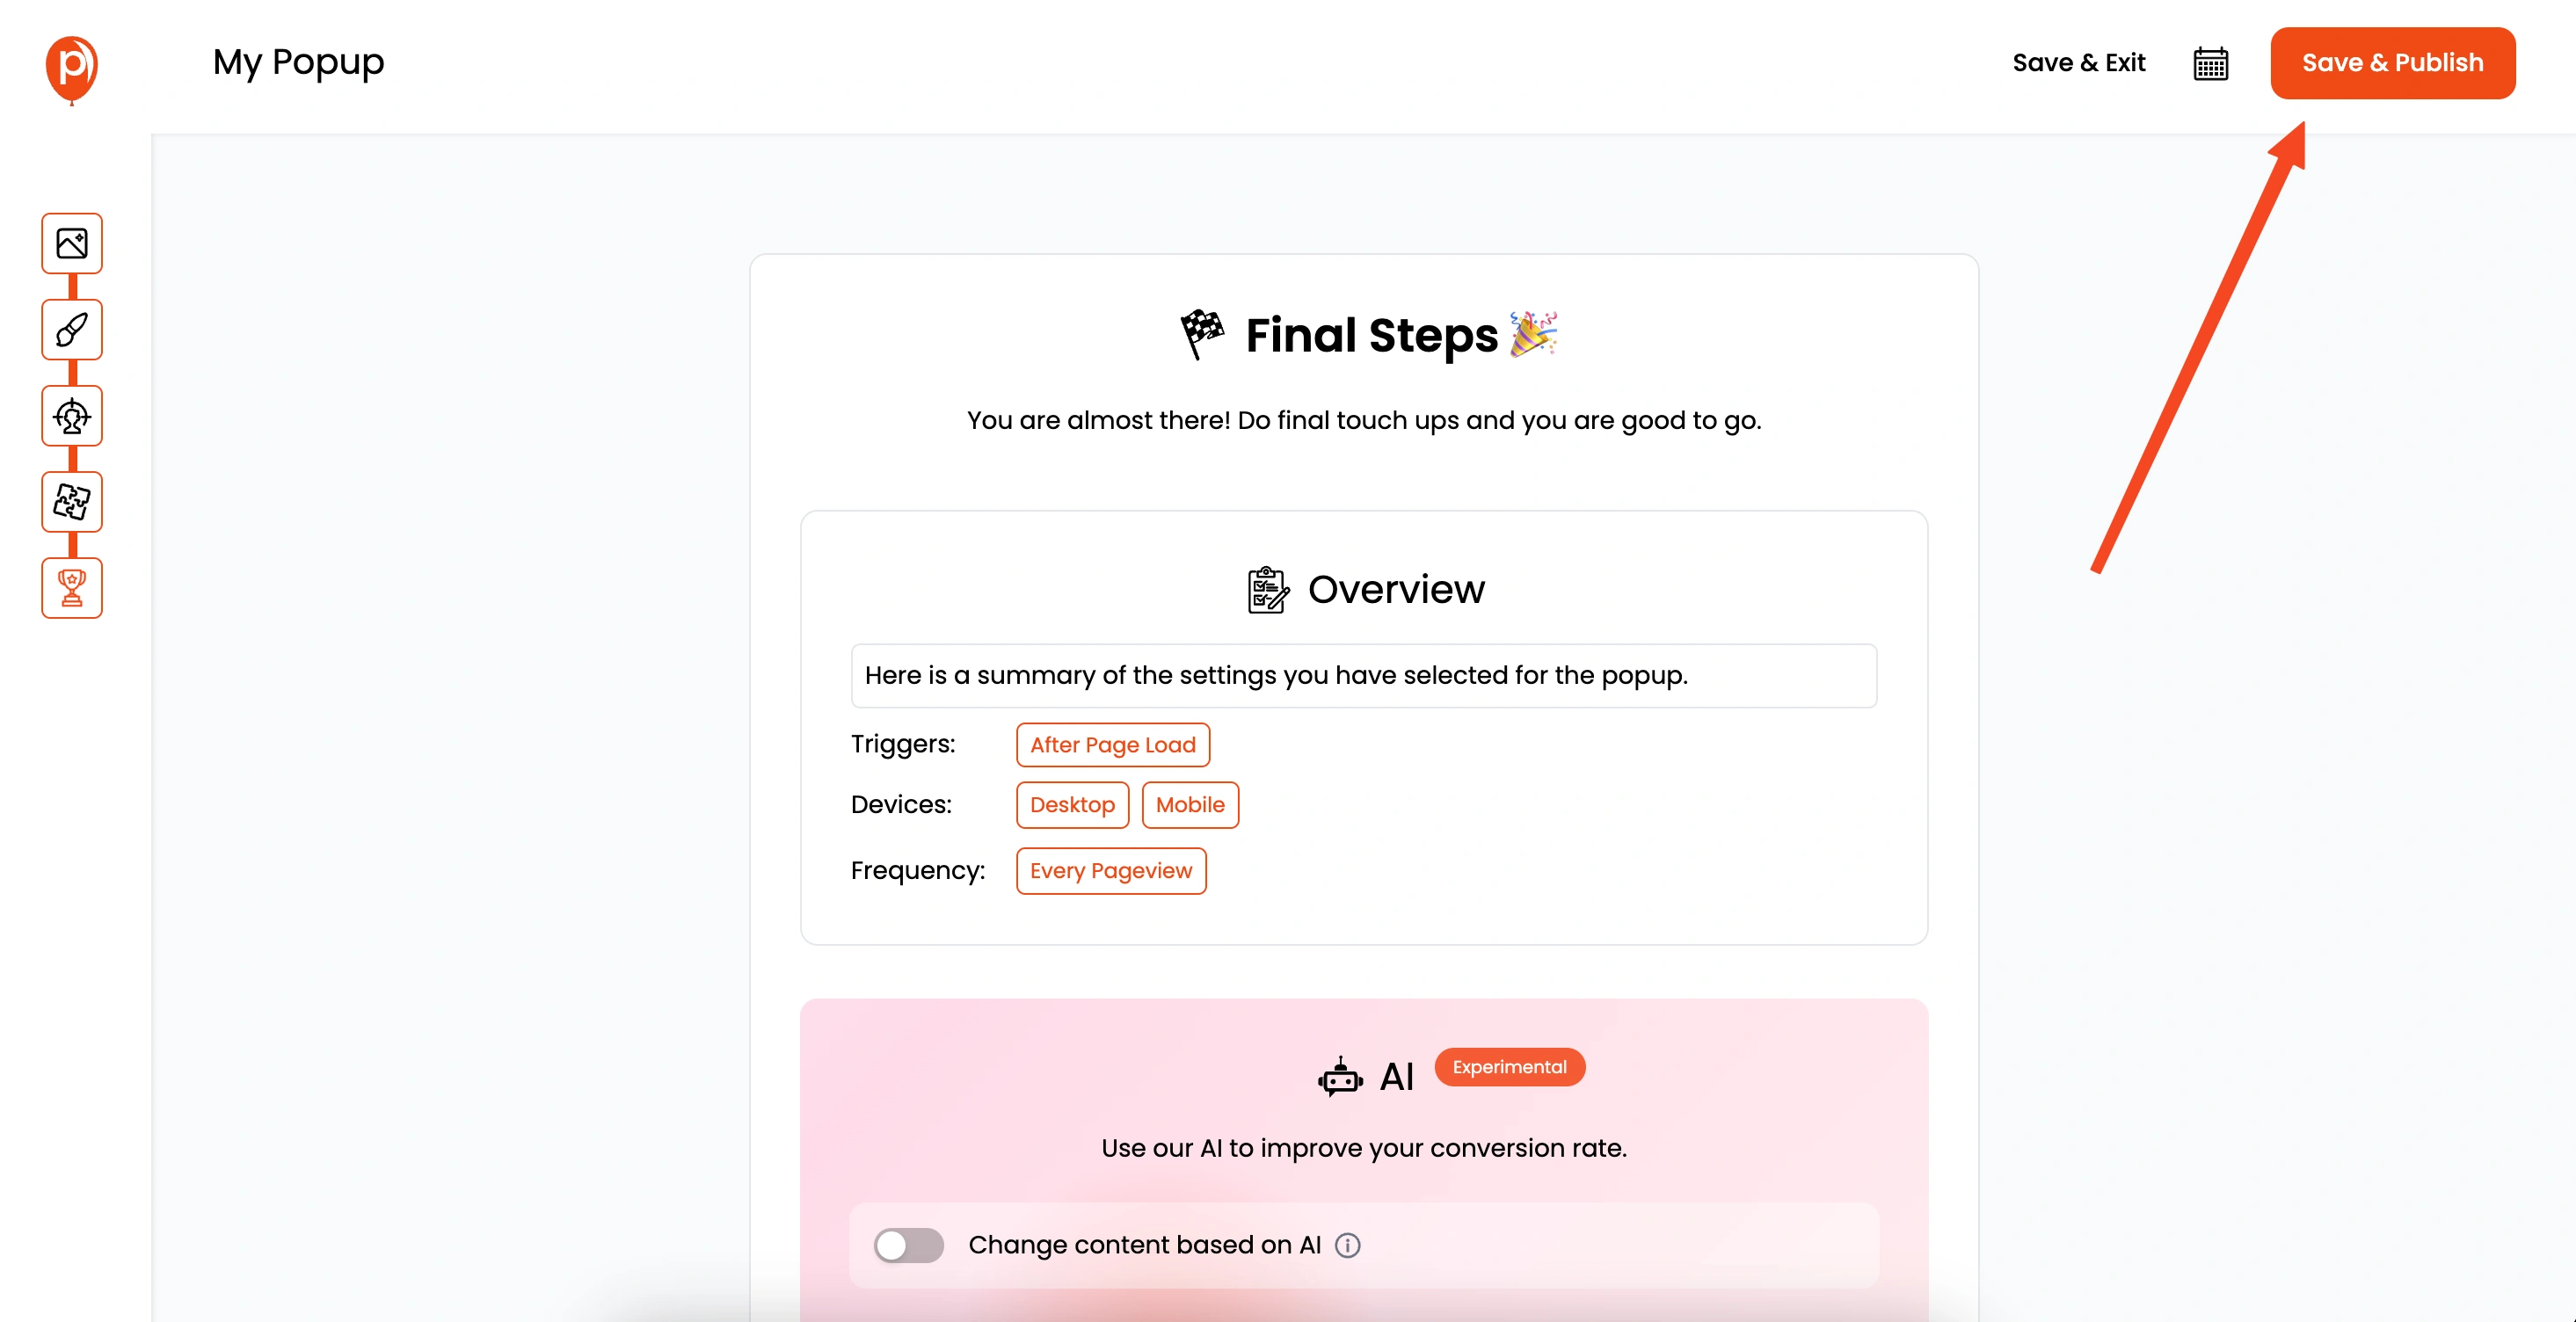
Once you're satisfied with the design and display rules, hit Save & Publish. This makes your new cookie consent popup active in your Poper workspace, ready to be shown to visitors.
Step 5: Install the Poper Code on Your Website
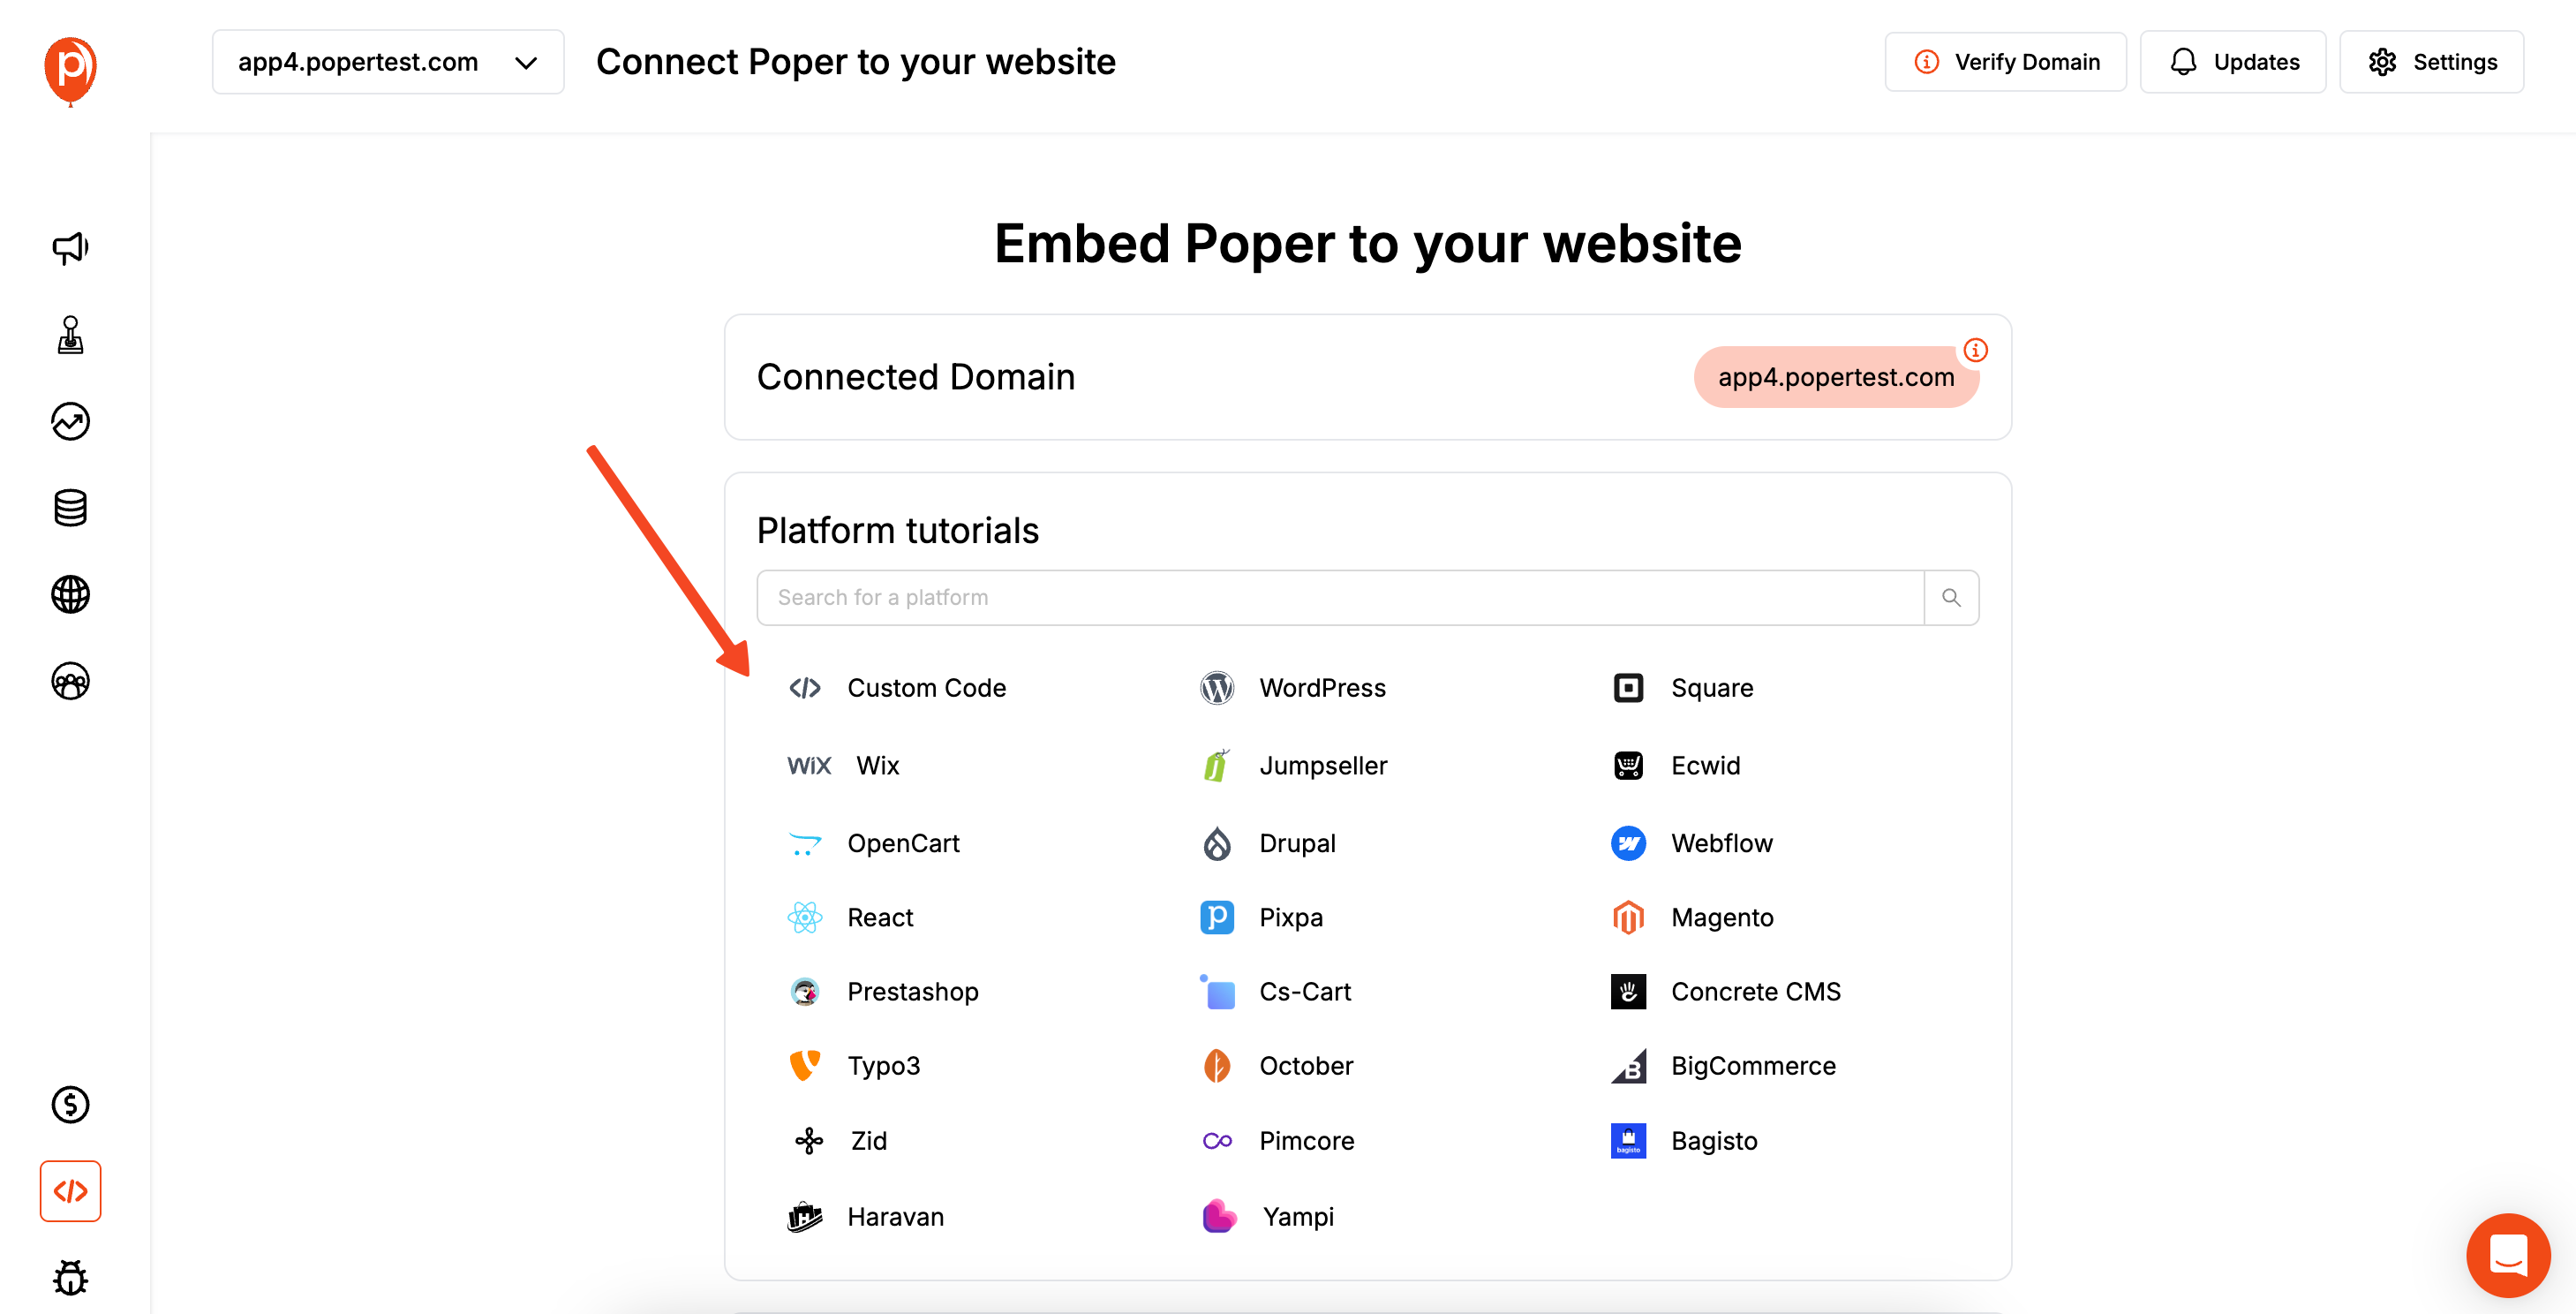
If you haven't already, you need to install the main Poper code on your site. Don't worry, you only have to do this once! All popups you create in the future will work automatically without adding more code.
Go to your Poper Dashboard, find the Code section, and click to copy your unique workspace code. Paste this code into your website's header area, which is usually in Settings > Code Injection. Save your website settings, and your new cookie consent popup will be live.
Method 3: Building a Cookie Popup with Code (HTML, CSS, JS)
For developers, creating a simple cookie consent banner from scratch provides full control. This involves creating the banner and using JavaScript to set a cookie once the user clicks "Accept."
Step 1: Create the HTML for the Banner
<div id="cookie-consent-banner" class="cookie-banner">
    <p>This website uses cookies to ensure you get the best experience on our website. <a href="/privacy-policy">Learn More</a></p>
    <button id="accept-cookies-btn">Accept</button>
</div>
Step 2: Style the Banner with CSS
.cookie-banner {
    display: none; /* Hidden by default */
    position: fixed;
    bottom: 0;
    left: 0;
    width: 100%;
    background-color: #222;
    color: #fff;
    padding: 15px;
    box-shadow: 0 -2px 5px rgba(0,0,0,0.2);
    display: flex;
    justify-content: space-between;
    align-items: center;
    z-index: 1000;
}
.cookie-banner p { margin: 0; font-size: 14px; }
.cookie-banner a { color: #4db2ec; text-decoration: underline; }
.cookie-banner button {
    padding: 8px 15px;
    background-color: #4db2ec;
    color: #fff;
    border: none;
    border-radius: 4px;
    cursor: pointer;
}
Step 3: Write JavaScript to Handle Consent and Cookies
This script checks if a consent cookie already exists. If not, it shows the banner. When the user clicks "Accept," it sets a cookie and hides the banner. For more on setting cookies specifically for popups, see our guide to setting cookies for popups.
document.addEventListener('DOMContentLoaded', function() {
    const consentBanner = document.getElementById('cookie-consent-banner');
    const acceptBtn = document.getElementById('accept-cookies-btn');

    // Function to set a cookie
    function setCookie(name, value, days) {
        let expires = "";
        if (days) {
            const date = new Date();
            date.setTime(date.getTime() + (days * 24 * 60 * 60 * 1000));
            expires = "; expires=" + date.toUTCString();
        }
        document.cookie = name + "=" + (value || "") + expires + "; path=/";
    }

    // Function to get a cookie
    function getCookie(name) {
        const nameEQ = name + "=";
        const ca = document.cookie.split(';');
        for(let i = 0; i < ca.length; i++) {
            let c = ca[i];
            while (c.charAt(0) === ' ') c = c.substring(1, c.length);
            if (c.indexOf(nameEQ) === 0) return c.substring(nameEQ.length, c.length);
        }
        return null;
    }

    // Check if the consent cookie exists
    if (!getCookie('cookie_consent')) {
        consentBanner.style.display = 'flex';
    }

    // When the accept button is clicked
    acceptBtn.addEventListener('click', function() {
        setCookie('cookie_consent', 'true', 365); // Set a cookie that lasts for a year
        consentBanner.style.display = 'none';
    });
});
Conclusion
Creating an accept cookies popup is a vital step in building a trustworthy and legally compliant website.
Manual coding offers developers ultimate control over a simple banner.
WordPress plugins provide a comprehensive and automated solution for the world's most popular CMS.
Dedicated tools like Poper offer the best of both worlds for any website: an incredibly easy setup with a simple generator, or a powerful visual editor for full customization, all while handling the crucial logic of setting cookies and not showing the notice again after acceptance.
By implementing a clear, user-friendly cookie consent notice, you show respect for your visitors' privacy, build trust, and stay on the right side of important data protection laws.
Frequently Asked Questions (FAQ)
Do I need an "Accept Cookies" popup if my website is just a simple blog?
Most likely, yes. If you use Google Analytics, have social media share buttons, embed YouTube videos, or have any ads, those services place cookies on your visitors' devices. If you have visitors from the EU or California, you need to inform them and get consent.
What's the difference between a cookie banner and a cookie popup?
A banner is typically a bar that appears at the top or bottom of the screen and is less intrusive. A popup (or modal) often appears in the center of the screen and may block interaction with the page until a choice is made. Banners are generally better for user experience.
Does the user have to be able to decline cookies?
For strict GDPR compliance, users must be given a genuine choice, which includes the ability to decline non-essential cookies. Many comprehensive consent management plugins and platforms offer this functionality.
Where should I link to in my cookie notice?
You must link to your Privacy Policy or a dedicated Cookie Policy page. This page should provide detailed information about what cookies your site uses, why they are used, and how users can manage them.
How does the website "remember" that a user has accepted cookies?
When a user clicks the "Accept" button, a small script runs that places its own cookie on the user's browser (e.g., a cookie named cookie_consent with a value of true). On subsequent page loads, the script first checks for the presence of this specific cookie. If it finds it, it doesn't show the banner again.

