

Flodesk has won the hearts of creators and small businesses with its stunningly beautiful and intuitive email marketing platform. A key to leveraging Flodesk's power is effectively growing your email list, and to do that, you need to know how to create a Flodesk form.
Whether you want a popup that grabs attention or an inline form that sits seamlessly within your website content, Flodesk provides the tools to build them. If you'd like to learn how to create website forms for other platforms or want advanced popups, see our guide on creating website forms.
This ultimate guide will provide a detailed, step-by-step walkthrough of creating forms using Flodesk's native builder. We will then explore how a specialized tool like Poper can offer enhanced design, targeting, and triggering capabilities while still integrating perfectly with your Flodesk account.
Understanding Flodesk's Form Types
Flodesk offers three primary types of sign-up forms, each designed for a specific purpose:
Popup Form:
- What it is: An overlay that appears on top of your website content.
- Best for: High-impact offers, promoting a lead magnet, or a general newsletter sign-up that you want visitors to see.
What it is: An overlay that appears on top of your website content.
Best for: High-impact offers, promoting a lead magnet, or a general newsletter sign-up that you want visitors to see.
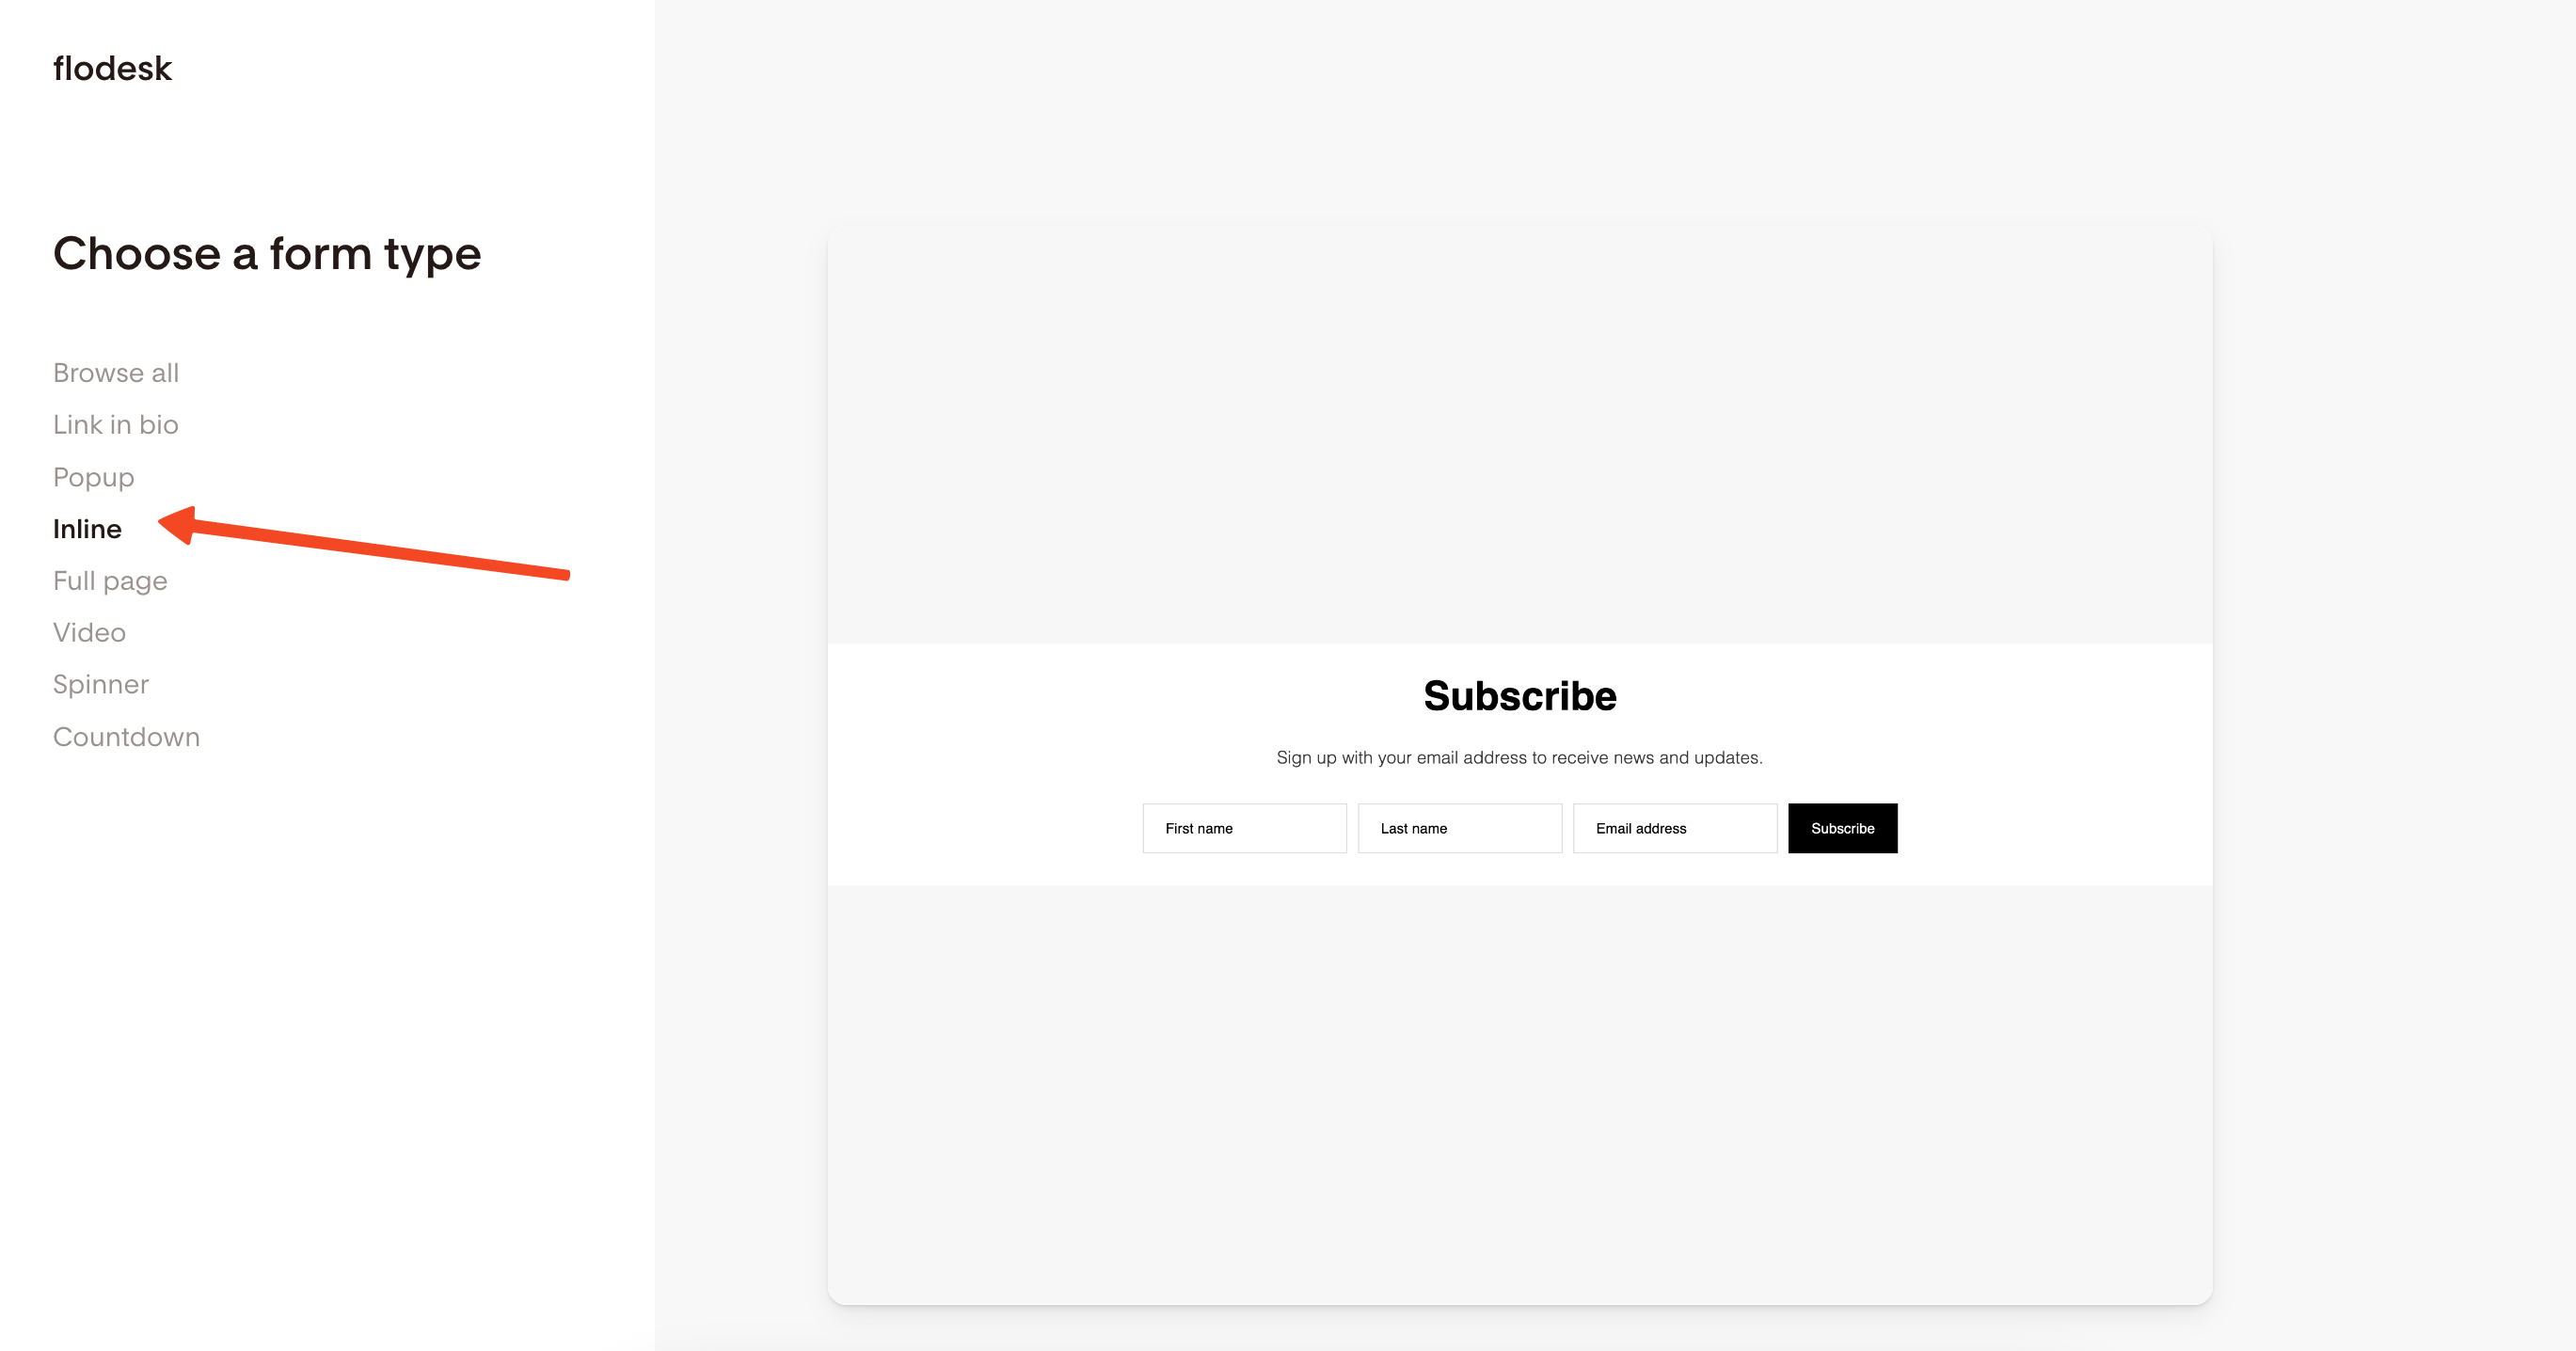
Inline Form:
- What it is: A form that is embedded directly into the content of a page, post, or sidebar. It's a static part of the page.
- Best for: Placing in your website's footer, at the end of a blog post, or on a dedicated "Subscribe" page.
What it is: A form that is embedded directly into the content of a page, post, or sidebar. It's a static part of the page.
Best for: Placing in your website's footer, at the end of a blog post, or on a dedicated "Subscribe" page.
Full Page Form:
- What it is: A simple, dedicated landing page hosted by Flodesk that contains only your form.
- Best for: Sharing a direct link to a sign-up page on social media or in your email signature.
What it is: A simple, dedicated landing page hosted by Flodesk that contains only your form.
Best for: Sharing a direct link to a sign-up page on social media or in your email signature.
That's exactly why I designed Poper. I wanted to give you a powerful way to create forms that not only look great but are smart enough to capture leads right when they're most interested. Let’s walk through how you can create an amazing form for your Flodesk audience.
How to Create High-Converting Flodesk Forms with Poper
I’ll show you how to create a form that embeds seamlessly on your website, connects directly to your Flodesk account, and helps you grow your subscriber list effortlessly.
Step 1: Create Your First Campaign in Poper
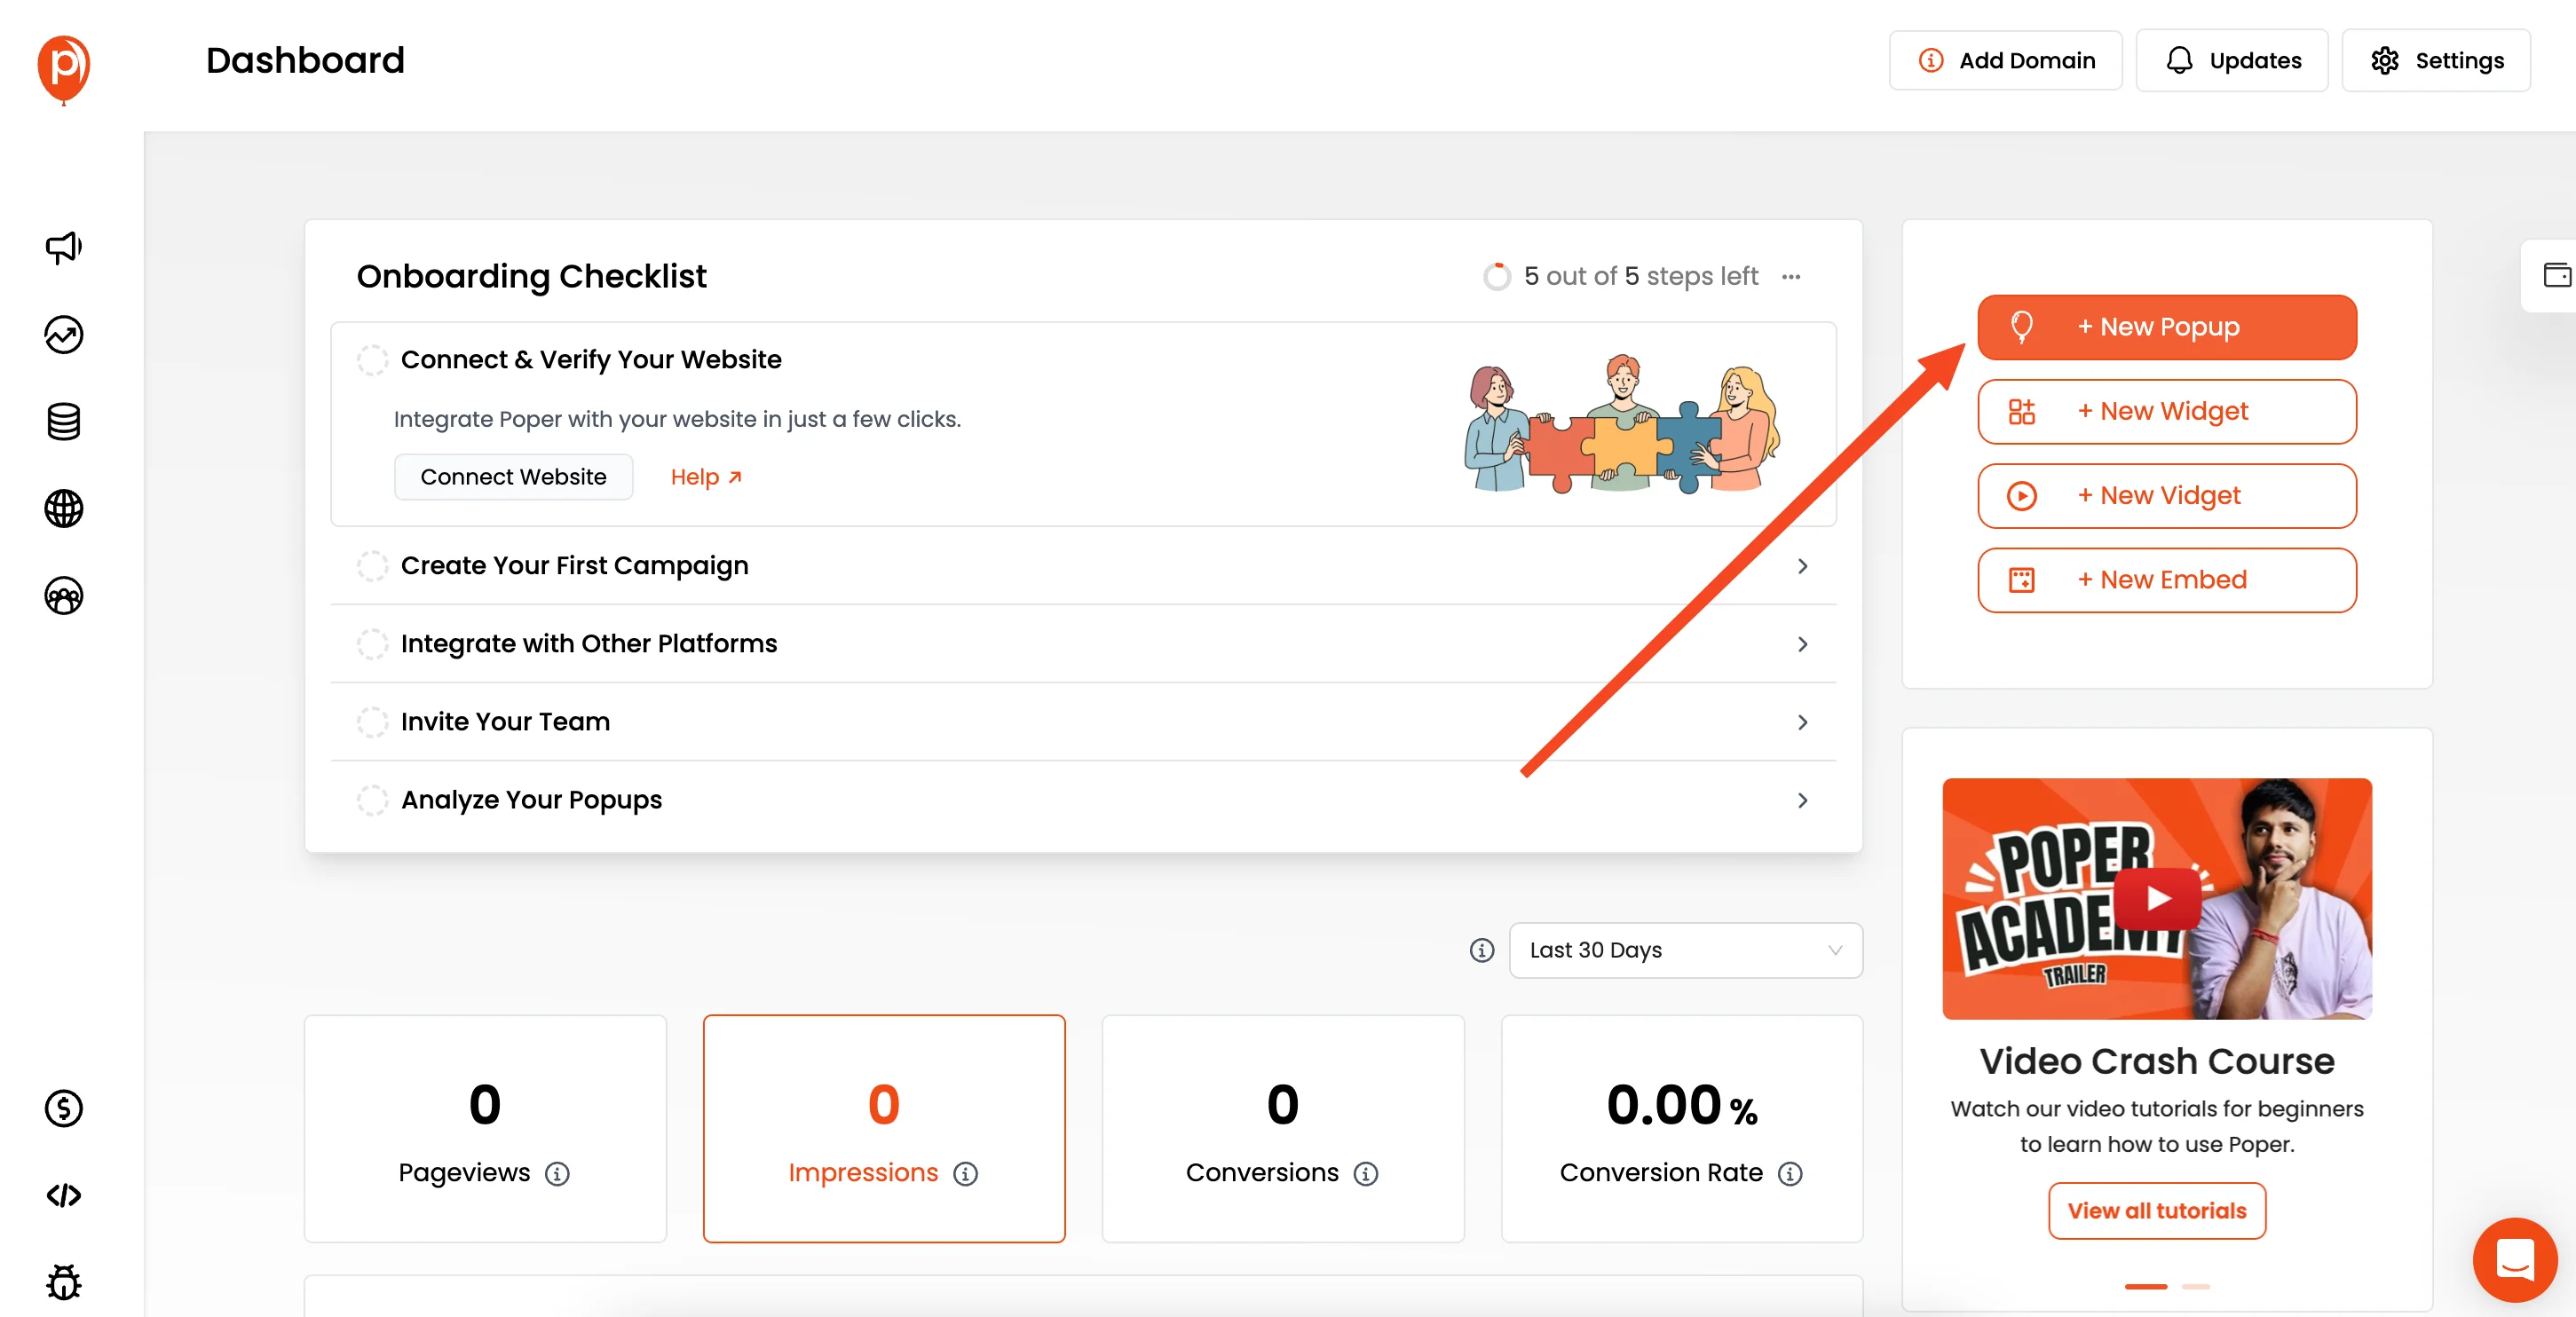
First things first, let's get a campaign started. If you haven't already, sign up for a Poper account and add your website's domain. Once you're in the dashboard, click the "New Popup" button to begin. Don't worry about getting it perfect right away; we can tweak everything as we go.
Step 2: Choose a Template That Fits Your Goal
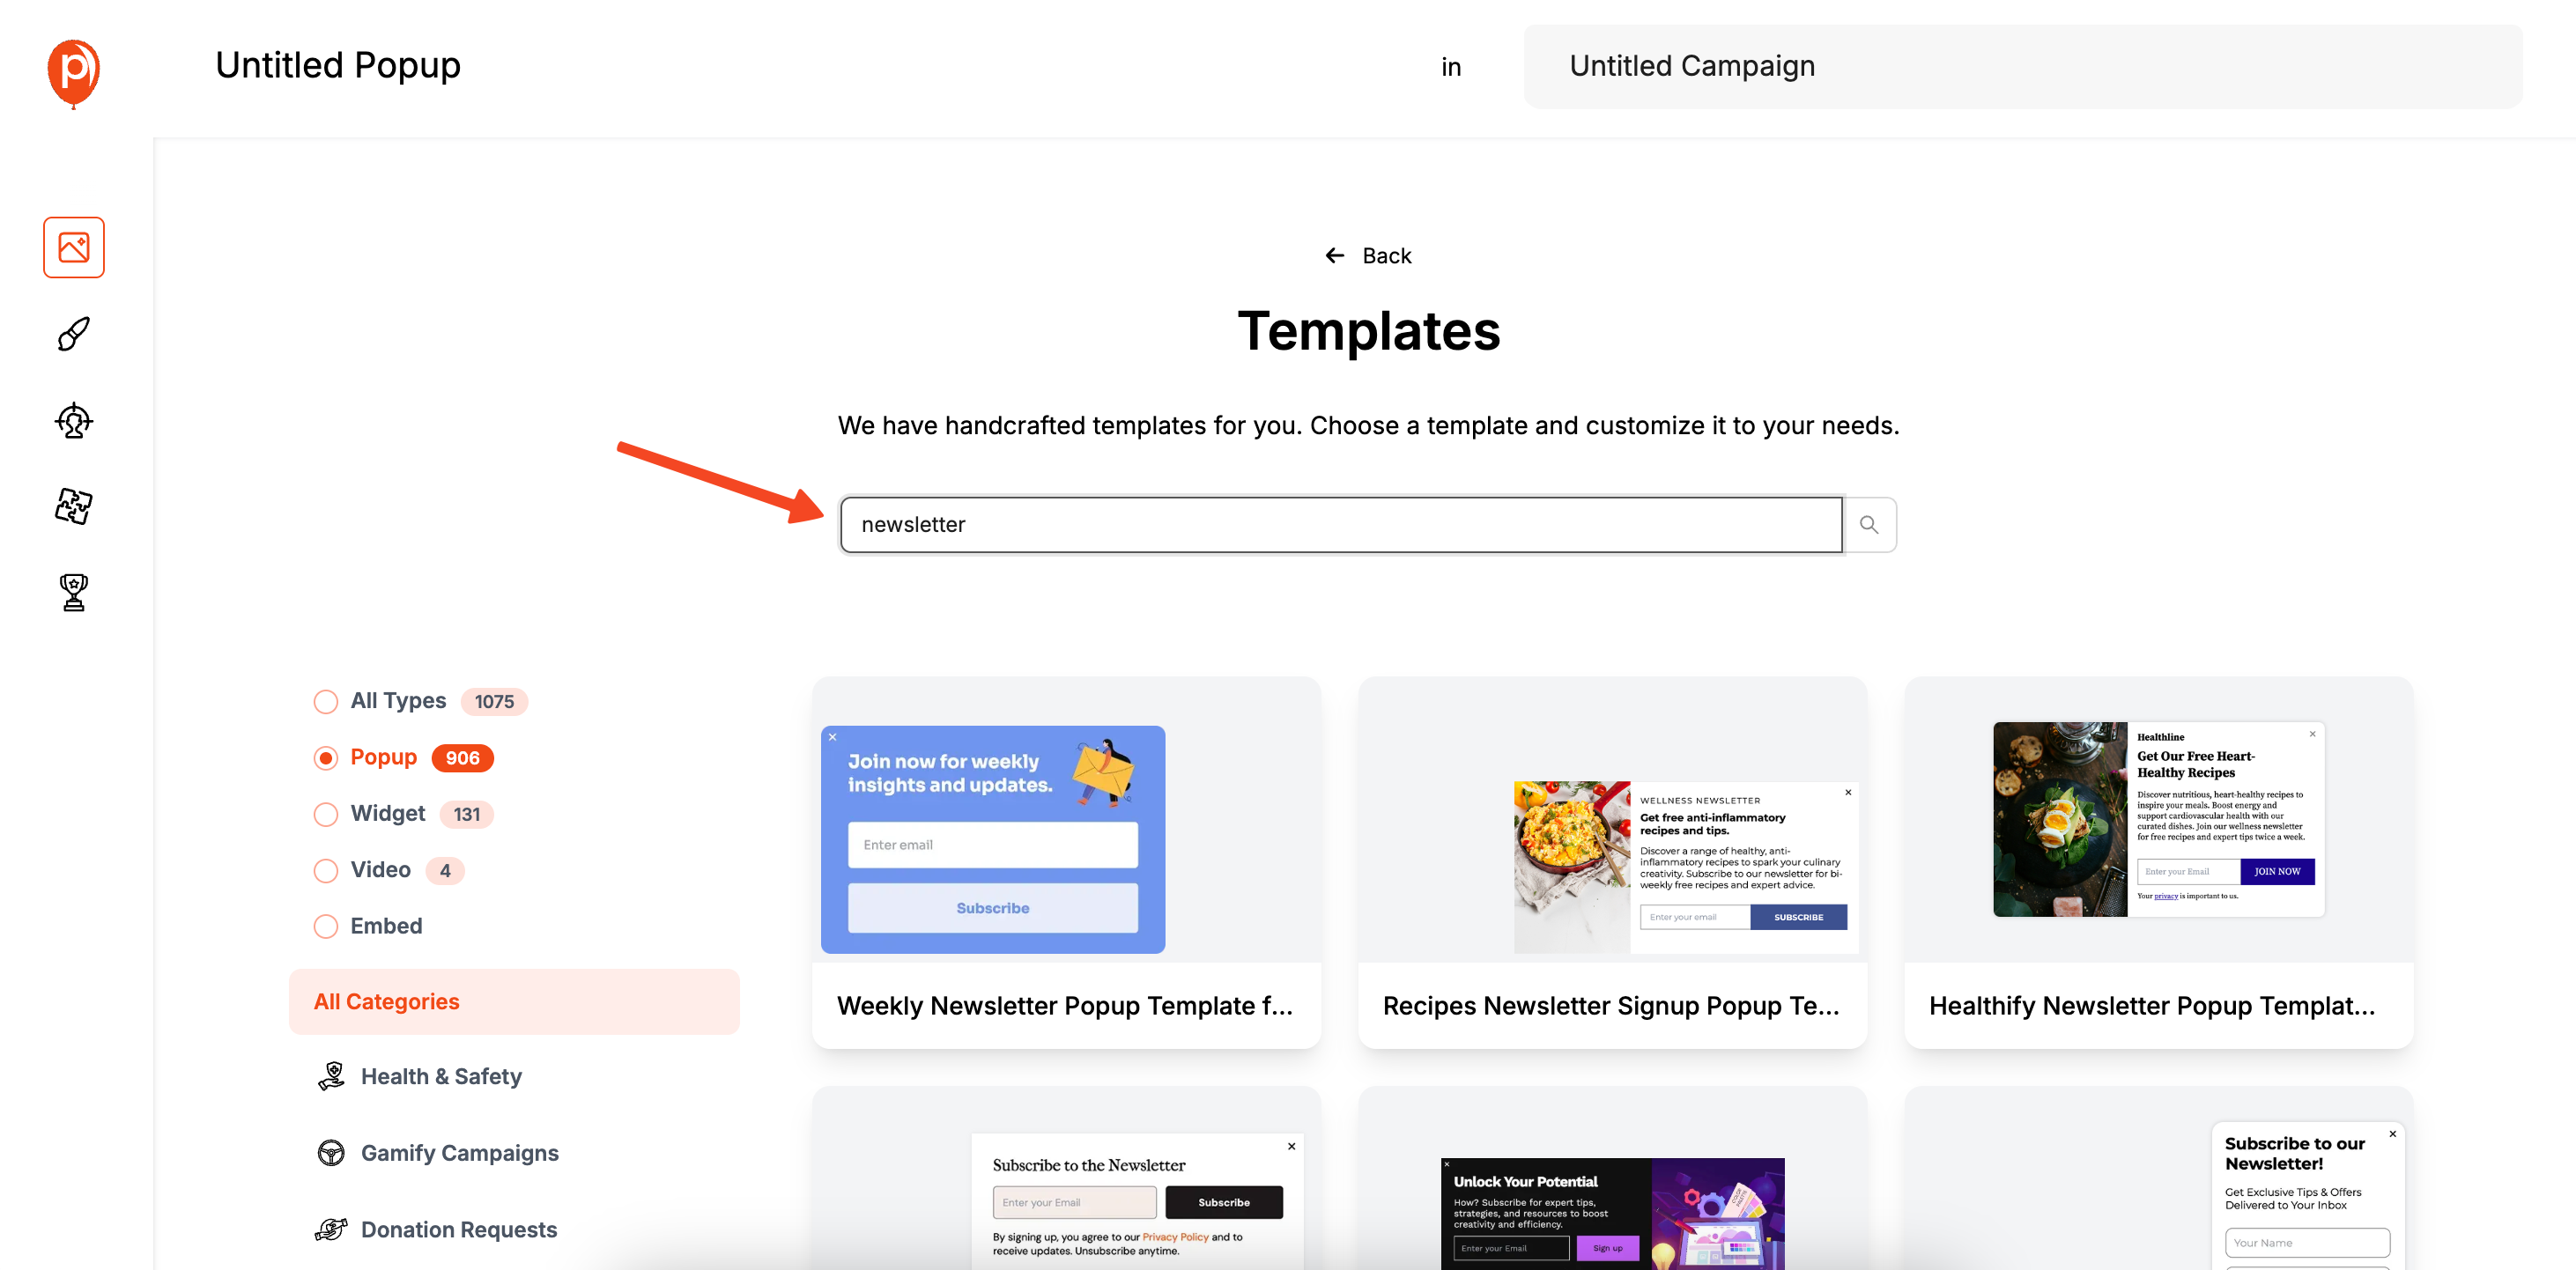
I always recommend starting with a template because it gives you a solid foundation to build on. You can find templates for all sorts of goals, but for this, try searching for "Newsletter" or "Lead Magnet." Pick one that catches your eye. You can also start from scratch if you have a specific vision in mind.
Step 3: Customize Your Form in the Editor
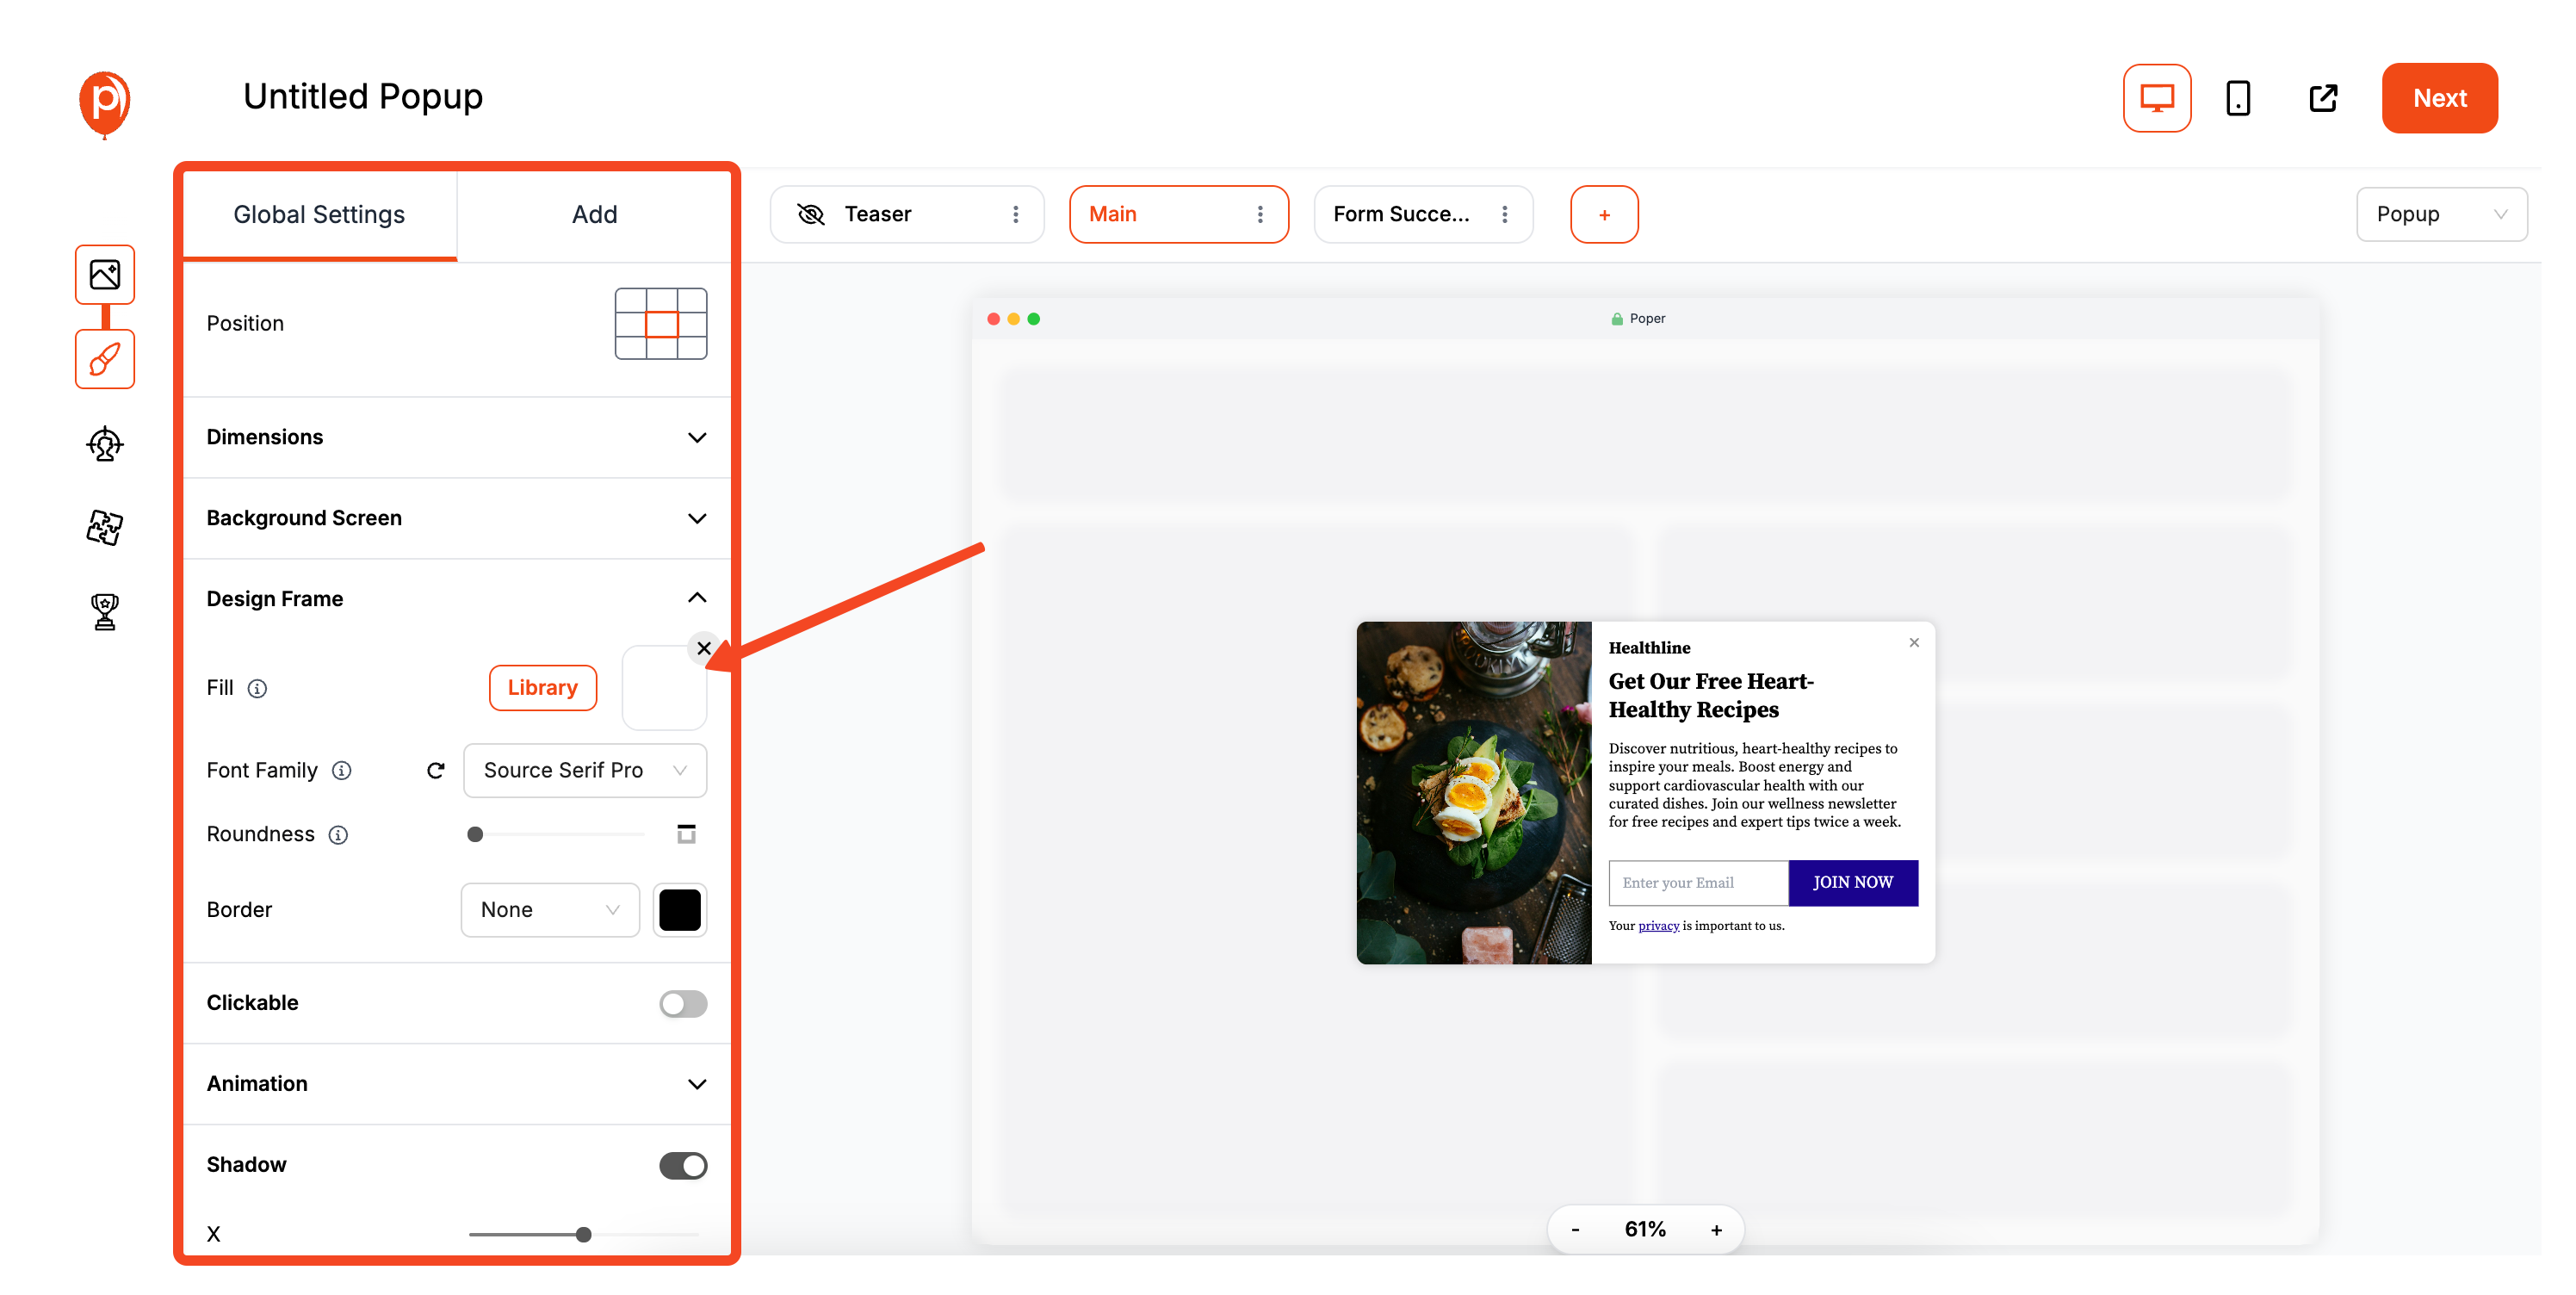
This is where you bring your form to life. In our editor, you can change every font, color, and image to perfectly match your brand's look and feel. From the "Add" tab, you can also drag in new fields if you need to collect more than just an email, like a name or phone number.
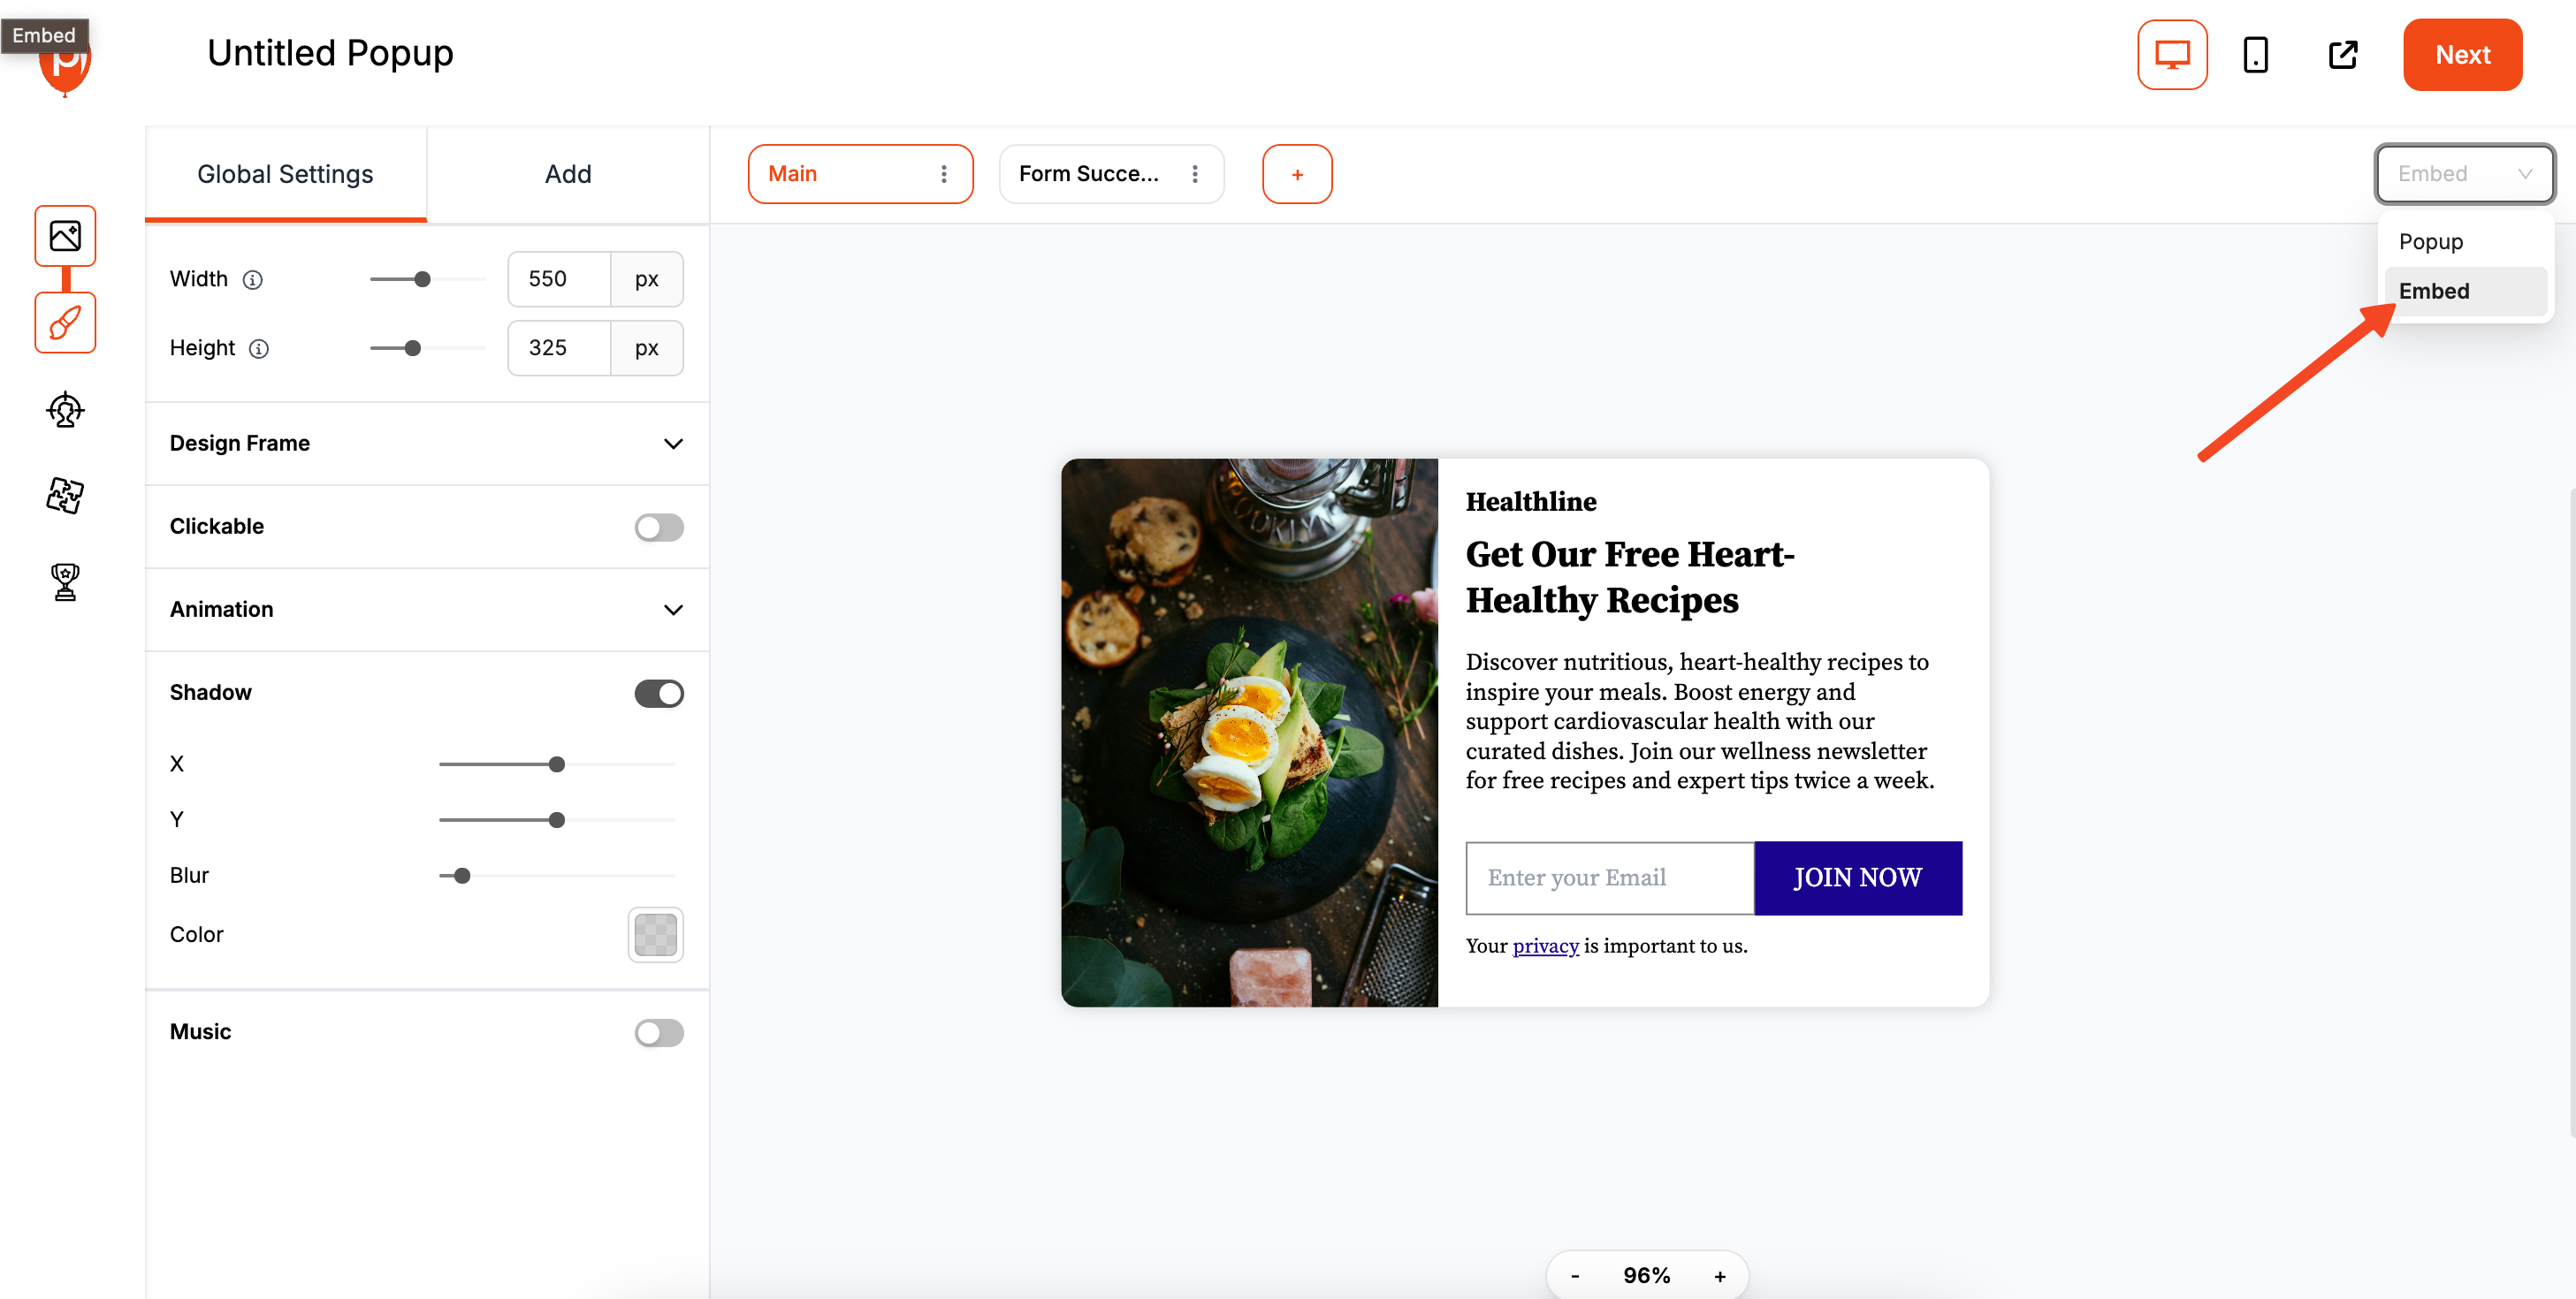
Since we're making an embeddable form, look for the toggle in the top-right corner of the editor and switch the campaign type from "Popup" to "Embed." This changes its behavior from showing up over your content to sitting nicely within it.
Step 4: Choose Where and How Your Form Appears
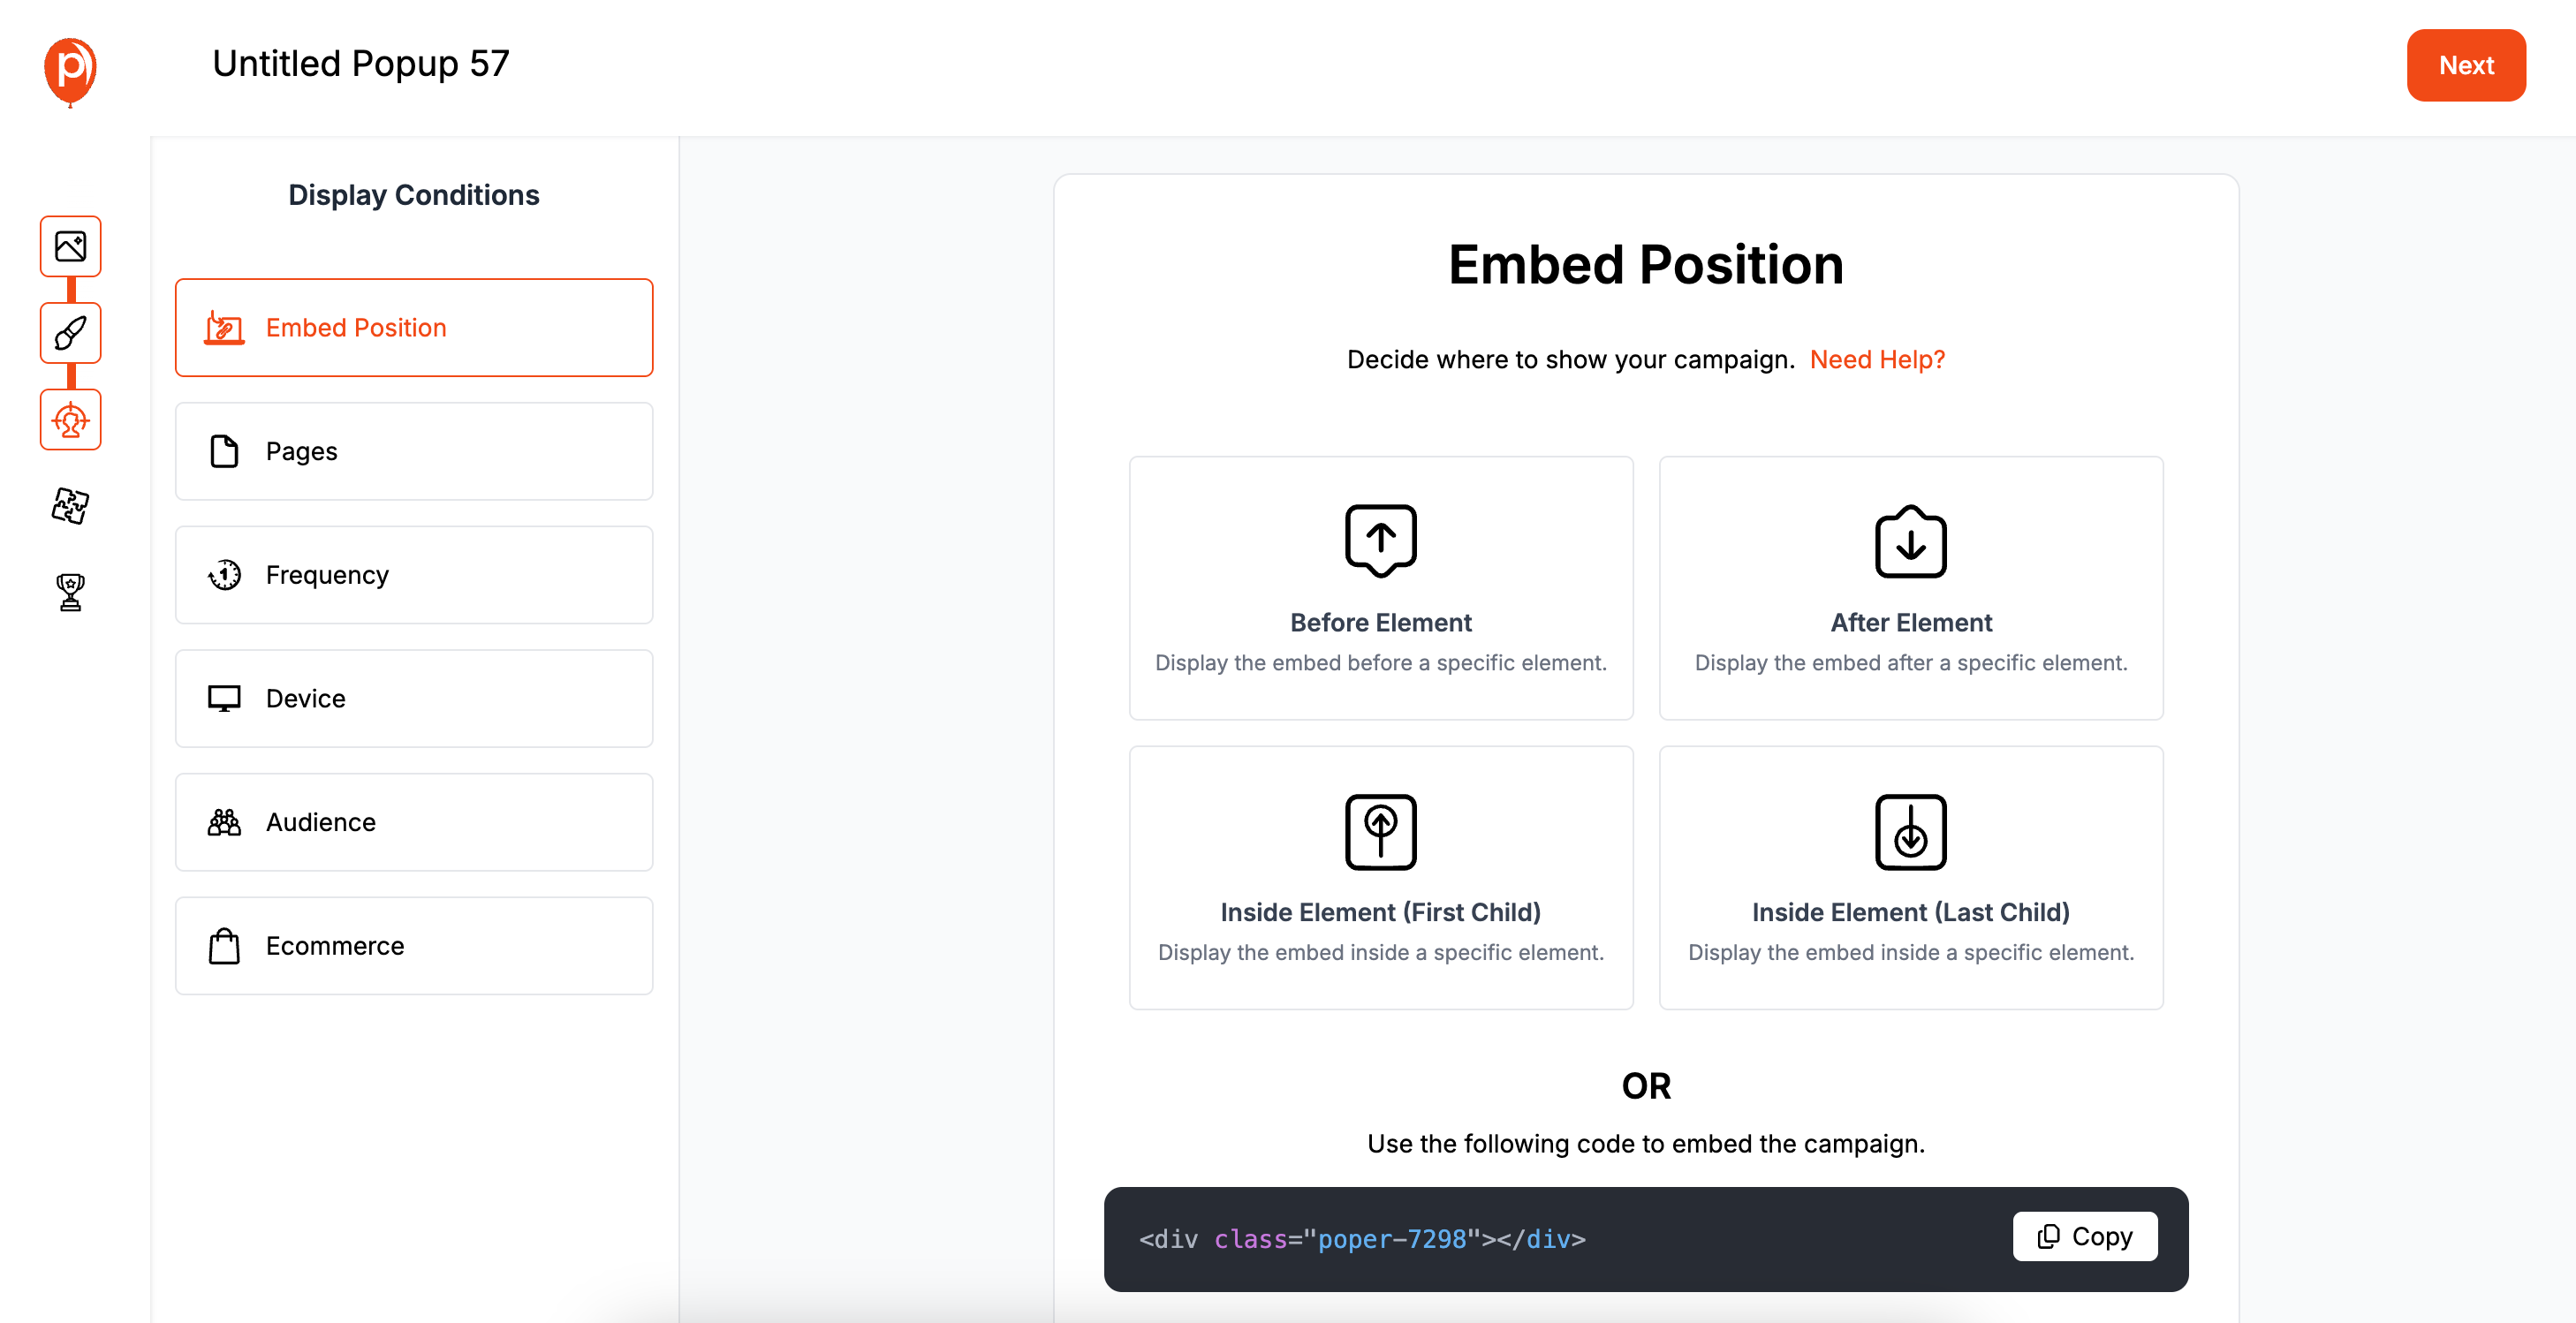
Next, you’ll decide where on your site the form should live. In the "Embed Position" section, you can choose to place it in a specific spot on the page. I built these controls to give you precision, ensuring your form appears exactly where it makes the most sense for your visitors.
You can also set rules for who sees the form. For example, you could show it only on your blog pages or to visitors from a specific country. This targeting ensures your message reaches the right audience without being intrusive. Learn more about segmenting audiences for popup campaigns and how advanced segmentation can optimize conversions.
Step 5: Connect Poper to Your Flodesk Account
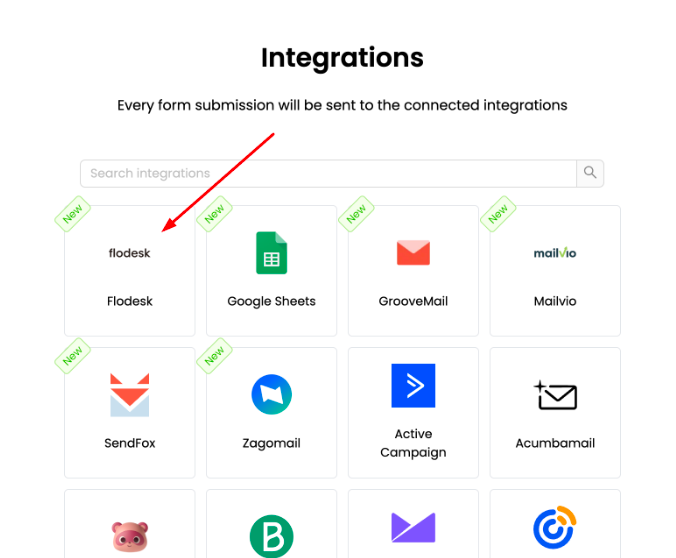
Now for the most important part: linking your form to Flodesk. Go to the "Integrations" step and select Flodesk from the list. It will ask for an account name (just for your reference) and your Flodesk API key to create a secure connection.
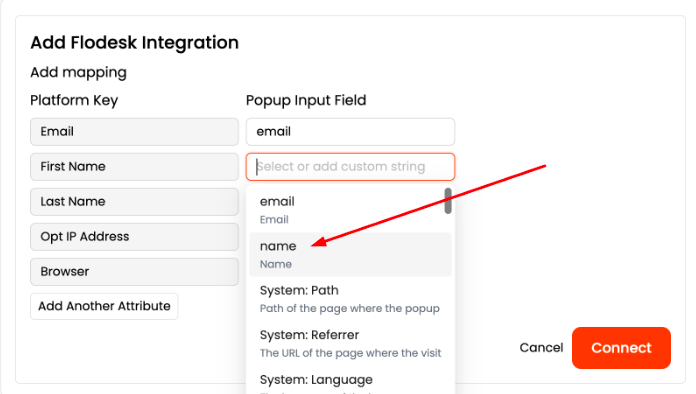
Once connected, you can choose which Flodesk segment to add new subscribers to and even assign tags. You’ll then map the fields from your Poper form to the corresponding fields in Flodesk. This step is crucial because it tells Poper exactly where to put the information it collects.
Step 6: Install Poper and Publish Your Form
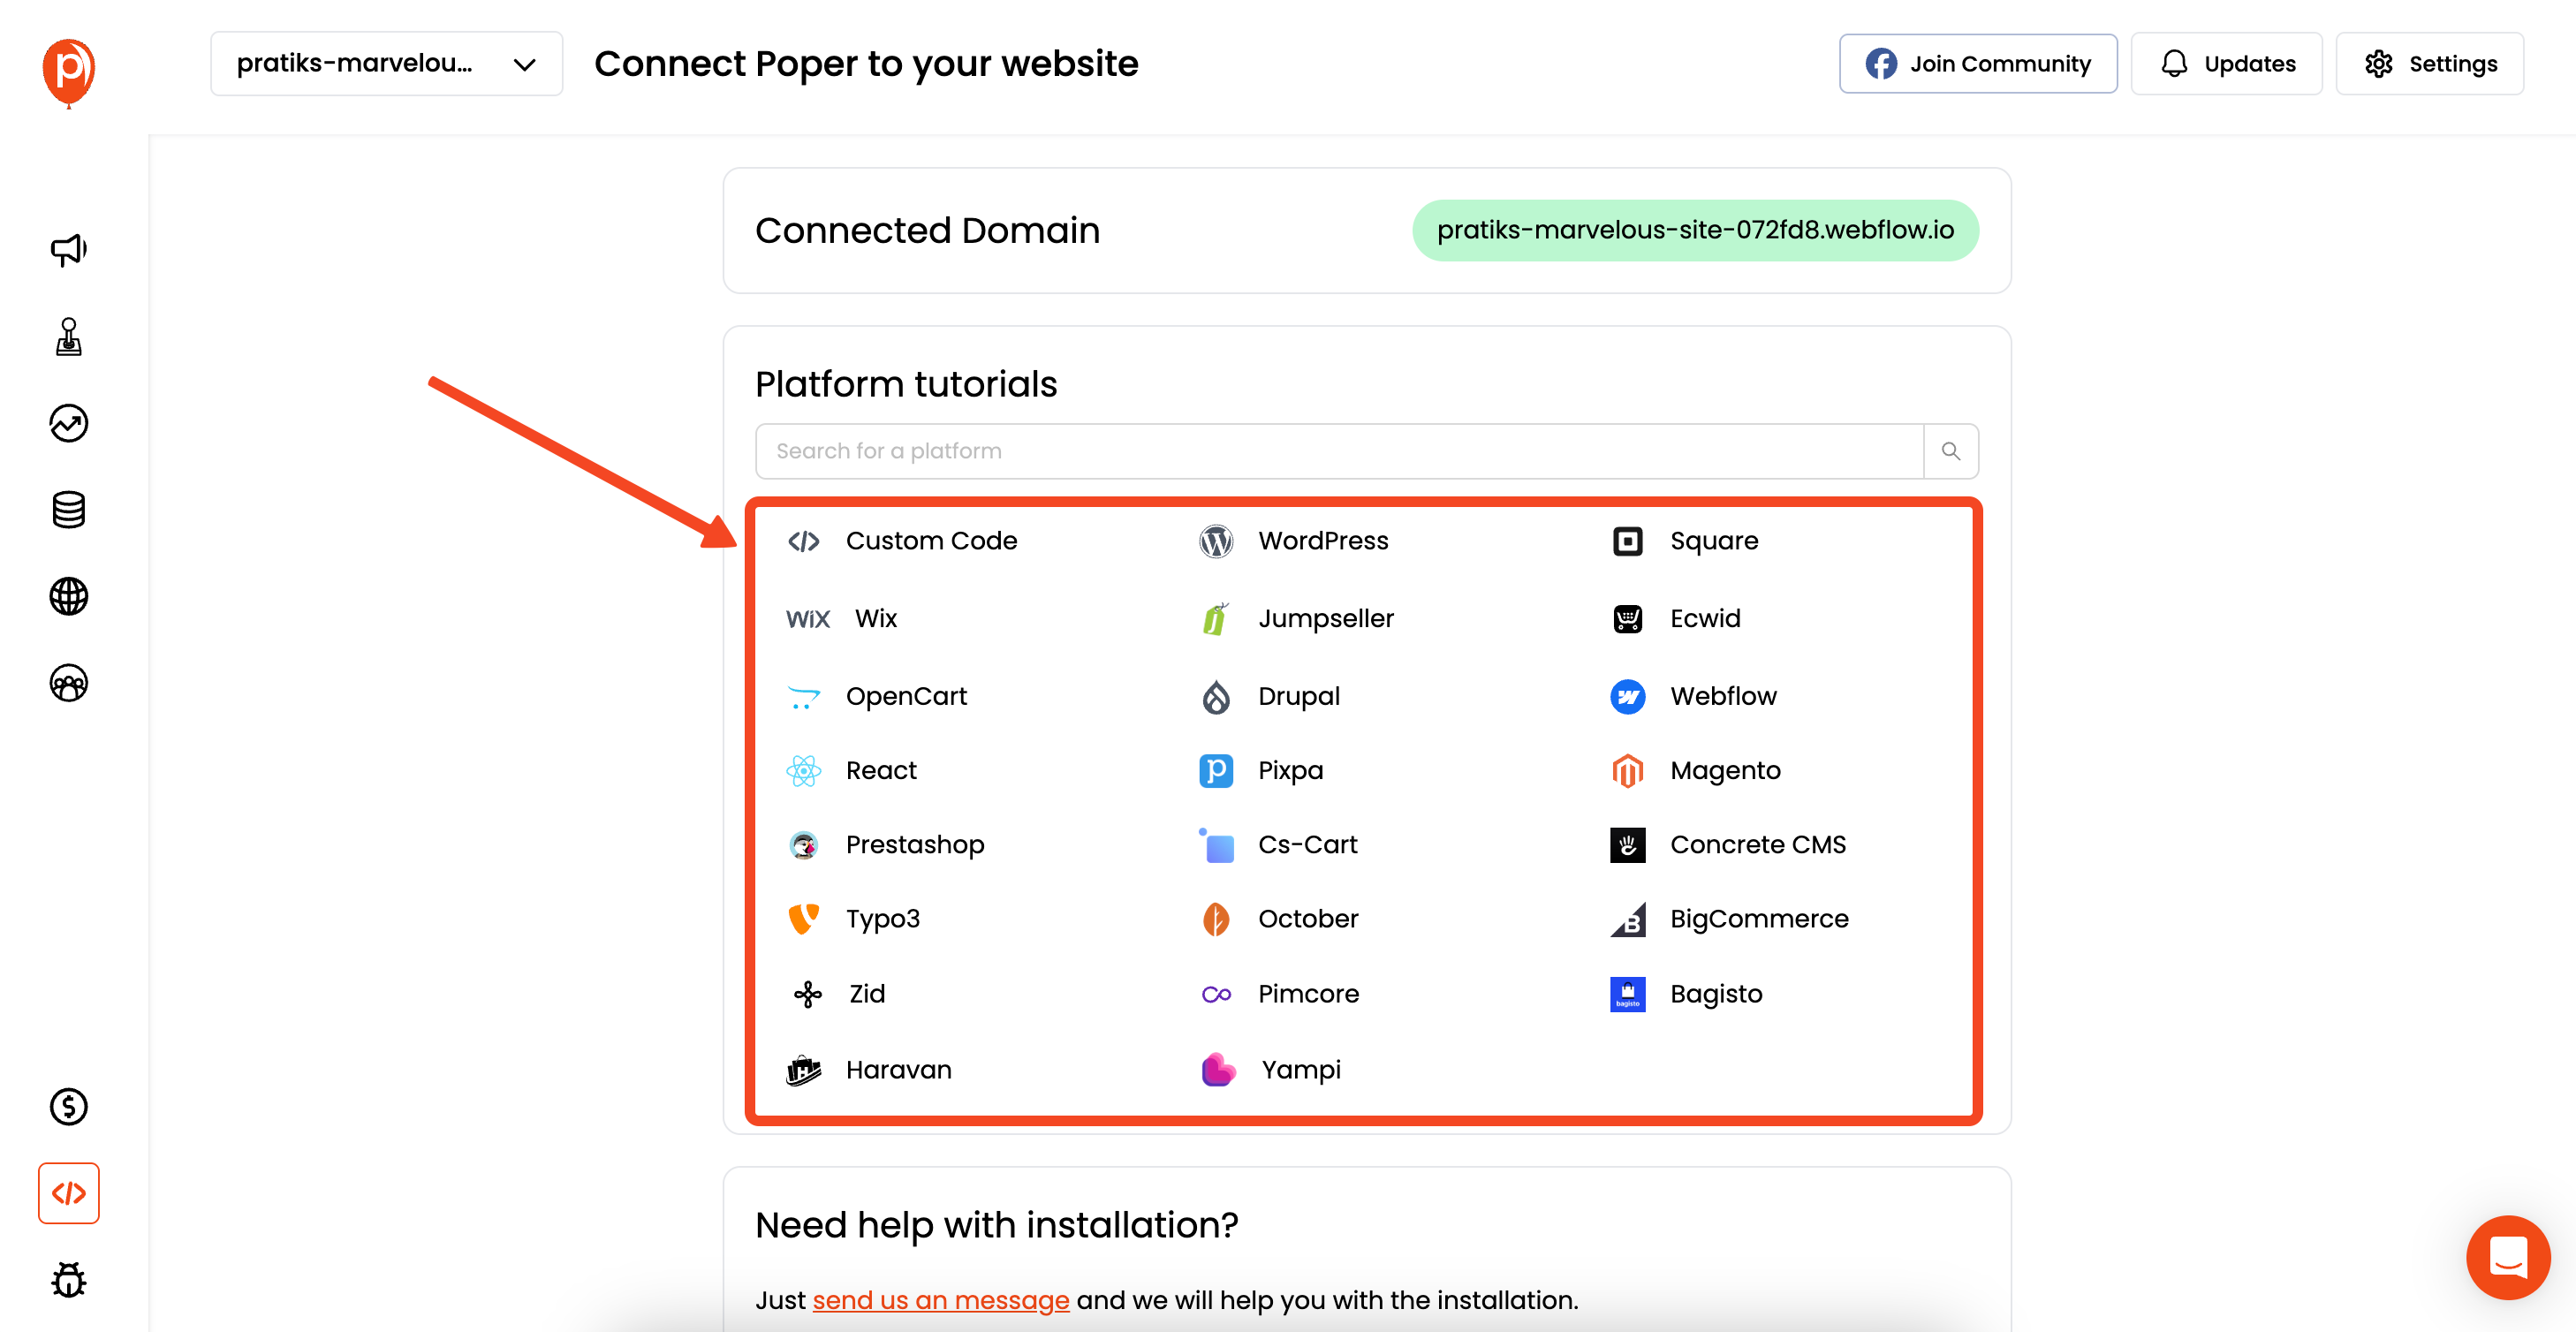
The final step is to get Poper running on your website. It’s a simple one-time setup. Just head to the "Code" section in your Poper dashboard, select your website platform, and follow the quick instructions to add our script.
Once the code is in place, go back to your campaign and hit "Save & Publish." Your new Flodesk form is now live on your site, ready to capture leads!
What About Flodesk's Built-in Forms?
You might be wondering about the forms you can make directly inside Flodesk. They are a good, straightforward option if you just need a very basic inline form.
The process involves choosing an inline template, selecting your segment, and making a few quick edits to the text and colors.
However, I built Poper for those moments when you need more power and control. If you want to customize every design detail, add more form fields, or use advanced targeting to show your form to specific visitors at the perfect time, Poper gives you that flexibility. It bridges the gap between a simple signup box and a truly intelligent lead-capture tool.
Flodesk Native Forms vs. Poper for Flodesk: Which to Choose?
| Feature | Flodesk Native Forms | Poper Forms (Flodesk Integrated) |
| Ease of Use | Very easy, all within the Flodesk ecosystem | Easy, with a dedicated visual editor |
| Design Flexibility | Beautiful templates, but within Flodesk's system | High, with total drag-and-drop control |
| Trigger Options | Basic (primarily time delay) | Advanced (Exit-intent, Scroll, On-click, etc.) |
| Targeting Options | Basic | Advanced (Page, Geo, Device, Source, etc.) |
| Popup Types | Popup, Inline, Full Page | Wider range (Popups, Slide-ins, Bars, Gamified) |
| Integration | Only with Flodesk | Flodesk + many other CRMs/ESPs |
Conclusion
When you need to create a Flodesk form, you have two fantastic options:
Flodesk's native forms are the perfect choice for anyone who wants a beautifully designed, simple, and tightly integrated solution. They are quick to create and ideal for standard inline and timed-popup needs.
A specialized tool like Poper is the superior choice if you require more powerful marketing features. This includes advanced triggers like exit-intent, granular audience targeting, A/B testing, and greater design freedom, all while ensuring every new subscriber lands directly in your Flodesk account.
By understanding the strengths of each tool, you can choose the right path to create high-converting forms that will consistently grow your Flodesk audience.
Frequently Asked Questions (FAQ)
What is a Flodesk "segment"?
In Flodesk, a "segment" is essentially your email list. You organize your subscribers into different segments (e.g., "Newsletter Subscribers," "Customer List") to send targeted campaigns.
Does Flodesk have an exit-intent popup feature?
No, Flodesk's native pop-up forms do not currently offer an exit-intent trigger. They are primarily based on a time delay. To get exit-intent functionality for a popup that sends leads to Flodesk, you would need to use a third-party tool like Poper.
How do I offer a lead magnet (freebie) with a native Flodesk form?
In the form's settings within Flodesk, you can configure it to automatically send an "Incentive Email" to new subscribers. You would include the download link for your freebie in this email.
If I use Poper, can I still trigger Flodesk "Workflows"?
Yes. In Flodesk, you can set up a Workflow to be triggered when a subscriber is added to a specific segment. Since you can configure Poper to add new subscribers to any of your Flodesk segments, this will initiate the corresponding workflow automatically.
Can I have multiple Flodesk forms on my website?
Yes. You install the header code once, and then you can embed multiple inline forms throughout your site. For popups, you can create several, but you should use Flodesk's targeting options to ensure they don't all try to appear on the same page at the same time, which would create a poor user experience.

