
I’m always looking for ways to make user interaction smoother and more effective. Popups can be a powerful tool, but they need to be implemented thoughtfully.
Here are a few methods I recommend, from simple Python scripts to integrating with your web projects using Poper.
What is a Python Popup?
A Python popup is a small window that appears on the user’s screen to display a message, ask for input, or provide notifications. These popups can be used in desktop applications using libraries like ctypes or easygui, or in web applications by integrating tools like Poper to dynamically engage users.
Creating Python Popups with ctypes
The ctypes library is a built-in Python module that allows you to call functions from C-compatible libraries. This gives you access to lower-level system functionality, including displaying message boxes.
Step 1: Import the ctypes Library
Start by importing ctypes into your Python script. This makes the necessary functions available.
import ctypesStep 2: Call the MessageBoxW Function
This function is part of the Windows API, so this approach is specific to Windows systems. We're going to use it to display the popup.
ctypes.windll.user32.MessageBoxW(0, "Your text", "Your title", 1)Let’s break down the arguments of MessageBoxW:
0: This is the handle to the owner window. Using0makes the popup an application-level window, meaning it's not tied to any specific window."Your text": This is the message you want to display in the popup. Replace this with your desired text."Your title": This is the title that will appear in the title bar of the popup window.1: This controls the style of the popup, including the buttons and icon. This is the most versatile part and the one you’ll likely customize.
Step 3: Customize the Popup Style
The last number (in the example above, 1) determines the buttons displayed on the popup. Here’s a breakdown:
0: OK button only.1: OK and Cancel buttons.2: Abort, Retry, and Ignore buttons.3: Yes, No, and Cancel buttons.4: Yes and No buttons.5: Retry and No buttons.6: Cancel, Try Again, and Continue buttons.
You can also add icons by adding the following values to the button style number:
16: Stop-sign icon (error).32: Question-mark icon.48: Exclamation-point icon (warning).64: Information-sign icon (an 'i' in a circle).
For example, if you want to display a warning popup with an "OK" button, use 16:
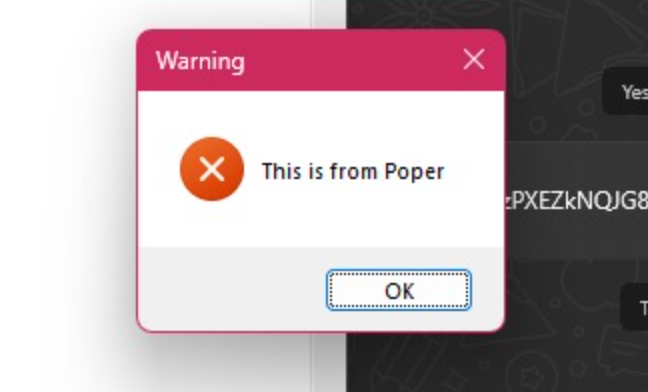
ctypes.windll.user32.MessageBoxW(0, "This is from Poper", "Warning", 16)Creating Python Popups with easygui
easygui is a Python module that makes it incredibly easy to create simple GUI interfaces like popups. It's great for quick scripts where you need basic user interaction.
Step 1: Install easygui
First, you'll need to install the easygui library. You can do this using pip:
pip install easyguiStep 2: Import the easygui Library
Import easygui into your Python script.
import easyguiStep 3: Use the Popup Functions
easygui offers several functions for creating different types of popups:
ynbox(): This creates a Yes/No box.
easygui.ynbox('Shall I continue?', 'Title', ('Yes', 'No'))This displays a popup with the message "Shall I continue?", the title "Title", and Yes/No buttons. It returns `True` if the user clicks "Yes" and `False` if they click "No".msgbox(): This creates a simple message box with an "OK" button.
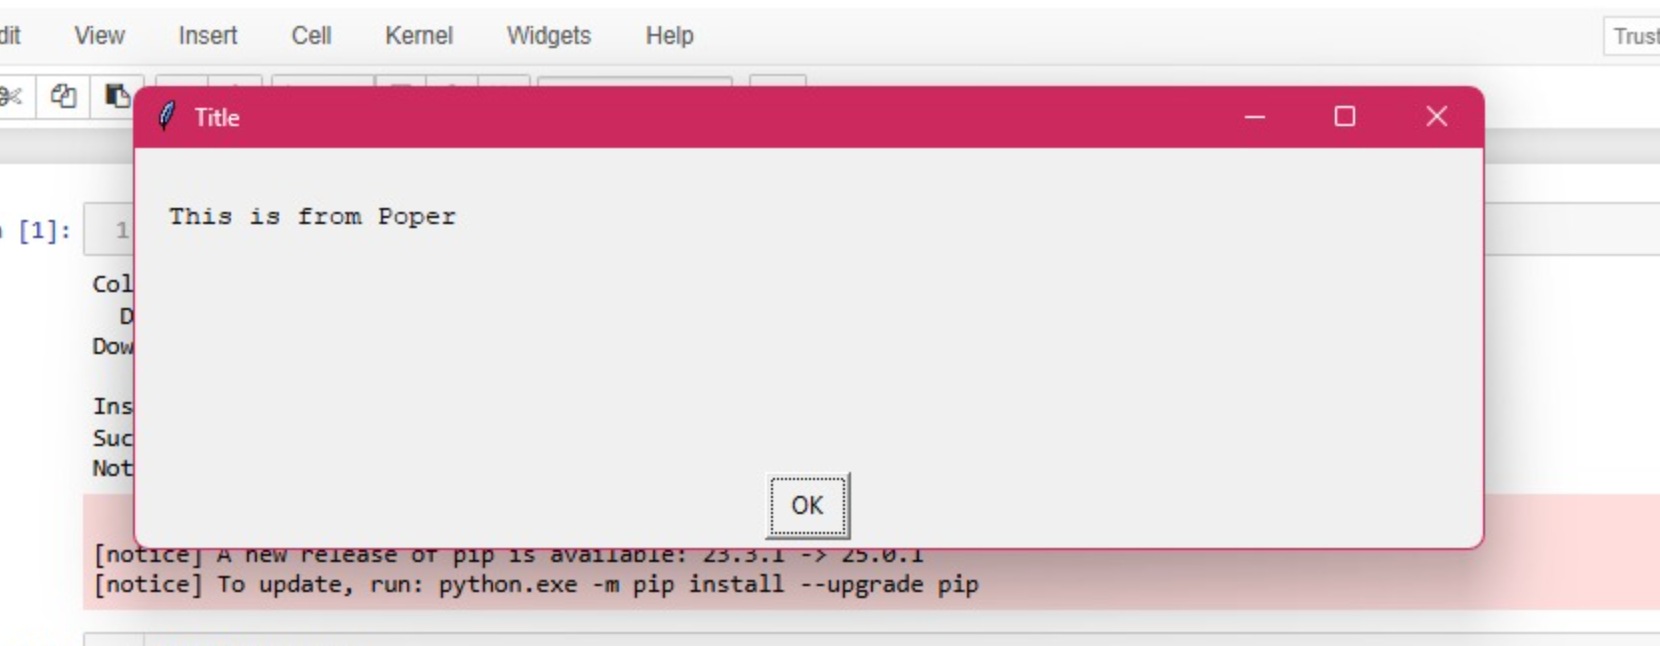
easygui.msgbox('This is from Poper.', 'Title')This displays a popup with the message "This is a basic message box." and the title "Title Goes Here". It returns "OK" when the user clicks the "OK" button.buttonbox(): This creates a popup with custom buttons.
easygui.buttonbox('Click on your favorite flavor.', 'Favorite Flavor', ('Chocolate', 'Vanilla', 'Strawberry'))This displays a popup with the message "Click on your favorite flavor.", the title "Favorite Flavor", and buttons labeled "Chocolate", "Vanilla", and "Strawberry". It returns the text of the button that the user clicked.Creating Python Popups with Tkinter messagebox
Tkinter is Python's standard built-in library for creating graphical user interfaces. Its messagebox module provides a set of predefined dialogs that are easy to use for simple notifications, warnings, errors, and questions.
Step 1: Import Tkinter and messagebox
You'll need to import the tkinter library and specifically its messagebox module.
import tkinterfrom tkinter import messagebox Step 2: (Optional) Hide the Main Tkinter Window
If you only want to show a popup and not a main application window, you should create a root Tkinter window and then immediately hide it.
# Create the main windowroot = tkinter.Tk()# Hide the main windowroot.withdraw() Step 3: Display the Message Box
The messagebox module has several functions for different types of popups:
showinfo(): Displays an informational message with an "OK" button.
messagebox.showinfo("Information", "This is an informational message from Tkinter.") These Tkinter message boxes are cross-platform and will generally use the native look and feel of the operating system.
Using Python Popups for Websites Built in Flask or Django
If you're building websites with Flask or Django, Poper can be a powerful tool for adding engaging popups. This allows you to handle popups through a user-friendly interface without directly coding them into your web application.
Step 1: Create a Poper Account
Signup to get started.
Step 2: Add Your Domain
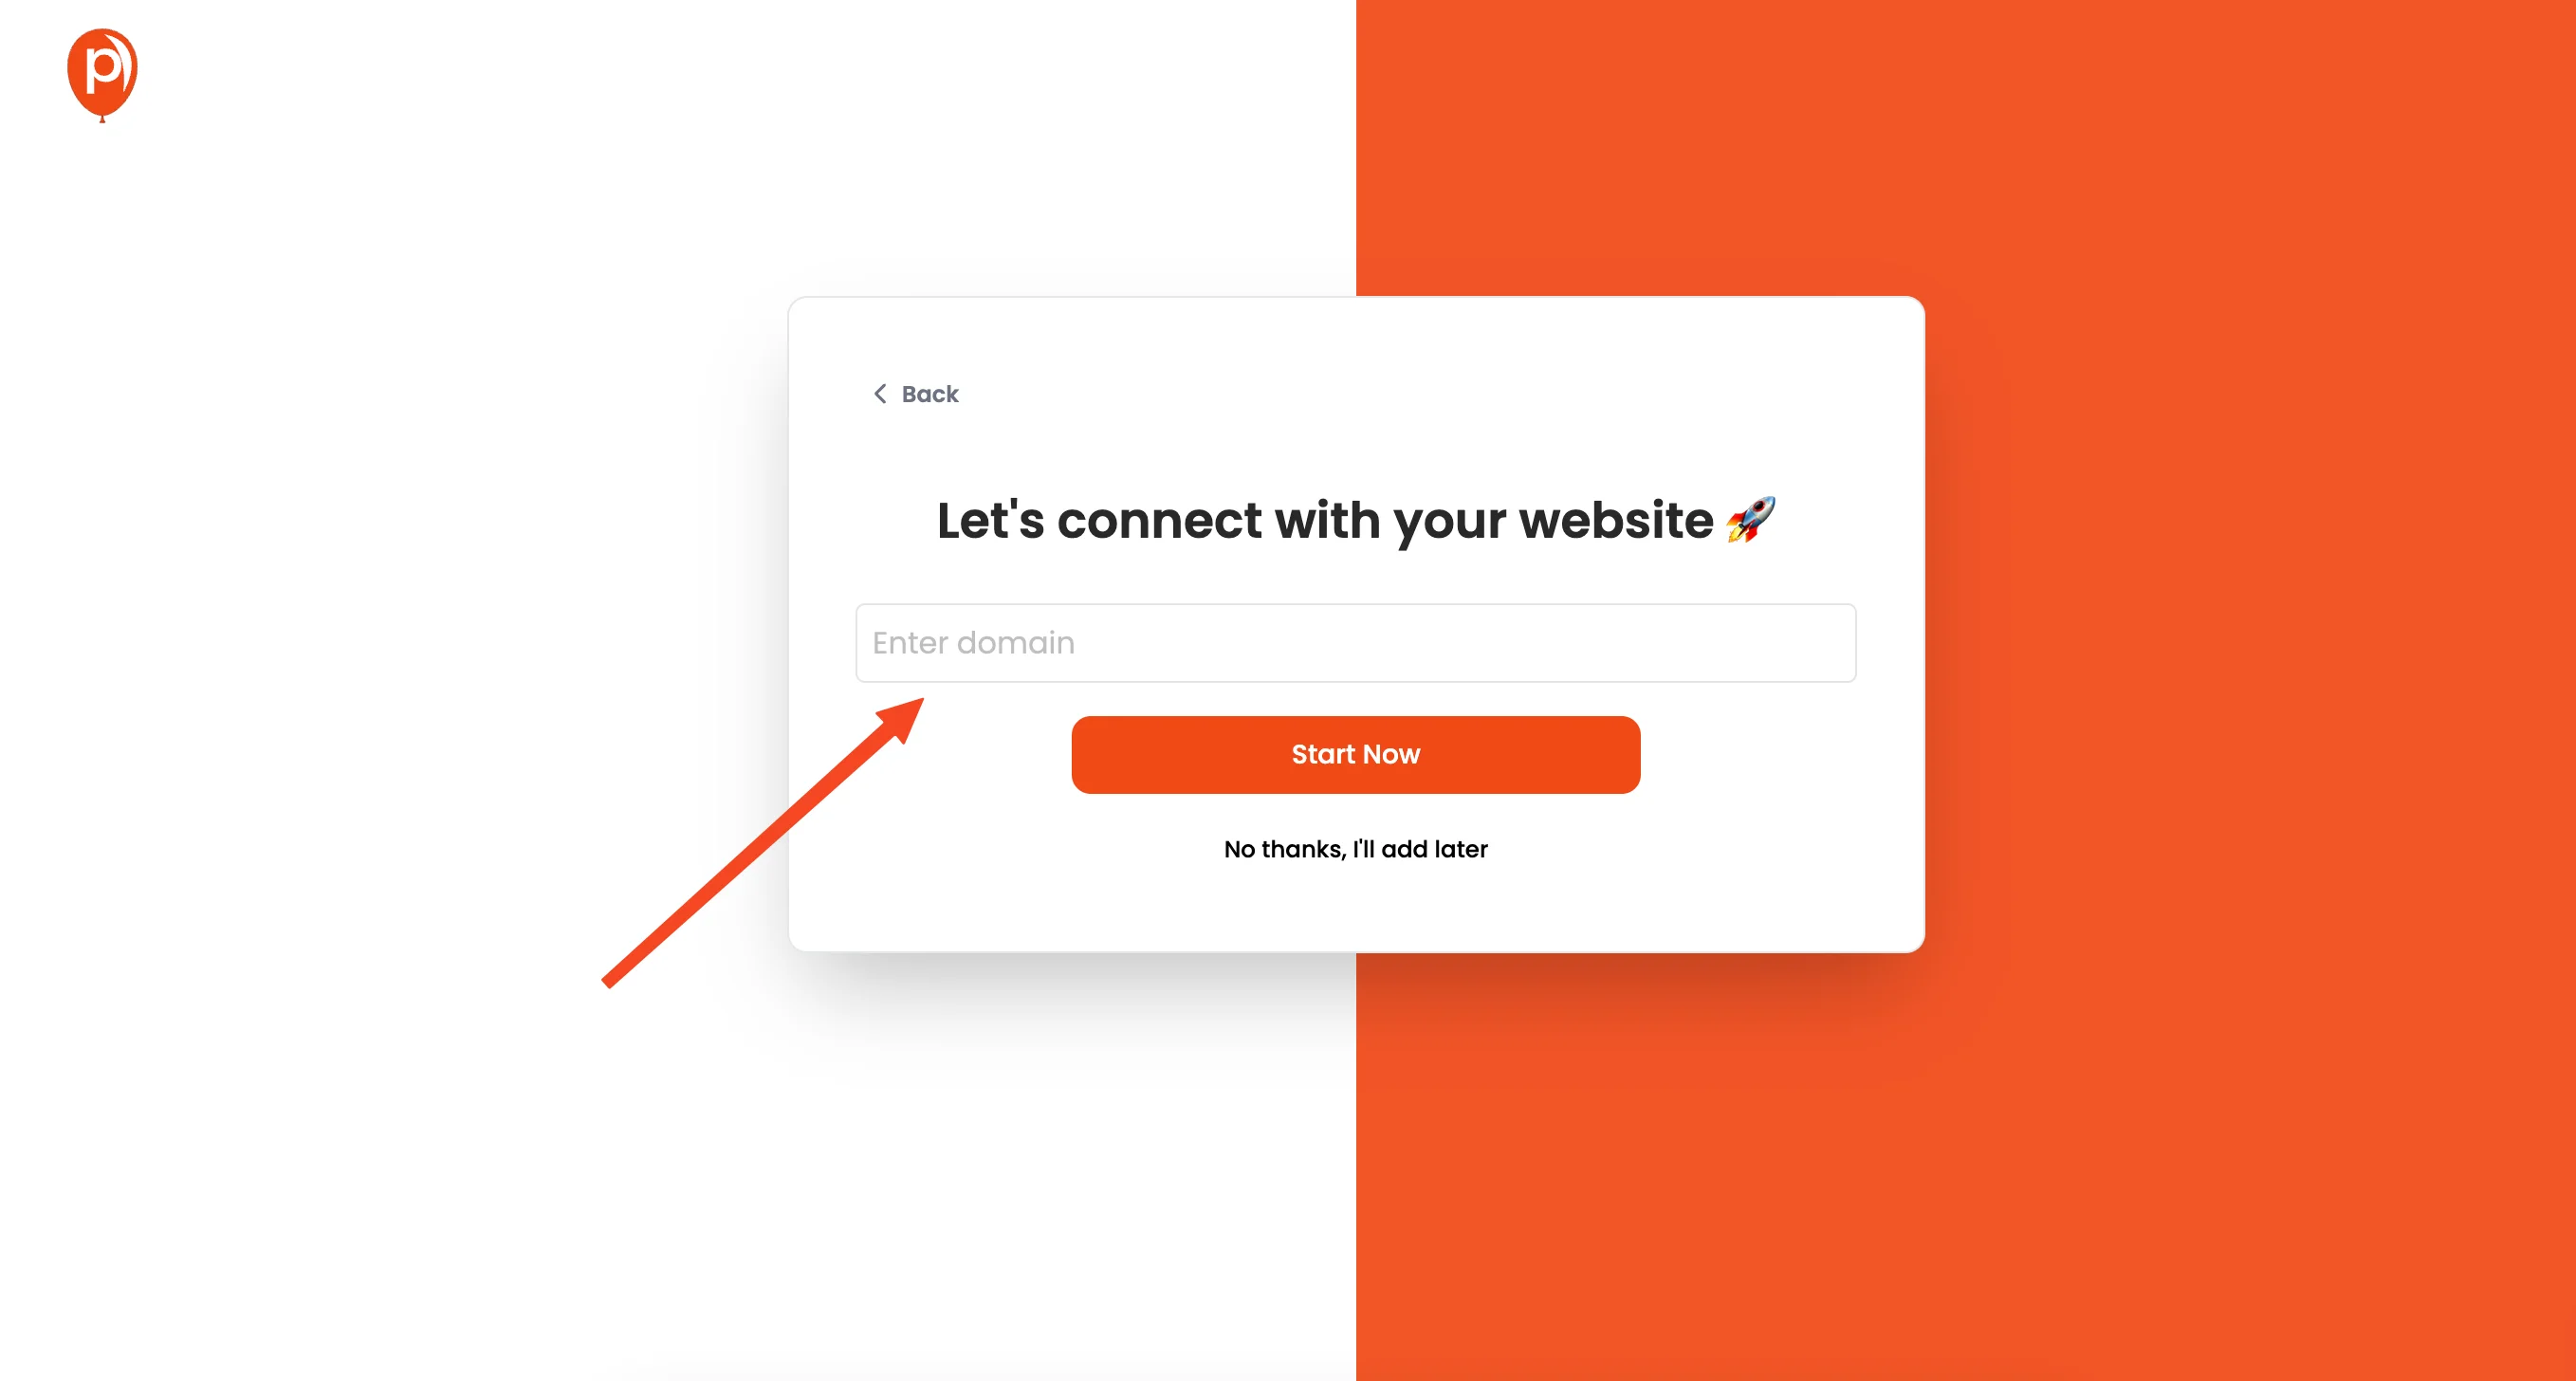
Once you're logged in, add the domain of your website to Poper. This will allow Poper to track and manage popups on your site.
Step 3: Create a New Popup
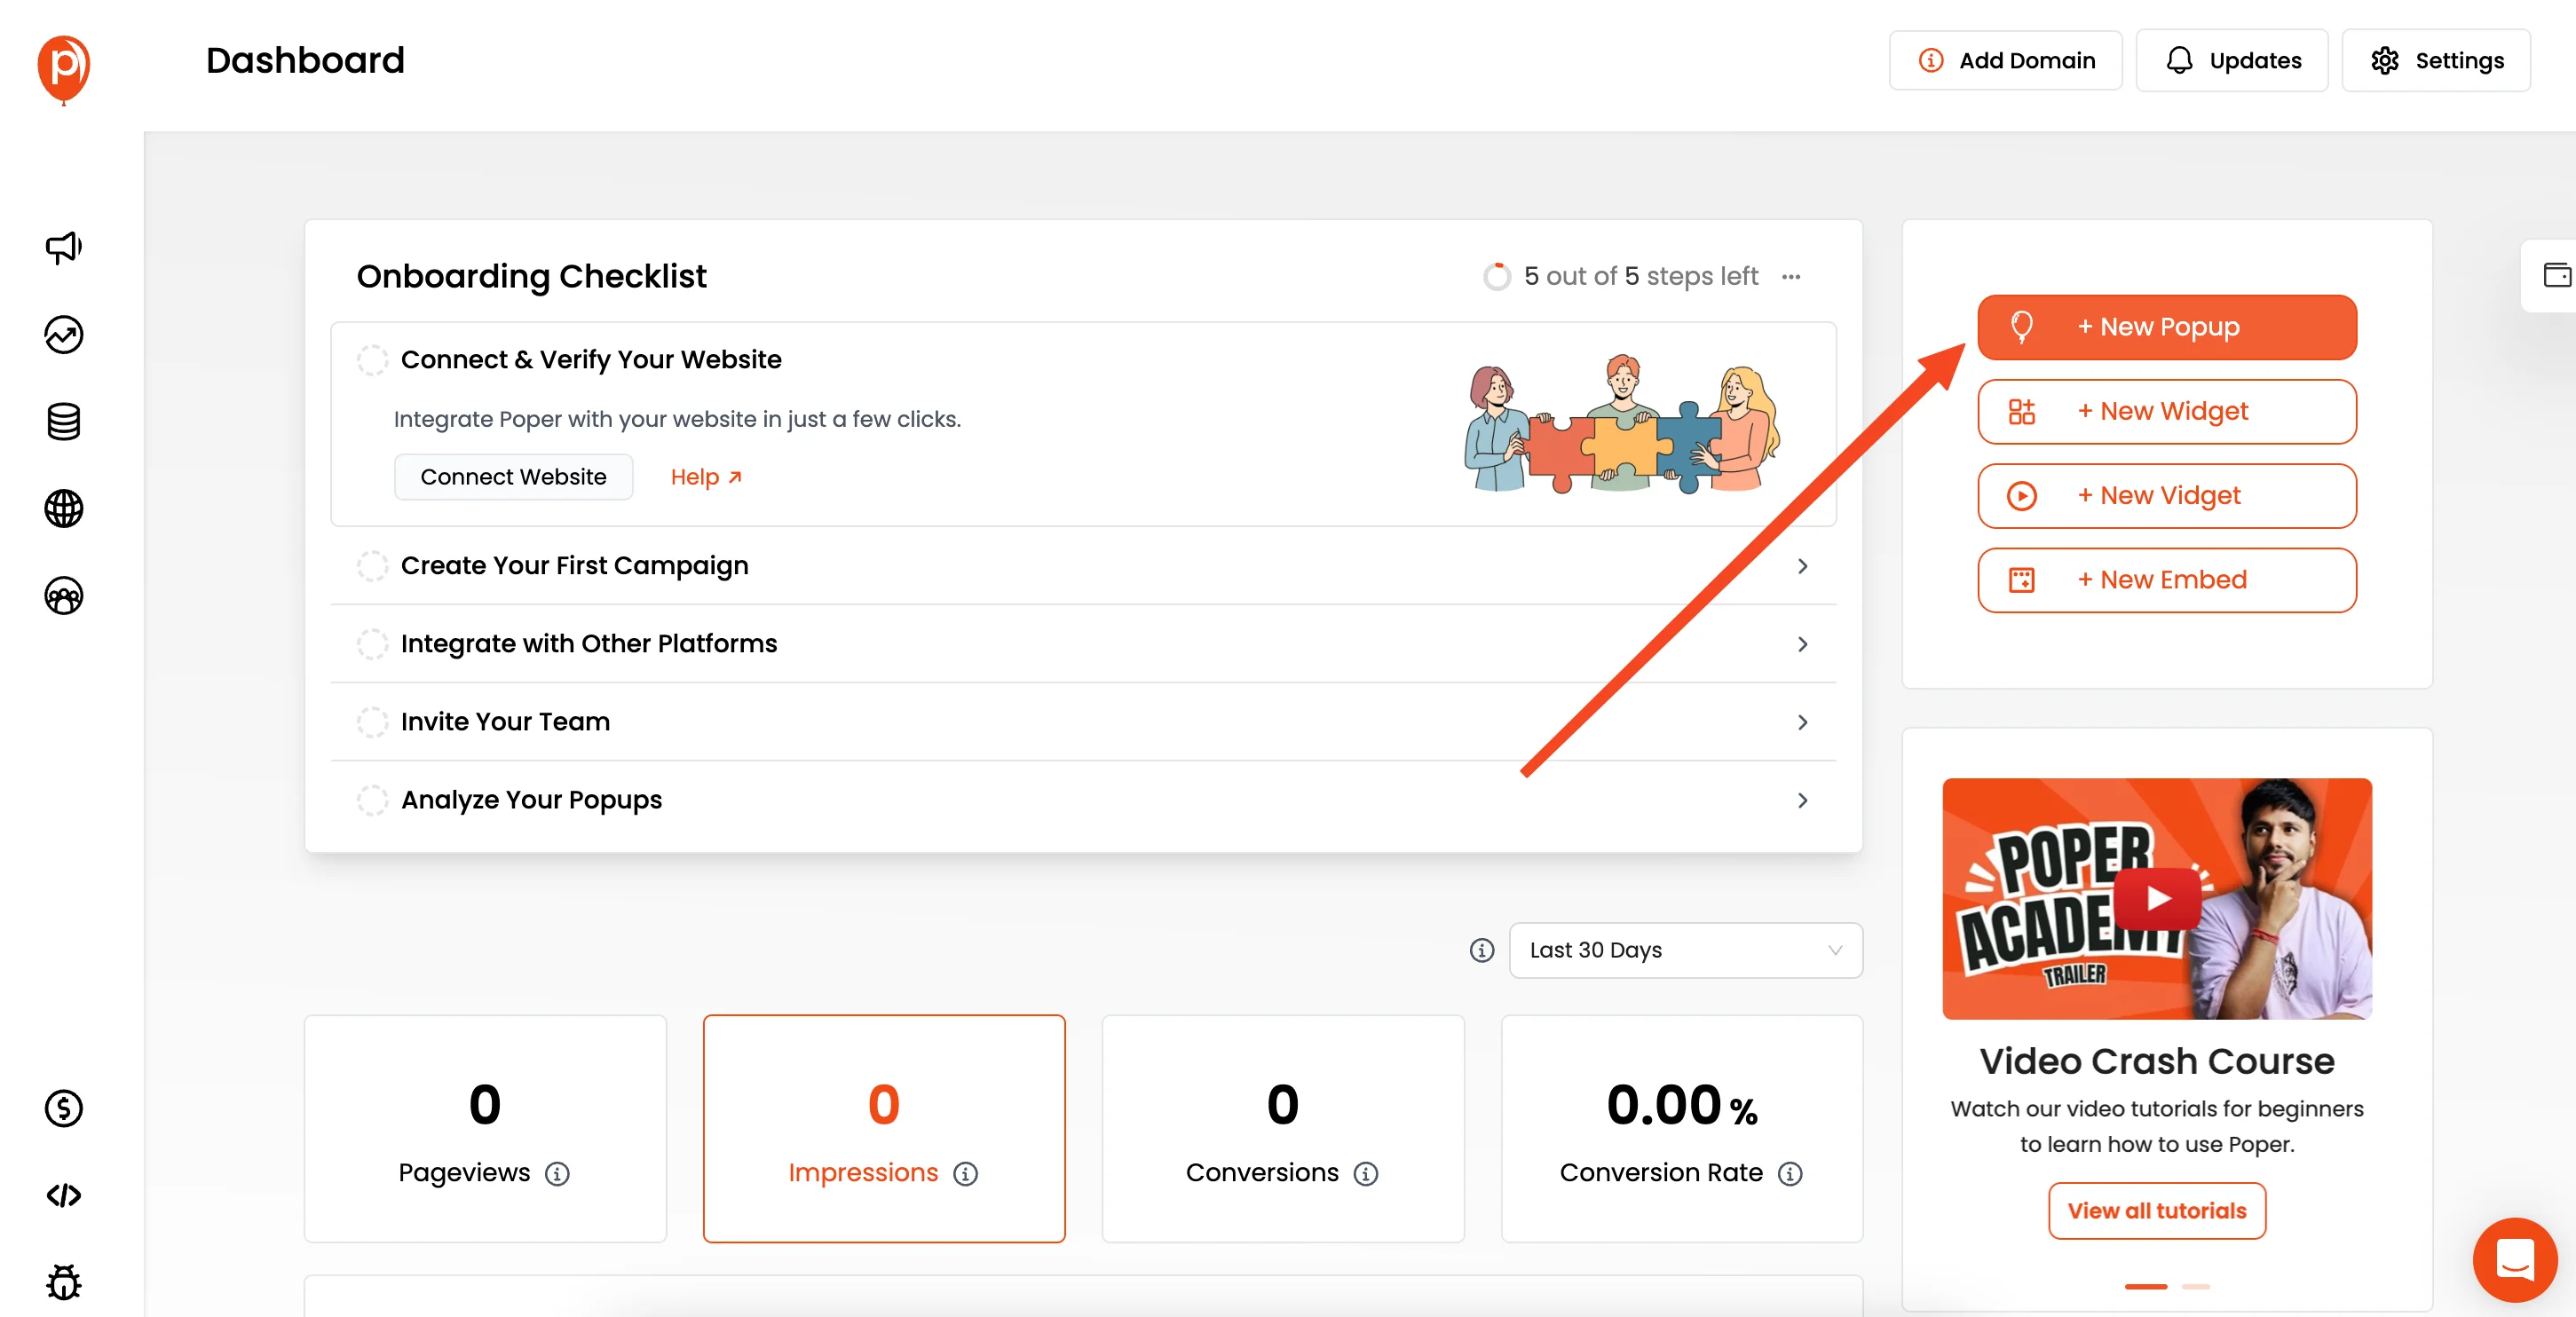
Click the "New Popup" button and choose "Choose from Templates" to get started quickly.
Step 4: Select a Template
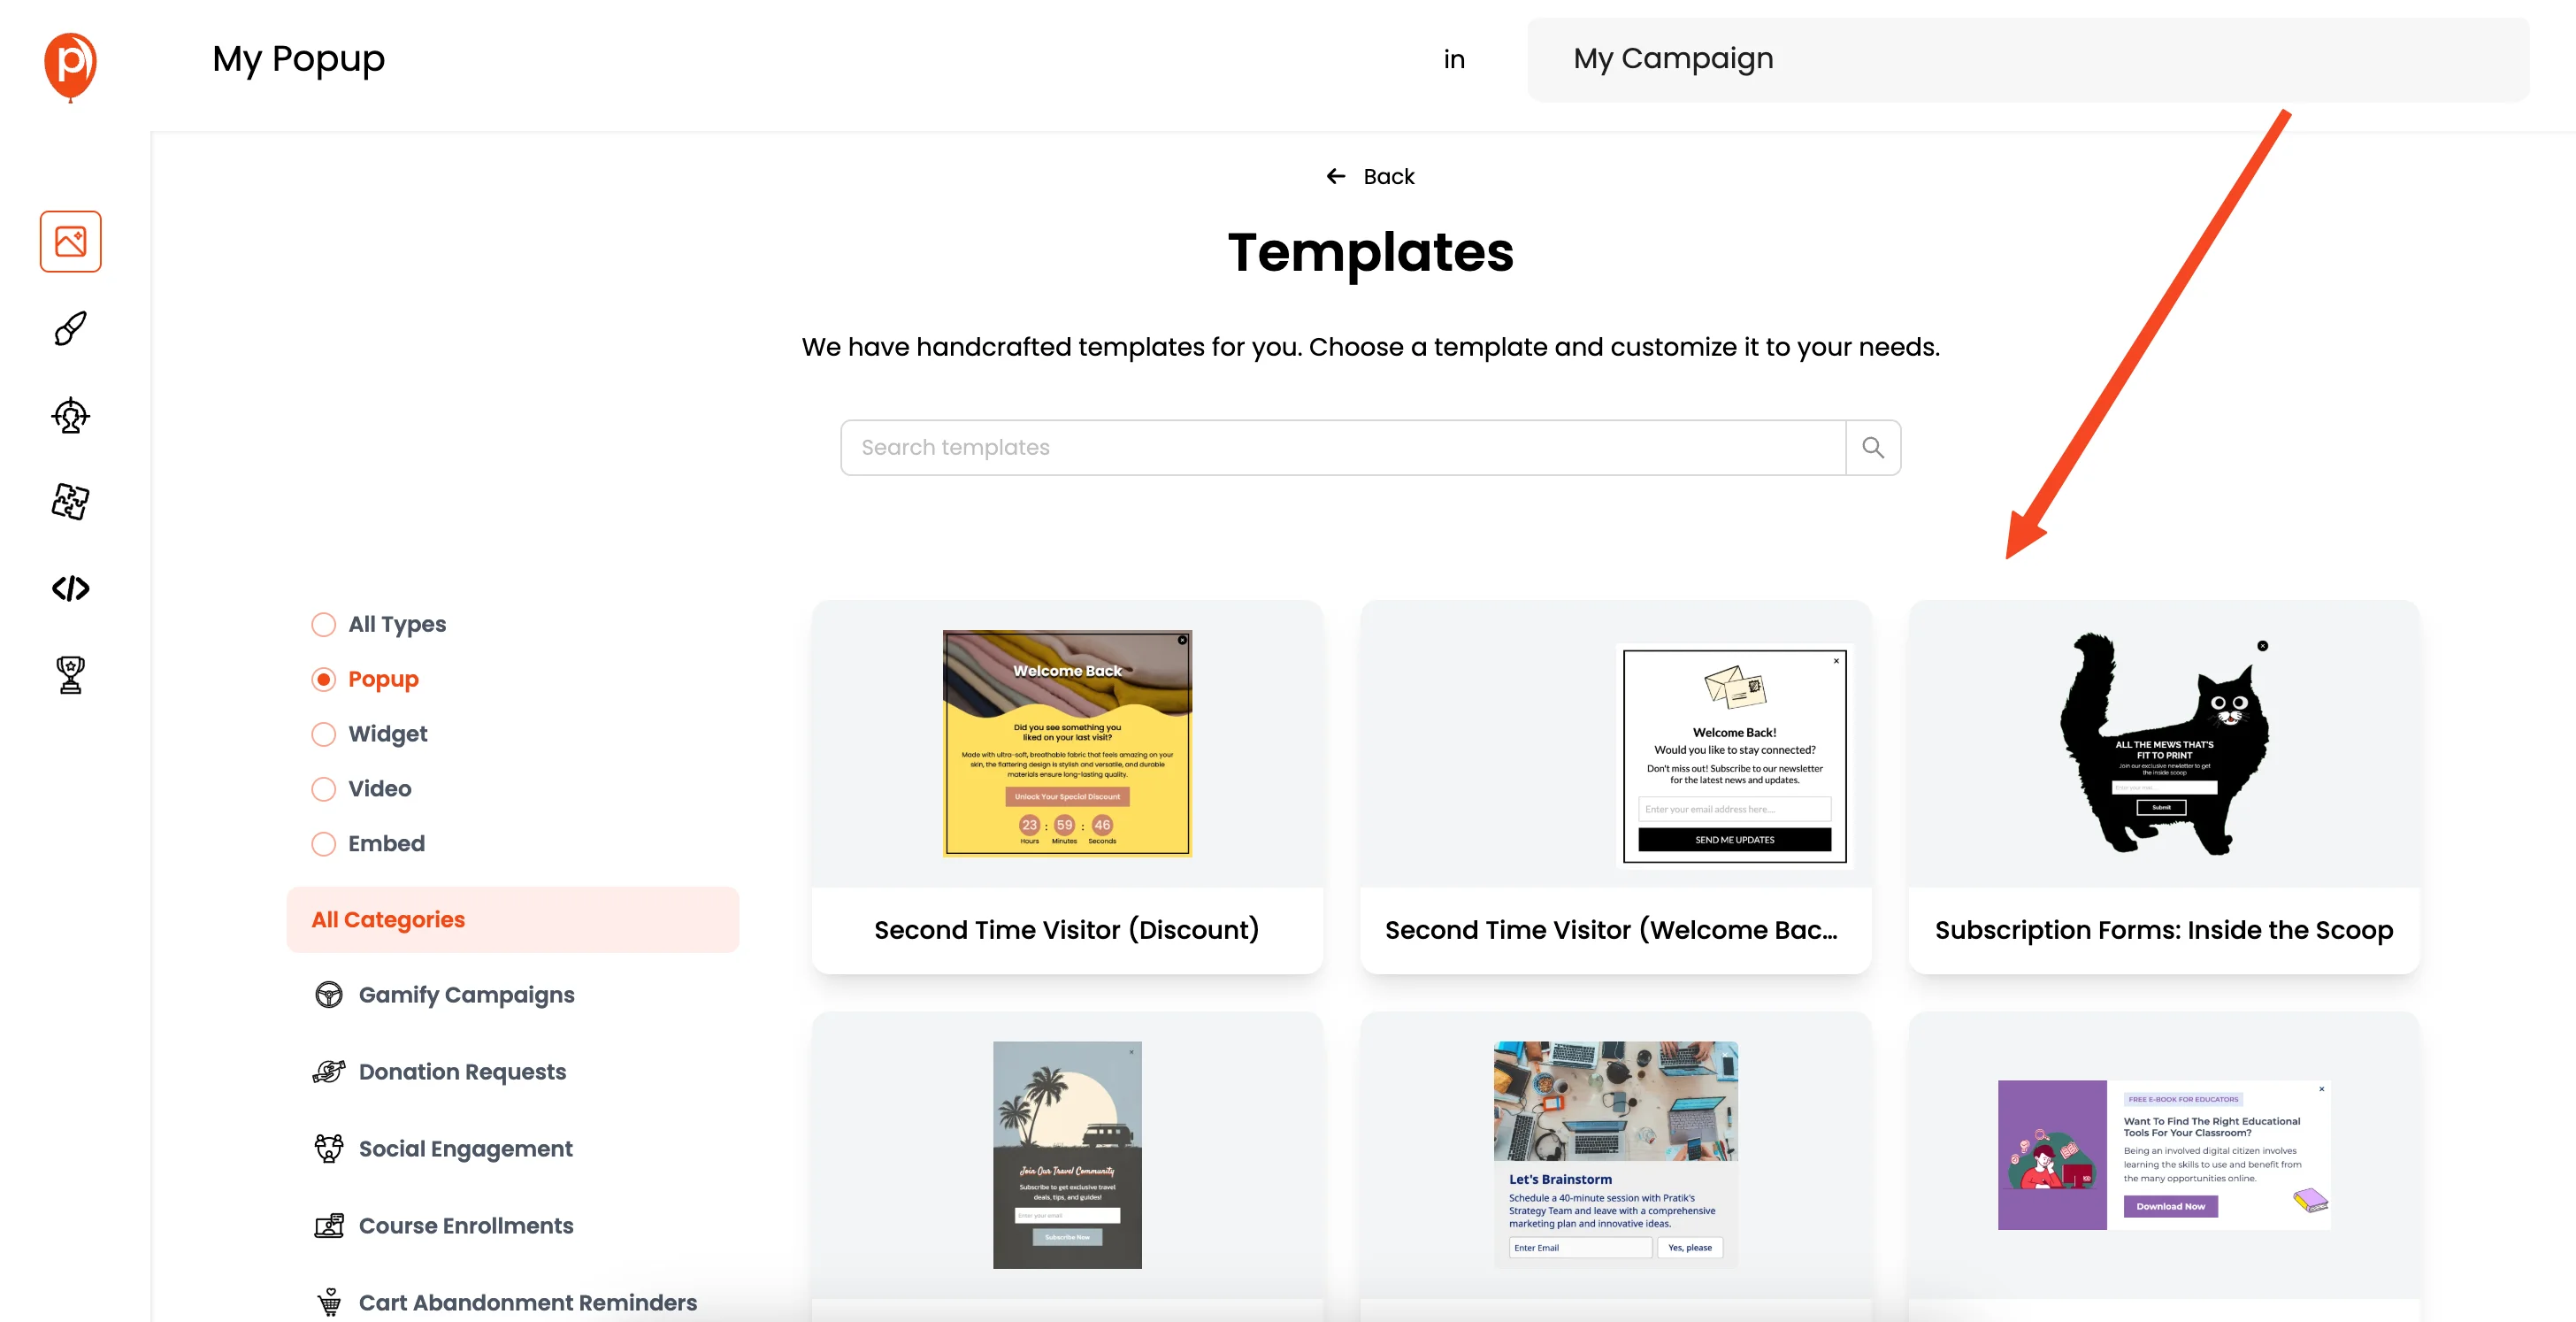
Browse the templates and select one that matches your campaign goal. For example, if you're promoting a 20% discount, select the "Sales Offer" template. You can also create a custom popup from scratch if you prefer.
Step 5: Customize the Popup
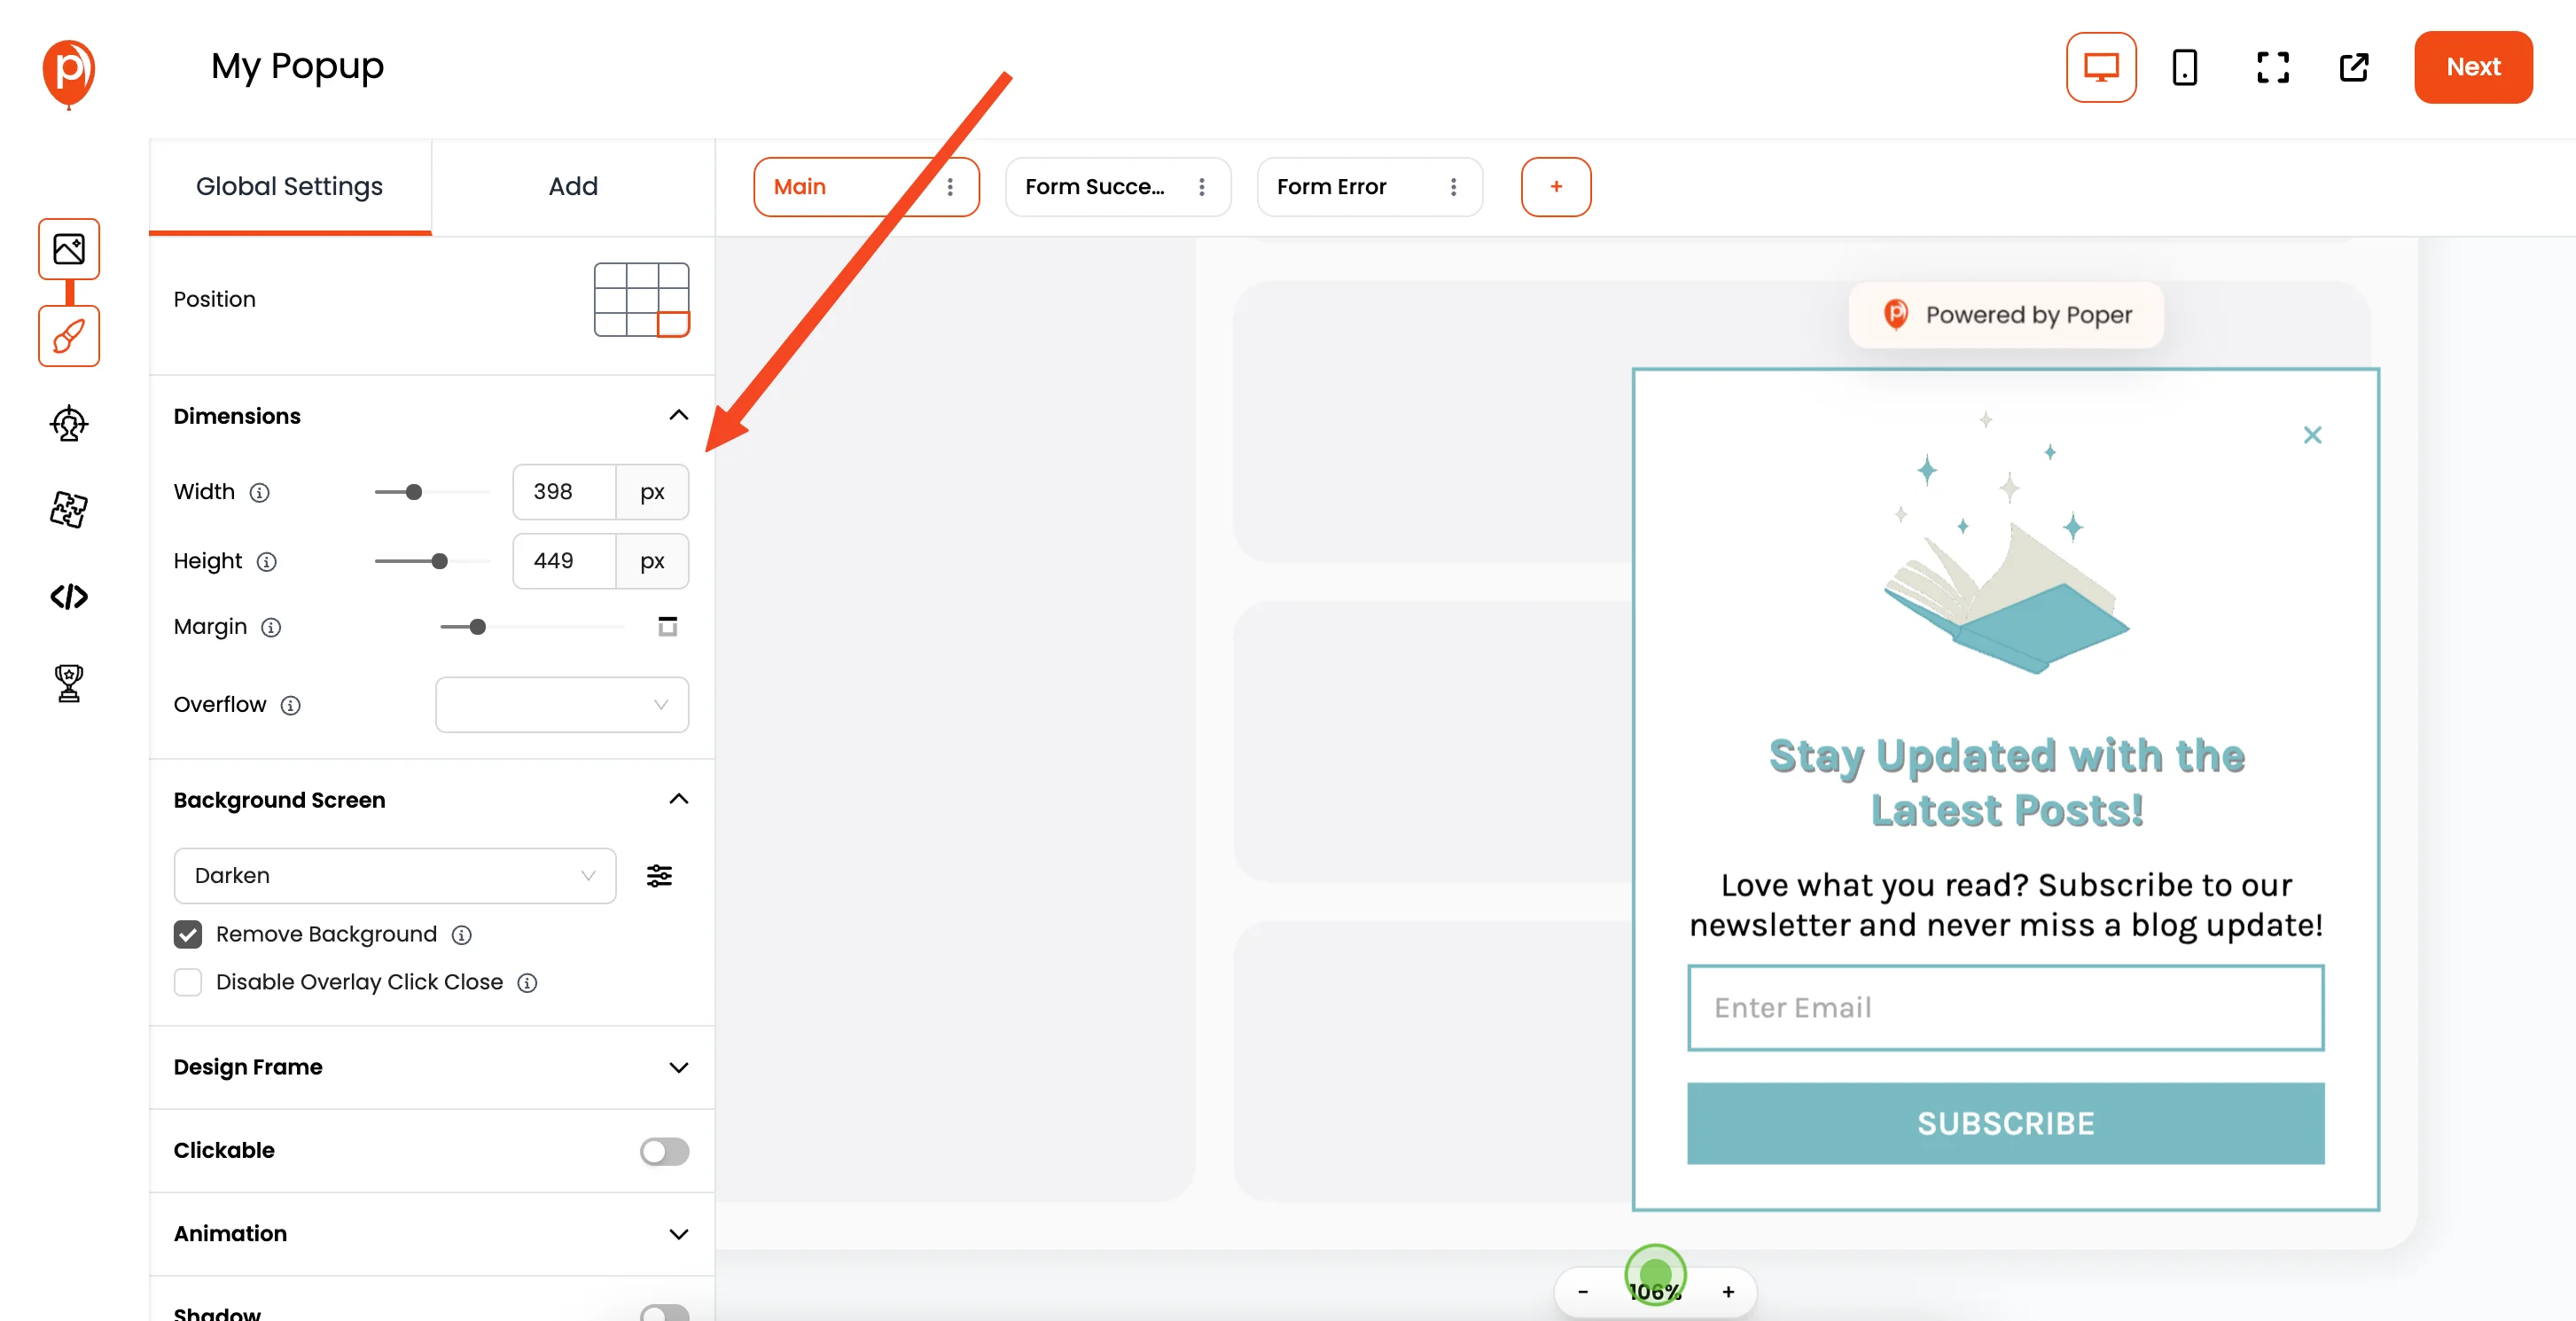
Use the popup editor to customize the design. You can change fonts, colors, images, and text to match your branding.
Step 6: Configure Display Conditions

Click "Next" to go to the "Display Conditions" page. Here, you can set triggers for when the popup should appear, such as:
Scroll trigger: Display the popup when the user scrolls a certain percentage down the page.
Exit intent: Display the popup when the user's mouse cursor moves towards the top of the browser window, indicating they're about to leave the page.
Delayed display: Display the popup after a certain amount of time has passed.
You can also target specific pages, audience demographics, and more. This ensures your popup is shown to the right people at the right time.
Step 7: Save and Publish

Once you're satisfied with your popup and display conditions, save and publish it.
Step 8: Get the Poper Code
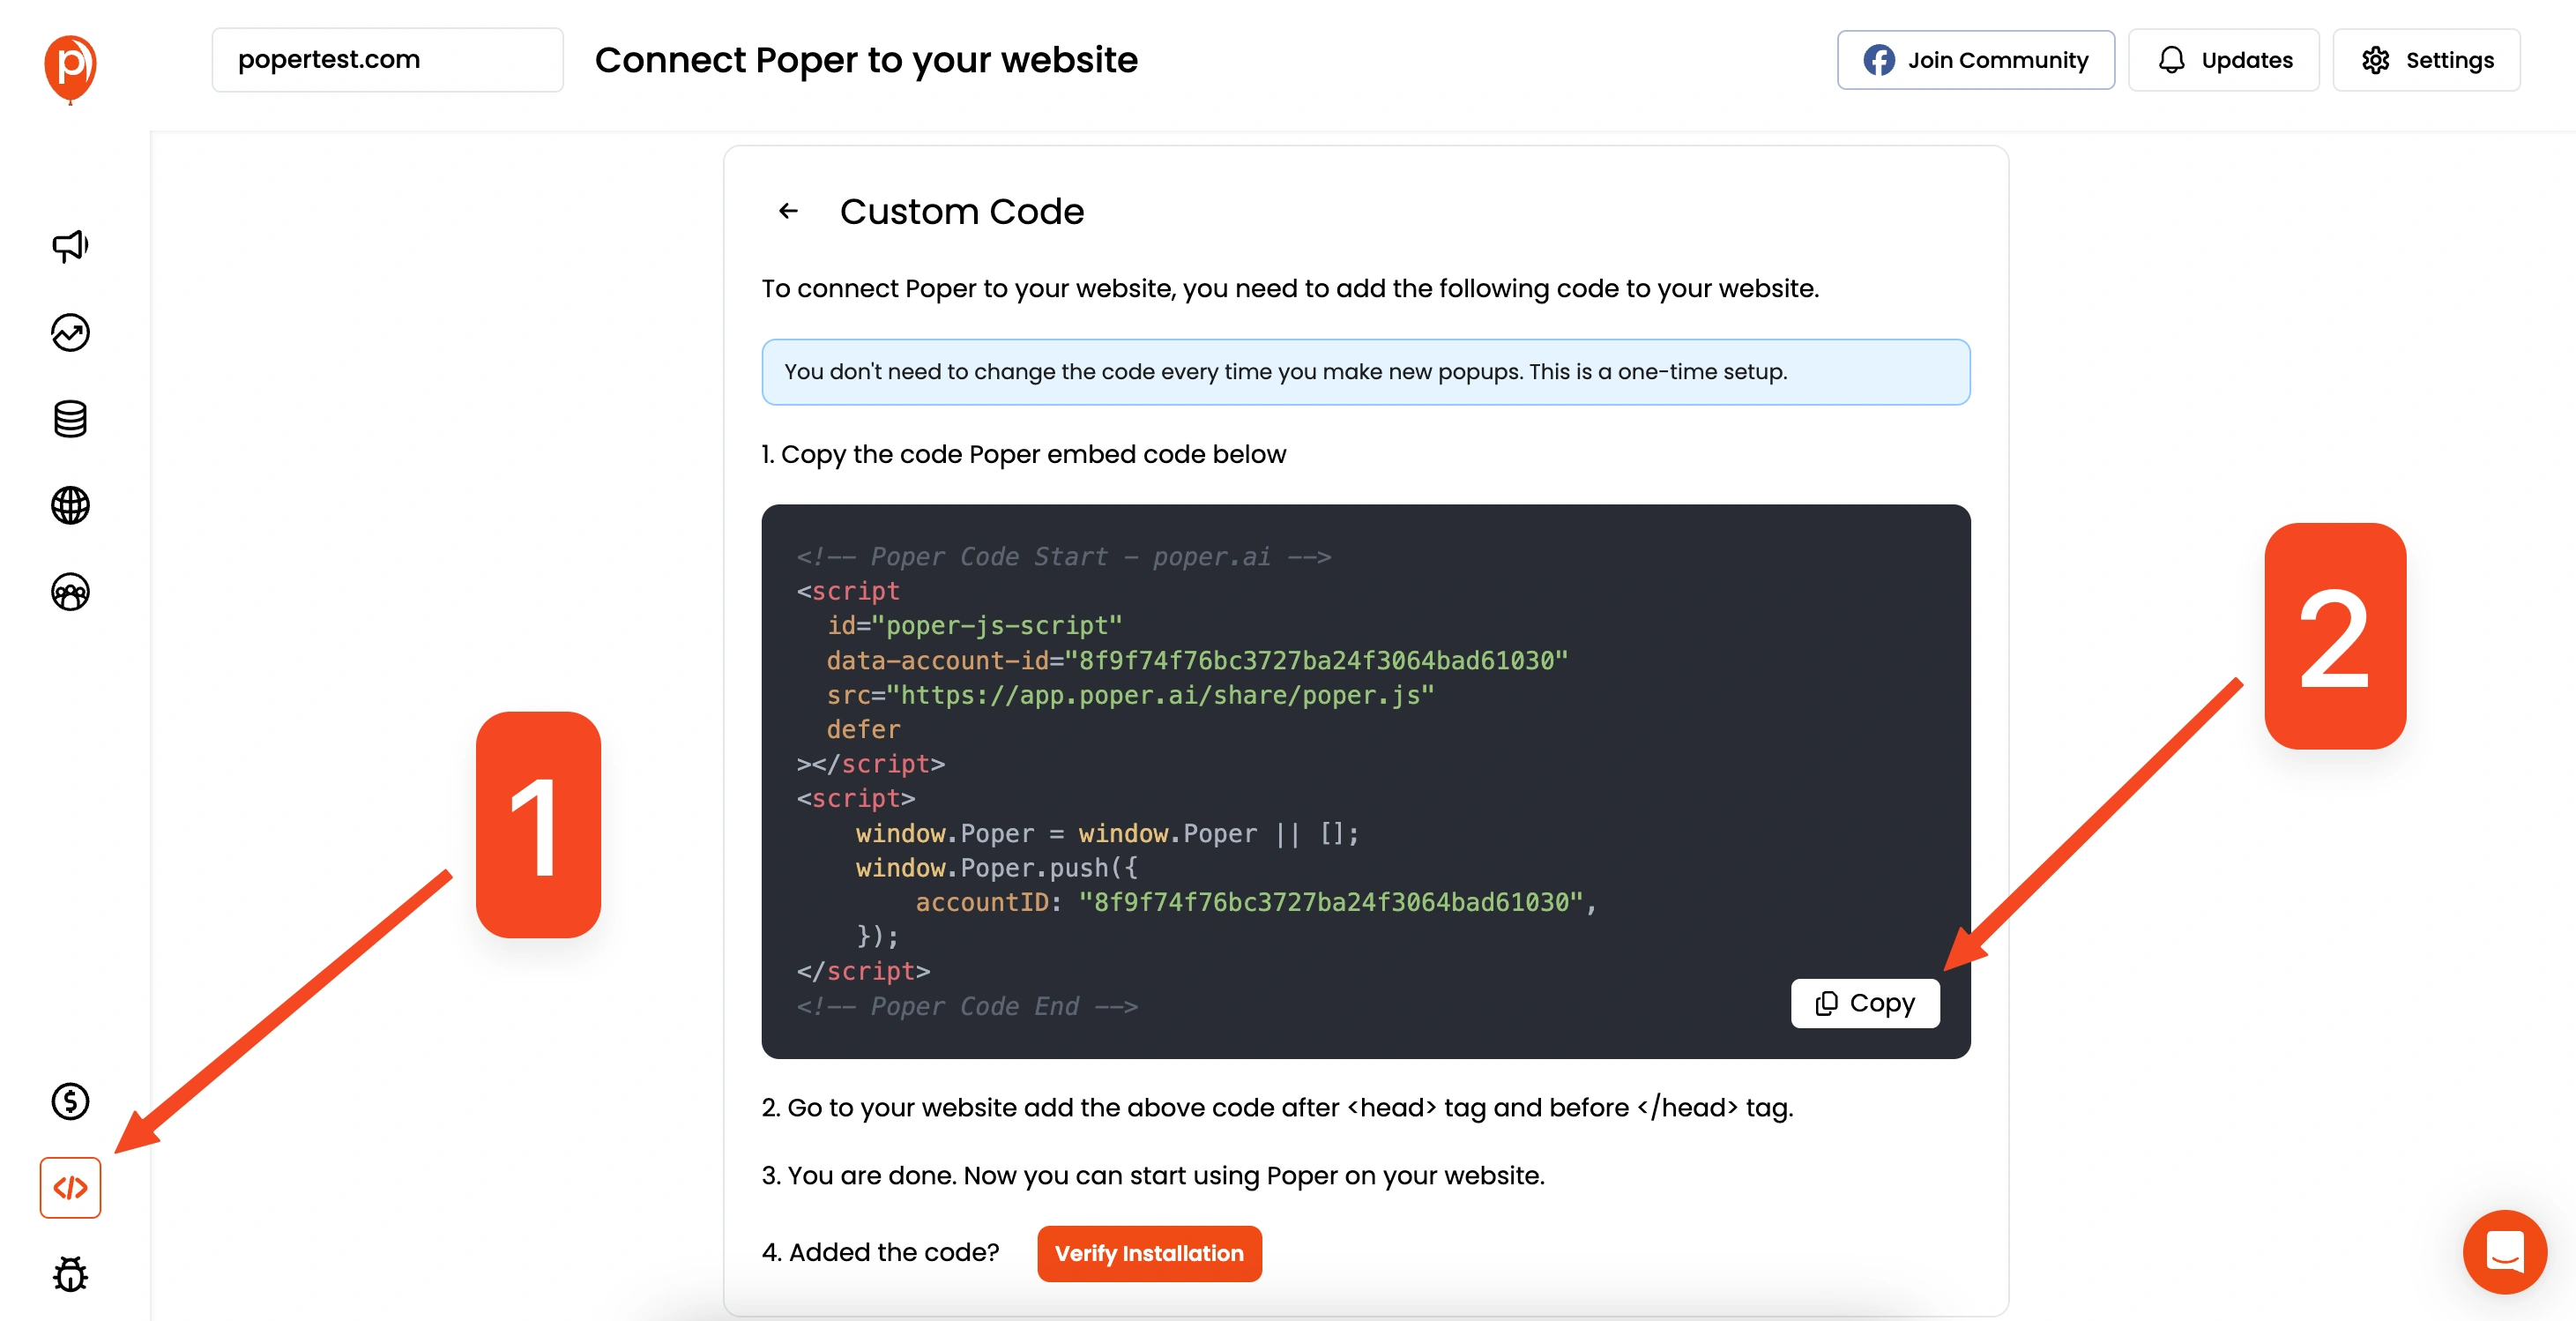
Go to your Poper Dashboard, click on "Code," and then "Custom Code." Copy the provided code snippet.
Step 9: Paste the Code into Your Website
Paste the copied code snippet into the <head> section of your website's HTML. If you're using Flask or Django, this typically involves editing the base template or the specific template where you want the popup to appear.
Step 10: Save and Test
Save the changes to your website's HTML and test the popup to ensure it's working correctly.
Comparison of Python Popup Methods: ctypes vs. Tkinter vs. Poper
| Feature | ctypes | Tkinter | Poper |
|---|---|---|---|
| Platform Support | Windows Only | Cross-Platform | Web (All Browsers) |
| GUI Complexity | Minimal | Moderate | Highly Customizable |
| Ease of Use | Requires API Knowledge | Easy to Use | No Coding Required |
| Button Options | Basic Presets | Custom Button Options | Fully Customizable |
| Icons | Limited | Basic Icons Available | Advanced Media Support |
| Popup Triggering | Manual | Manual | Automated Triggers |
| Best Use Case | Quick System Popups | Interactive Scripts | Web Popups with Triggers |
Best Practices for Python Popups
Keep it Simple: Ensure that popups convey a clear message without overwhelming users.
Use Appropriate Triggers: For web popups, configure exit intent or scroll triggers to capture attention at the right time.
Test Across Platforms: For GUI-based popups using
ctypesor Tkinter /easygui, test on different operating systems to ensure compatibility.Ensure Relevance: Popups should be contextually relevant to the user’s action or query.

