
Notion has become a powerhouse for organization, and sharing a Notion calendar—whether it's a public roadmap, an event schedule, or a content calendar—on your website can provide immense value to your audience. However, if you've tried to embed a Notion calendar, you've likely discovered it's not as simple as copying and pasting a link.
This guide will demystify the process and walk you through the most effective methods for embedding a Notion calendar on any website. We'll cover:
The crucial difference between the new "Notion Calendar" app and a "Calendar View" in a Notion page.
Using third-party tools like Indify to generate a proper embed code (the most common method).
Using a platform like Poper to enhance your embed with advanced targeting and display options.
First, Which "Notion Calendar" Are You Using? (This is Important)
The term "Notion Calendar" can be confusing. Let's clarify:
The New "Notion Calendar" App: This is the standalone calendar app (formerly Cron) that integrates with your Notion databases. As of now, this new app does not have a direct public embed feature for websites.
A "Calendar View" of a Database in a Notion Page: This is a view you create inside a regular Notion page to display database items on a calendar. This is what can be embedded on a website, though it requires a helper tool to do it cleanly.
That’s where a little creativity—and Poper—comes in. We can use Poper as the bridge to get your Notion calendar exactly where you want it. This guide will walk you through the process, step by step.
Step 1: Sign Up for a Poper Account
First things first, you'll need a Poper account. If you don't have one, just head over to our signup page. The process is quick, and it’s your first step toward getting more interactive content on your site.
Once you’re in, we’ll ask you to add your website domain. This helps us know where you plan to install your popups and embeds later on.
Step 2: Create a New Campaign
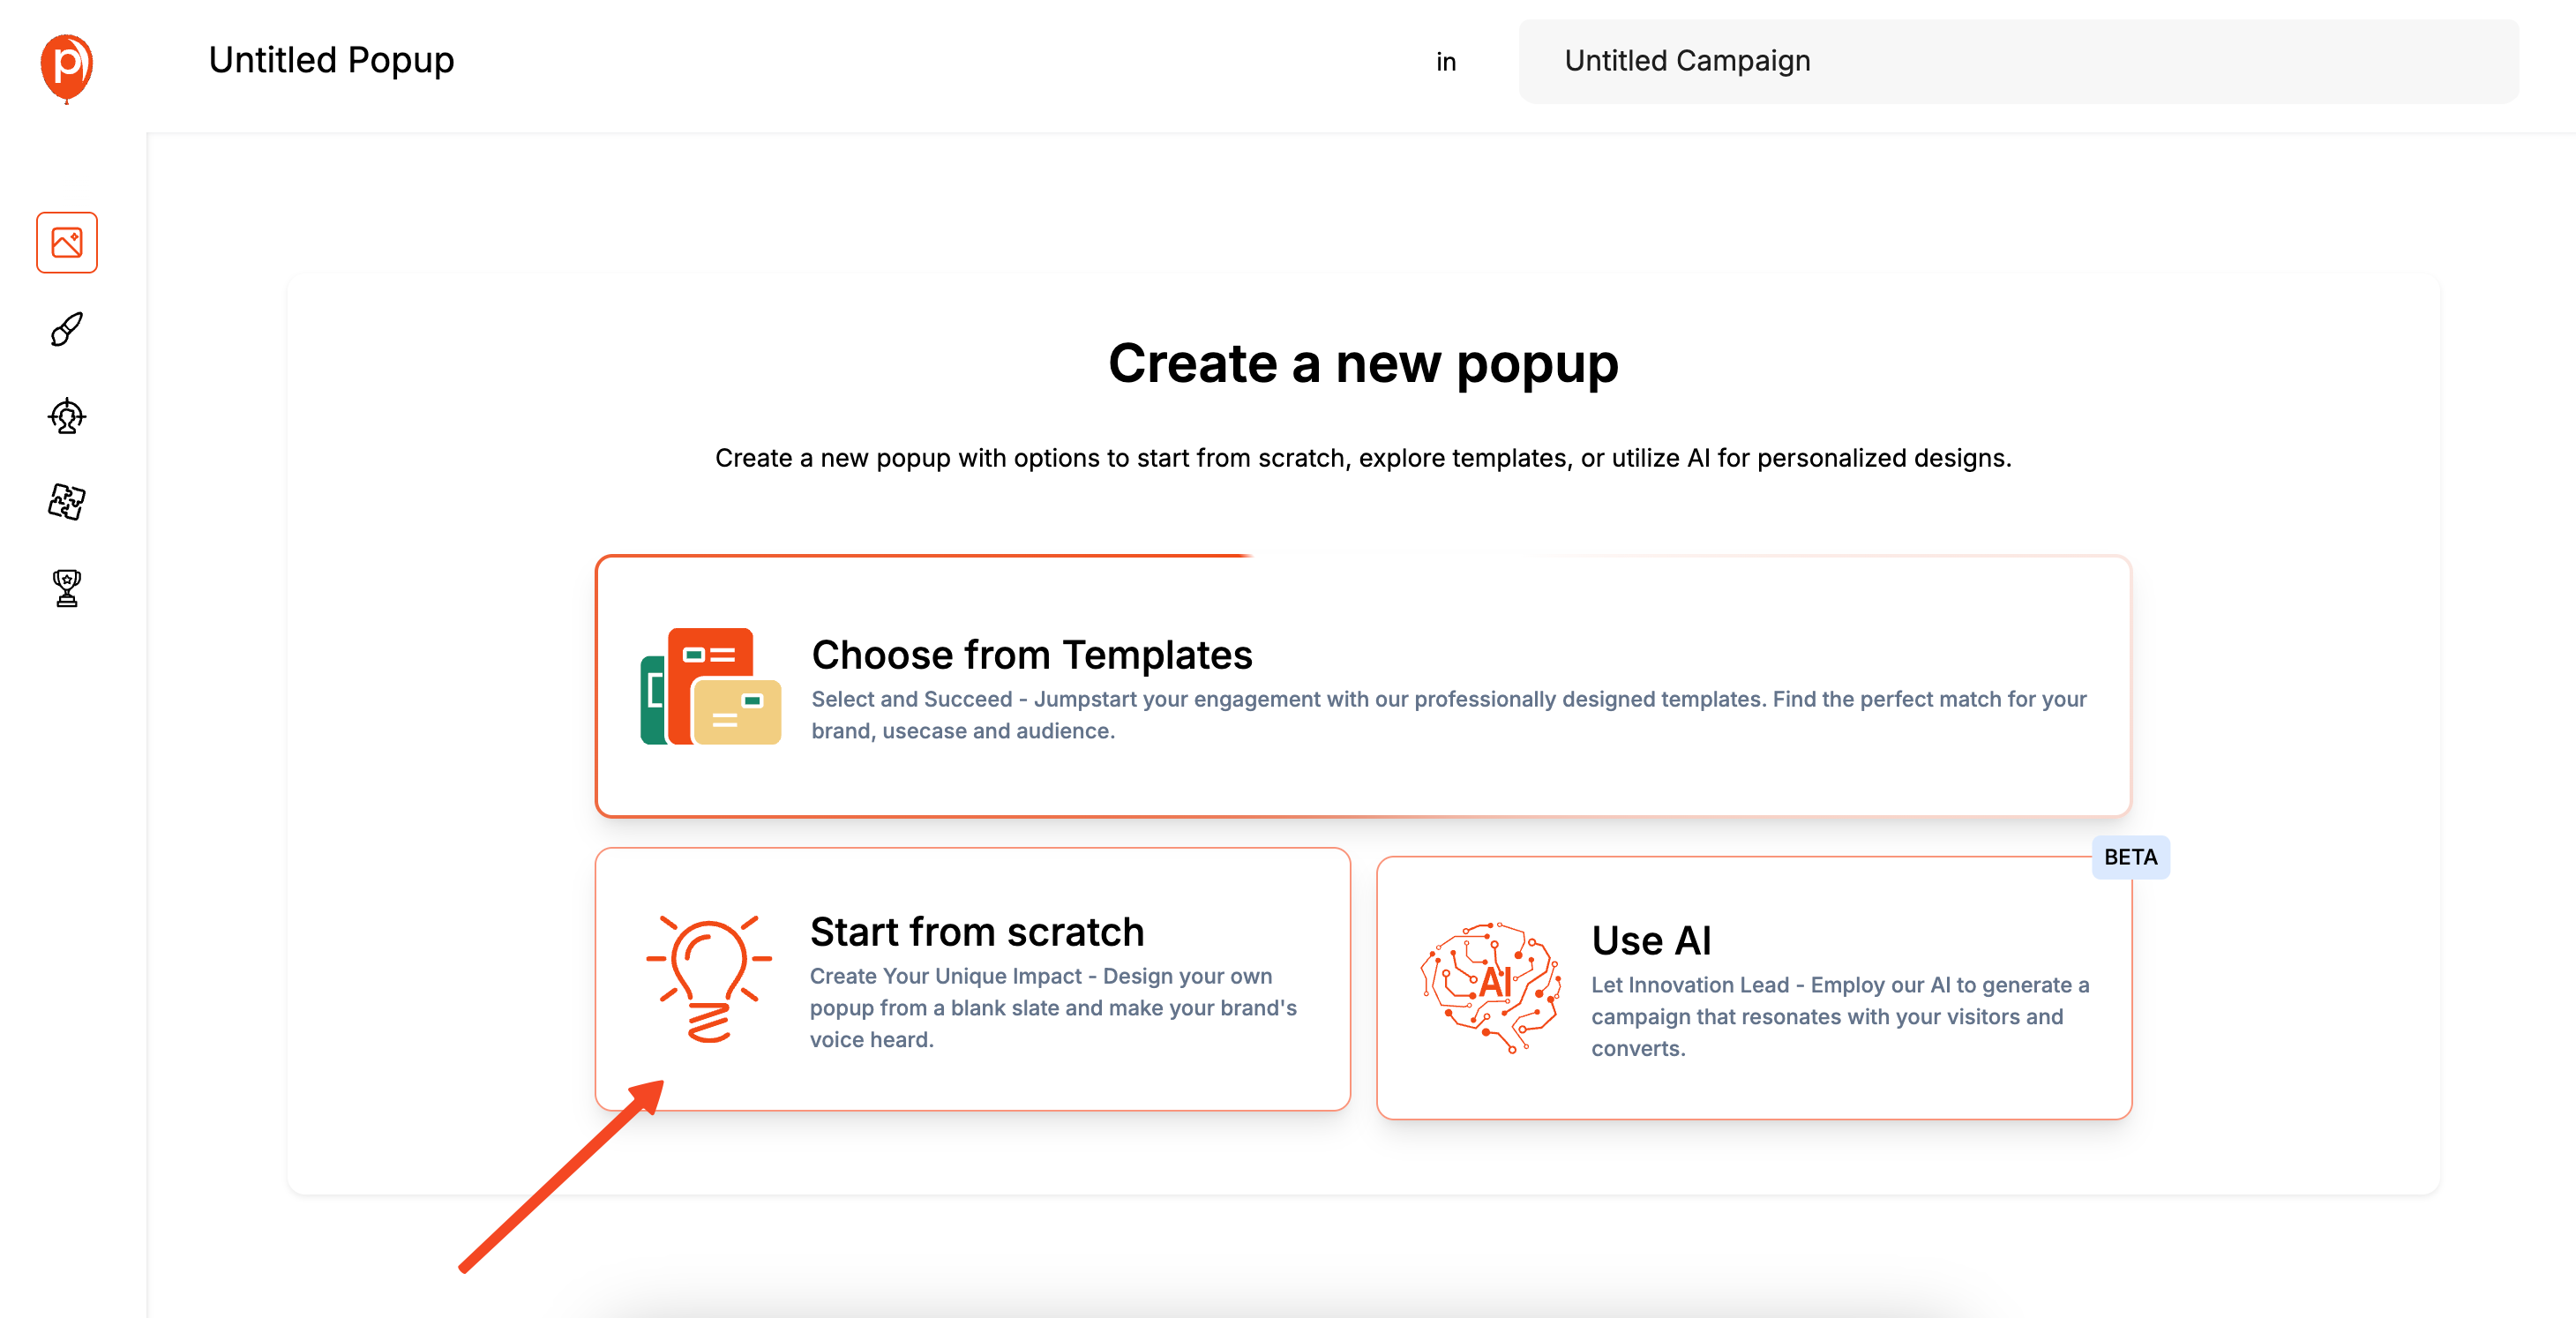
From your Poper dashboard, click the button to create a new campaign. We'll start with a blank popup, but don't worry—we're going to transform it into an embed in a moment.
Starting this way gives you access to our full editor, which is exactly what we need for this task. It gives us a flexible canvas to work with.
Step 3: Get Your Notion Embed Code
This is the key part. Since Notion doesn't provide an embed code, we need a helper tool to generate one. There are great, simple tools out there specifically for this, like EmbedNotion or Indify.
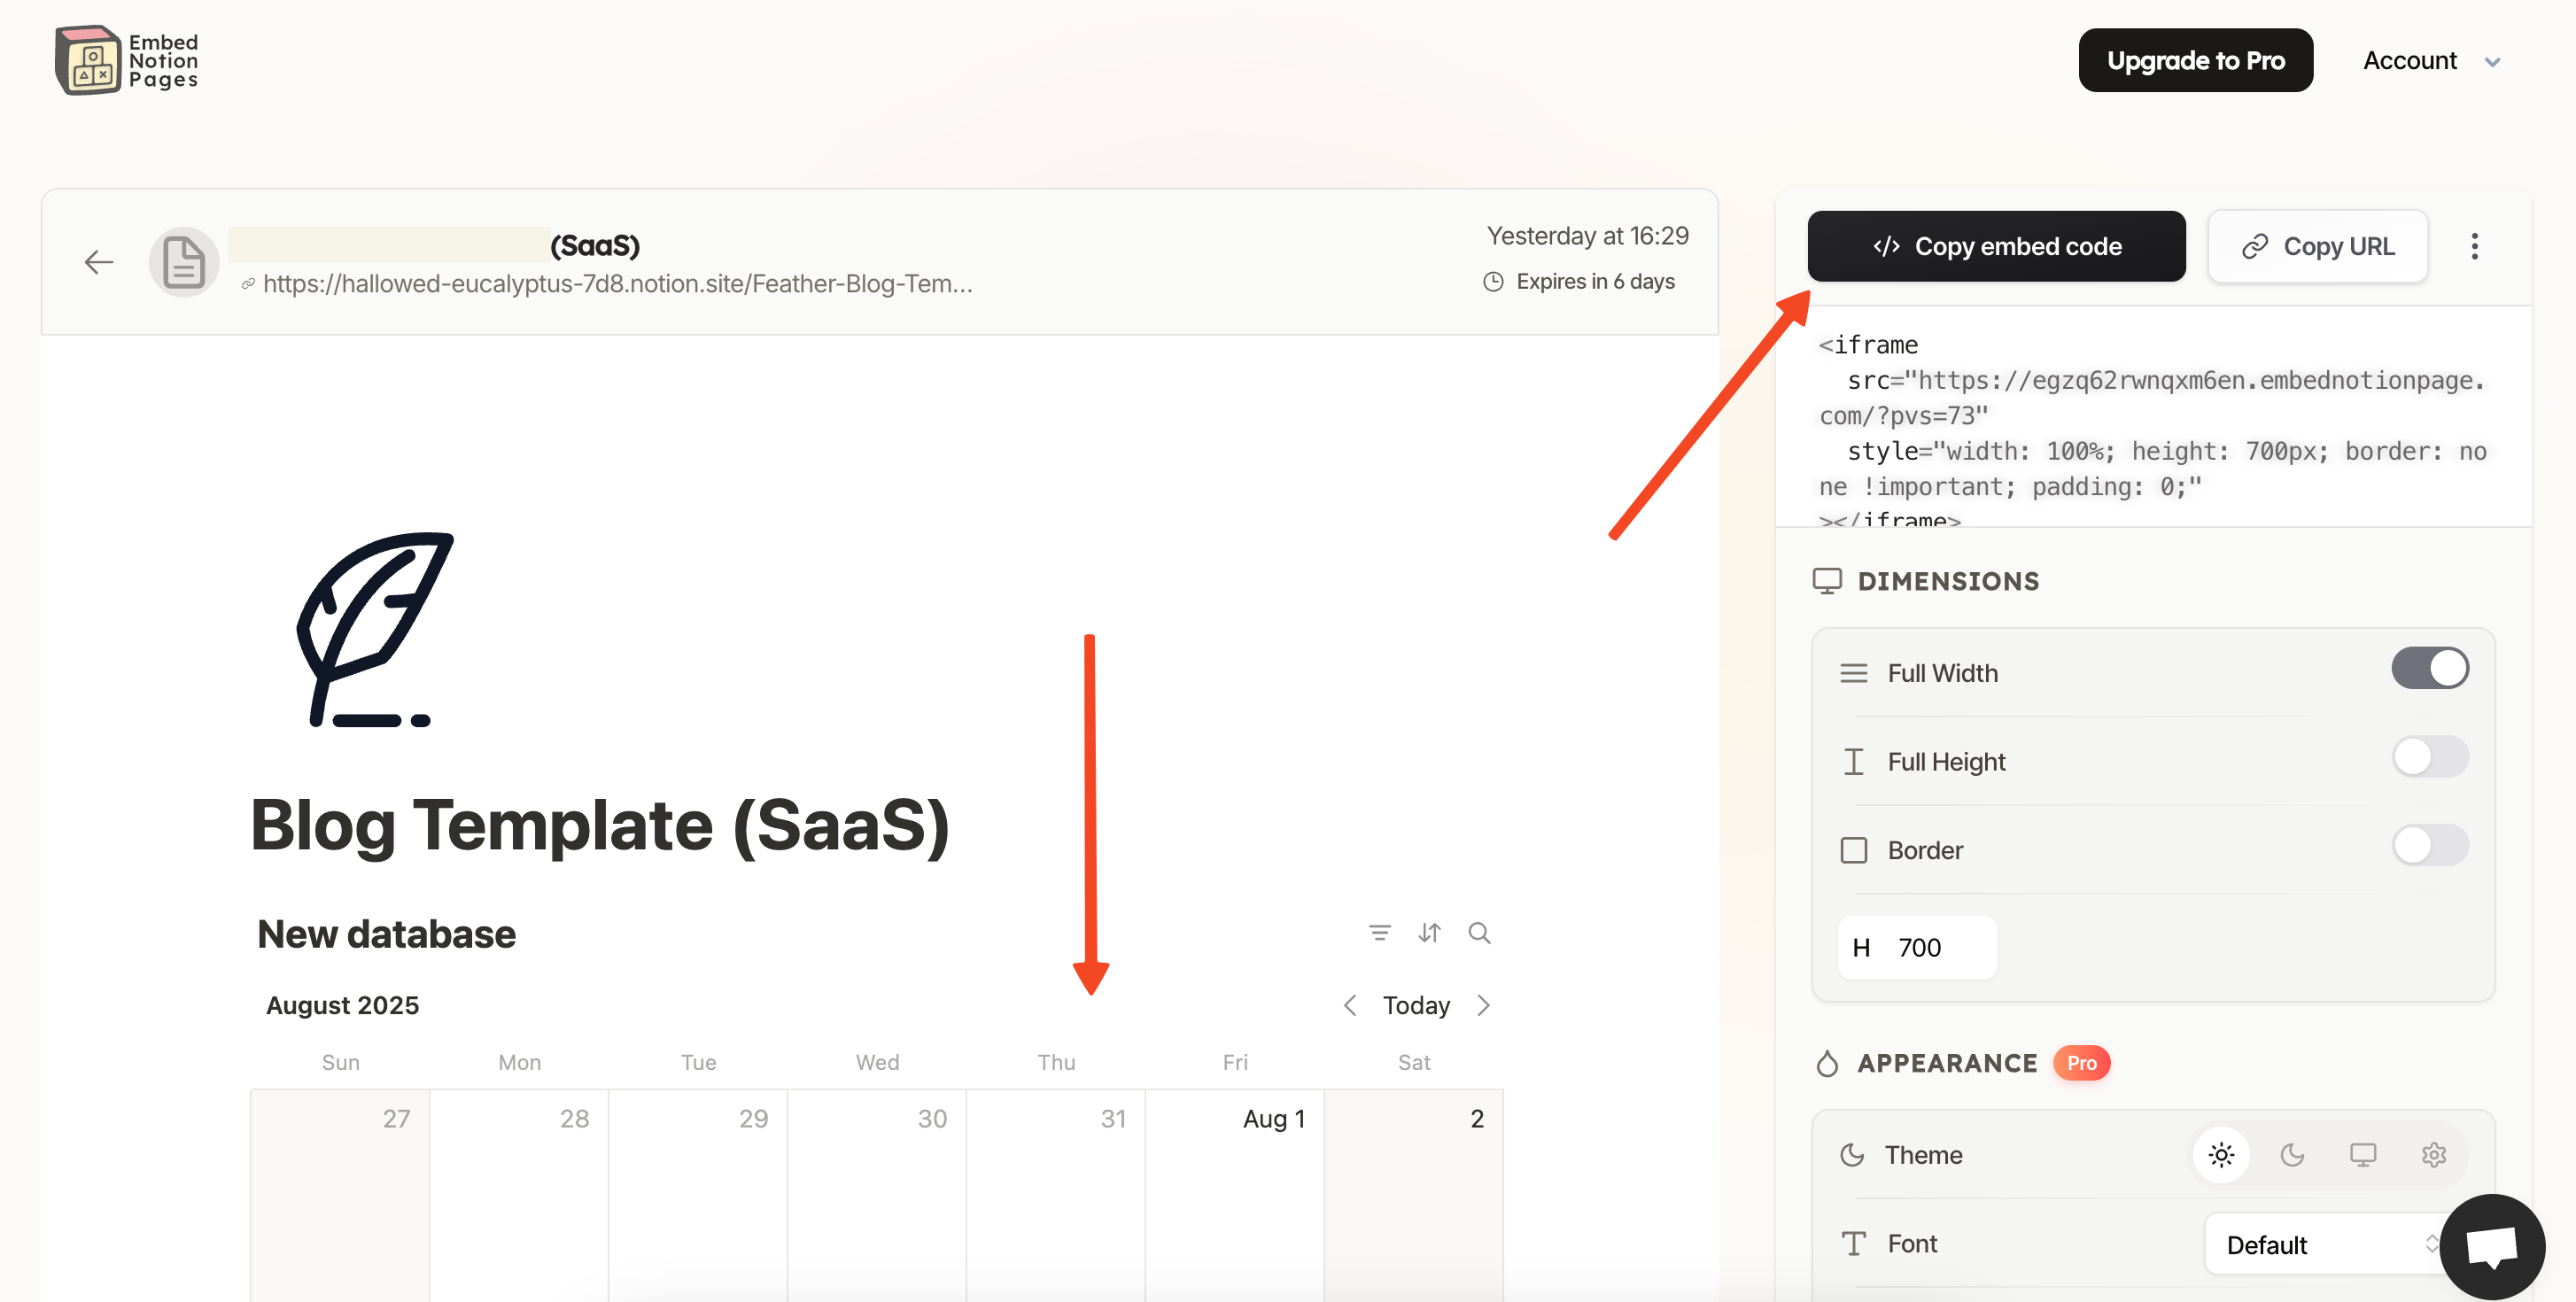
Go to one of those services, connect your Notion page, and generate the HTML embed code for your calendar. Copy that entire block of code to your clipboard. This code is what tells the browser how to display your calendar.
Step 4: Add the Notion Code to Your Poper Campaign
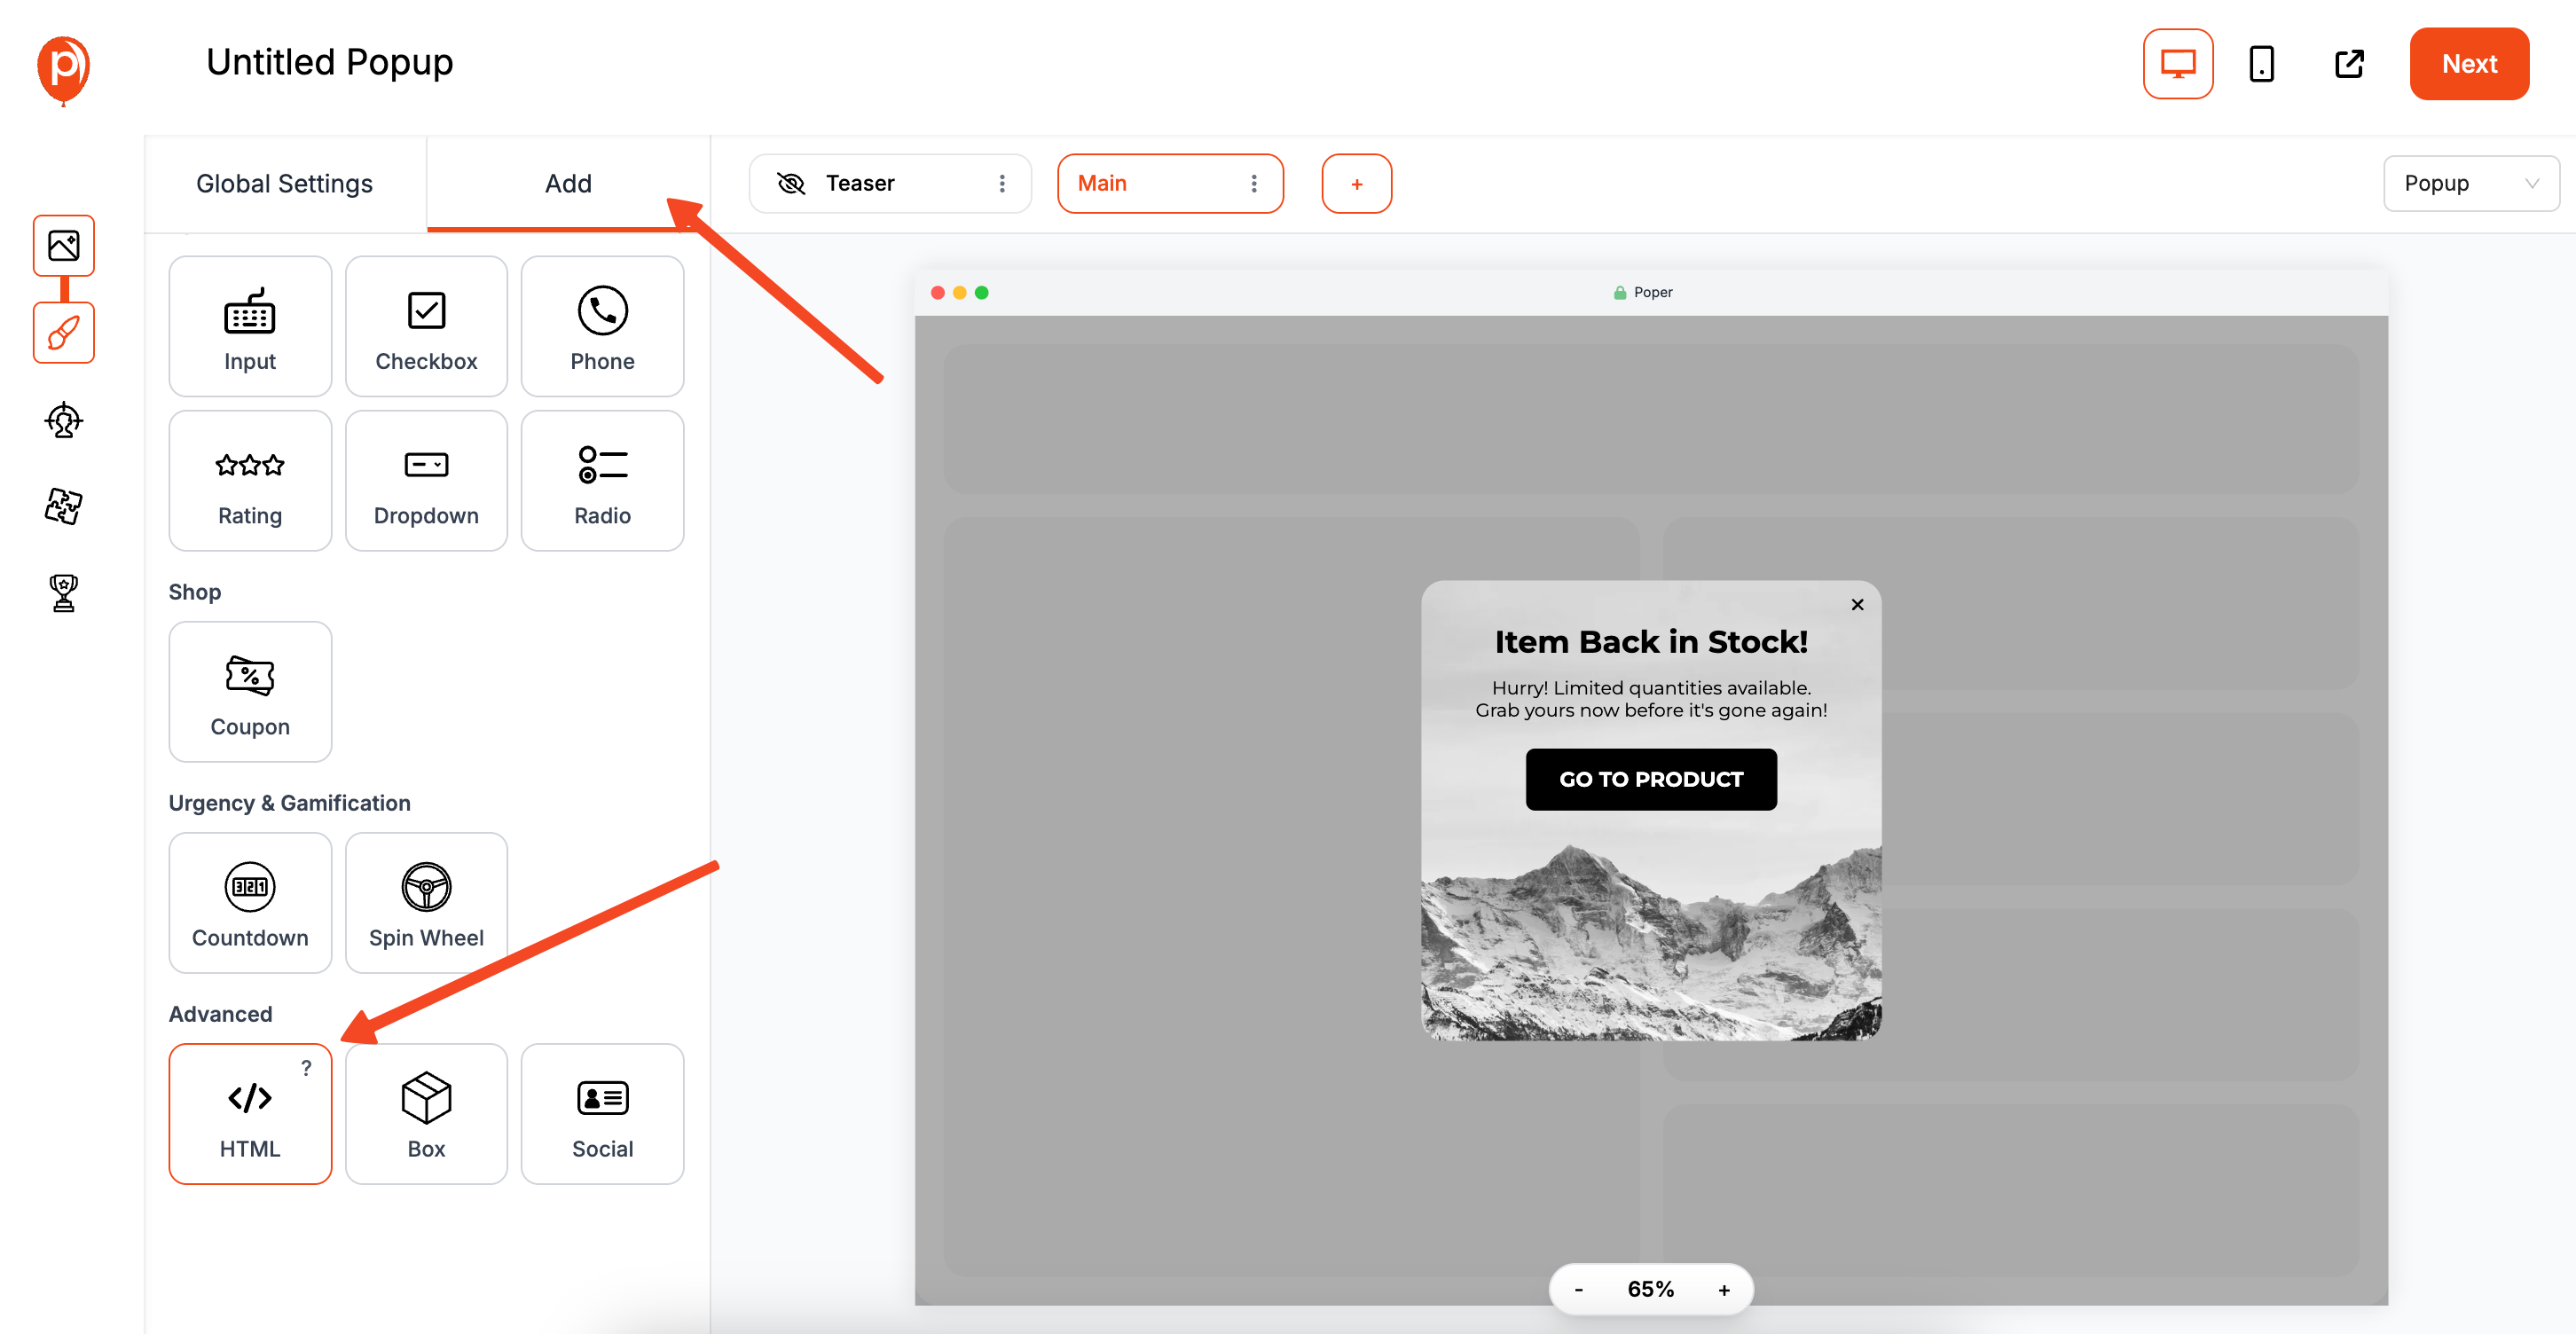
Now, head back to the Poper editor. On the left-hand sidebar, look for the 'Add Element' option and click it. From the list, select the 'HTML' element. This allows you to add any custom code directly into your design.
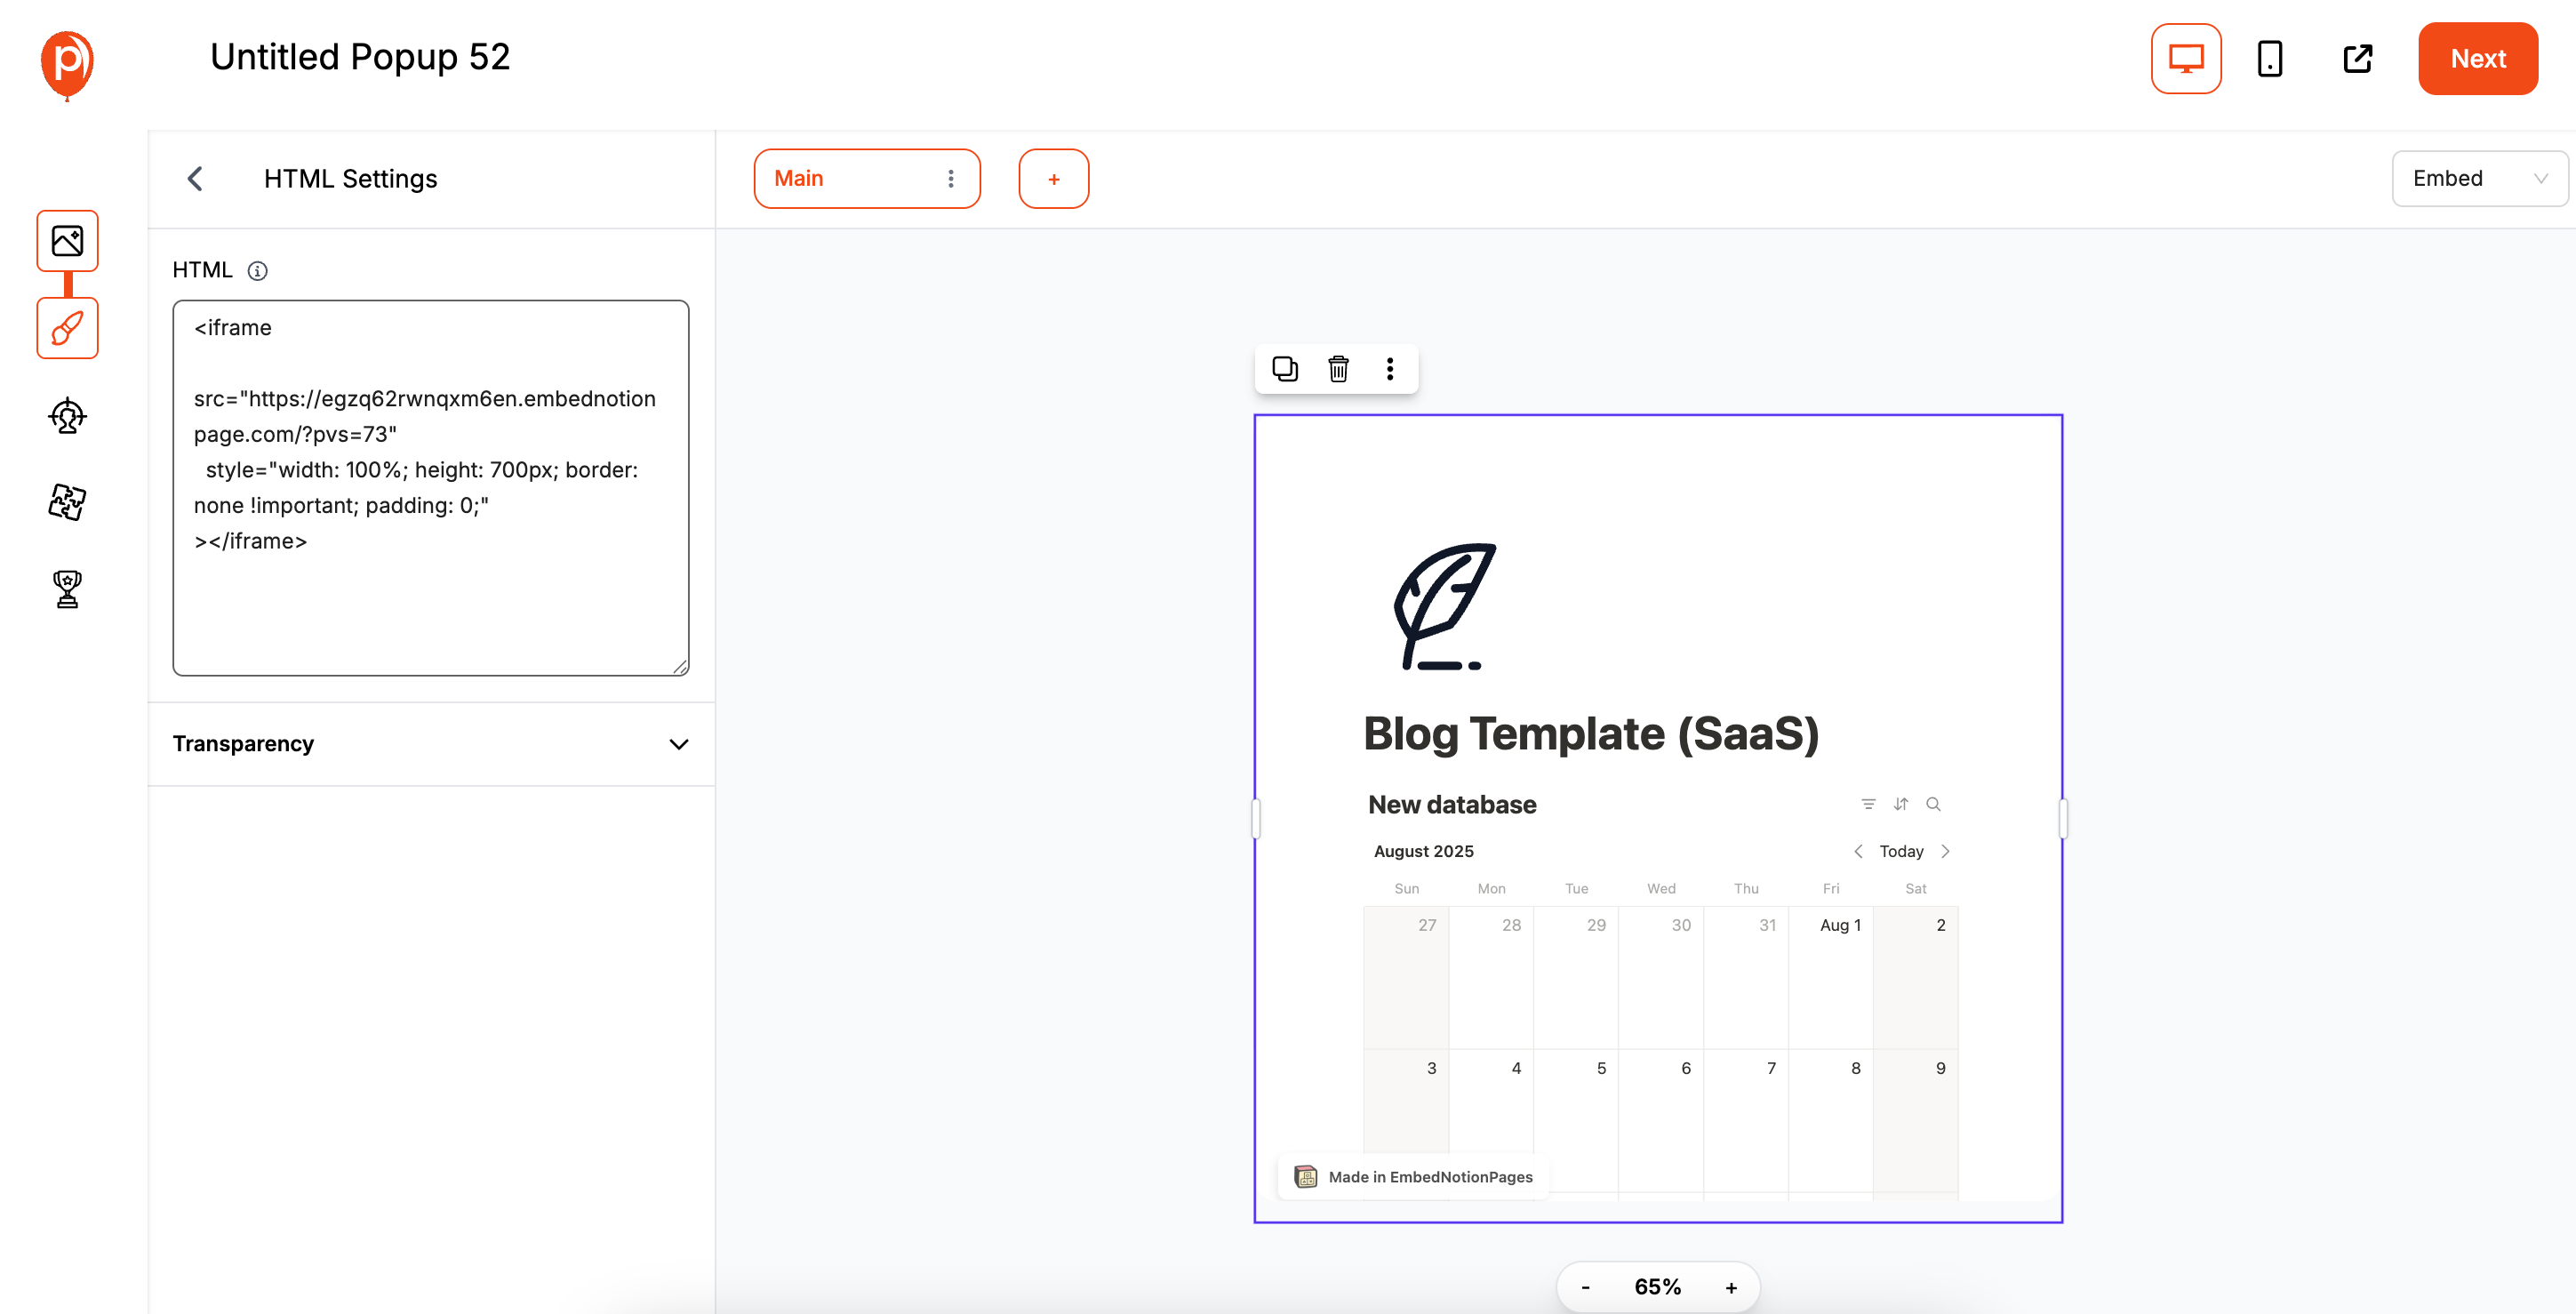
A box will appear on your canvas. Click on it, and paste the Notion calendar code you copied in the previous step. You should see a preview of your calendar appear right inside the Poper editor.
Step 5: Switch Your Campaign from a Popup to an Embed

Here’s where the magic happens. By default, your campaign is a popup. In the top-right corner of the editor, you'll see a toggle or option labeled 'Convert to Embed'. Click it.
This instantly changes your campaign's behavior. Instead of showing up as an overlay, it's now designed to sit permanently within a specific part of your webpage, just like a YouTube video.
Step 6: Set Your Display Rules
Before we grab the final code, you’ll move to the 'Display Conditions' page. You might wonder why you need display rules for an embed. This is one of Poper’s strengths—you can still control who sees it!
For example, you could show a special event calendar only to visitors from a specific country or only to users who are logged into your site. For now, you can leave it to show on all pages for all visitors.
Step 7: Publish and Get Your Poper Embed Code

Once your display rules are set, click 'Save & Publish'. Poper will now give you a small snippet of code. This is Poper's embed code, which is different from the one you got for Notion. This new code tells your website where to place the Poper embed container.
Copy this code. This is what you'll paste directly into your website's HTML.
Step 8: Install the Poper Snippet on Your Website
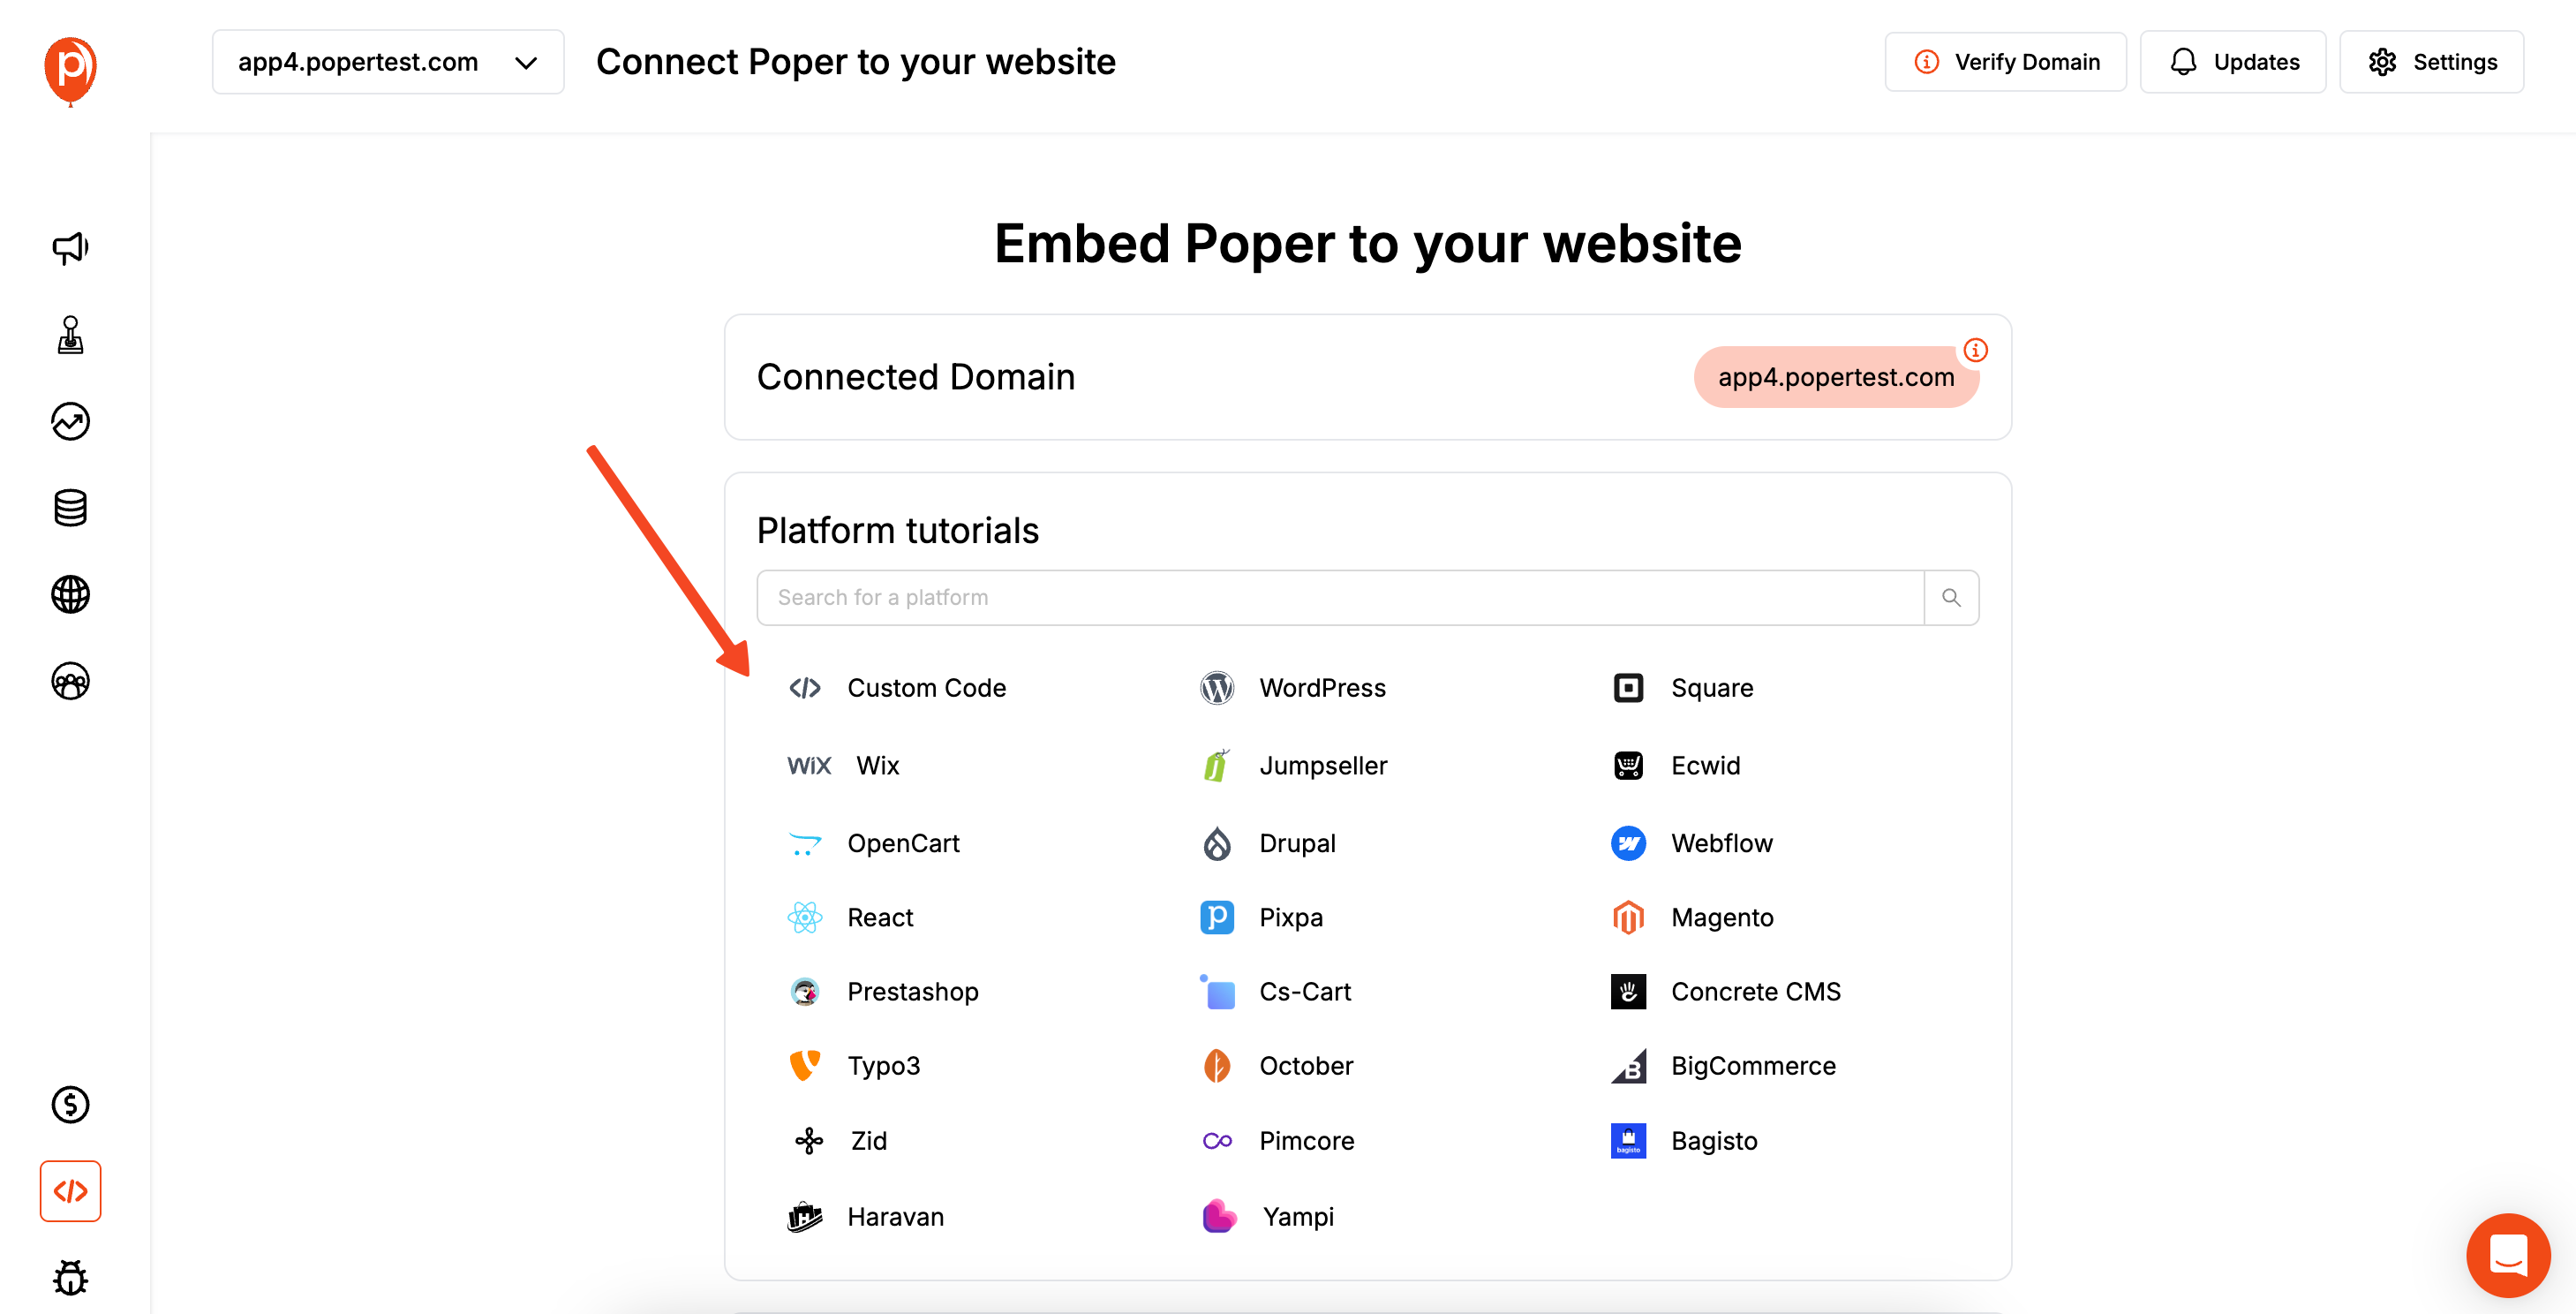
If you haven't already, you need to install Poper on your site. Just go to the 'Code' section in your Poper dashboard. You'll find a universal installation script. Copy it and paste it into your website’s header or footer. This only needs to be done once.
Next, go to the page where you want your Notion calendar to appear. Paste the specific embed code from Step 7 into the exact spot in the HTML where the calendar should be.
And that’s it! Your Notion calendar is now live on your site, seamlessly embedded for all your visitors to see.
Conclusion
While you cannot directly embed a Notion calendar (specifically, the new standalone app), you can effectively embed a Calendar View from a Notion page on your website.
The standard method involves making your Notion page public and using a third-party tool like Indify to generate a clean <iframe> embed code. This is the best approach for most users who need a simple, static display.
For advanced use cases, a tool like Poper acts as a powerful container for your Notion embed code. It allows you to apply sophisticated targeting rules, display the calendar conditionally, or even present it in an interactive popup, giving you a level of control that a direct embed cannot offer.
By choosing the right method, you can seamlessly integrate your beautifully organized Notion calendars into your public website.
Frequently Asked Questions (FAQ)
Can I embed the new "Notion Calendar" app on my website?
No, not at this time. The standalone Notion Calendar app (formerly Cron) does not have a feature for creating public, embeddable widgets for websites. The methods described in this guide are for embedding a "Calendar View" of a database that you create on a standard Notion page.
Is using a third-party tool like Indify to create an embed code safe?
Yes, reputable tools like Indify are safe. They only require access to your publicly shared Notion page URL. They do not access your private Notion workspace or data.
Will my embedded Notion calendar update automatically?
Yes. When you make changes to the database items in your original Notion page (the one you made public), the changes will automatically be reflected in the embedded calendar on your website after a short delay for syncing.
Is it free to embed a Notion calendar?
Yes, the entire process can be free. Making a Notion page public is free, and tools like Indify offer generous free plans for creating widgets.
Can visitors interact with my embedded Notion calendar?
Visitors can typically view the calendar and click on items to open them in a read-only view (often within the embed or by opening the public Notion page). They cannot edit or add items to your database directly from the embed.

