
Want to capture leads more effectively by showing a Mailchimp signup form or popup precisely when a user clicks a button on your website? You're in the right place! Triggering a Mailchimp popup on a button click offers a targeted, user-initiated way to grow your email list, far more engaging than generic timed popups.
While Mailchimp is excellent for email marketing, getting its popups to appear on a specific button click can sometimes require a bit more finesse than its standard display rules. This guide will walk you through various methods, with a special focus on using a powerful tool like Poper for maximum control and design flexibility, as well as other techniques including custom code.
Why Trigger Mailchimp Popups on a Button Click?
Before diving into the "how," let's consider the benefits:
Higher Conversion Rates: Users clicking a button show clear intent. Presenting a signup form at this moment is highly relevant.
Improved User Experience: It's less intrusive than automatic popups, as the user initiates the interaction.
Targeted Lead Generation: Use different buttons for different lead magnets or segments (e.g., "Download Ebook," "Join Webinar," "Get Discount Code").
Contextual Signups: Offer a newsletter signup directly after a user engages with relevant content.
Methods to Trigger Mailchimp Popups/Forms on Button Click
There are several approaches to achieve this, each with its pros and cons:
Using Mailchimp's Native Subscriber Popup Forms (Limited for Direct Button Click):
Mailchimp's standard "Subscriber Popup" forms are typically designed to trigger based on time on page, scroll depth, or exit intent. Directly linking them to a specific button click without custom code or a third-party tool is generally not a built-in feature. You can embed Mailchimp forms, but making them pop up on a button click usually needs extra help.Using a Dedicated Popup Builder like Poper (Recommended for Ease & Features):
Tools like Poper are designed to give you granular control over popup triggers, appearance, and integrations. This is often the easiest and most flexible way to trigger a Mailchimp-connected popup on a button click.Custom HTML/JavaScript to Show/Hide a Mailchimp Embedded Form:
If you're comfortable with code, you can embed a standard Mailchimp form on your page, initially hide it with CSS, and then use JavaScript to display it when a button is clicked. This doesn't create a "popup" in the overlay sense but can achieve a similar form reveal.
Let's explore these, focusing on the Poper method first for its robust capabilities.
Trigger Mailchimp Popup On Button Click with Poper
Step 1: Get Yourself a Poper Account
First things first, you'll need to sign up for Poper. This is where all the magic happens! Creating an account gives you access to our platform where you can design popups specifically to work with your HTML site and so much more. It’s a quick process, and then you’re ready to start building.
Step 2: Add Your Website Domain
Once you're in your Poper dashboard, the next thing to do is add your website's domain. This tells Poper where your popups will live and allows us to connect everything smoothly.
It's a crucial step for ensuring your popups display correctly on your site.
Step 3: Create a New Popup and Choose a Template
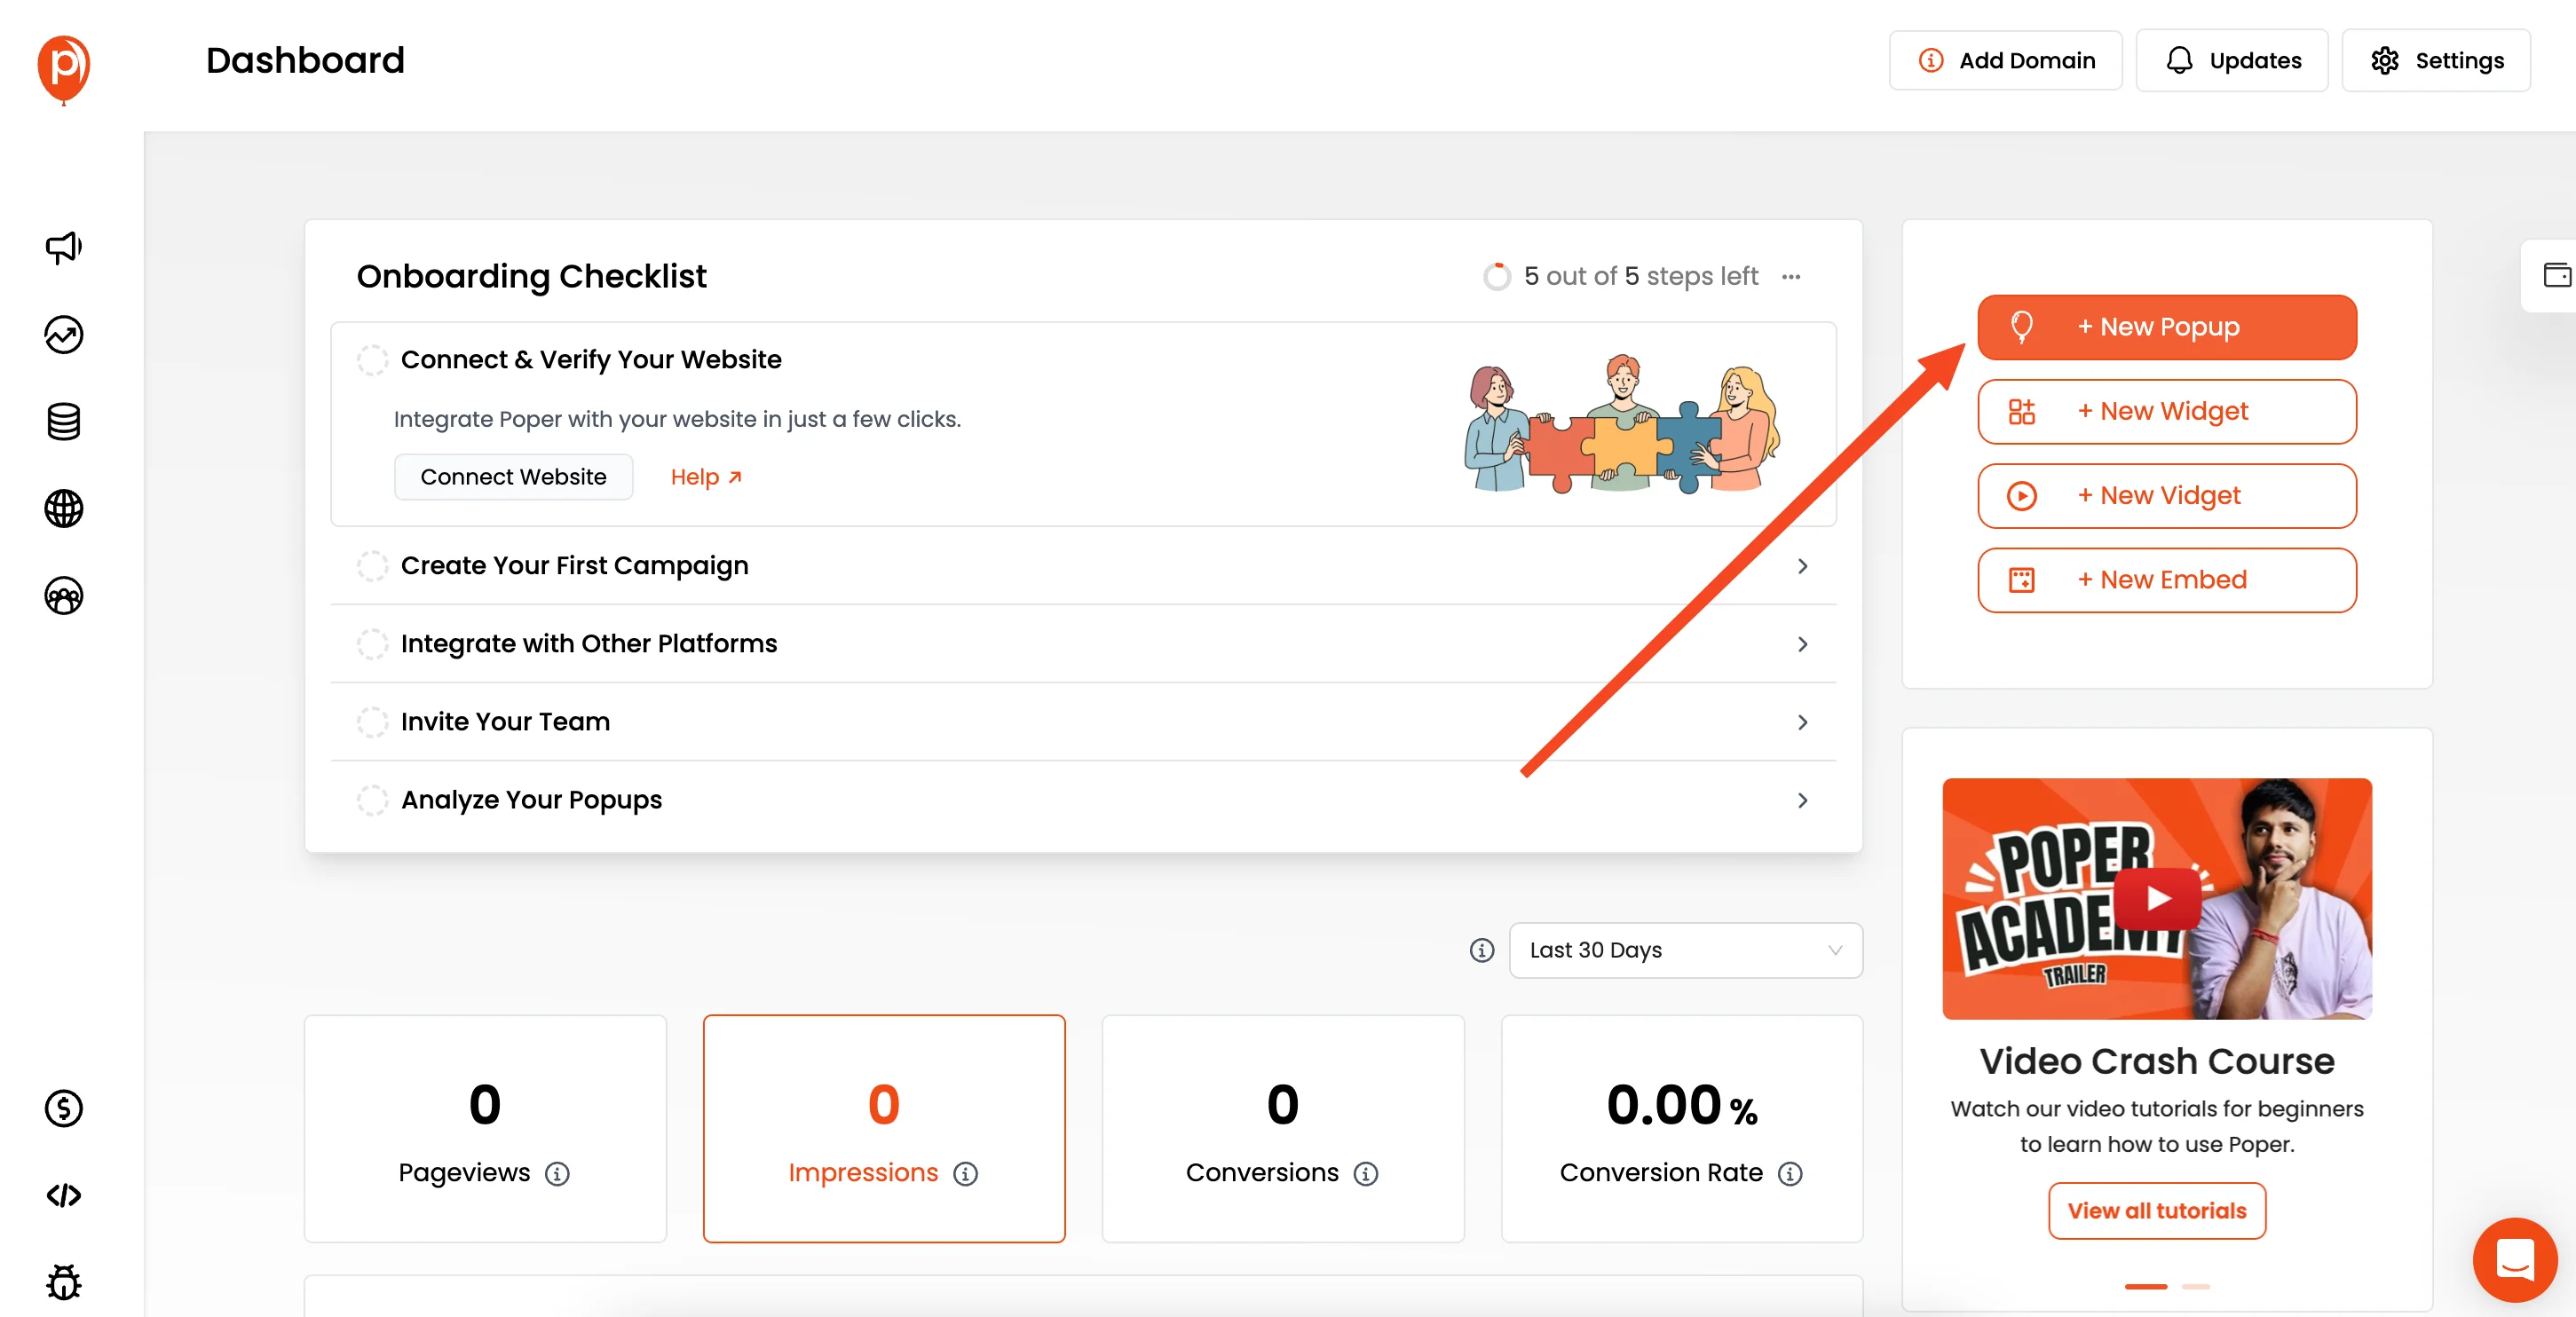
With your domain added, look for the ‘New Popup’ button – give that a click. You’ll then see an option to ‘Choose from templates.’
We’ve designed a bunch of these to give you a head start. For this specific goal, you can even search for "Newsletter" to find templates perfect for lead collection.
Step 4: Select or Design Your Popup
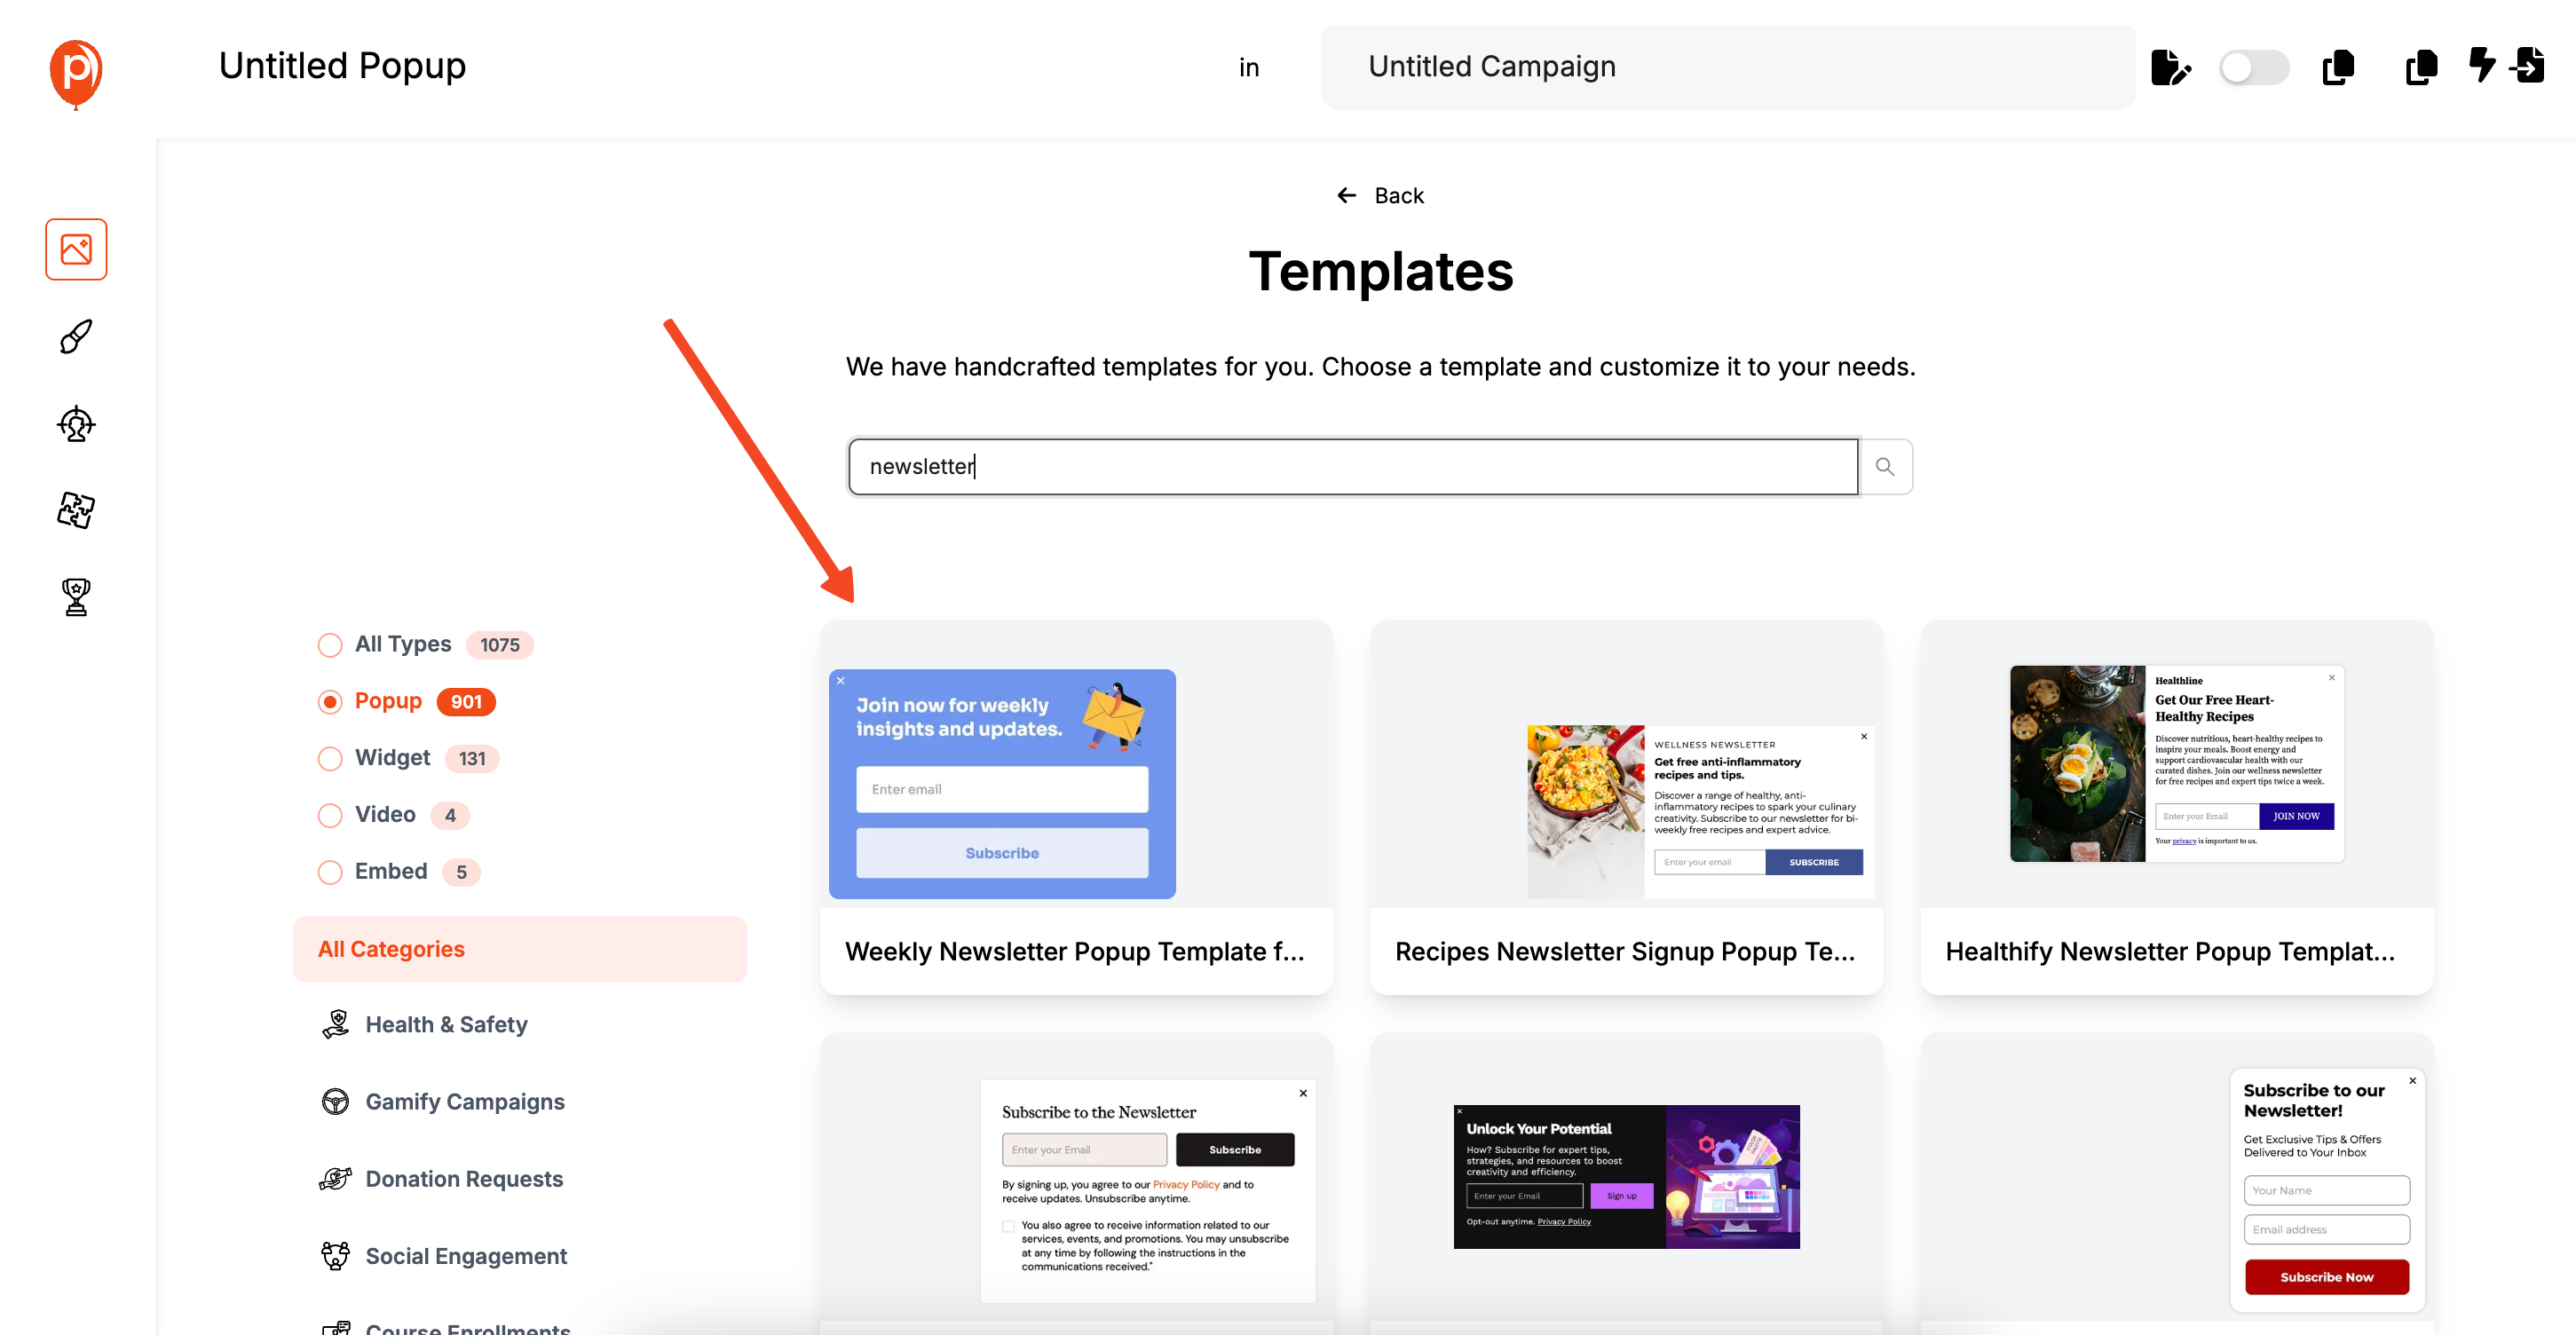
You can pick a pre-designed template that fits your style, which I often recommend if you want to get going quickly. For instance, if you're aiming to grow your newsletter list, a "Newsletter Signup" template is a great starting point.
Of course, if you have a specific vision, you can always start from scratch and build a custom popup. Many of our users do this to create unique popups for things like special ad campaigns.
Step 5: Customize Your Popup's Look and Feel
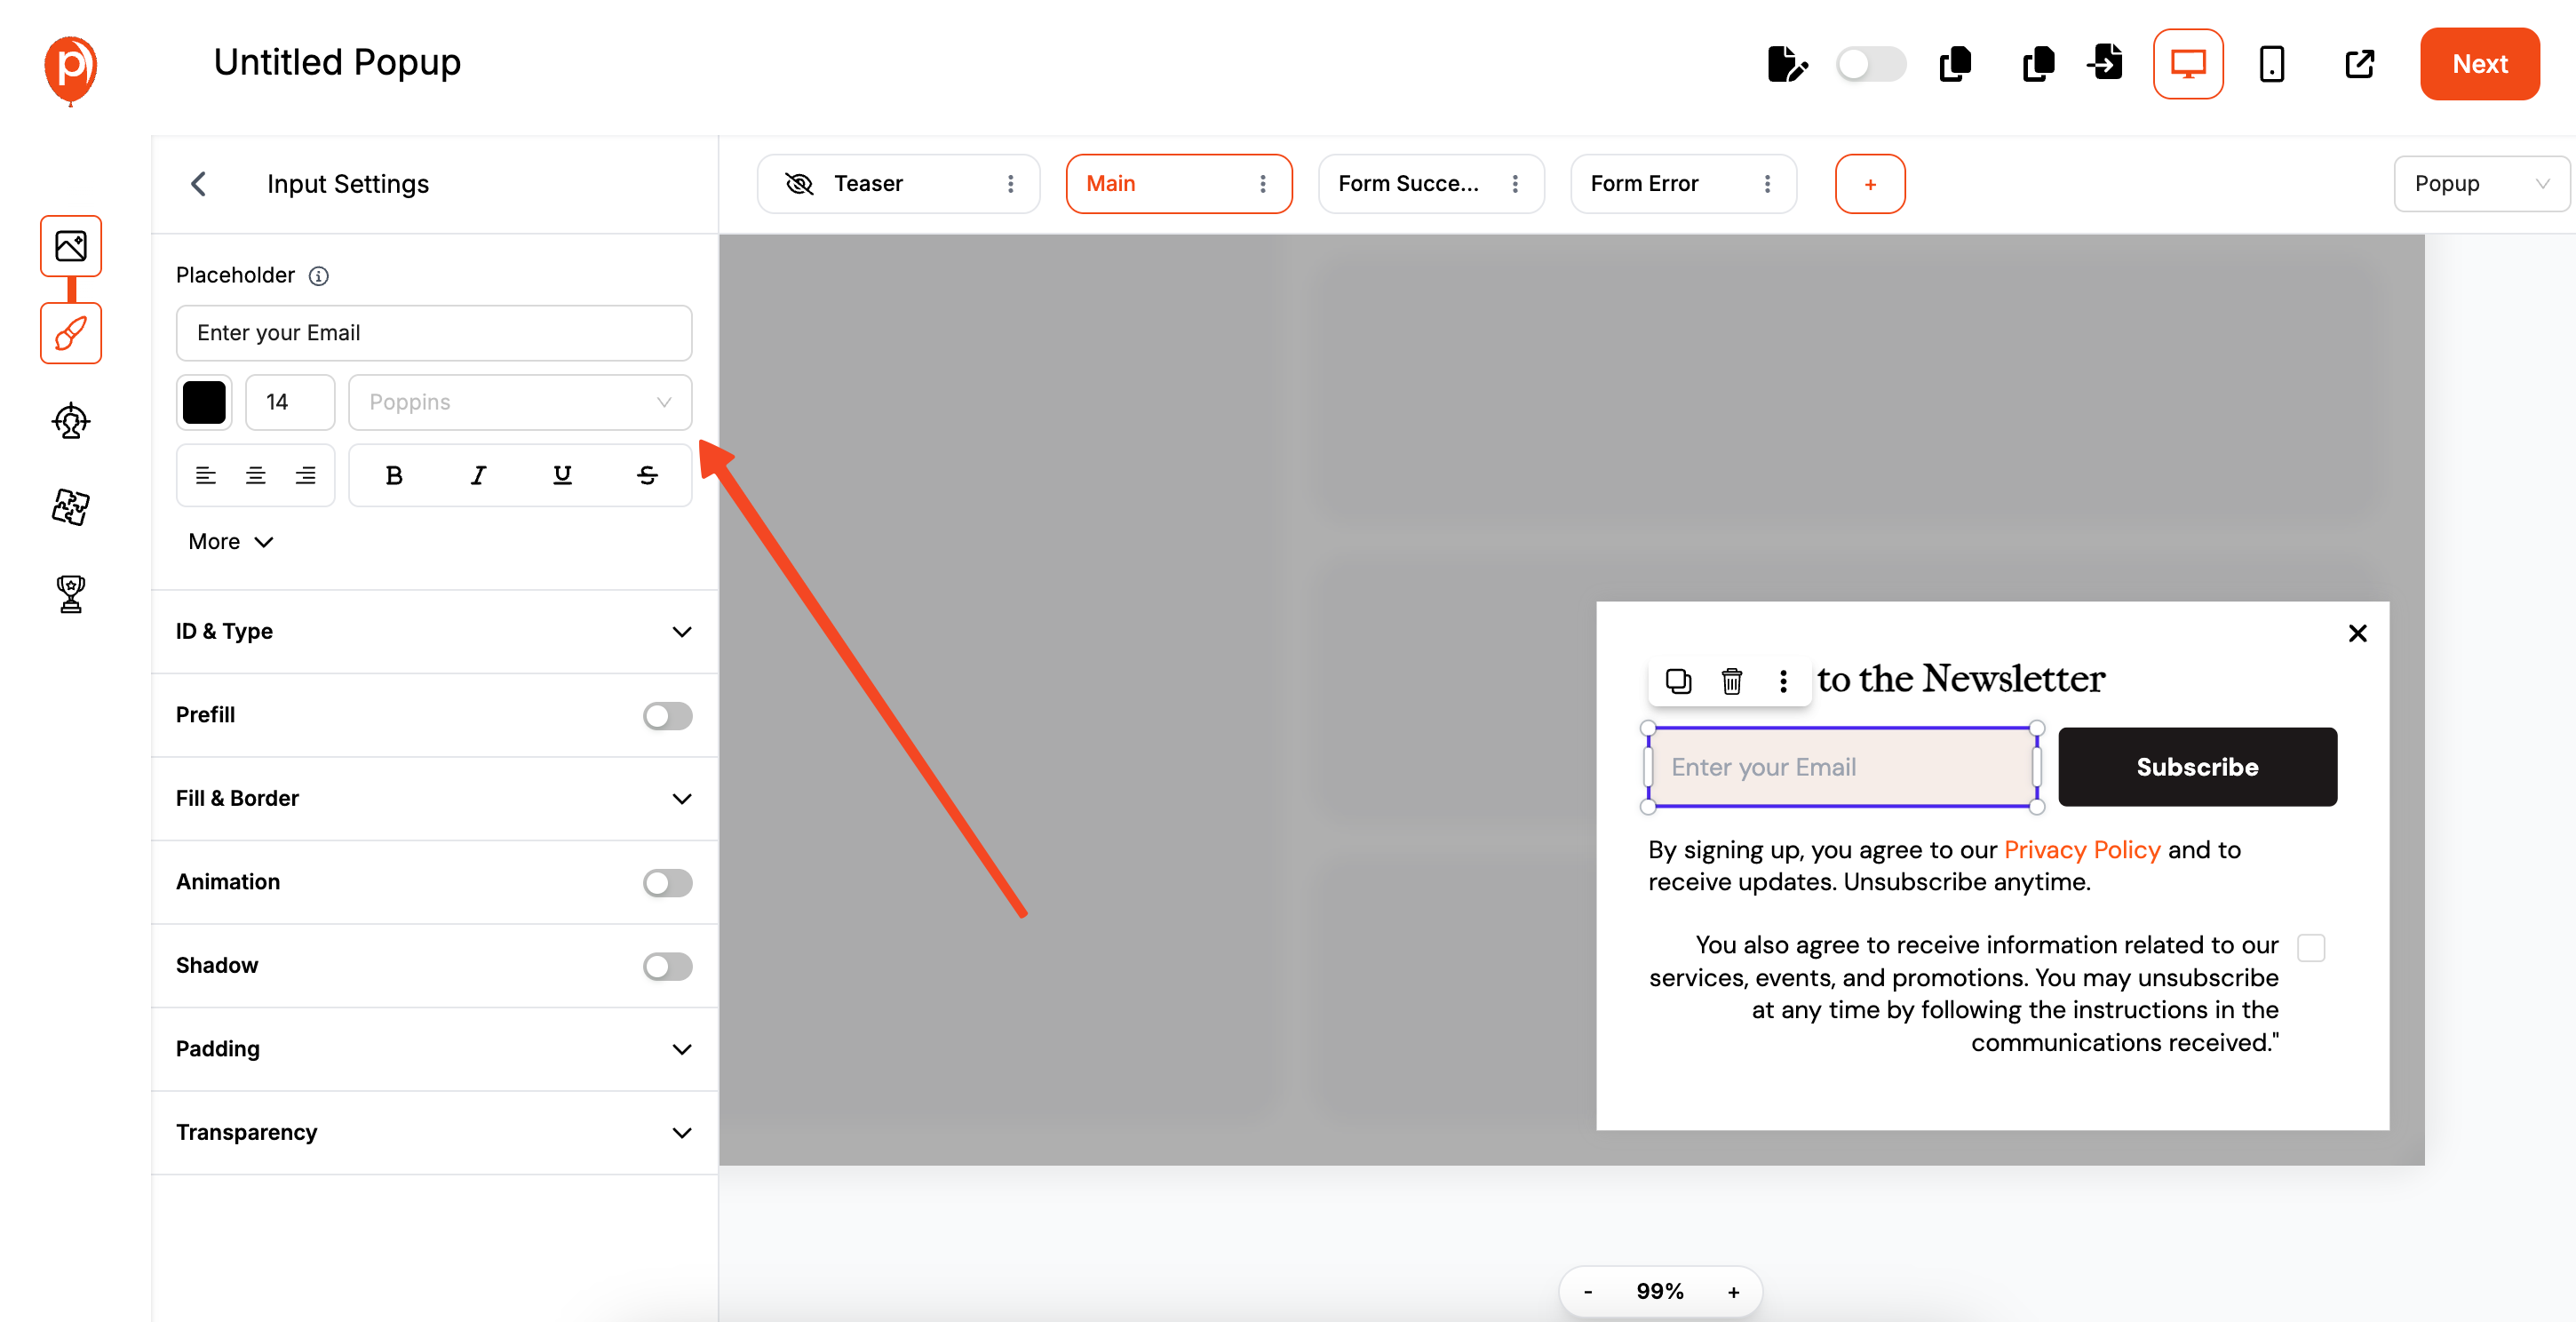
This will take you into our popup editor. Here, you can really make the popup your own. Play around with fonts, colors, add your logo, and tweak the text until it perfectly matches your brand and message.
I always suggest keeping it clean and focused so it’s easy for your visitors to understand the offer.
Step 6: Trigger Mailchimp Popup On Button Click
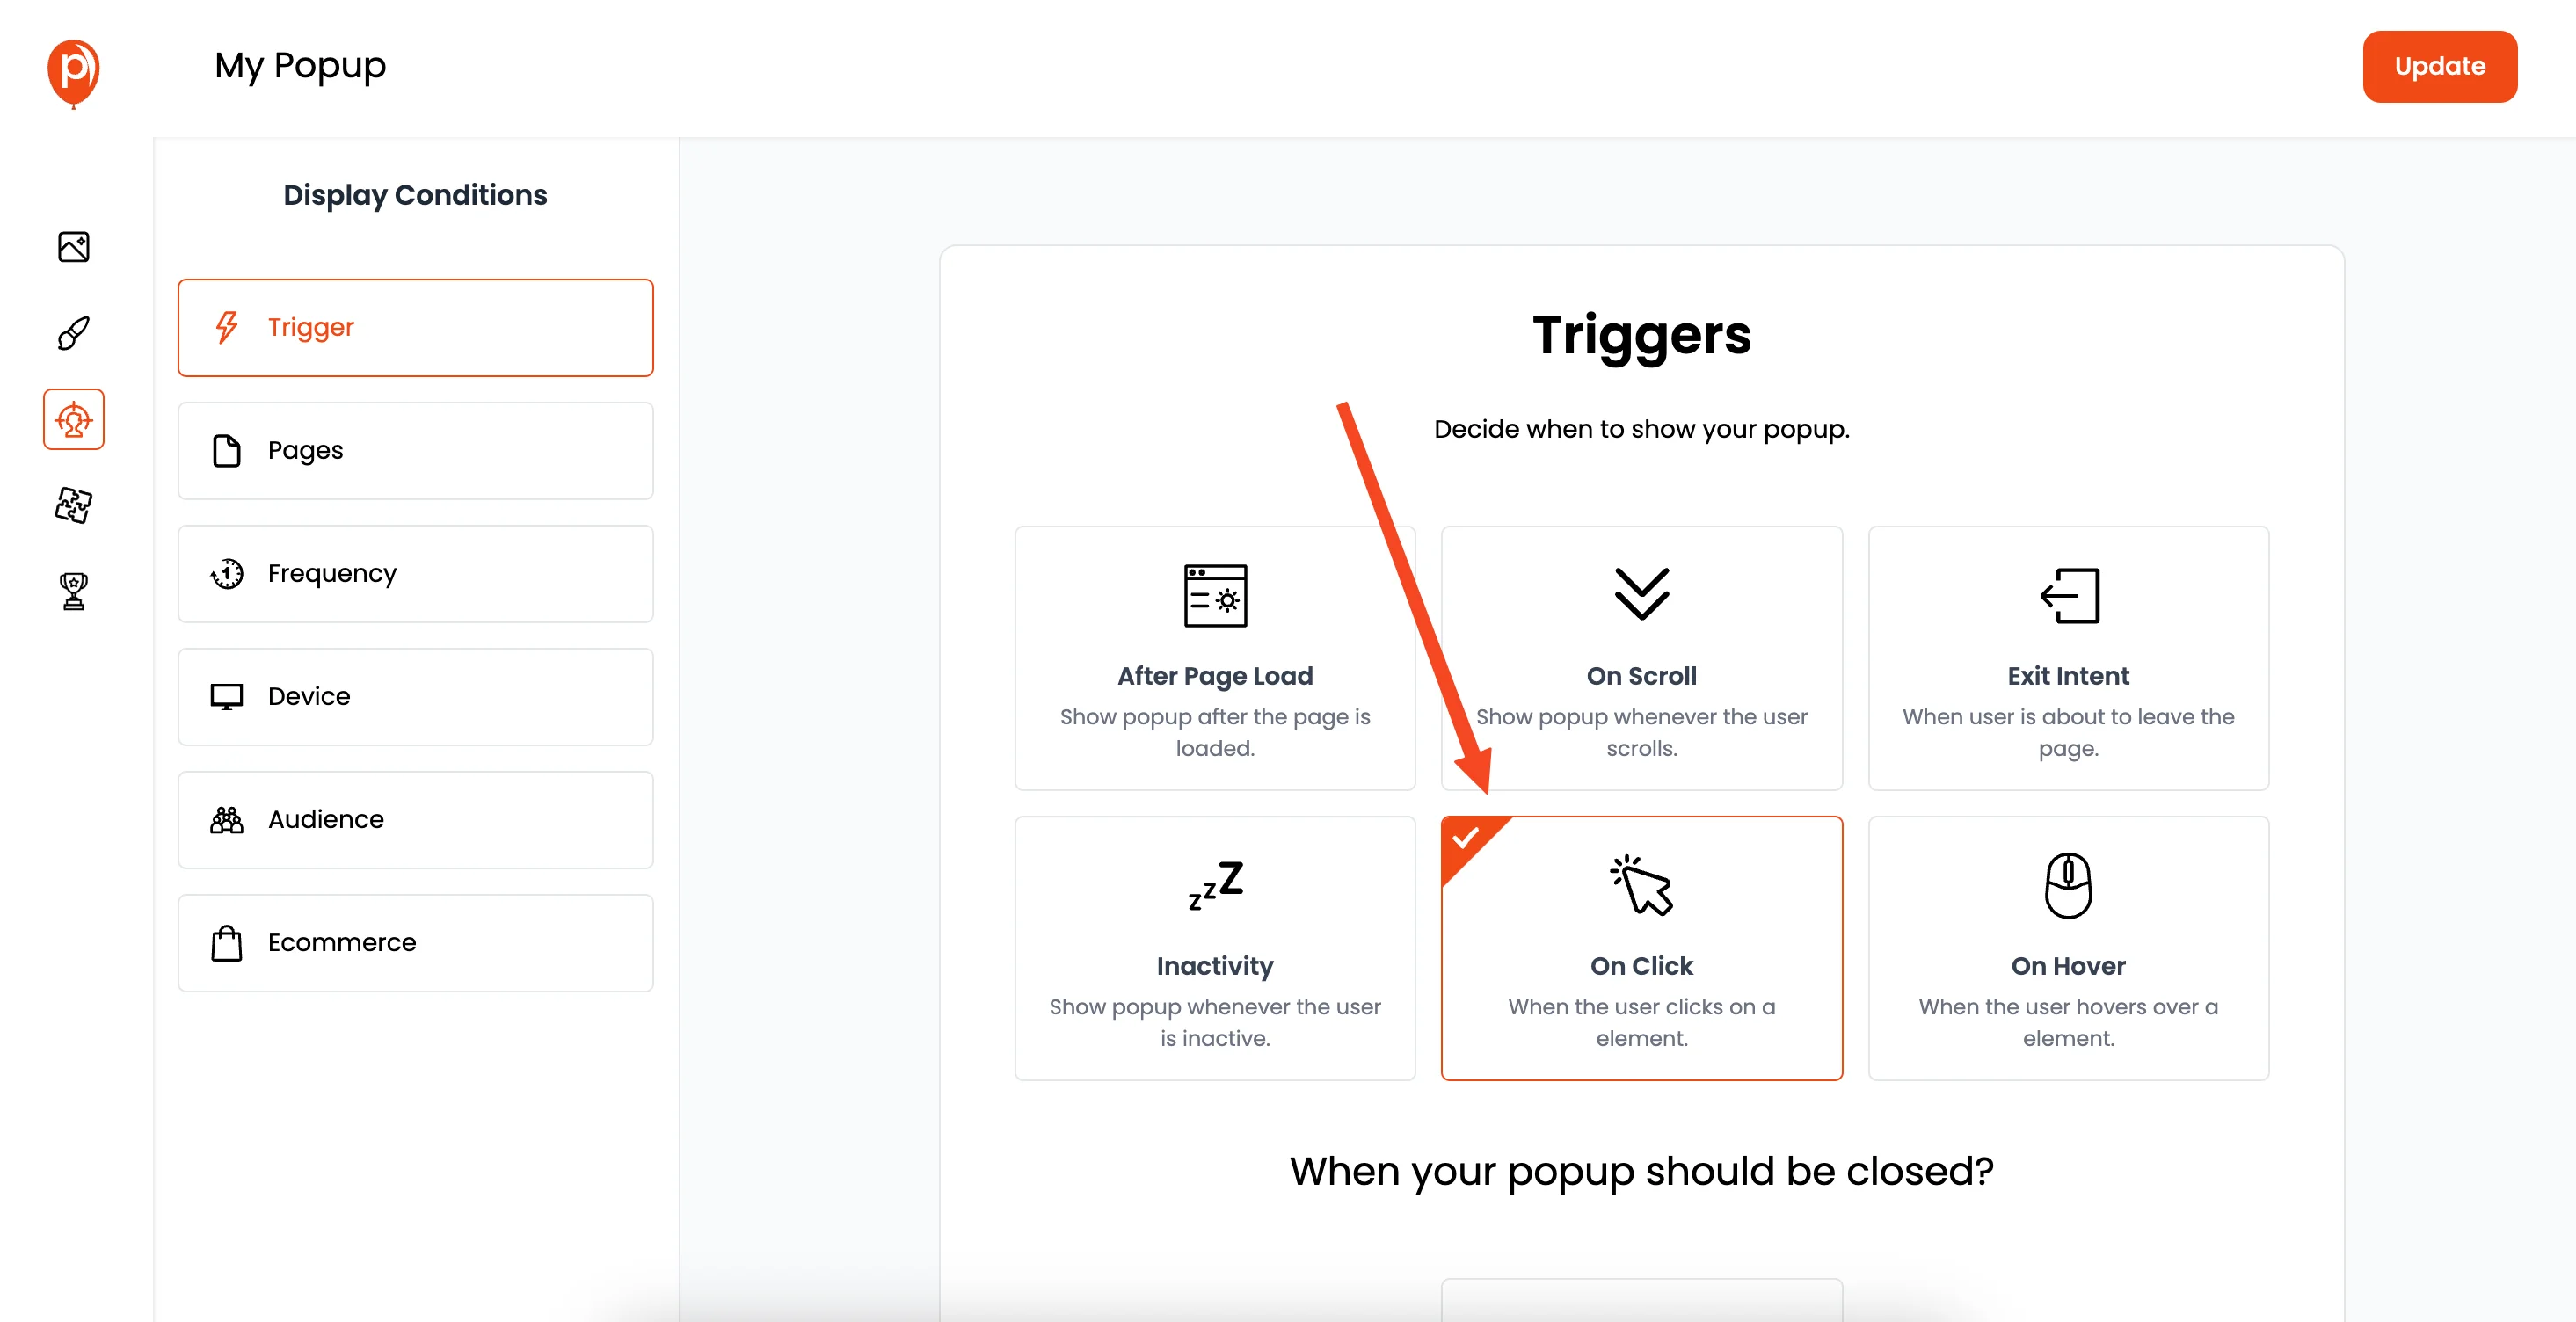
After you're happy with the design, click ‘Next.’ This brings you to the ‘Display Conditions’ page. This is where you'll tell Poper to show the popup when a specific button is clicked. You can use a CSS selector for this.
For example, if your button in your HTML has a class like class="my-action-button", you would enter .my-action-button in the CSS targeting field for the 'On Click' event. Then, just make sure that button on your website actually has the my-action-button class.
Now, when someone clicks it, Poper will display your popup. You can also fine-tune who sees this popup by targeting specific pages or audience demographics.
Step 7: Connect Poper to Mailchimp
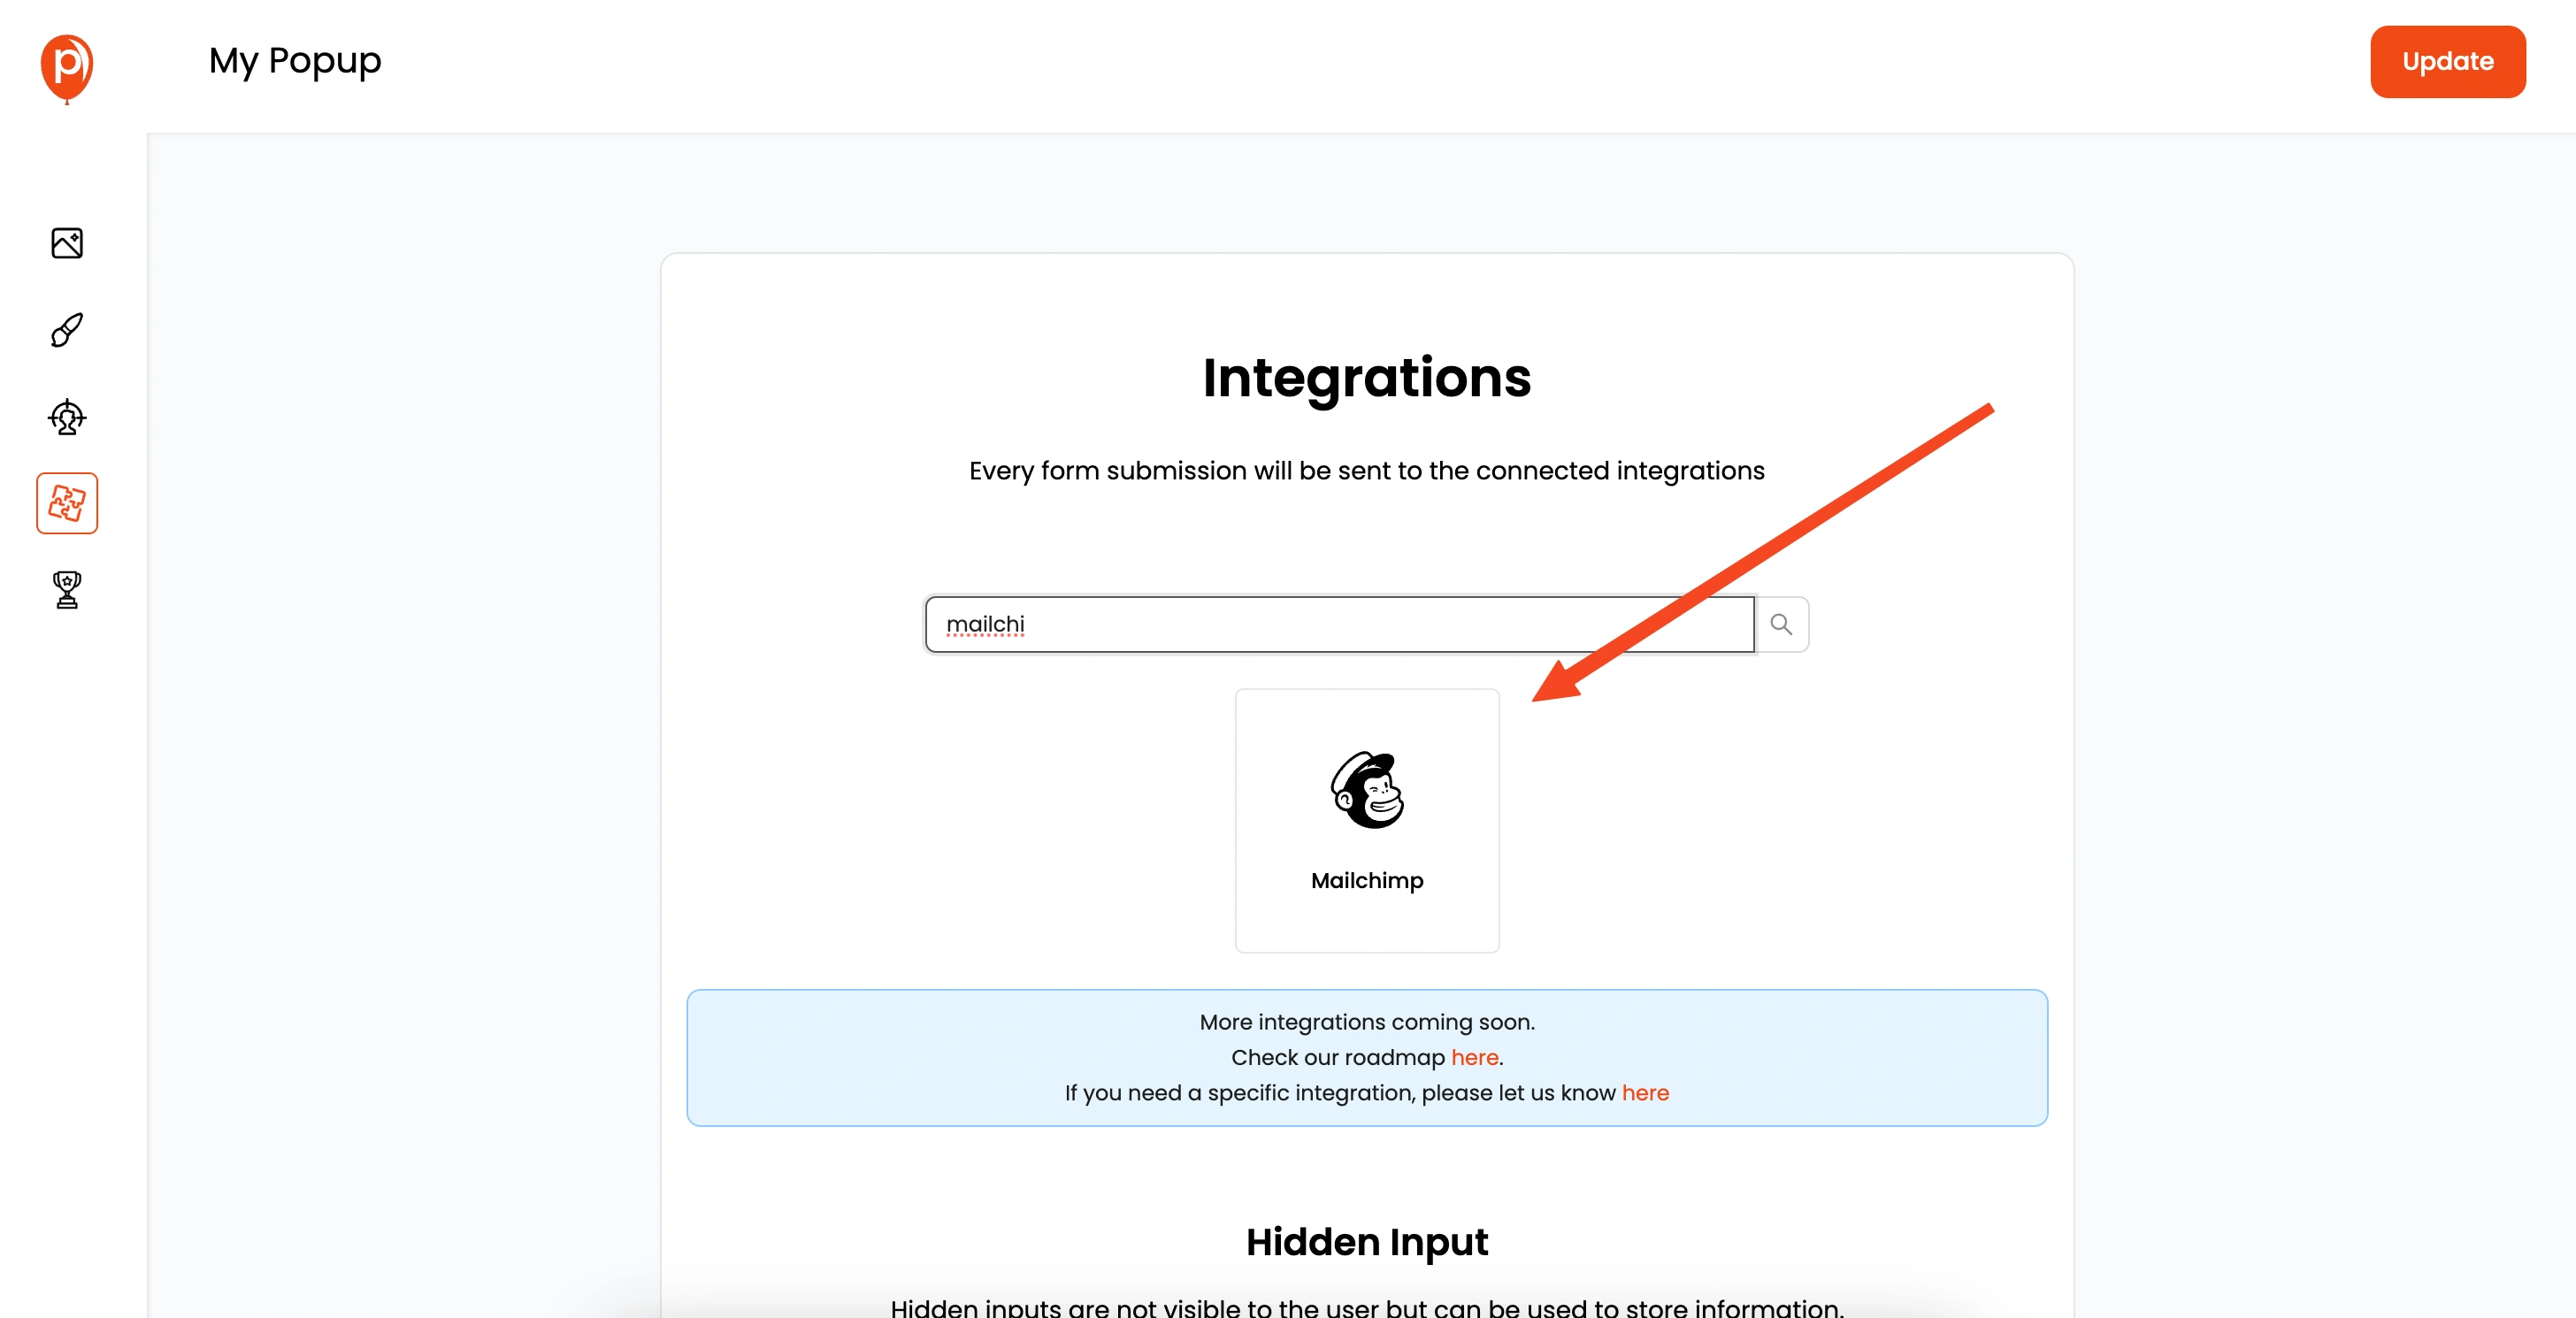
Click ‘Next’ again to head over to the ‘Integrations’ section. This is where you'll link your Poper popup directly to your Mailchimp account. Look for Mailchimp in the list of available integrations and select it.
Step 8: Authorize Your Mailchimp Account
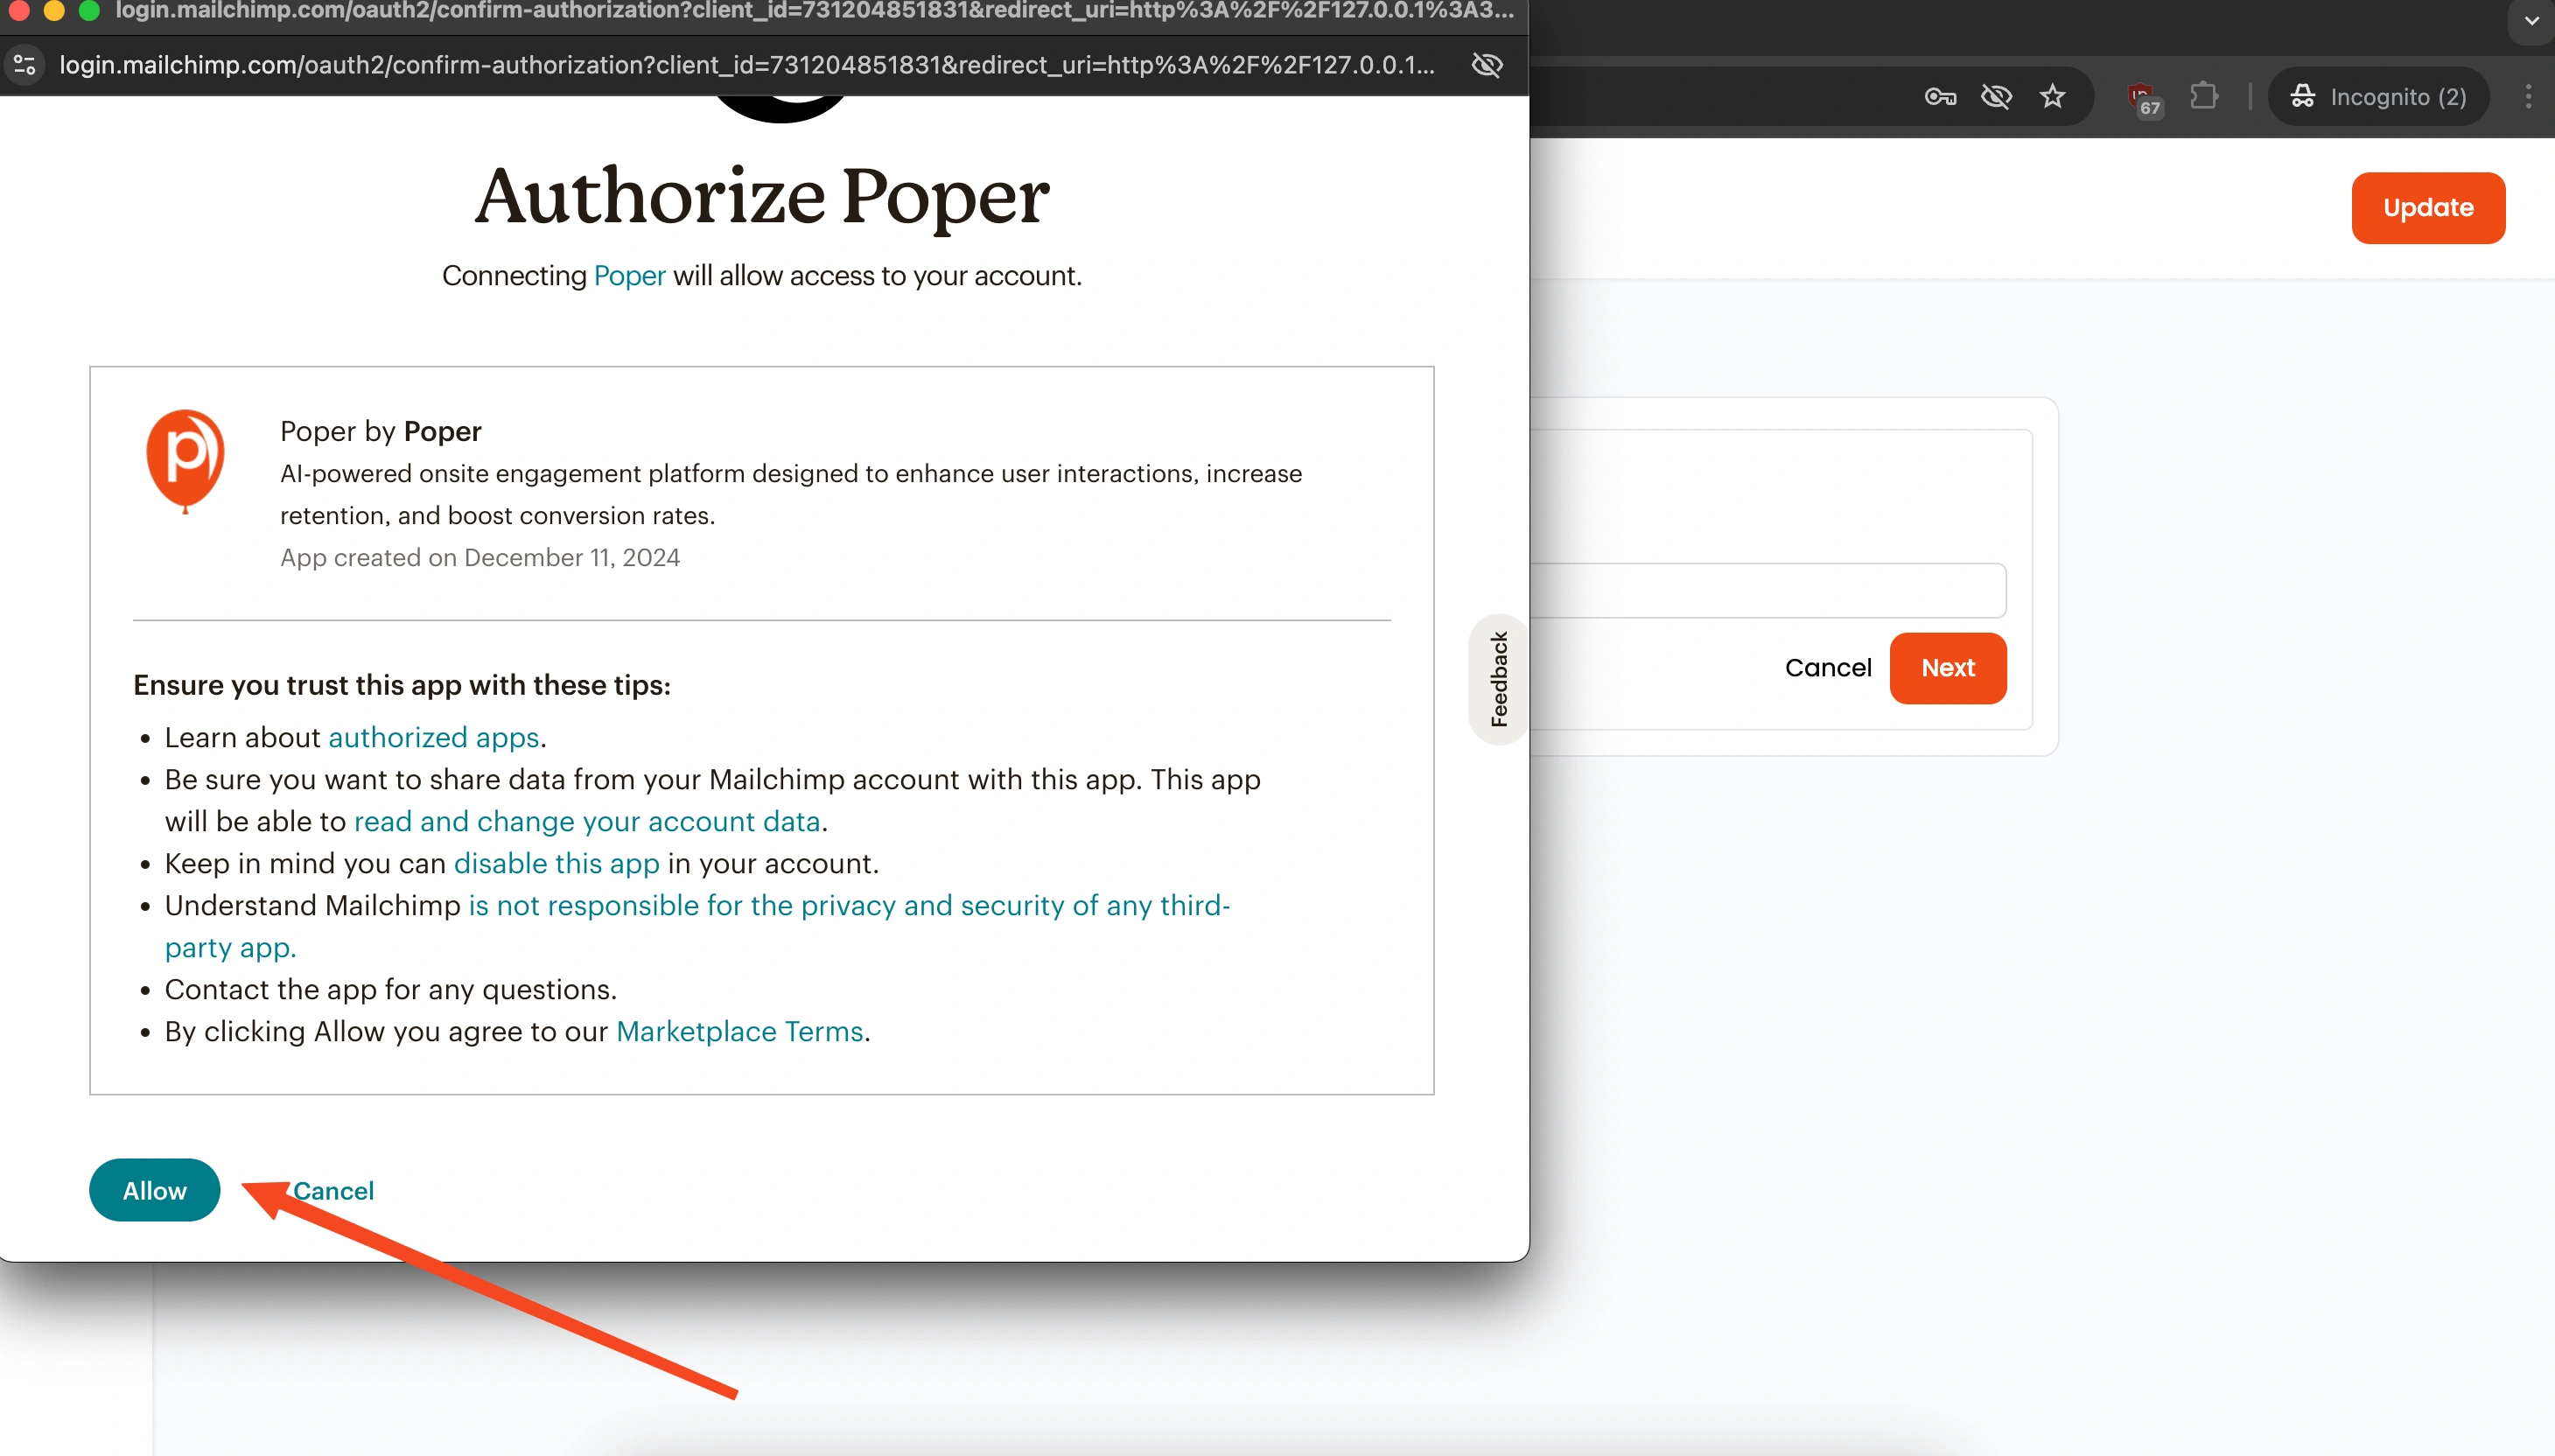
You’ll be prompted to enter an account name for this connection (just for your reference within Poper) and then click ‘Next.’
Poper will then guide you to log in to your Mailchimp account. This securely authorizes Poper to send data to your Mailchimp lists.
Step 9: Choose Your Mailchimp List and Assign Tags
Once connected, you’ll need to select the specific Mailchimp audience (list) where you want your new subscribers to be added.
This is also a great place to assign tags to these contacts. Tags are super useful for segmenting your audience later on in Mailchimp, perhaps based on how they signed up.
Step 10: Map Your Poper Fields to Mailchimp
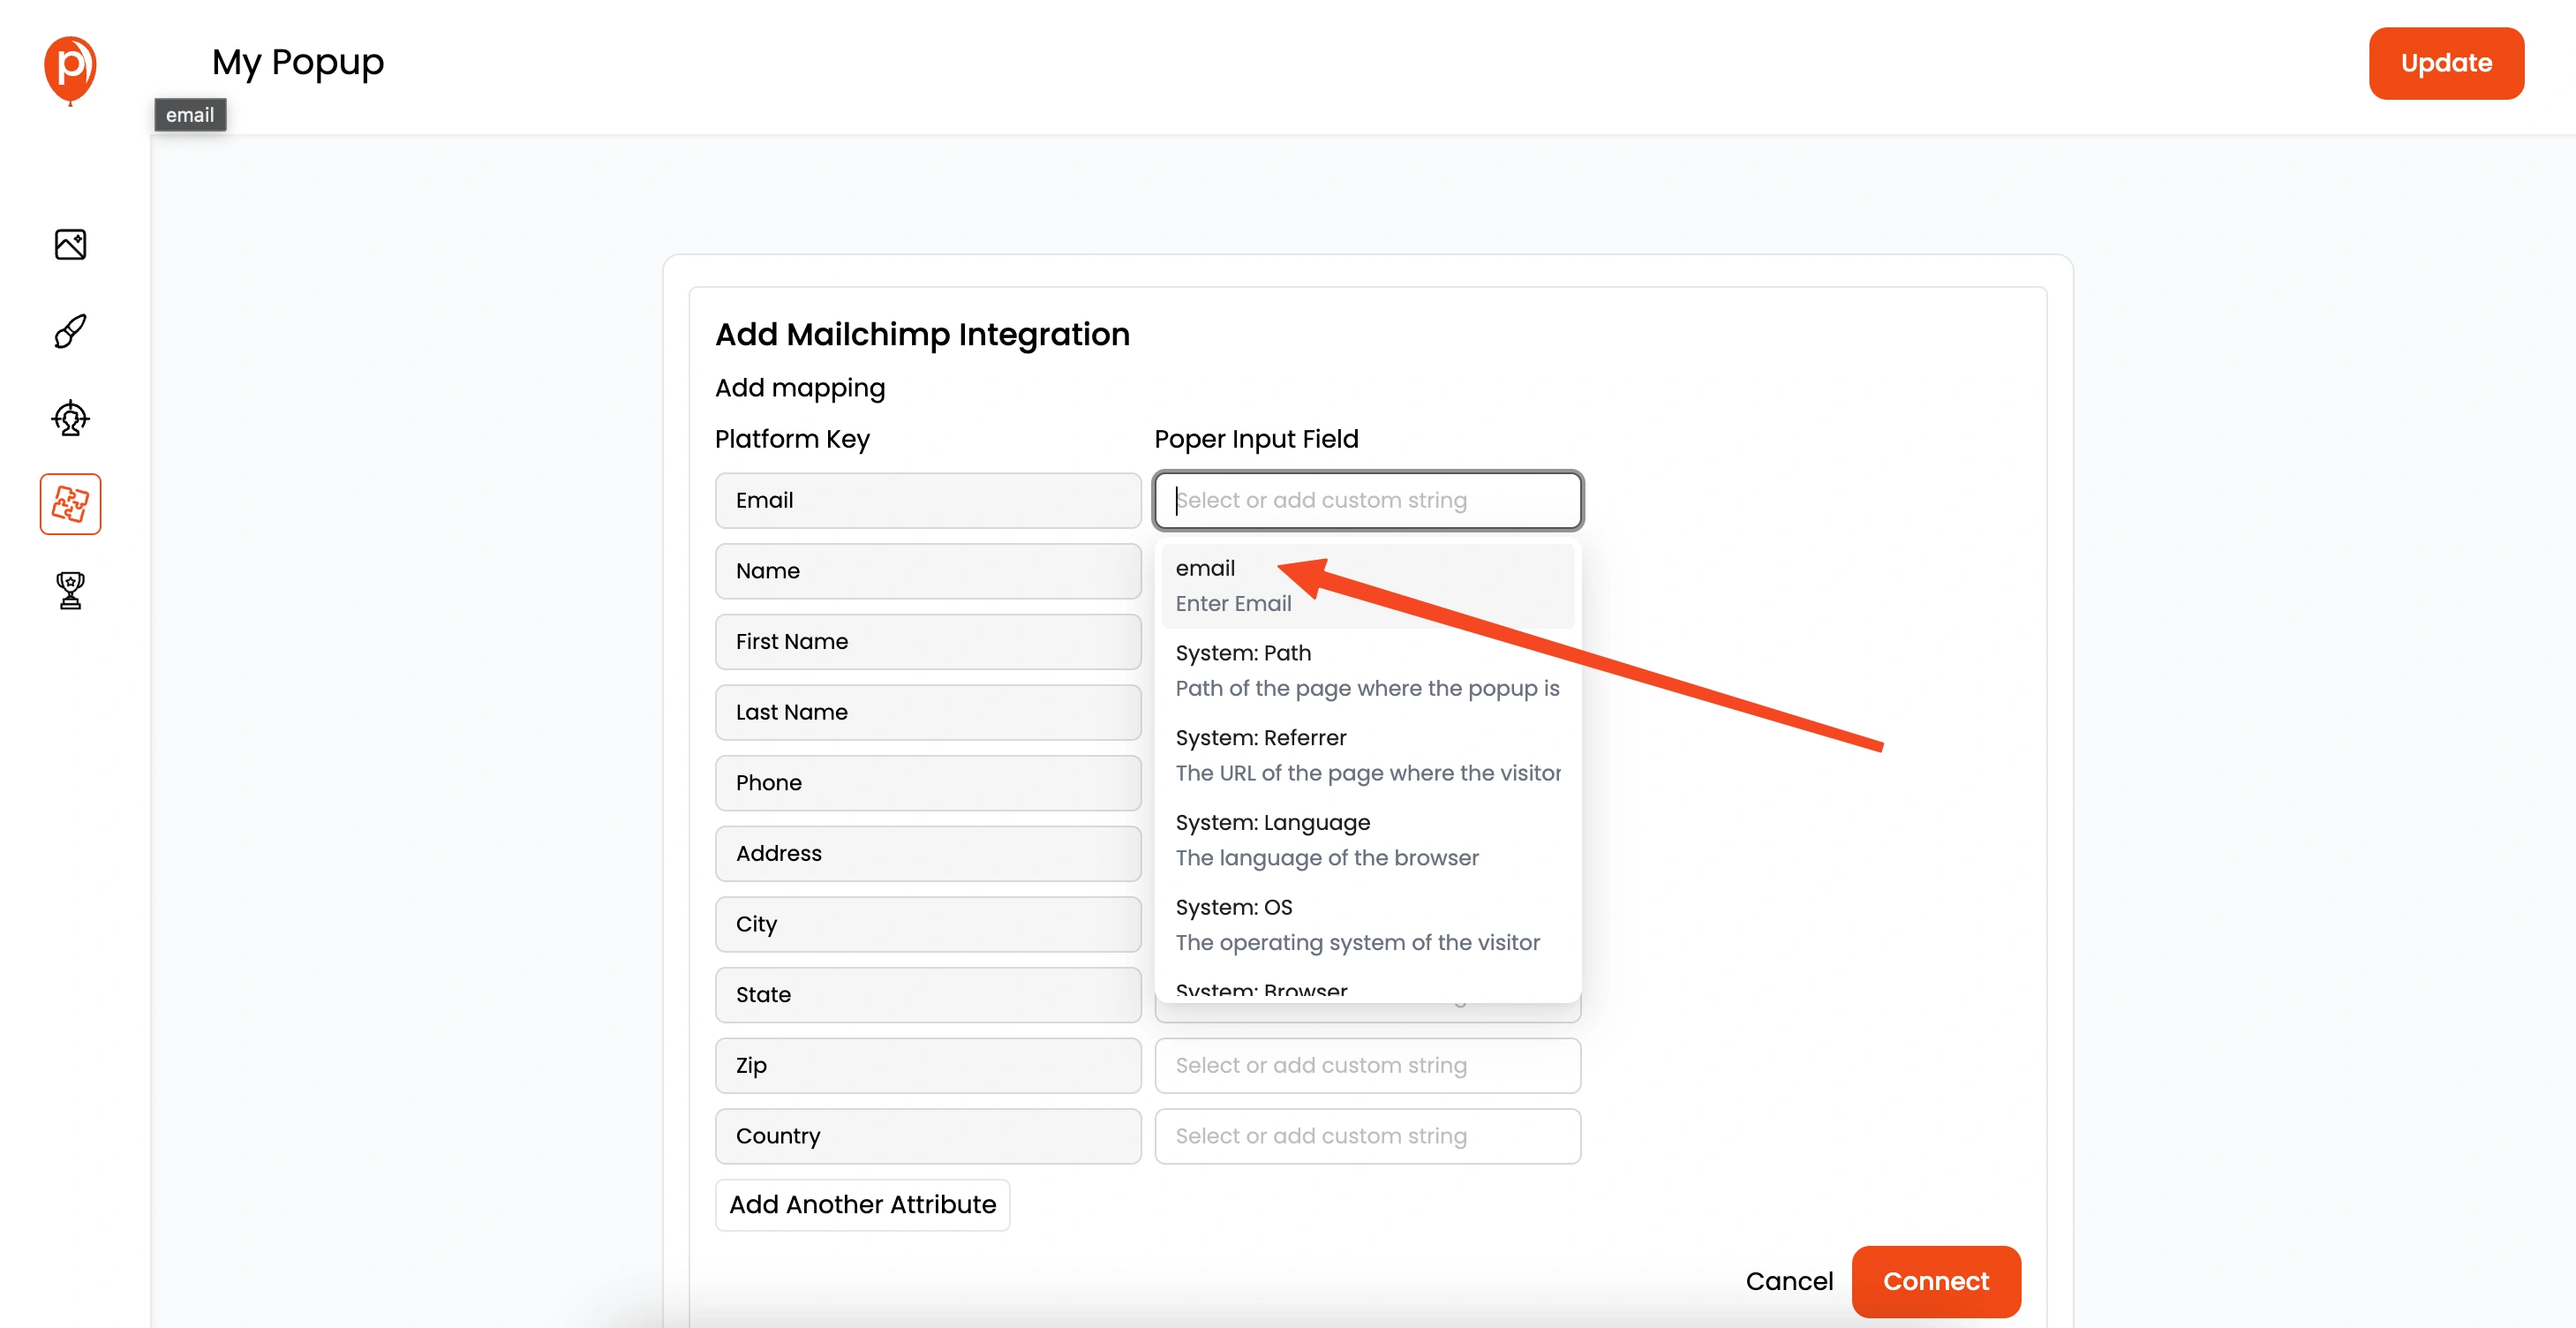
Next, you'll map the fields from your Poper popup (like 'Email', 'Name', etc.) to the corresponding fields in Mailchimp. This ensures the information collected through your Poper popup goes to the right place in your Mailchimp contacts.
If you need a more detailed walkthrough of the Mailchimp integration, we have a guide right here: https://support.poper.ai/en/articles/10095484-mailchimp-integration.
Step 11: Save and Publish Your Popup

With all the settings configured, it's time to hit ‘Save & Publish.’ This makes your popup live and ready to be triggered on your website once you’ve added the Poper installation code.
Step 12: Get Your Poper Installation Code
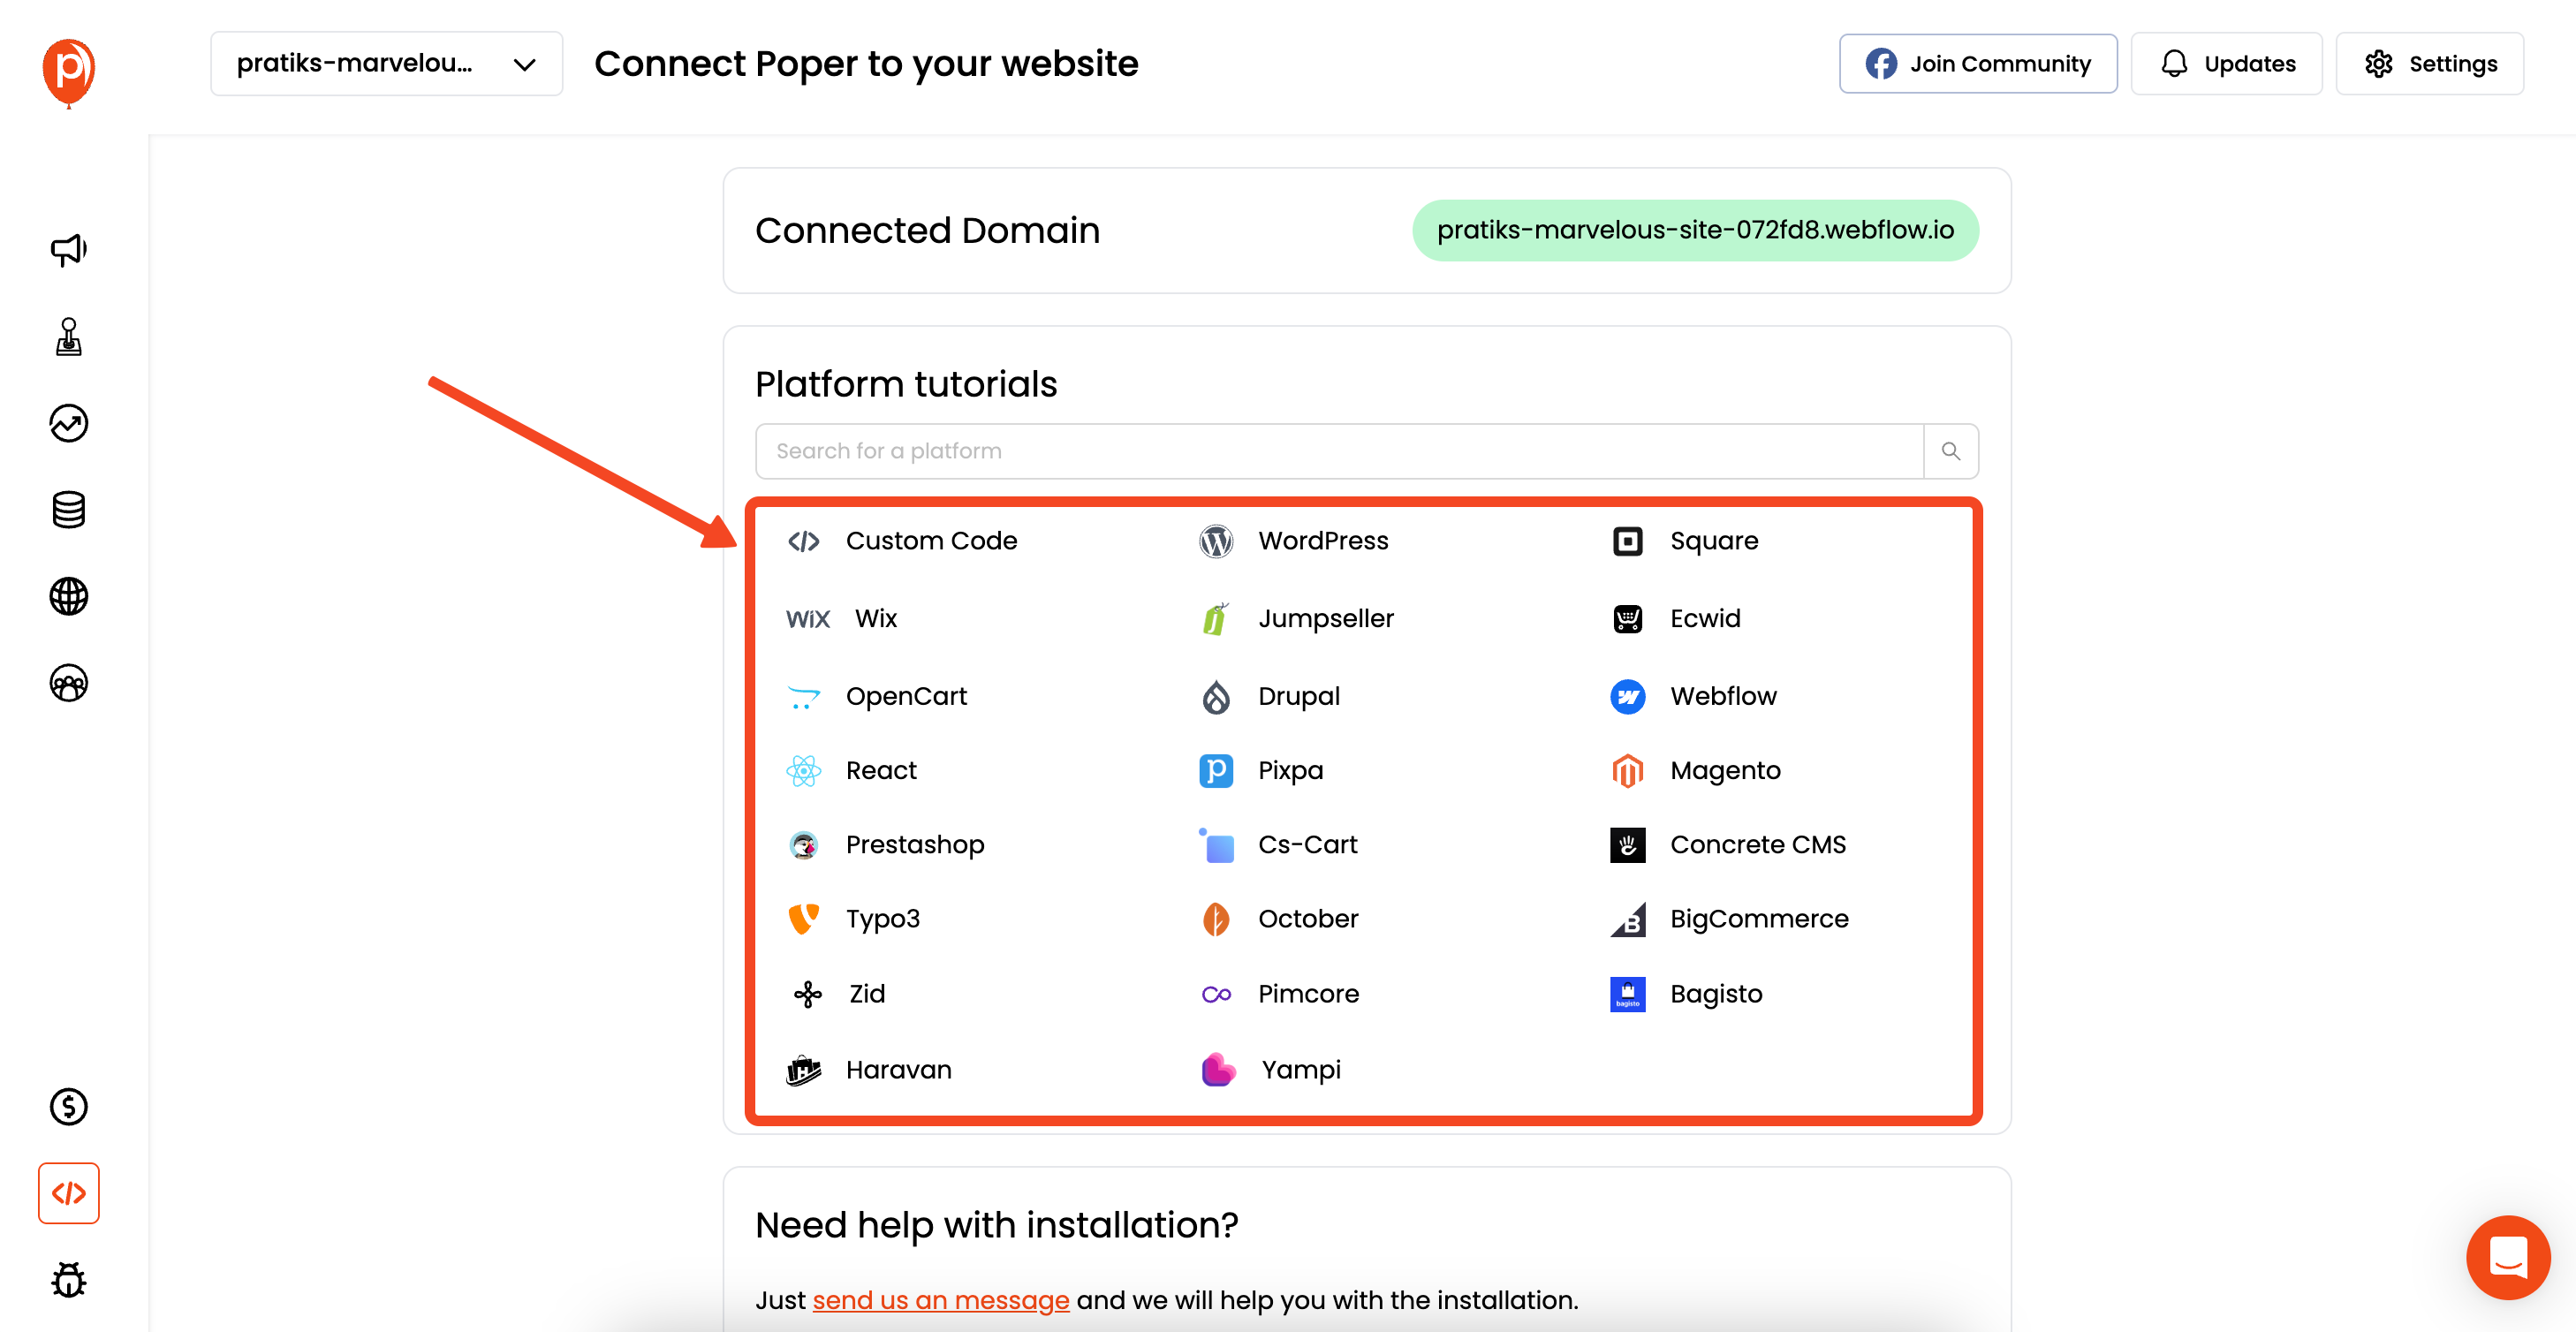
Now, let's get Poper onto your HTML website. In your Poper dashboard, find the ‘Code’ section, usually in the left navigation bar.
Click on it and select the ‘Custom Code’ option. You’ll see a snippet of code – copy this. This code allows Poper to work its magic on your site.
Step 13: Add the Poper Code to Your HTML Website
Go into your HTML website's code. You'll need to paste the Poper code you just copied into the <head> section of your website.
If your site uses a common header file (like header.php or a similar template include), you can just add it there once. If not, you’ll need to add it to the <head> section of each index.html page where you want Poper to operate.
Step 14: Save, Deploy, and Test Your Setup
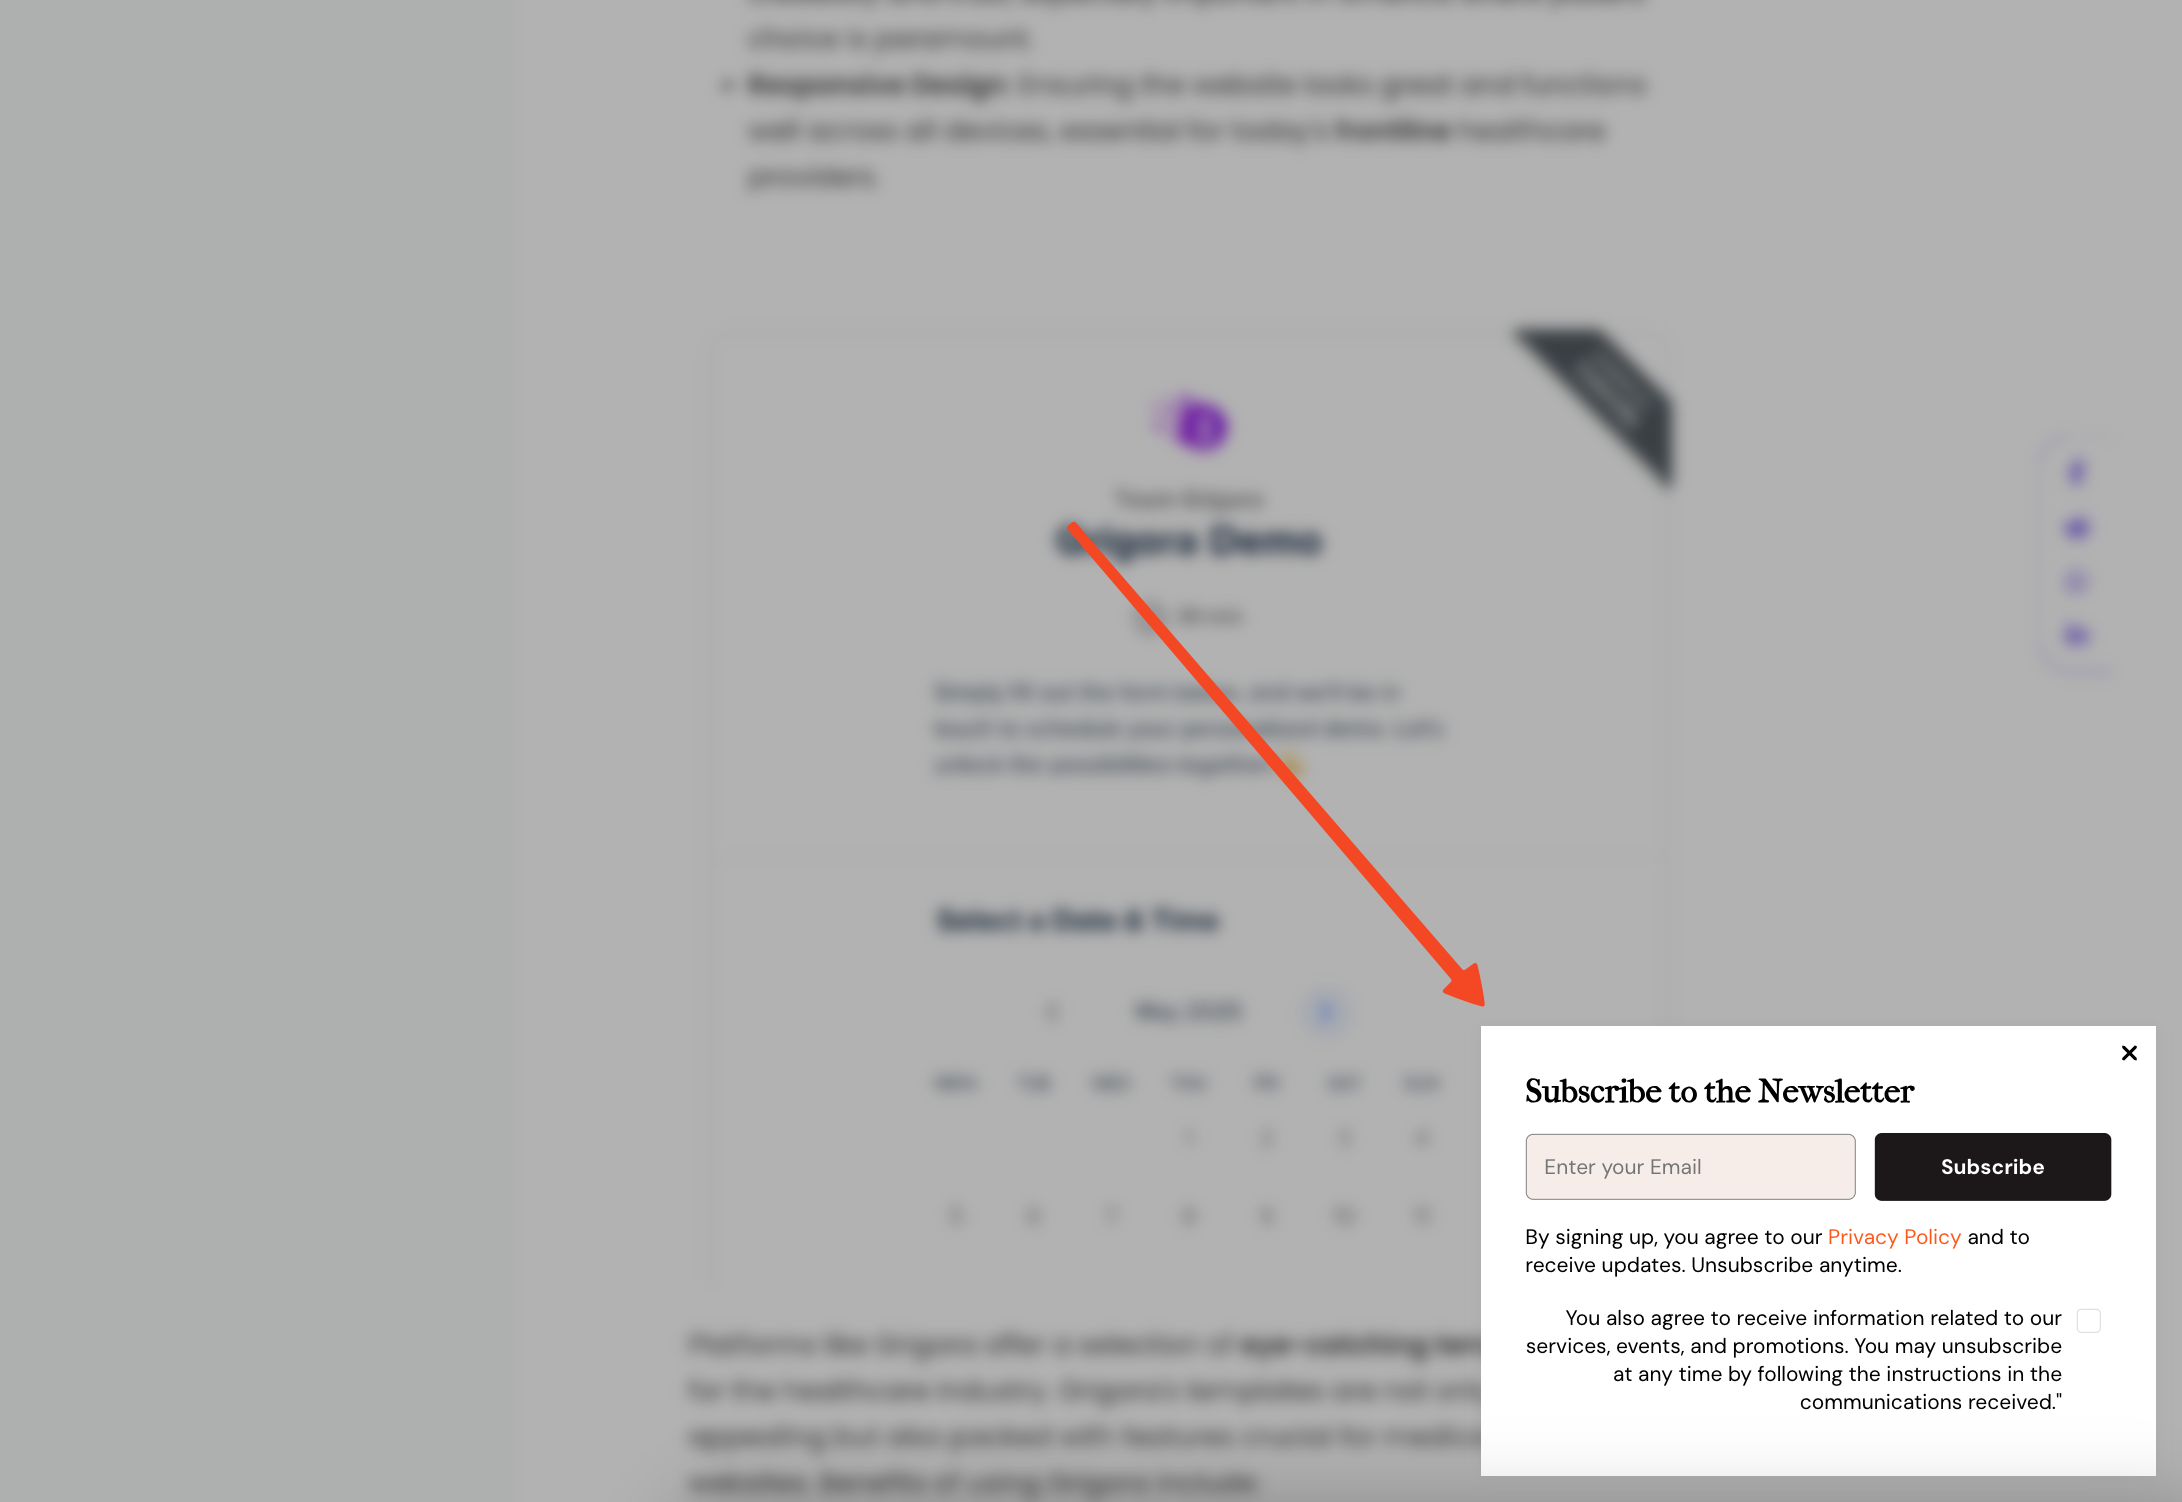
Finally, save the changes to your HTML files and deploy them to your web server. Then, the most important part: test it out! Go to your website, find the button you targeted, click it, and make sure your awesome new Mailchimp popup appears as expected. Also, try submitting the form to ensure the lead makes it into your Mailchimp list.
And that’s it! You’ve now got a Mailchimp-connected popup that triggers precisely when you want it to, all thanks to setting it up through Poper.
This gives you much more control over how you engage visitors and grow your subscriber list. If you run into any questions, our support team is always here to help!
Method 2: Triggering Mailchimp Embedded Forms on Button Click (Custom Code)
If you prefer not to use a third-party popup tool or want a simpler reveal of a standard Mailchimp embedded form, you can use a bit of HTML and JavaScript.
Step 1: Get Your Mailchimp Embedded Form Code
In Mailchimp, go to "Audience" -> "Signup forms."
Select "Embedded forms."
Customize your form (e.g., "Unstyled" or "Classic" often work best for this).
Copy the provided HTML code.
Step 2: Add the Mailchimp Form Code and a Trigger Button to Your HTML
Paste the Mailchimp form code into your HTML where you want it (it will be hidden initially). Add a button that will trigger it.
<!-- Your Trigger Button --><button id="showMailchimpFormBtn">Subscribe to Our Newsletter</button> <!-- Mailchimp Embedded Form Code (initially hidden) --><div id="mailchimpFormContainer" style="display:none;"> <!-- Paste Mailchimp's generated form code here --> <!-- Example structure (yours will be more complex): --> <!-- <div id="mc_embed_signup"> ... form content ... </div> --></div>
Step 3: Add JavaScript to Show the Form on Button Click
Add the following JavaScript to your page, preferably just before the closing </body> tag, or in a linked .js file.
<script>document.addEventListener('DOMContentLoaded', function() { const triggerButton = document.getElementById('showMailchimpFormBtn'); const formContainer = document.getElementById('mailchimpFormContainer'); if (triggerButton && formContainer) { triggerButton.addEventListener('click', function() { // Toggle display or just show: if (formContainer.style.display === 'none' || formContainer.style.display === '') { formContainer.style.display = 'block'; // Or 'flex', 'inline-block' depending on your layout // Optional: Scroll to the form // formContainer.scrollIntoView({ behavior: 'smooth' }); } else { // Optional: Allow button to also hide the form // formContainer.style.display = 'none'; } }); }});</script>document.addEventListener('DOMContentLoaded', function() { const triggerButton = document.getElementById('showMailchimpFormBtn'); const formContainer = document.getElementById('mailchimpFormContainer'); if (triggerButton && formContainer) { triggerButton.addEventListener('click', function() { // Toggle display or just show: if (formContainer.style.display === 'none' || formContainer.style.display === '') { formContainer.style.display = 'block'; // Or 'flex', 'inline-block' depending on your layout // Optional: Scroll to the form // formContainer.scrollIntoView({ behavior: 'smooth' }); } else { // Optional: Allow button to also hide the form // formContainer.style.display = 'none'; } }); }});
Step 4: Style as Needed (CSS)
You might want to add CSS to style your button and the form container. The Mailchimp form itself might inherit some styles or you can override them.
How this works:
The Mailchimp form is initially hidden using style="display:none;". The JavaScript listens for a click on your button (showMailchimpFormBtn). When clicked, it changes the display style of the mailchimpFormContainer to block, making the form visible.
This method is more technical but gives you a direct way to use Mailchimp's own embedded forms triggered by a button.
Best Practices for Button-Triggered Mailchimp Popups
Clear Call-to-Action (CTA): Your button text should clearly indicate what will happen (e.g., "Subscribe & Get Ebook," "Join Our List").
Value Proposition: Ensure the popup/form clearly states the benefit of signing up.
Minimal Fields: Ask only for essential information (email is often enough initially).
Design Consistency: Match the popup/form design with your website's branding.
Mobile Responsiveness: Ensure your popup and the trigger mechanism work flawlessly on all devices.
Test Thoroughly: Check on different browsers and devices.
Troubleshooting Common Issues
Popup/Form Not Appearing:
- Poper: Double-check the Poper installation script is in your <head>. Verify the CSS selector for the button trigger is correct in Poper's settings and matches your button's class/ID.
- Custom Code: Check for JavaScript errors in your browser's console (F12). Ensure IDs match between HTML and JavaScript.
Poper: Double-check the Poper installation script is in your <head>. Verify the CSS selector for the button trigger is correct in Poper's settings and matches your button's class/ID.
Custom Code: Check for JavaScript errors in your browser's console (F12). Ensure IDs match between HTML and JavaScript.
Styling Conflicts: Your website's CSS might interfere with the popup/form styling. Use browser developer tools to inspect and adjust CSS.
Leads Not Syncing to Mailchimp (Poper): Re-check the Mailchimp integration settings in Poper, field mapping, and ensure the correct list is selected.
Conclusion
Triggering a Mailchimp popup or form on a button click is a smart strategy to boost your subscriber list with engaged users.
For maximum flexibility, design control, and easy integration without deep coding, using a dedicated tool like Poper is highly recommended. It simplifies the process of creating targeted, on-click Mailchimp popups.
Alternatively, for those comfortable with basic HTML/JavaScript, revealing a standard Mailchimp embedded form on a button click offers a direct, no-frills solution.
Choose the method that best suits your technical comfort and needs, and start converting more visitors into loyal subscribers!
Frequently Asked Questions (FAQ)
Can I trigger a Mailchimp popup on any button on my HTML website?
Yes, with tools like Poper using CSS selectors, or with custom JavaScript, you can target virtually any button (or any clickable HTML element) on your site.
Does Mailchimp itself offer a direct "on button click" trigger for its popups?
Mailchimp's standard "Subscriber Popup" forms are primarily triggered by time, scroll, or exit intent. For specific button-click triggers, you typically need to use their embedded forms with custom code or a third-party tool like Poper.
Is Poper free to use for triggering Mailchimp popups?
Poper offers various plans, which may include a free tier with certain limitations or a trial period. Check Poper's current pricing page for details.
Do I need coding skills to use Poper for this?
No, Poper is designed to be user-friendly. You'll need to be able to identify a CSS class or ID for your button (which is basic HTML) and copy-paste the Poper installation script into your website's HTML. The rest is configured within the Poper interface.
Can I A/B test different button-triggered popups?
Advanced popup tools like Poper often include A/B testing capabilities, allowing you to test different designs or offers to see which performs best.

