
Hey there! One of the biggest challenges we all face is keeping visitors on our site. When someone decides to leave, it often feels like a lost opportunity. That’s exactly why I built the "Exit-Intent" trigger into Poper—it gives you one last chance to make a connection, and pairing it with Klaviyo is a fantastic way to grow your email list. Visitor retention strategies can further help reduce bounce rates and improve engagement. To discover more ways to capture and retain abandoning visitors, check out our in-depth guide on exit-intent popups.
Let’s walk through how to set up a campaign that shows a popup right when a user is about to leave your site, capturing their email directly into your Klaviyo account. Need more ideas for popups that boost sign-ups? Don’t miss our Klaviyo Signup Forms guide.
Step 1: Get Your Poper Account and Website Ready
First things first, you'll need a Poper account. If you don't have one, just sign up—it’s quick. Once you're in, the first thing we'll do is add your website domain. This tells Poper where your popups will live.
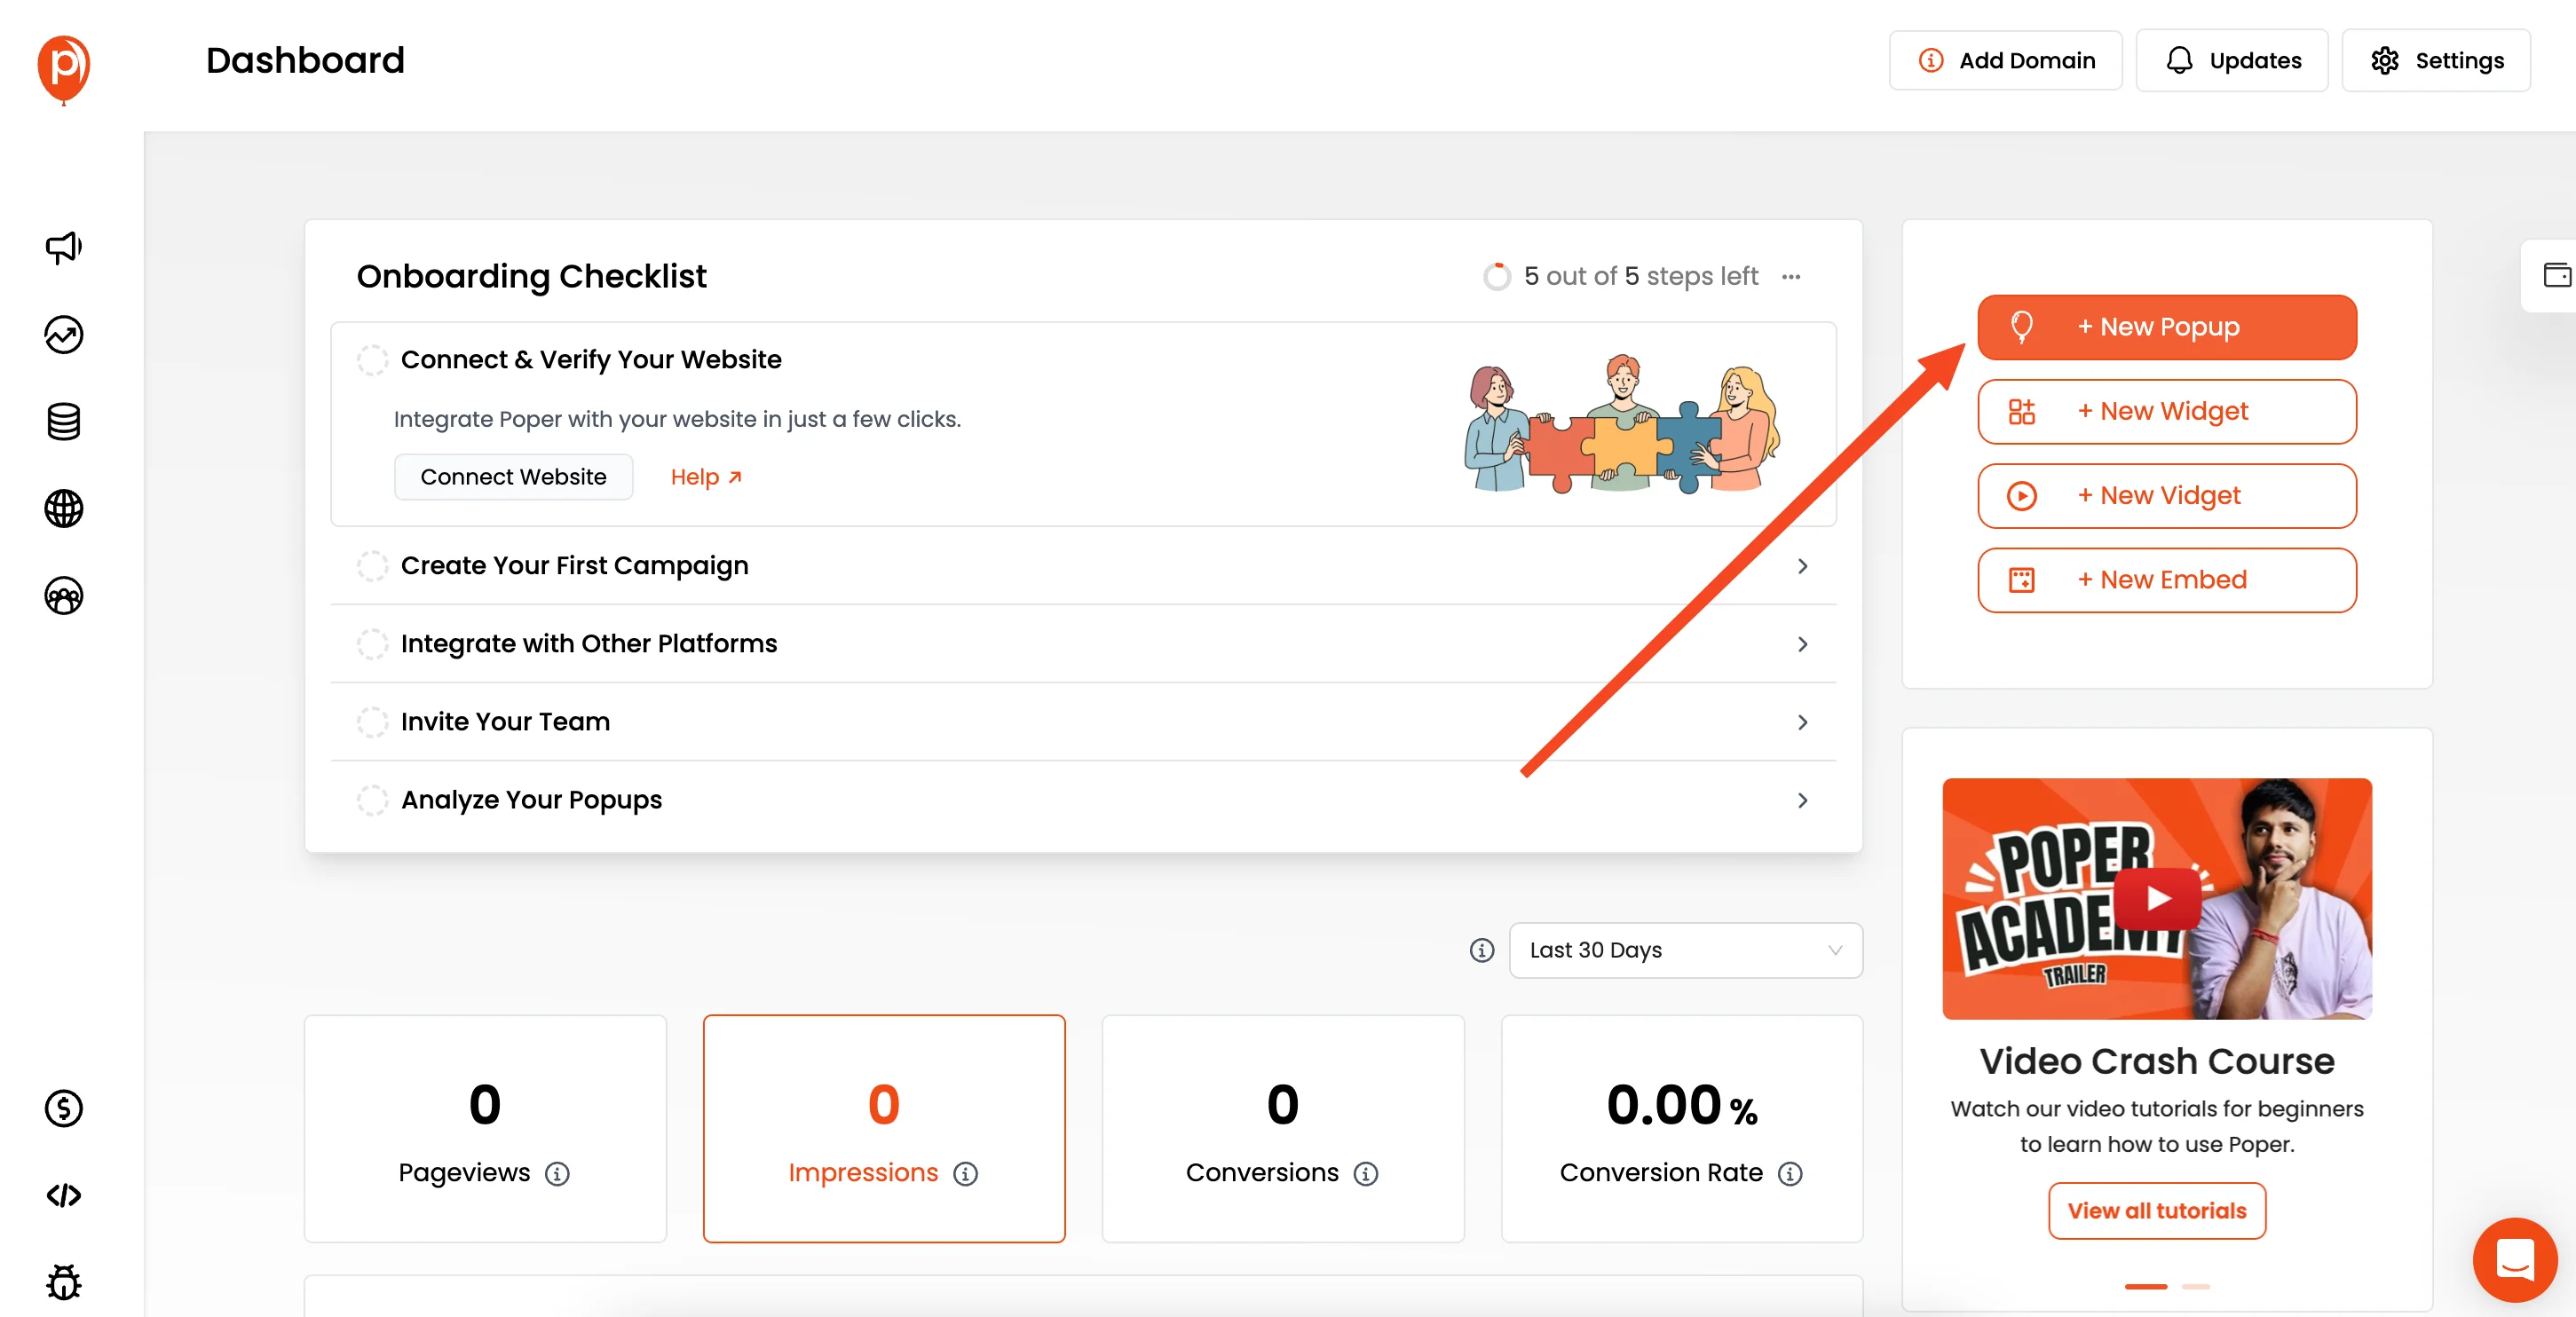
After that, hit the “New Popup” button to kick things off.
Step 2: Pick a Ready-Made Exit-Intent Template

I always suggest starting with a template. It saves a ton of time. Click on “Choose from Templates” and use the search bar to look for “Exit.” This will show you designs we’ve specifically created to re-engage visitors who are about to leave.
Make sure you choose a template that includes an email input field, as we need that to send leads to Klaviyo. A great one to start with is the Free Download Reminder Popup, but feel free to pick any that fits your offer. If you’re looking for even more ready-made designs, browse our Popup Template Library for a wide selection.
Step 3: Make the Popup Your Own
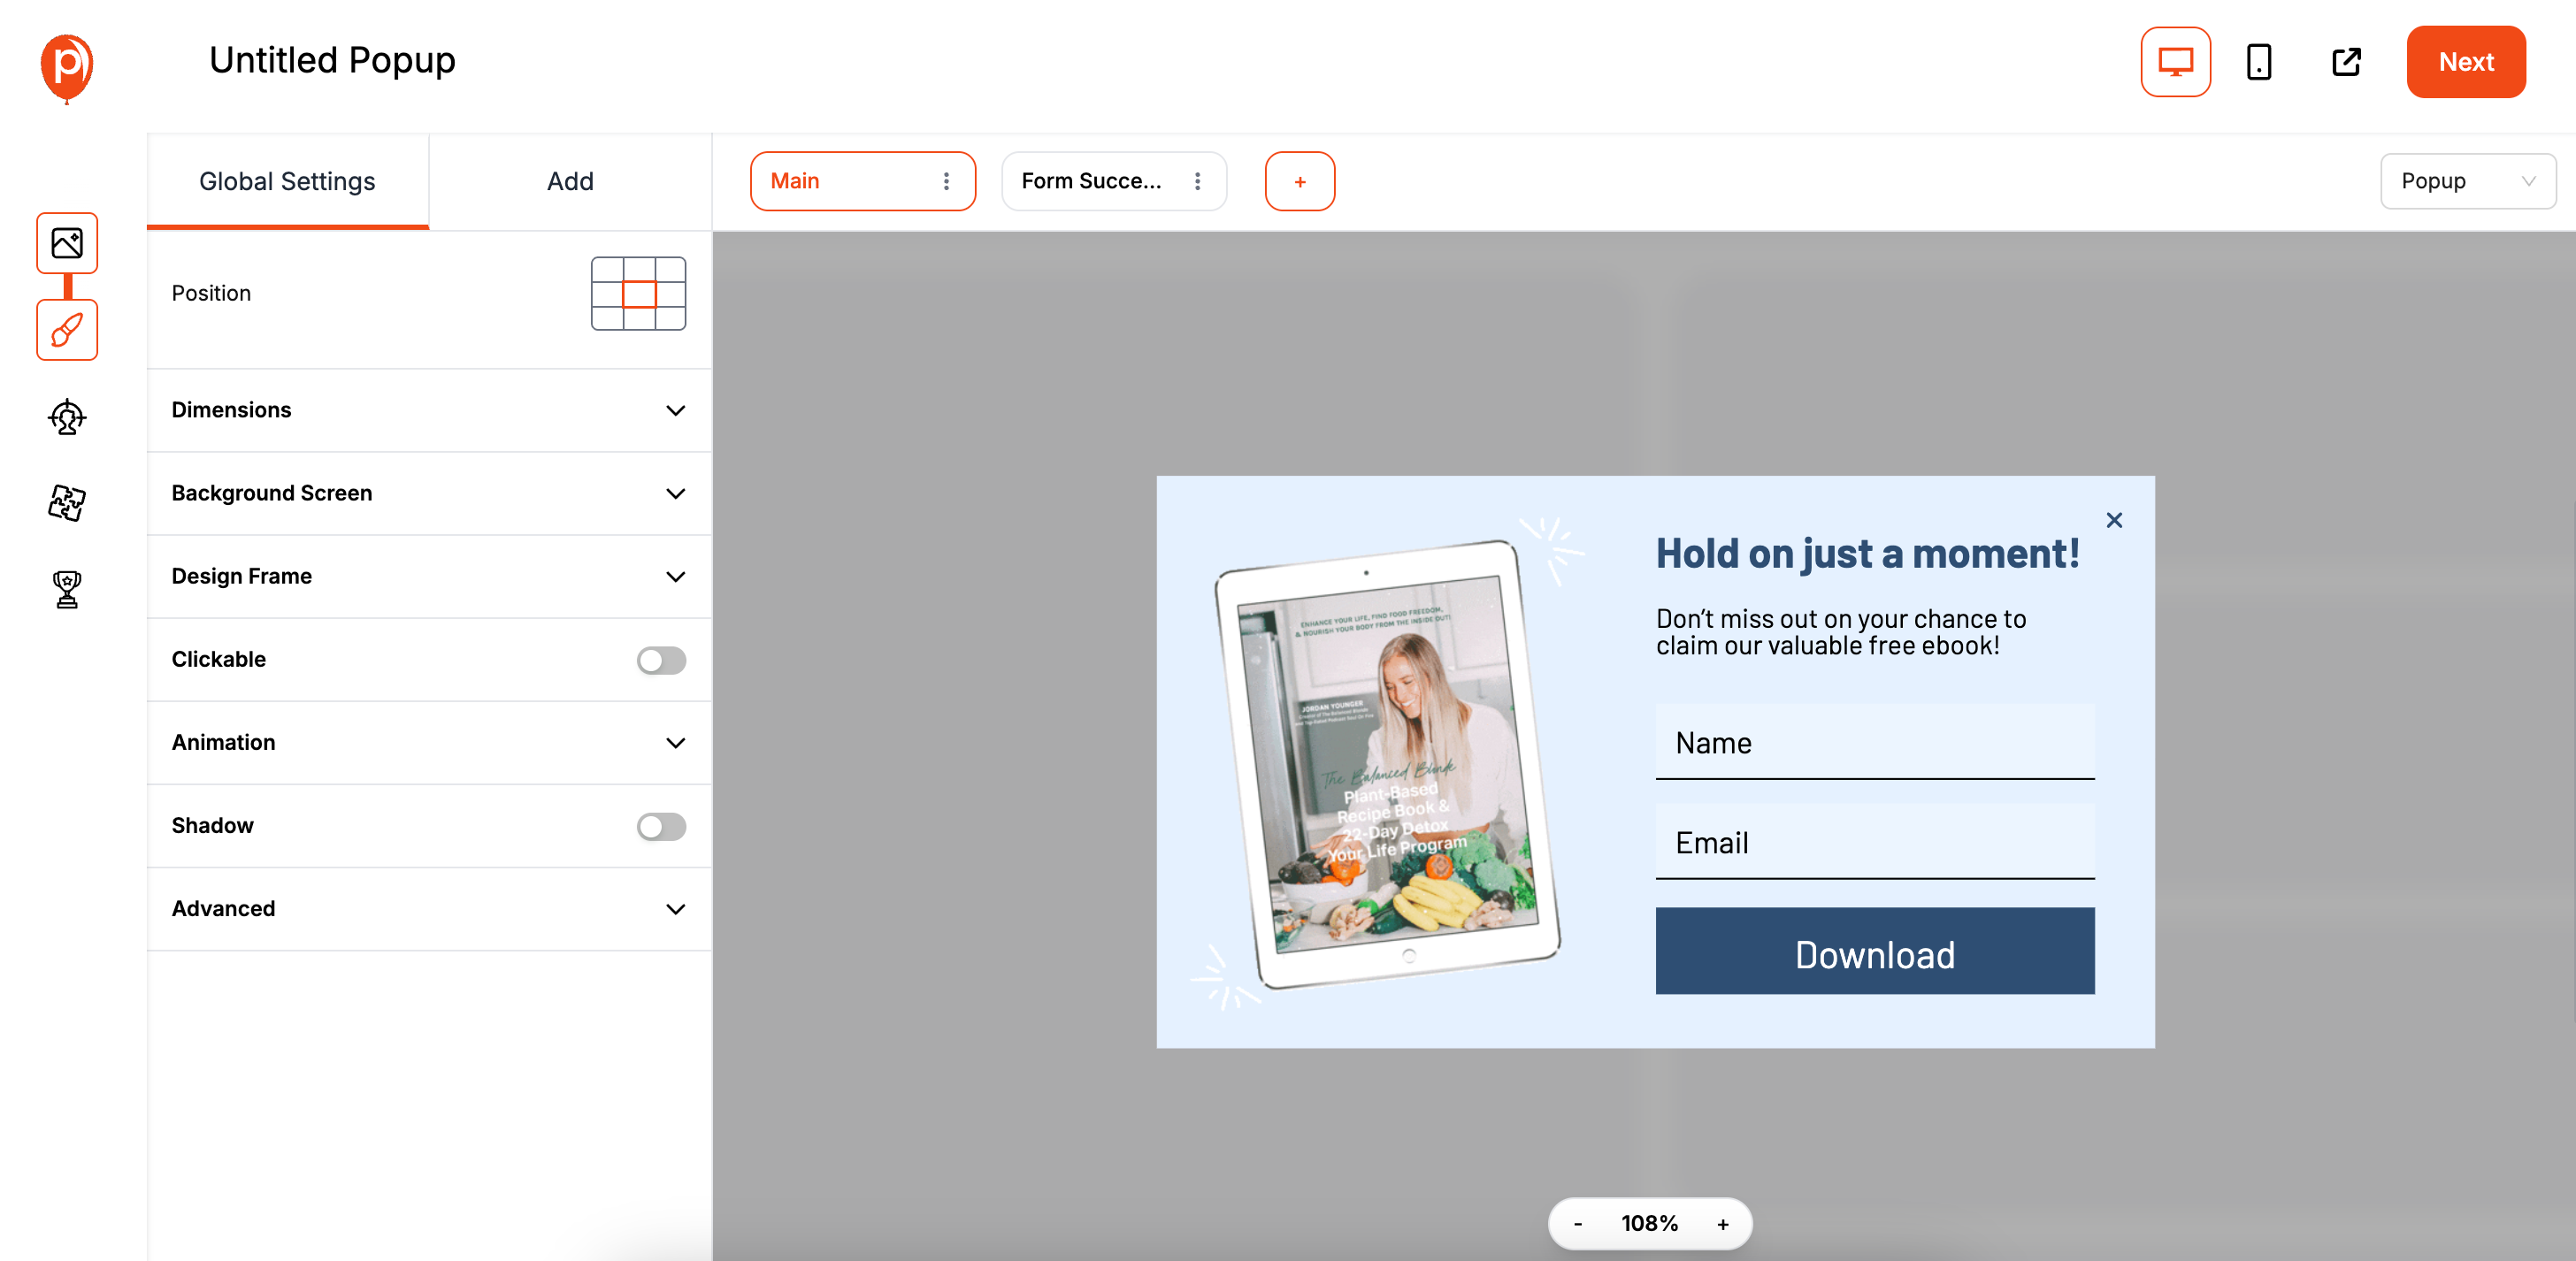
Now, let's make this template look like it belongs on your website. You can easily edit the text, change the fonts to match your brand, and adjust the color palette. A seamless design builds trust and makes the offer feel more authentic. Once you’re happy with how it looks, click “Next.”
Step 4: Choose the Exit-Intent Trigger
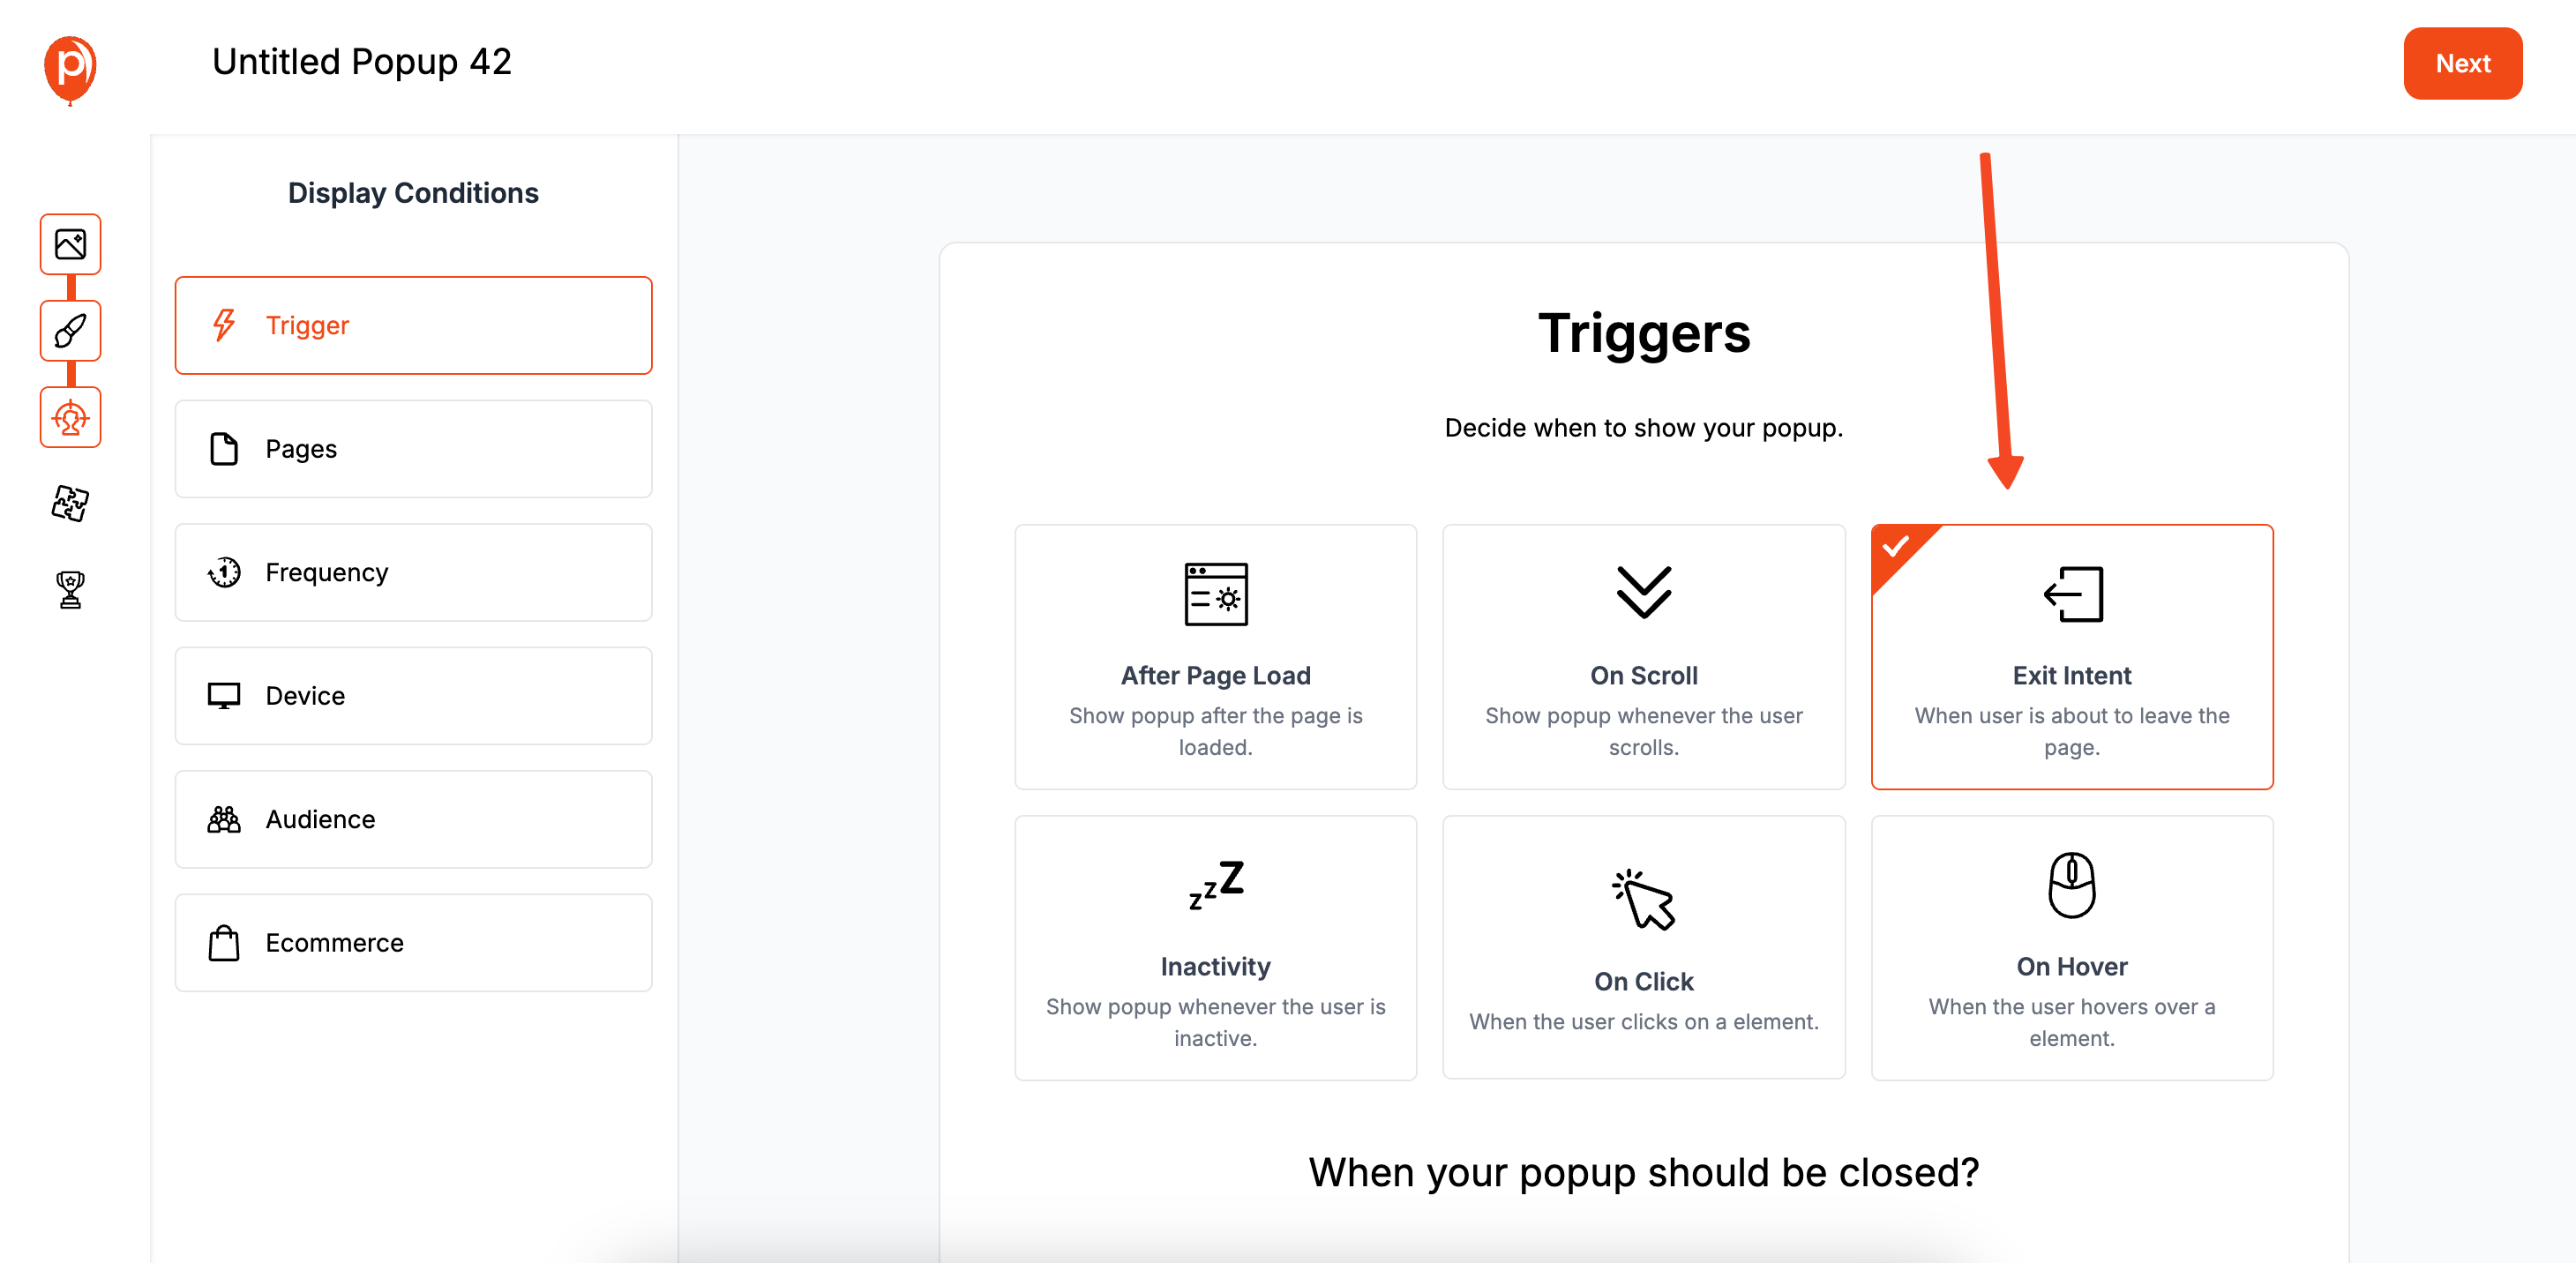
This is the magic step. On the “Display Conditions” screen, you’ll see several triggers. For this campaign, select “Exit Intent.”
This tells Poper to only show your popup when a visitor’s mouse movement suggests they are about to close the tab or hit the back button. It’s a powerful way to make an offer without interrupting their browsing experience.
Step 5: Link Your Popup to Your Klaviyo Account
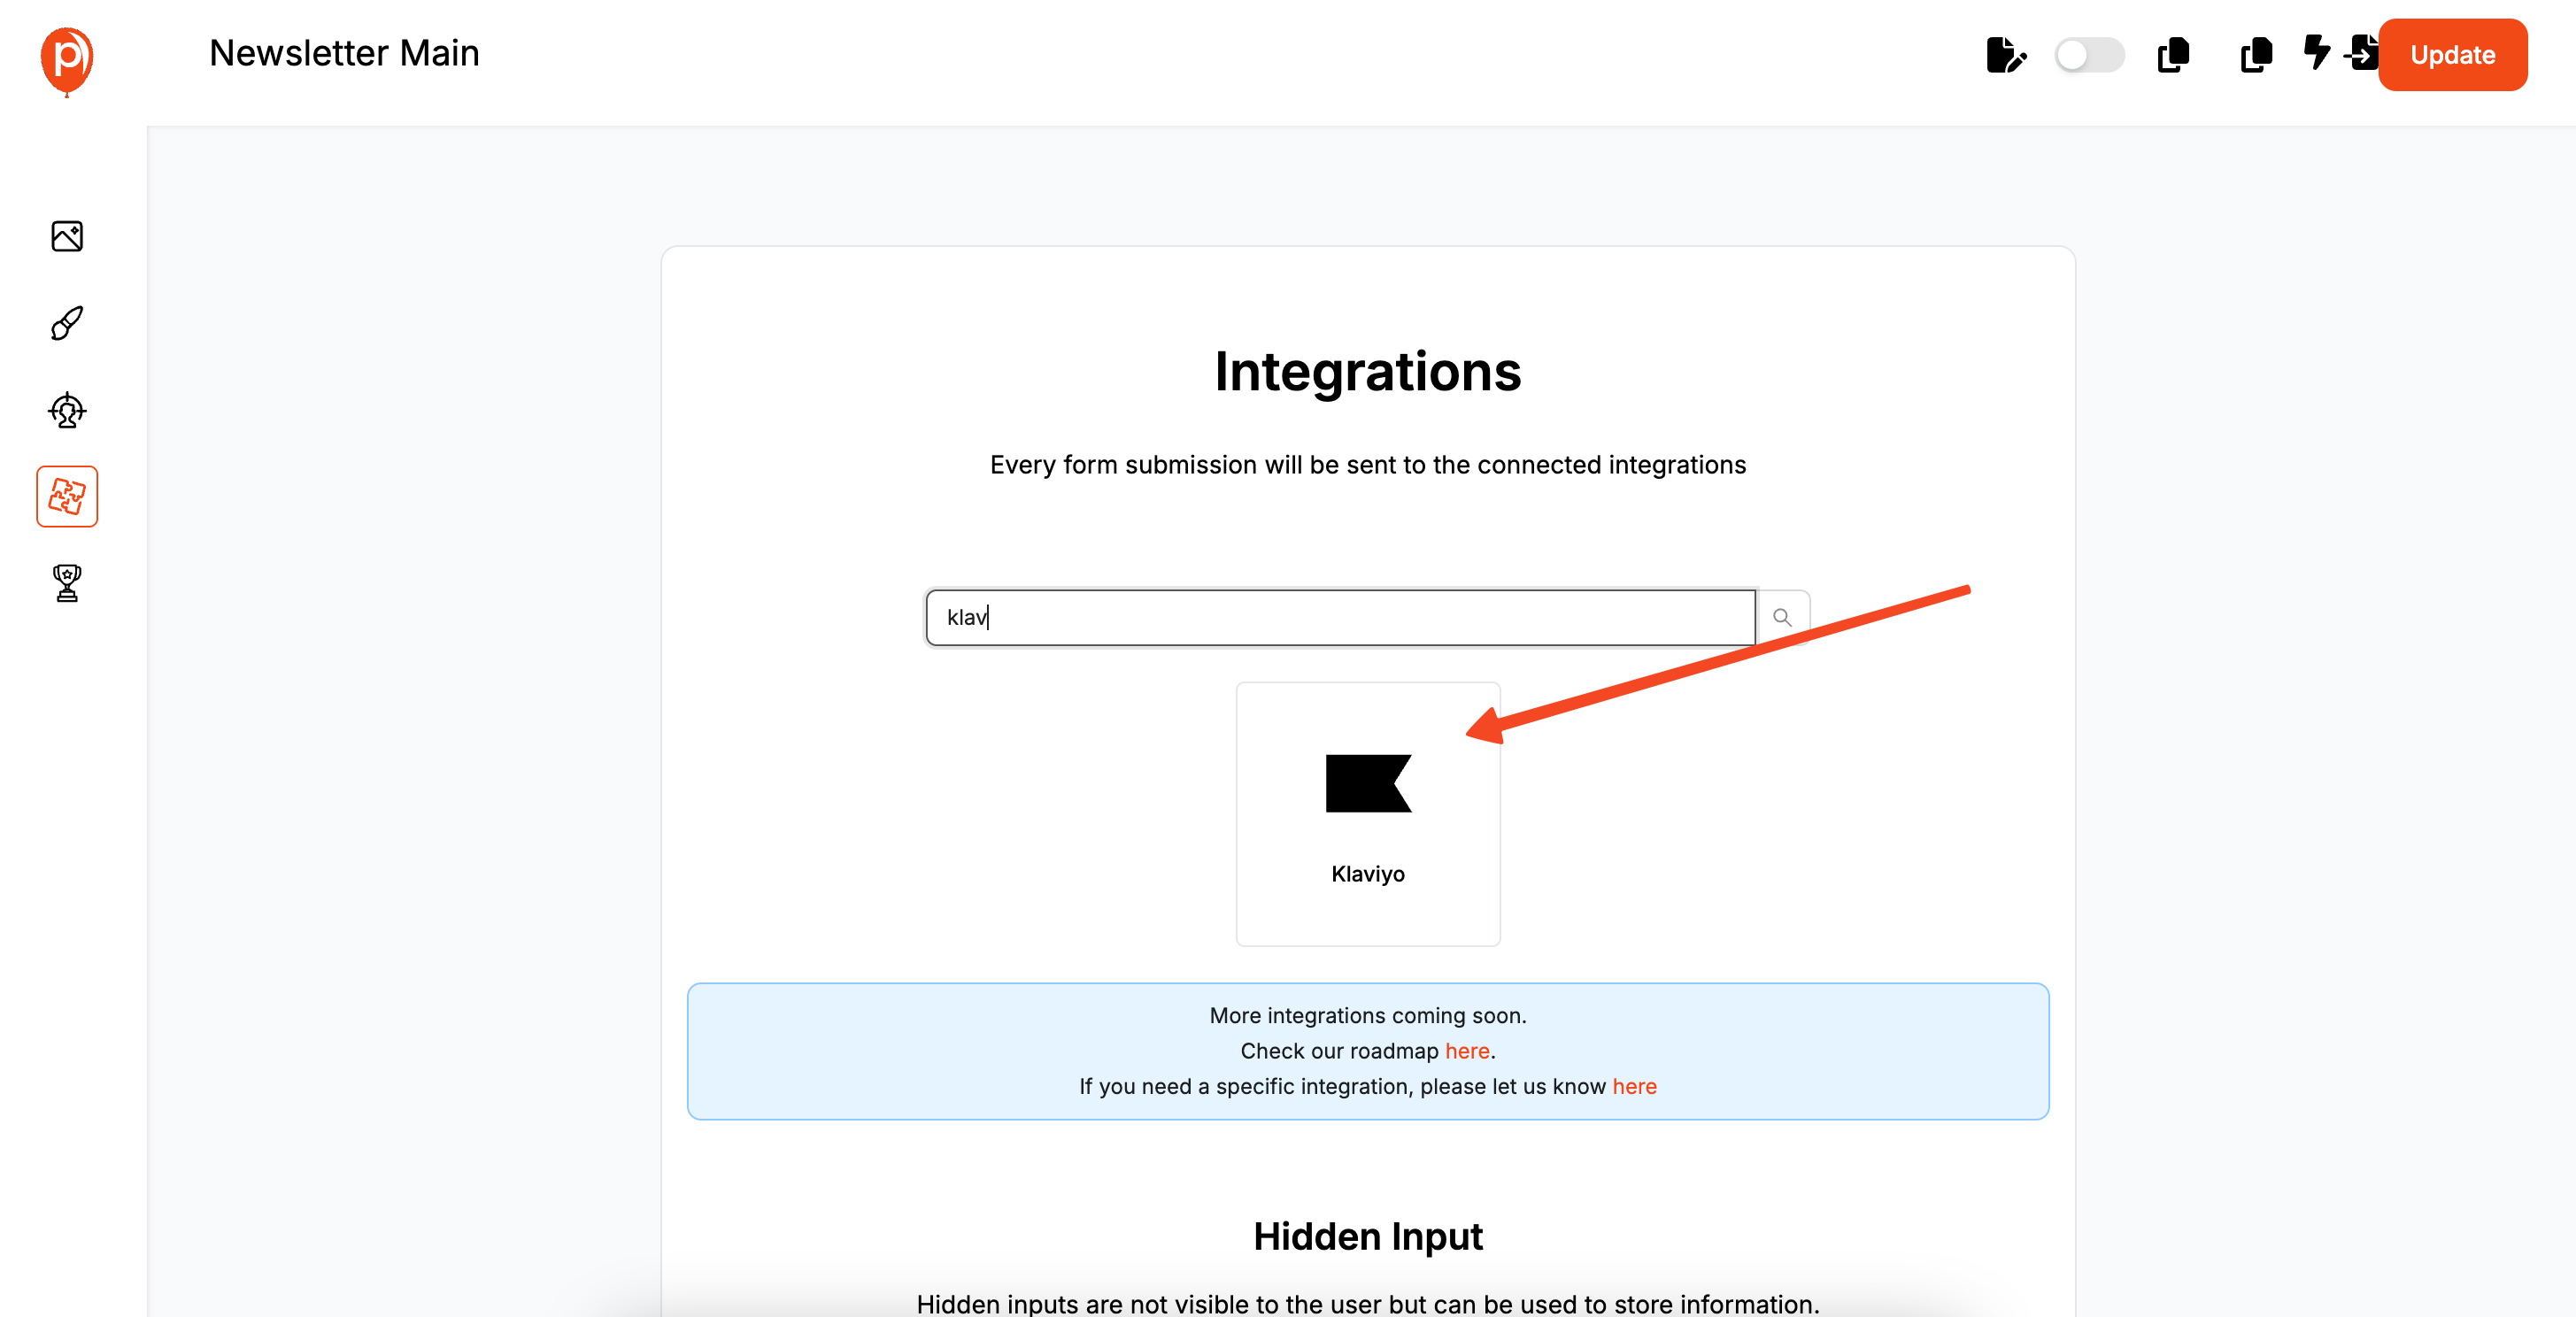
After setting the trigger, click “Next” to head over to the “Integrations” page. Find Klaviyo in the list and select it. We’ll ask for an account name—this is just for your reference—and then prompt you to log in to your Klaviyo account to create a secure connection. For step-by-step tips on connecting, check out our Connect Klaviyo with Poper Easy Guide.
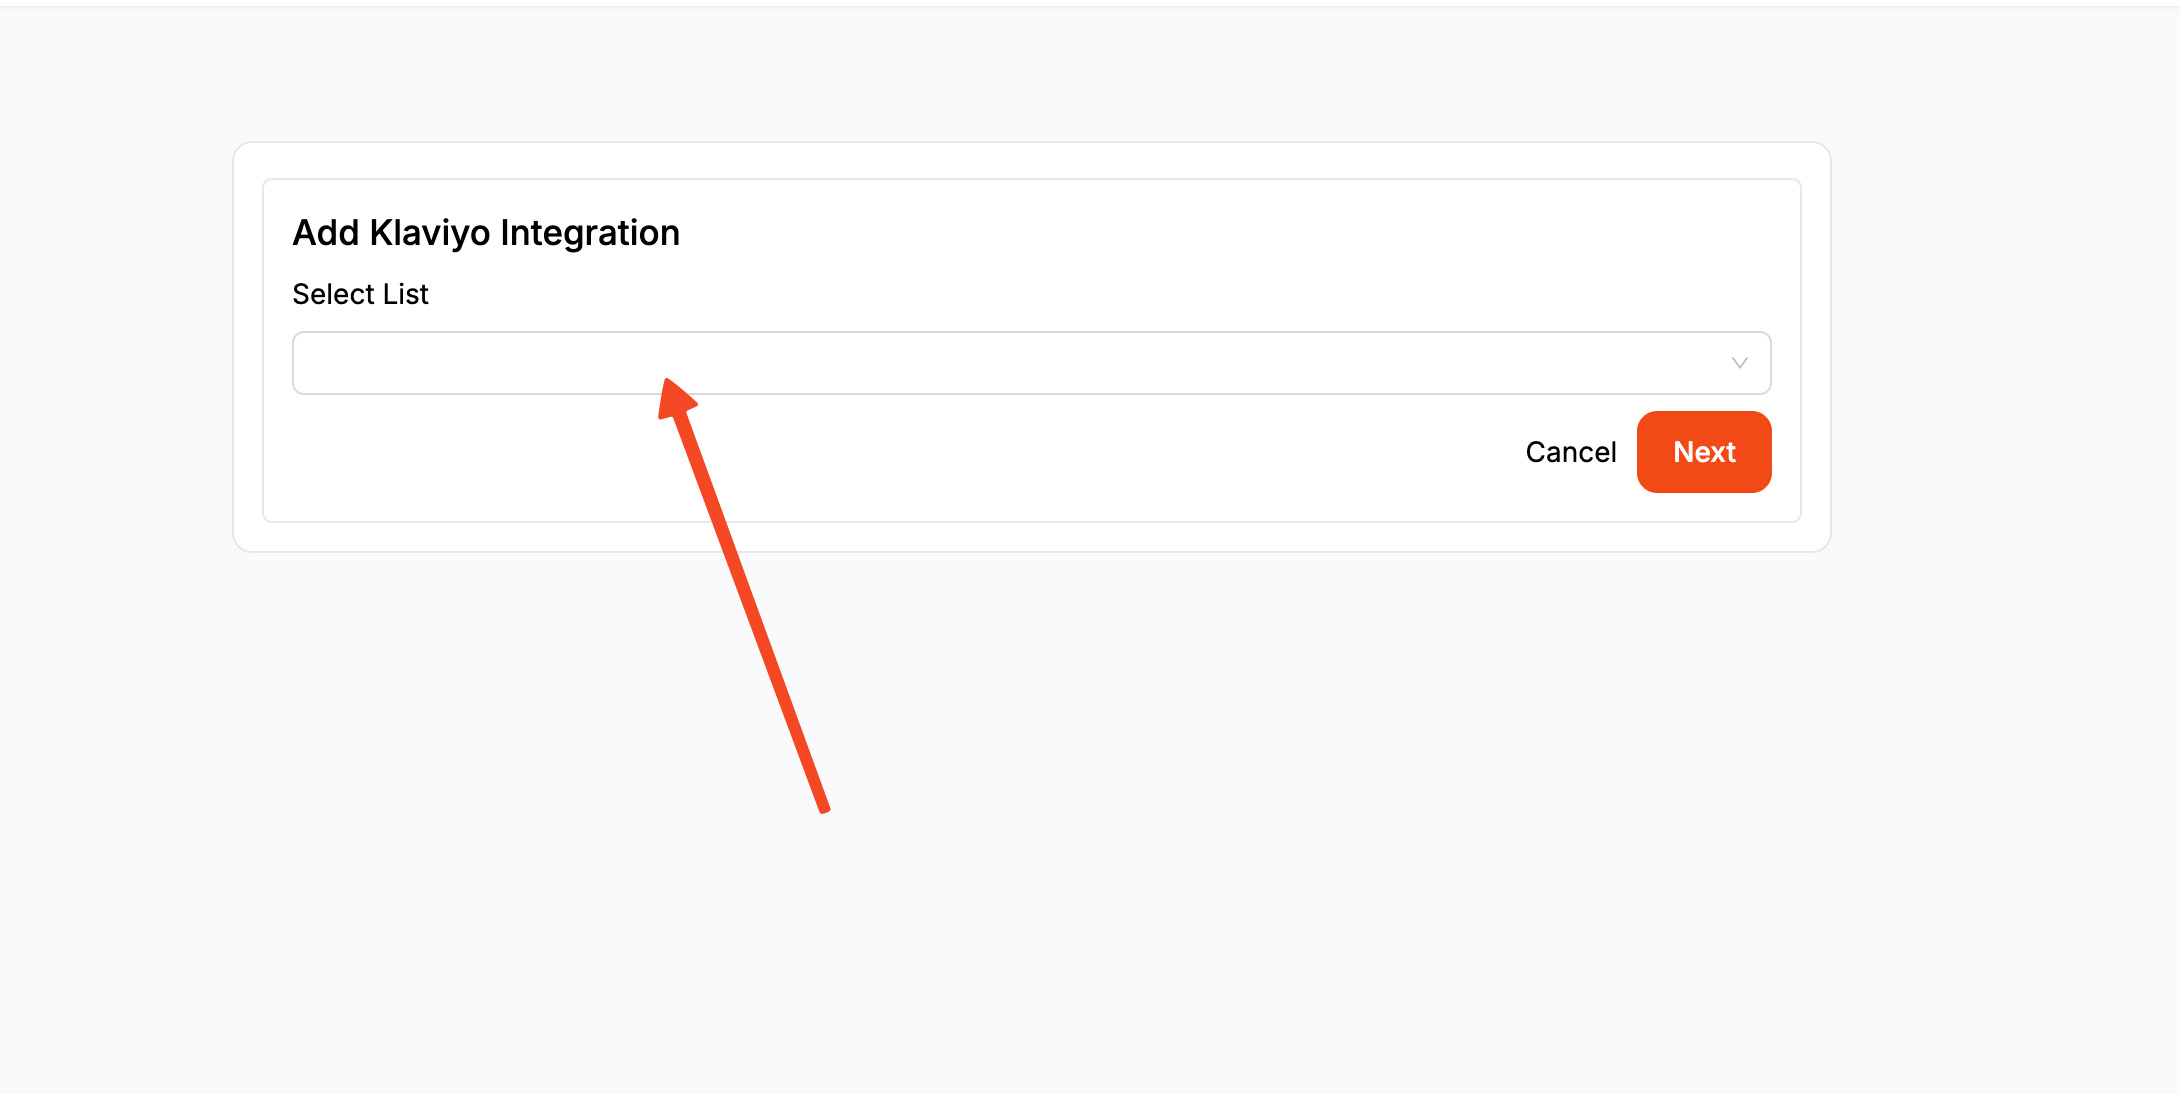
Once connected, you can choose the exact Klaviyo list where you want your new subscribers to go. You can also assign tags, which is super helpful for segmenting your audience later on. To deepen your segmentation with popups, see our guide on segmenting audiences for popup campaigns.
Step 6: Map Your Popup Fields to Klaviyo
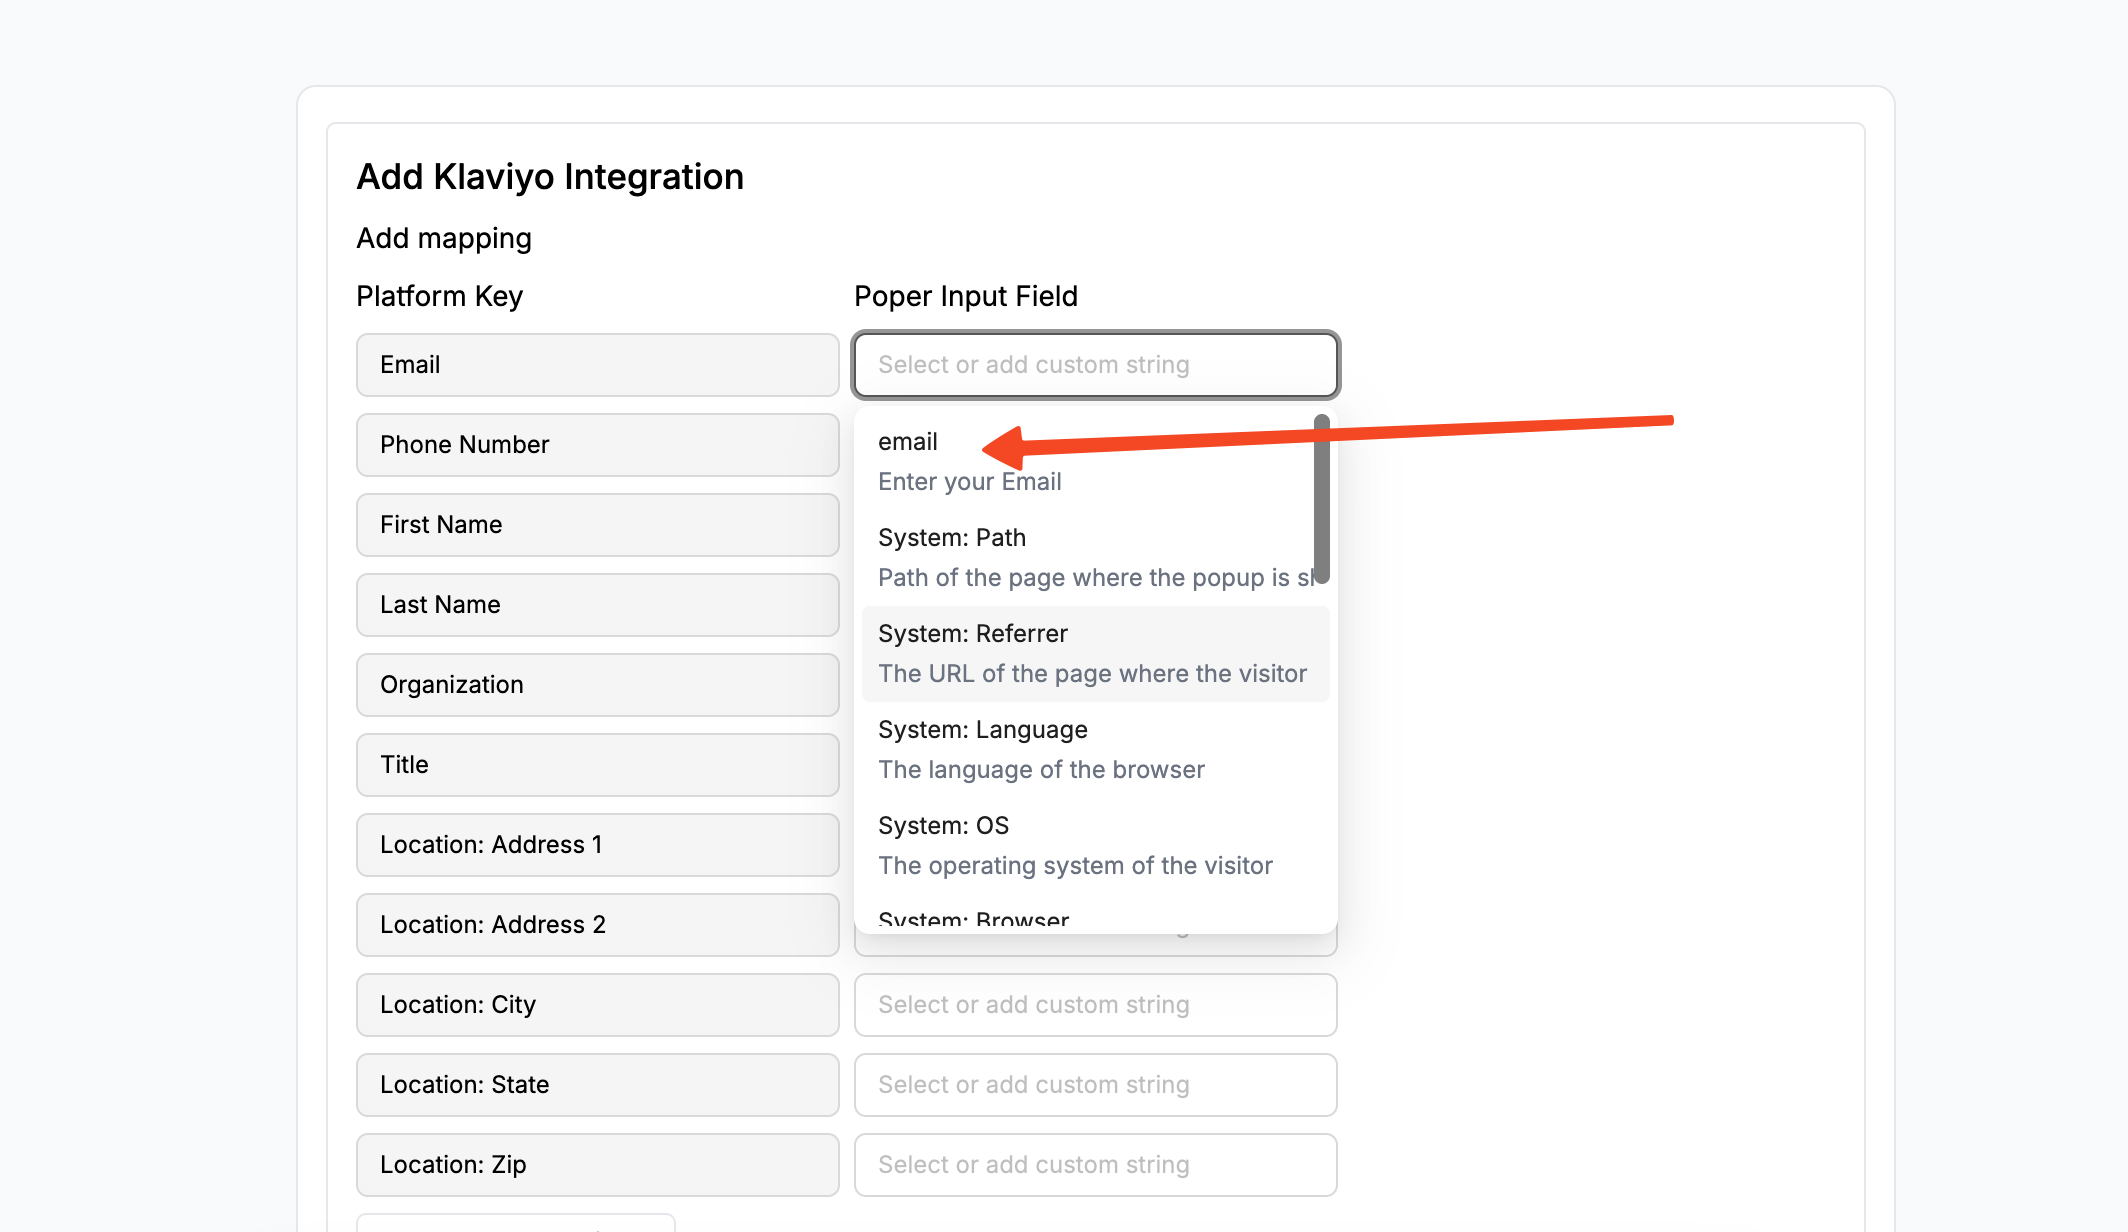
This step ensures the information from your popup goes to the right place. We need to "map" the fields. For example, you’ll map the “Email” field in your Poper popup to the corresponding “Email” field in Klaviyo. It’s a simple but crucial step to make sure the data transfers correctly.
If you need a more detailed walkthrough of the integration, we have a complete guide right here: Poper’s Klaviyo Integration Guide.
Step 7: Save and Publish Your Campaign

With everything set up, the last thing to do is go back to your popup campaign in Poper and hit “Save & Publish.” That’s it! Your exit-intent popup is now live and will start capturing leads from visitors who try to leave your site, sending them straight into your Klaviyo list.
Step 8: Add the Poper Snippet to Your Website
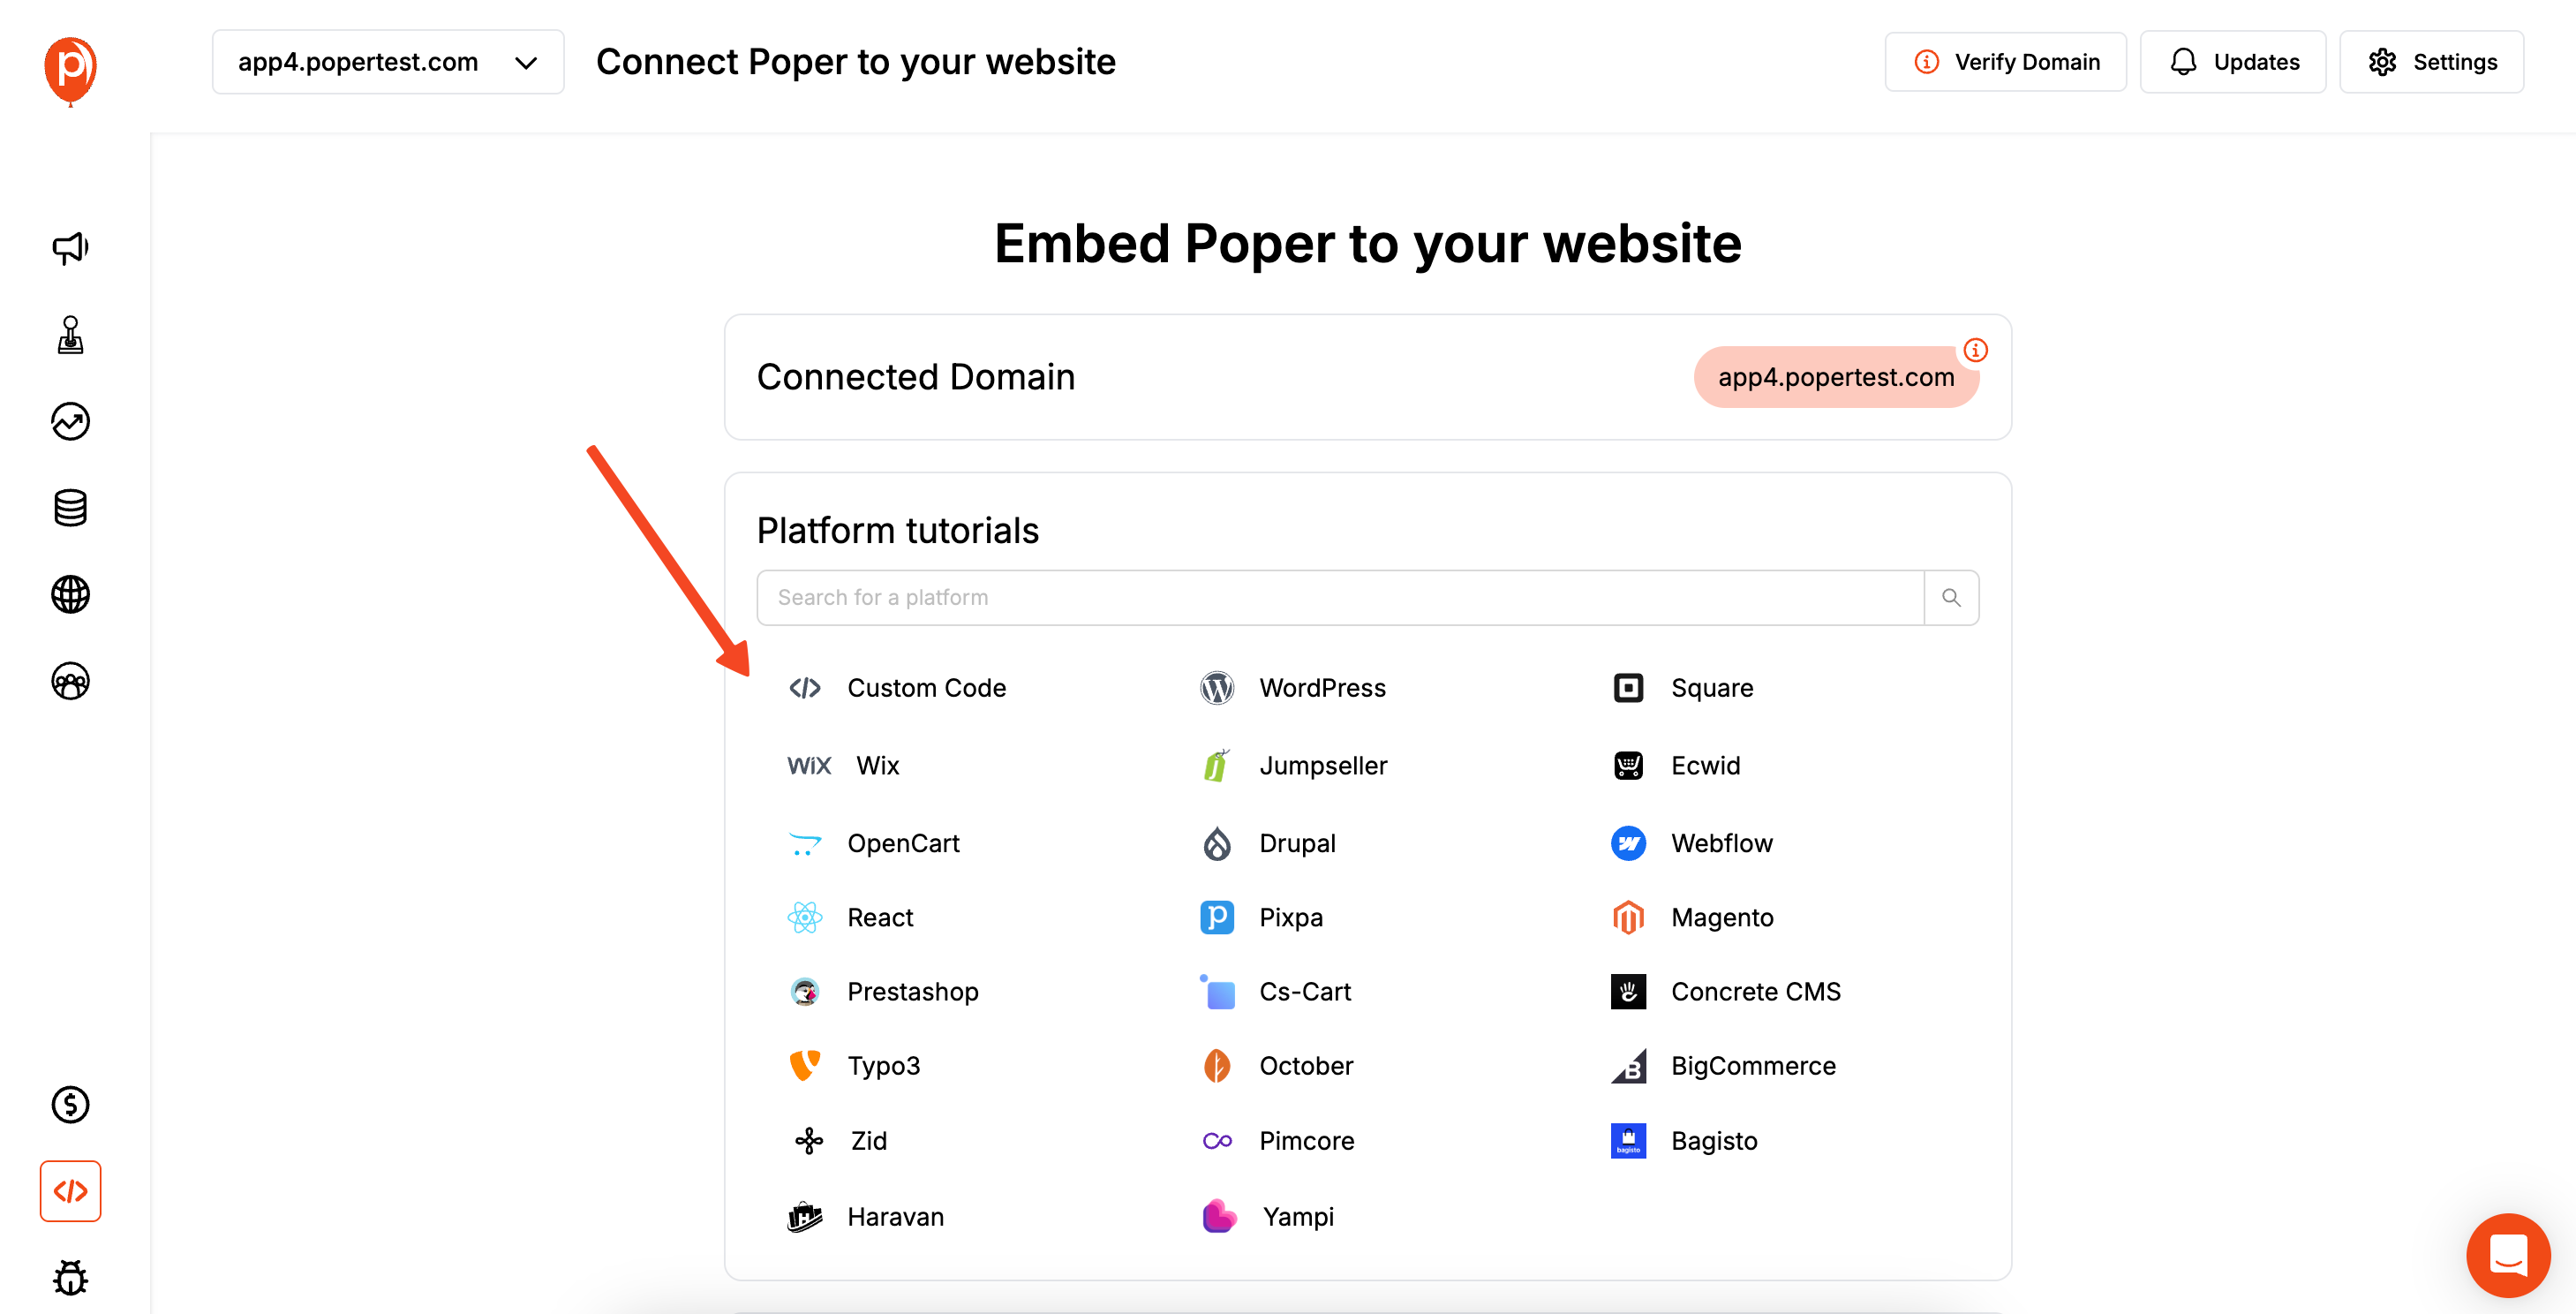
For your popups to appear on your site, you need to install a small piece of code. Don’t worry, you only have to do this once! In the Poper dashboard, go to the “Code” section in the left navigation menu. Copy the custom code snippet you see there.
Next, head over to your website’s editor or content management system. You'll need to paste this code into the <head> section of your site’s HTML. After you paste it, save the changes. Now, Poper is officially connected to your site.
Method 2: Setting Up a Native Klaviyo Exit Intent Popup
Klaviyo includes exit intent as a standard trigger for its sign-up forms (popups and flyouts). This is the most direct and integrated method for Klaviyo users. Learn about maximizing Klaviyo popup effectiveness for your store with our Klaviyo Popup for Shopify guide. If you want to explore how Klaviyo compares with other popup tools, check out our Amped Vs Klaviyo Popup comparison.
Step 1: Create a New Sign-up Form in Klaviyo
Log into your Klaviyo account.
Navigate to Sign-up Forms from the main menu.
Click "Create Sign-up Form" and choose a form type, typically a "Popup."
Select a template designed for a compelling offer. Templates with strong headlines and clear calls to action work best for exit intent.
Step 2: Design Your Exit-Intent Offer
Use Klaviyo's editor to customize the form. The message needs to be strong and simple to stop a departing visitor.
Compelling Headline: "Wait! Before You Go..." or "Get 15% Off Your Order!"
Clear Offer: Explicitly state what they will get (e.g., the discount code, the free guide).
Minimal Fields: For exit intent, ask for the bare minimum, usually just an email address, to reduce friction.
Strong Call to Action (CTA) Button: "Get My Code" or "Download Now."
Success Step: Configure the success message to deliver the discount code or provide the download link immediately.
Step 3: Configure the Exit-Intent Trigger and Targeting in Klaviyo
This is the most crucial step for this strategy.
In the form editor, go to the "Behavior" tab.
Under "Timing," select "Show based on rules."
Choose the option "Show on exit intent." Klaviyo provides options for both desktop and mobile exit-intent triggers. It's recommended to enable both.
Frequency: Set the frequency to avoid annoying repeat visitors (e.g., "Don't show again for 7 days after closing").
Go to the "Targeting" tab.
- URLs: Define where the popup should appear. For a general list-building popup, you might show it on all pages except the checkout. For a cart abandonment offer, you would target only the cart page.
- Visitors: You can target specific segments, such as "Show only to visitors who are not in a Klaviyo list."
URLs: Define where the popup should appear. For a general list-building popup, you might show it on all pages except the checkout. For a cart abandonment offer, you would target only the cart page.
Visitors: You can target specific segments, such as "Show only to visitors who are not in a Klaviyo list."
Step 4: Publish the Form and Ensure Installation
Select the Klaviyo list where new subscribers should be added.
Click "Publish."
For the popup to appear, ensure you have the main Klaviyo sign-up form installation snippet (a single line of JavaScript) installed on your website, typically right before the closing </body> tag. If you've installed any Klaviyo form before, this is likely already done.
Step 5: Test Your Klaviyo Exit Intent Popup
Open your website in an incognito/private browser window.
Navigate to a page where the popup is targeted.
Move your mouse cursor to the top of the browser as if you are about to close the tab.
The popup should appear. Submit a test lead to ensure it's added to the correct Klaviyo list.
Klaviyo Native Exit Intent vs. Poper for Exit Intent: Which to Choose?
| Feature | Klaviyo Native Exit Intent | Poper for Exit Intent (Klaviyo Integrated) |
| Setup Ease | Very easy, all within the Klaviyo platform | Easy, requires Poper script install & integration |
| Design Flexibility | Good, within Klaviyo's builder | High, with full drag-and-drop control |
| Trigger Control | Standard desktop & mobile exit triggers | Often more granular control over sensitivity |
| Advanced Targeting | Robust, especially with e-commerce data | Very advanced, with more diverse rule options like traffic source |
| Popup Types | Standard popups and flyouts | Wider range (e.g., full-screen, gamified popups on exit) |
| A/B Testing | Yes, built-in to Klaviyo | Yes, a core feature of Poper |
| Integration | Seamlessly part of Klaviyo | Requires a one-time integration setup with Klaviyo |
Choose Klaviyo's Native Exit-Intent Feature When:
You want the quickest and most tightly integrated solution.
Klaviyo's native design and targeting options are sufficient for your needs.
You want to leverage Klaviyo's deep e-commerce targeting (like cart value) for your exit-intent offers.
Choose Poper for Your Klaviyo Exit-Intent Strategy When:
You need more advanced design capabilities or want to create a unique popup type (like a spin-to-win game on exit).
You require more granular control over the exit-intent trigger's sensitivity.
You want to A/B test different popup designs or offers using Poper's dedicated testing suite.
You manage popups across multiple platforms and prefer a centralized tool.
Conclusion
A Klaviyo Exit Intent strategy is a must-have for any serious e-commerce business. It's a non-intrusive yet highly effective way to capture leads and recover sales at the most critical moment. If you want to see how these strategies compare with alternatives, see our A/B comparison of Klaviyo and other popup tools or check out Klaviyo Abandoned Cart strategies to recover even more potential sales.
Klaviyo's native sign-up forms provide a powerful, seamless, and easy-to-implement solution that is perfect for most users already embedded in the Klaviyo ecosystem.
Specialized tools like Poper serve as an excellent enhancement, offering superior design flexibility and advanced trigger controls, all while ensuring the valuable leads you capture are sent directly to Klaviyo for immediate nurturing.
By implementing a well-designed exit-intent popup—using either of these powerful methods—you can turn abandoning visitors into loyal subscribers and customers.
Frequently Asked Questions (FAQ)
Does Klaviyo's exit-intent trigger work on mobile devices?
Yes, Klaviyo's exit-intent trigger for mobile is typically based on user behavior that indicates they are leaving, such as a rapid upward scroll or an attempt to use the back button.
Can I have an exit-intent popup only on my cart page?
Yes. In both Klaviyo and Poper, you can use URL targeting rules to specify that the exit-intent popup should only appear on pages where the URL contains "/cart".
How do I send a discount code in a Klaviyo exit-intent popup?
In Klaviyo's native form builder, you can add a "Coupon" element to the success step. You would first create a set of unique, single-use codes in your e-commerce platform (like Shopify) and import them into Klaviyo. The form will then display one of these unique codes to each new subscriber.
Can I A/B test my Klaviyo exit-intent popups?
Yes. Klaviyo has a built-in A/B testing feature for its sign-up forms. You can create two variations of your exit-intent popup to test different headlines, offers, or designs. Poper also has robust A/B testing capabilities.
If I use Poper for exit intent, how do I trigger a Klaviyo flow?
You would set up the Poper-to-Klaviyo integration to add new subscribers to a specific Klaviyo list and/or add a specific tag (e.g., "poper-exit-lead"). Then, within Klaviyo, you create a flow that is triggered when someone is added to that list or gets that tag.

