
For any e-commerce store, an "out of stock" label on a popular product can feel like a lost sale. However, with a Klaviyo Back in Stock Popup or sign-up form, you can turn this moment of disappointment into a valuable lead capture opportunity and recover that revenue later. This powerful feature allows shoppers to subscribe to alerts and automatically notifies them the moment their desired product is available again. Learn more about using Klaviyo popups on Shopify to enhance your store's lead generation.
This guide will cover the two primary methods for implementing this on your Shopify store:
Using Klaviyo's powerful, native Back in Stock feature, which is deeply integrated with Shopify.
Employing a specialized popup builder like Poper to create a custom sign-up popup that then feeds subscribers into a Klaviyo list for manual or semi-automated notification.
Understanding the Back in Stock Flow
A successful back-in-stock strategy has two essential parts:
The Sign-up Form: A form or popup that appears only on out-of-stock product pages, inviting customers to enter their email to be notified when the item is restocked.
The Automated Notification Flow: An email automation (a "Flow" in Klaviyo) that is triggered when the product's inventory is updated in Shopify, sending an email only to those who signed up for that specific product.
Step 1: Choose a Back in Stock Template
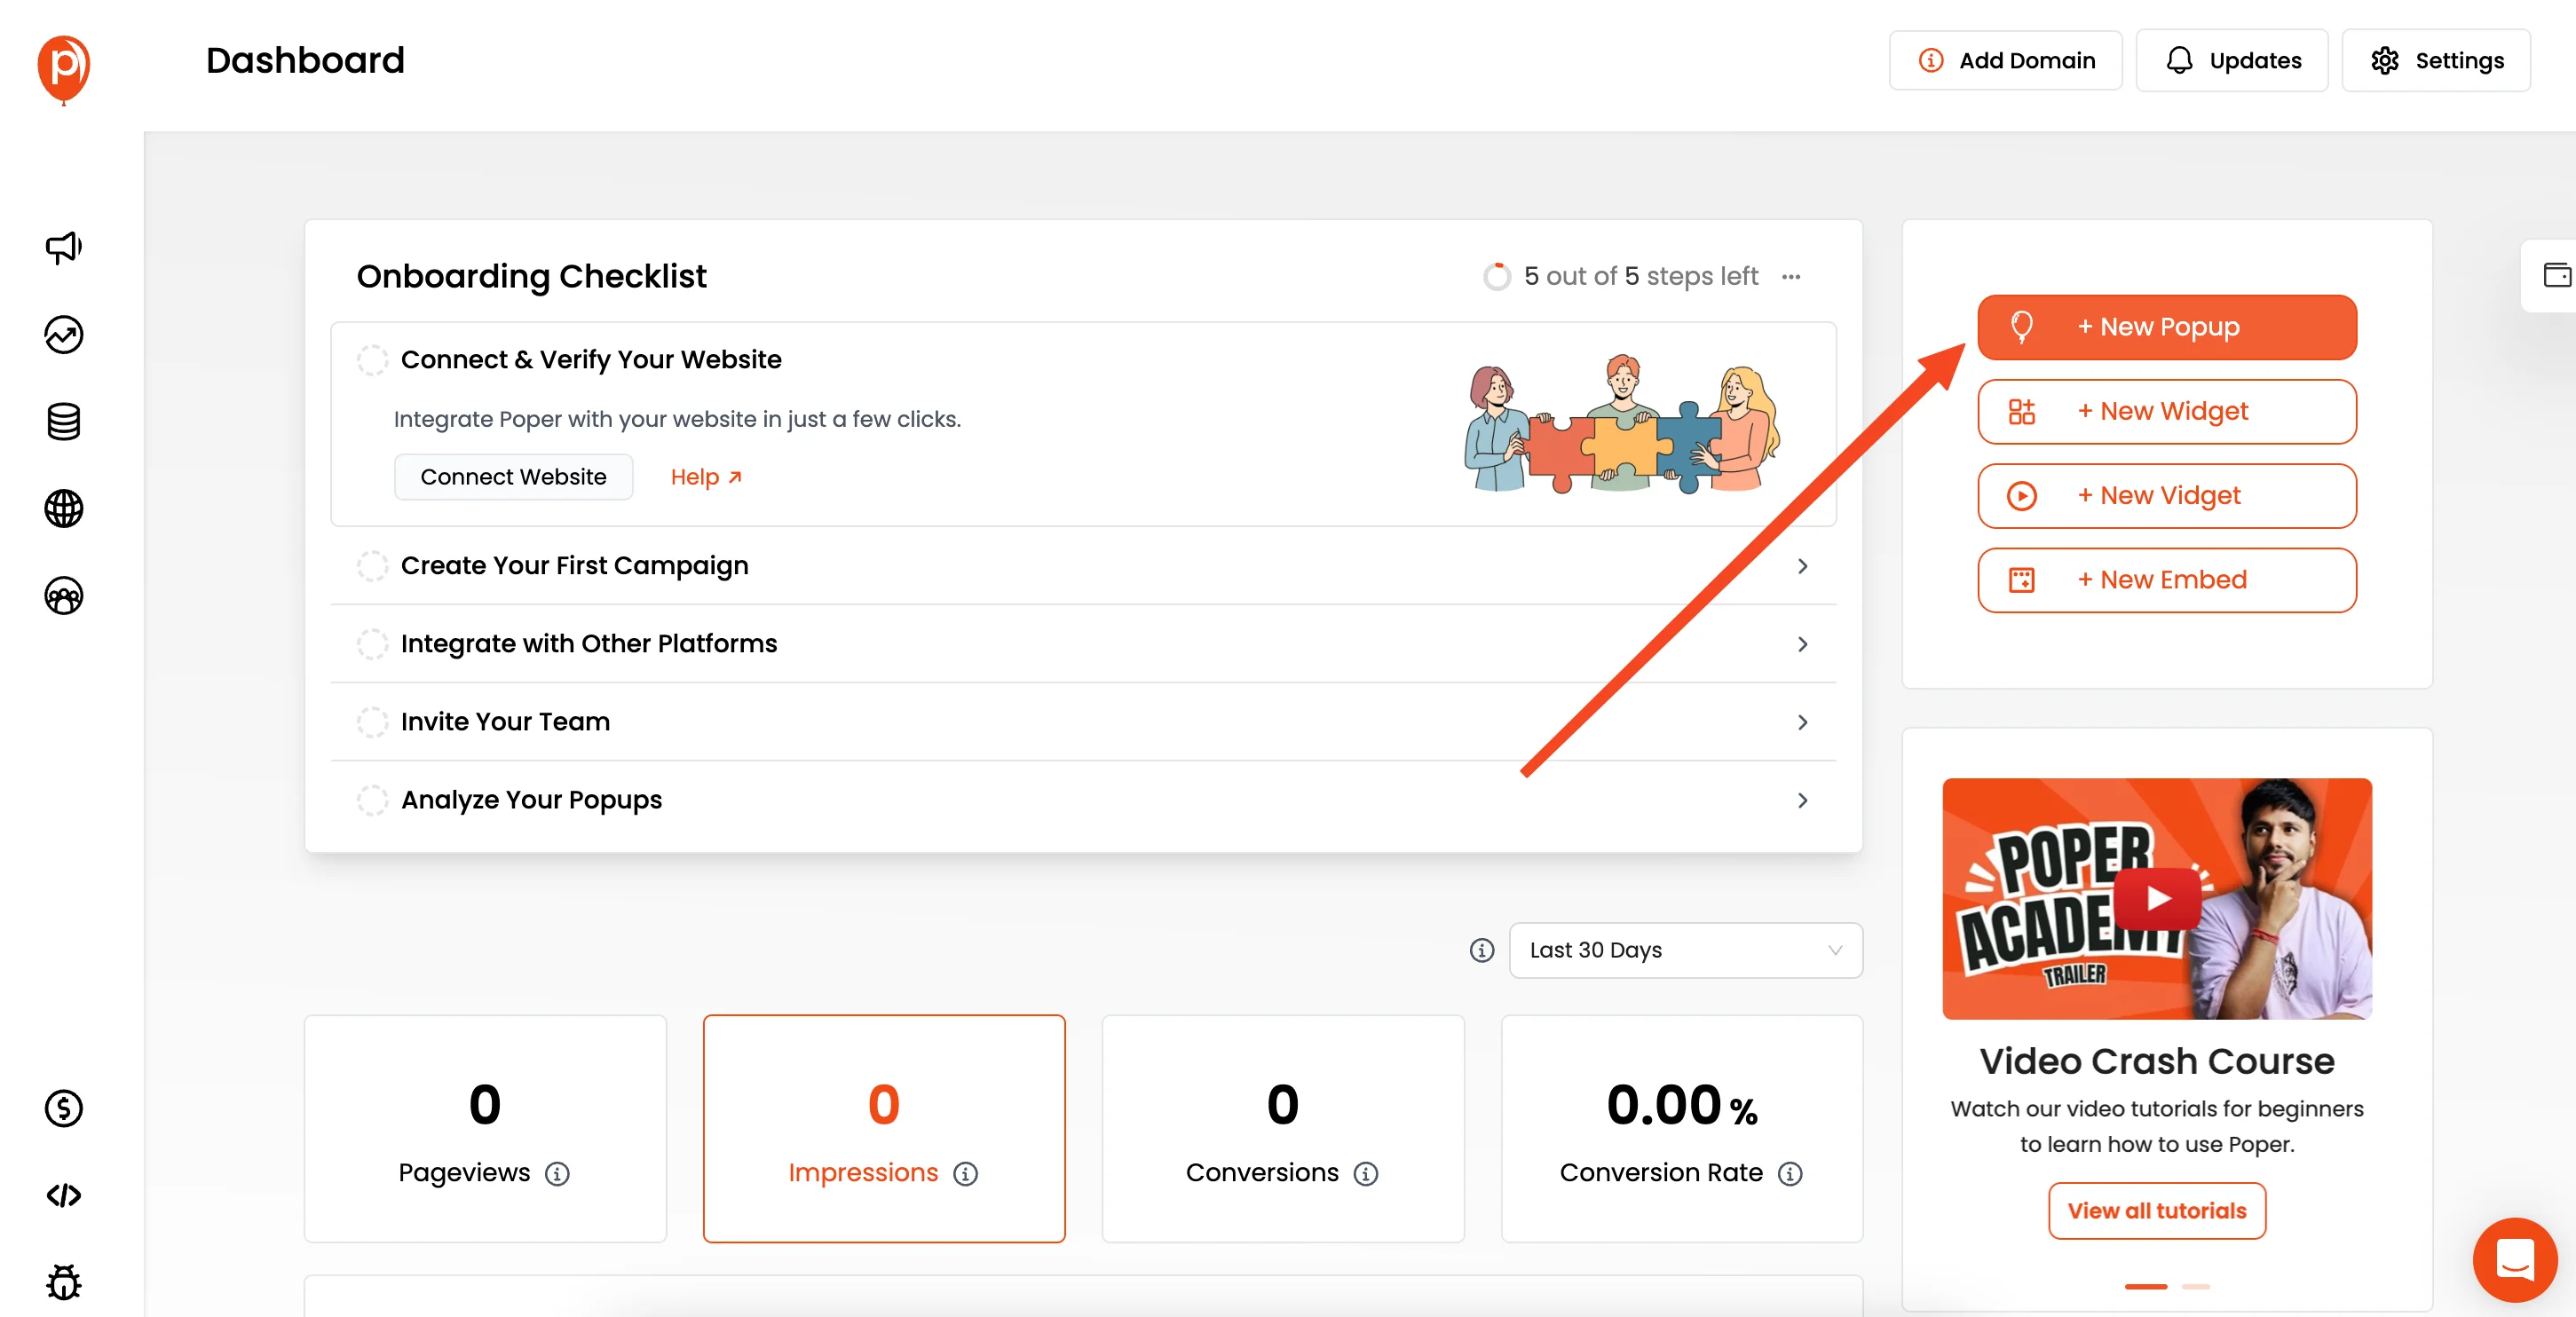
First things first, head to your Poper dashboard and click "New Popup." To get moving quickly, I recommend starting with a pre-built design. Click “Choose from Templates” to open our library.

In the template search bar, type “Stock” or “Back in Stock.” You’ll see a few options designed specifically for this purpose.
Look for one with an email field, like our "Back in Stock Alert Signup" template, and select it. This saves you a ton of time on the initial design.
Step 2: Customize the Design to Match Your Brand
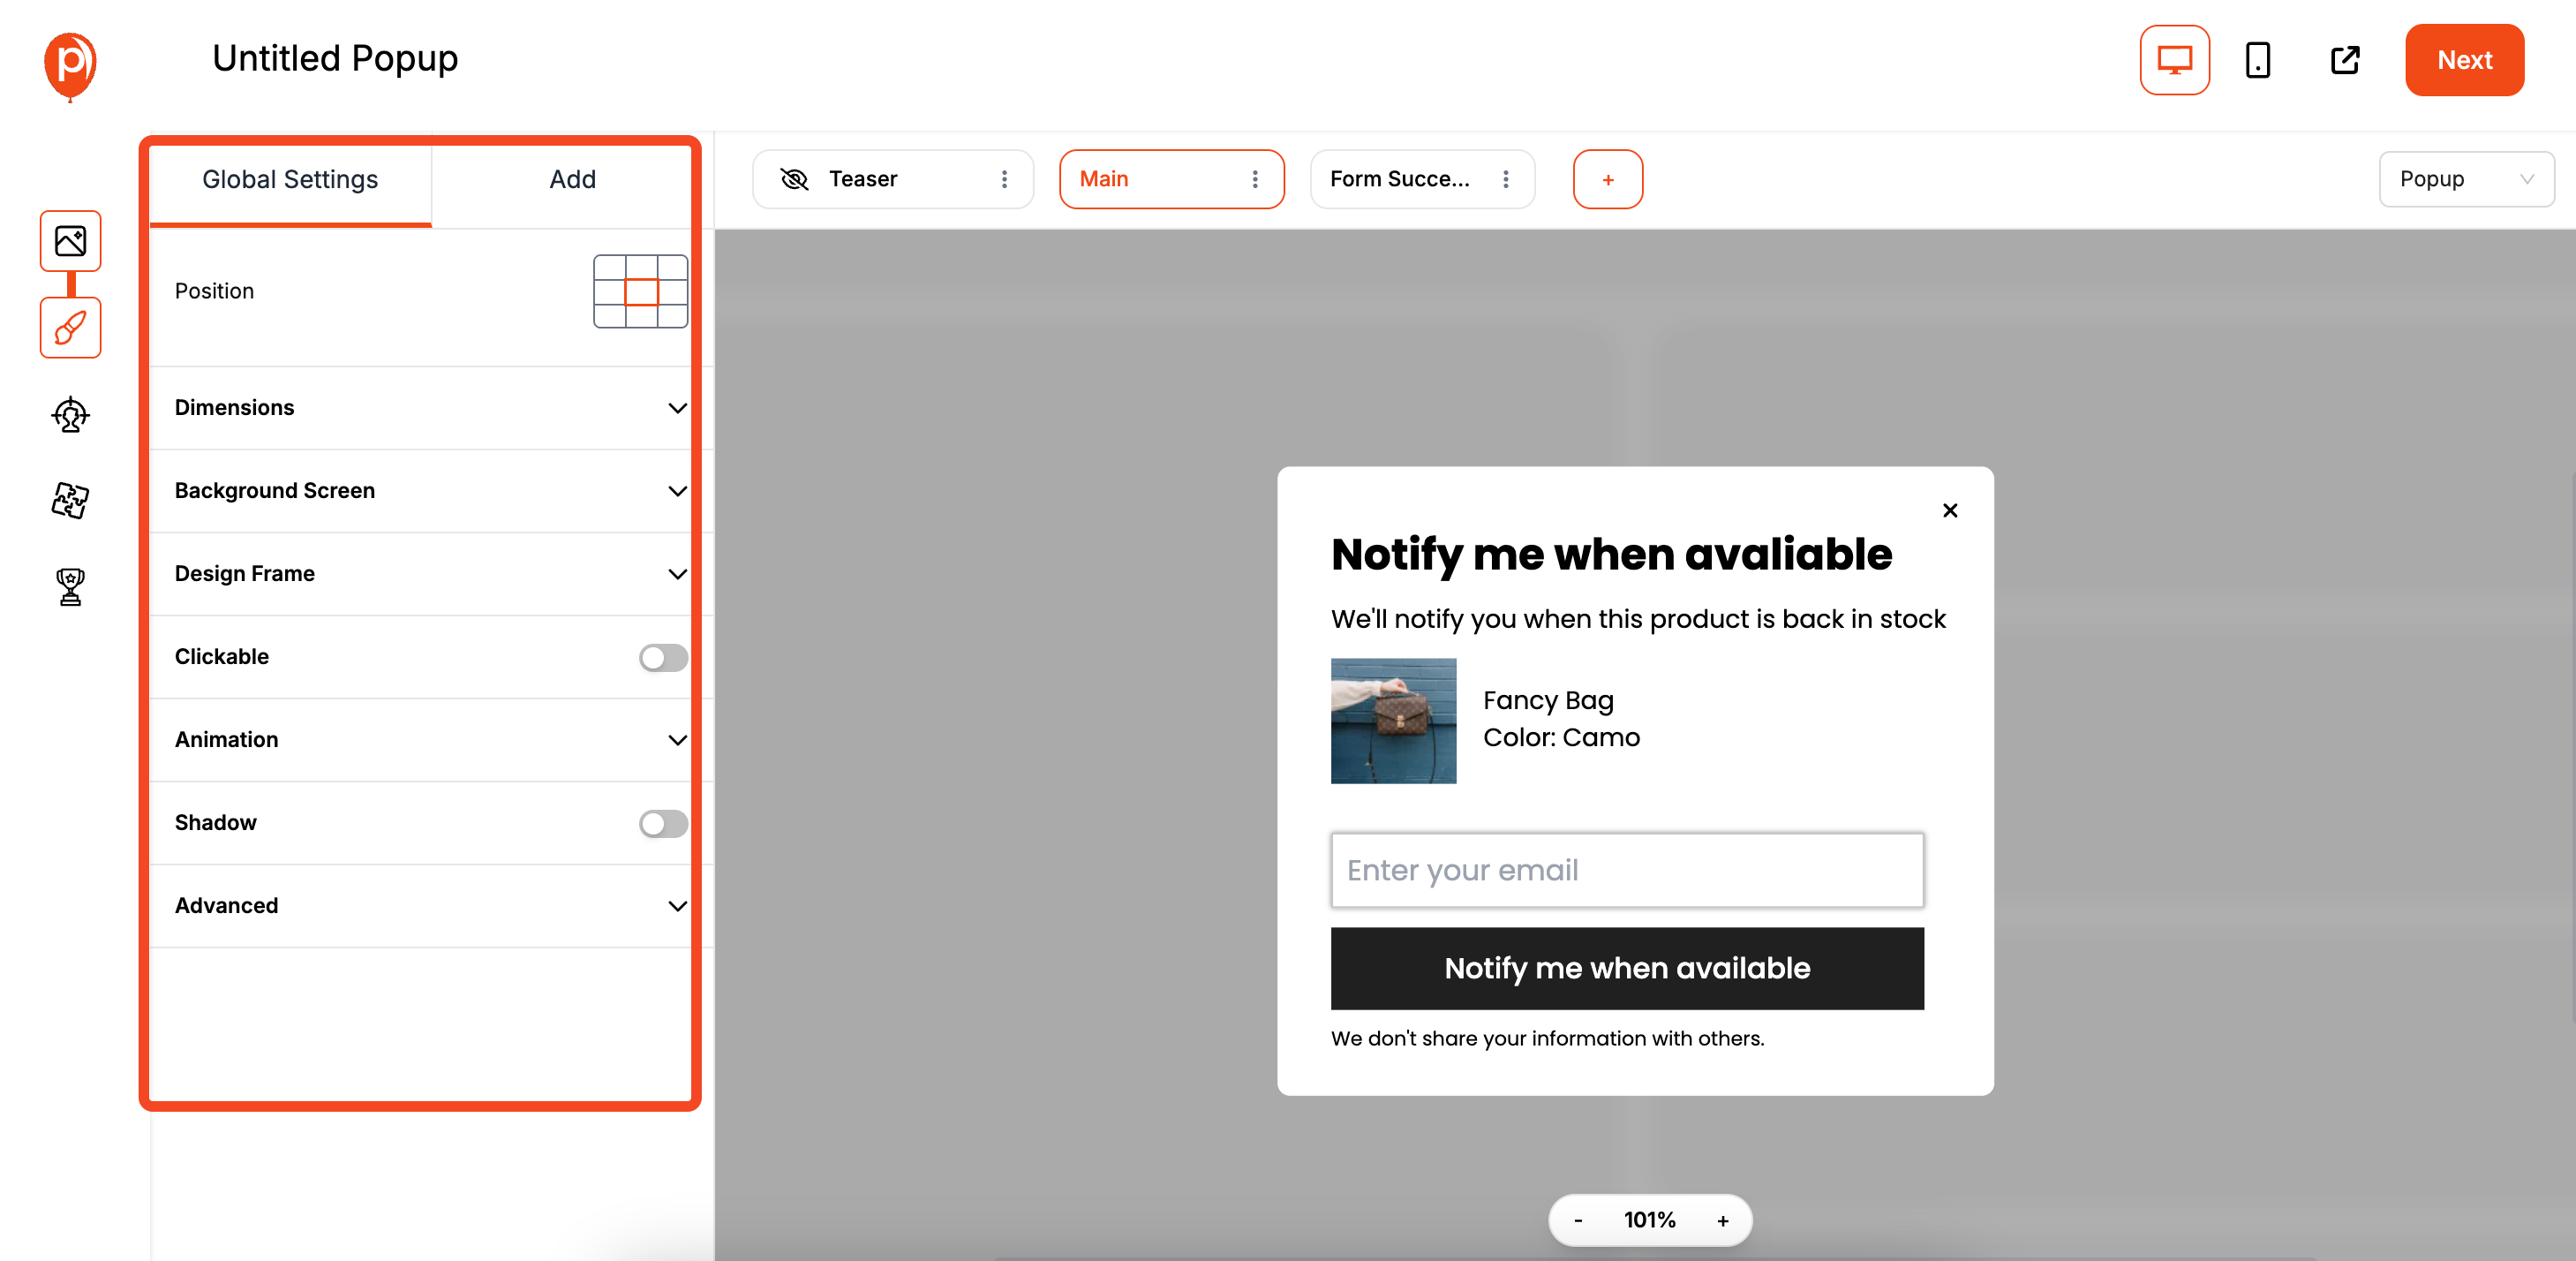
Now, let's make the template look like it belongs on your site. In the editor, you can easily change the text, fonts, and colors to match your brand’s style guide.
Go to the ‘Settings’ to adjust the colors and typography. The goal is to create a seamless experience for your visitors, so consistency is key. Once you’re happy with the look, click "Next."
Step 3: Set Up Your Targeting Rules

This is where the magic happens. On the Display Conditions page, you'll tell Poper exactly when and where to show your popup. We're going to use a special feature for this.
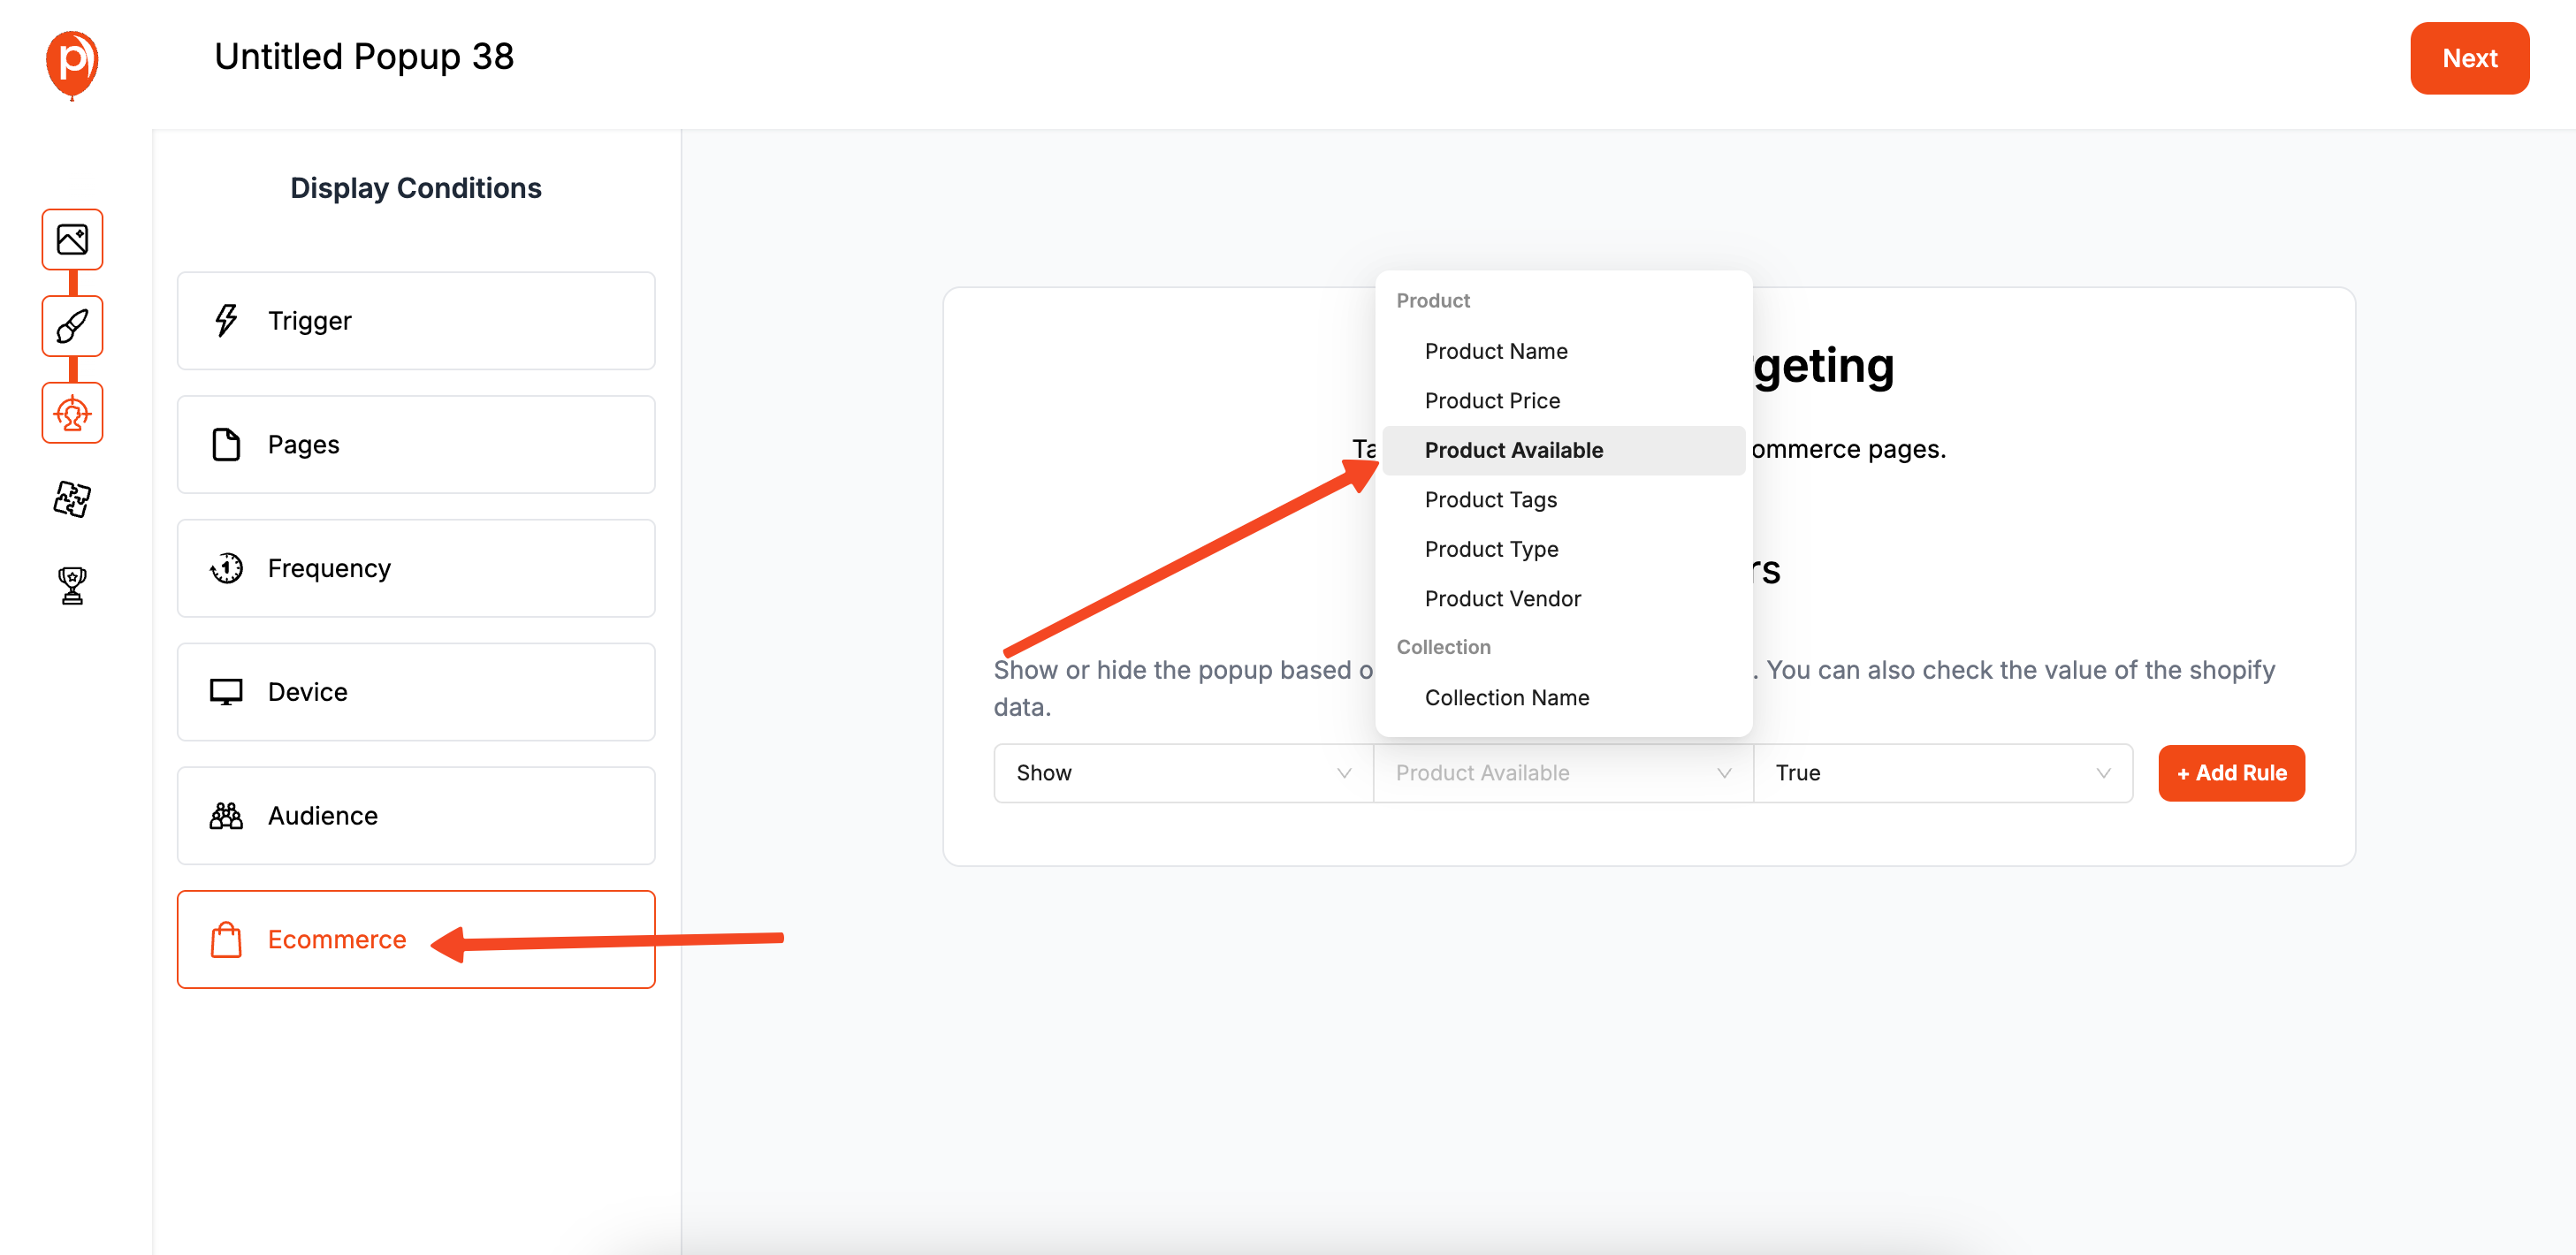
Scroll down to the "Ecommerce Targeting" section. Find the rule "Product Available" and set its value to "False."
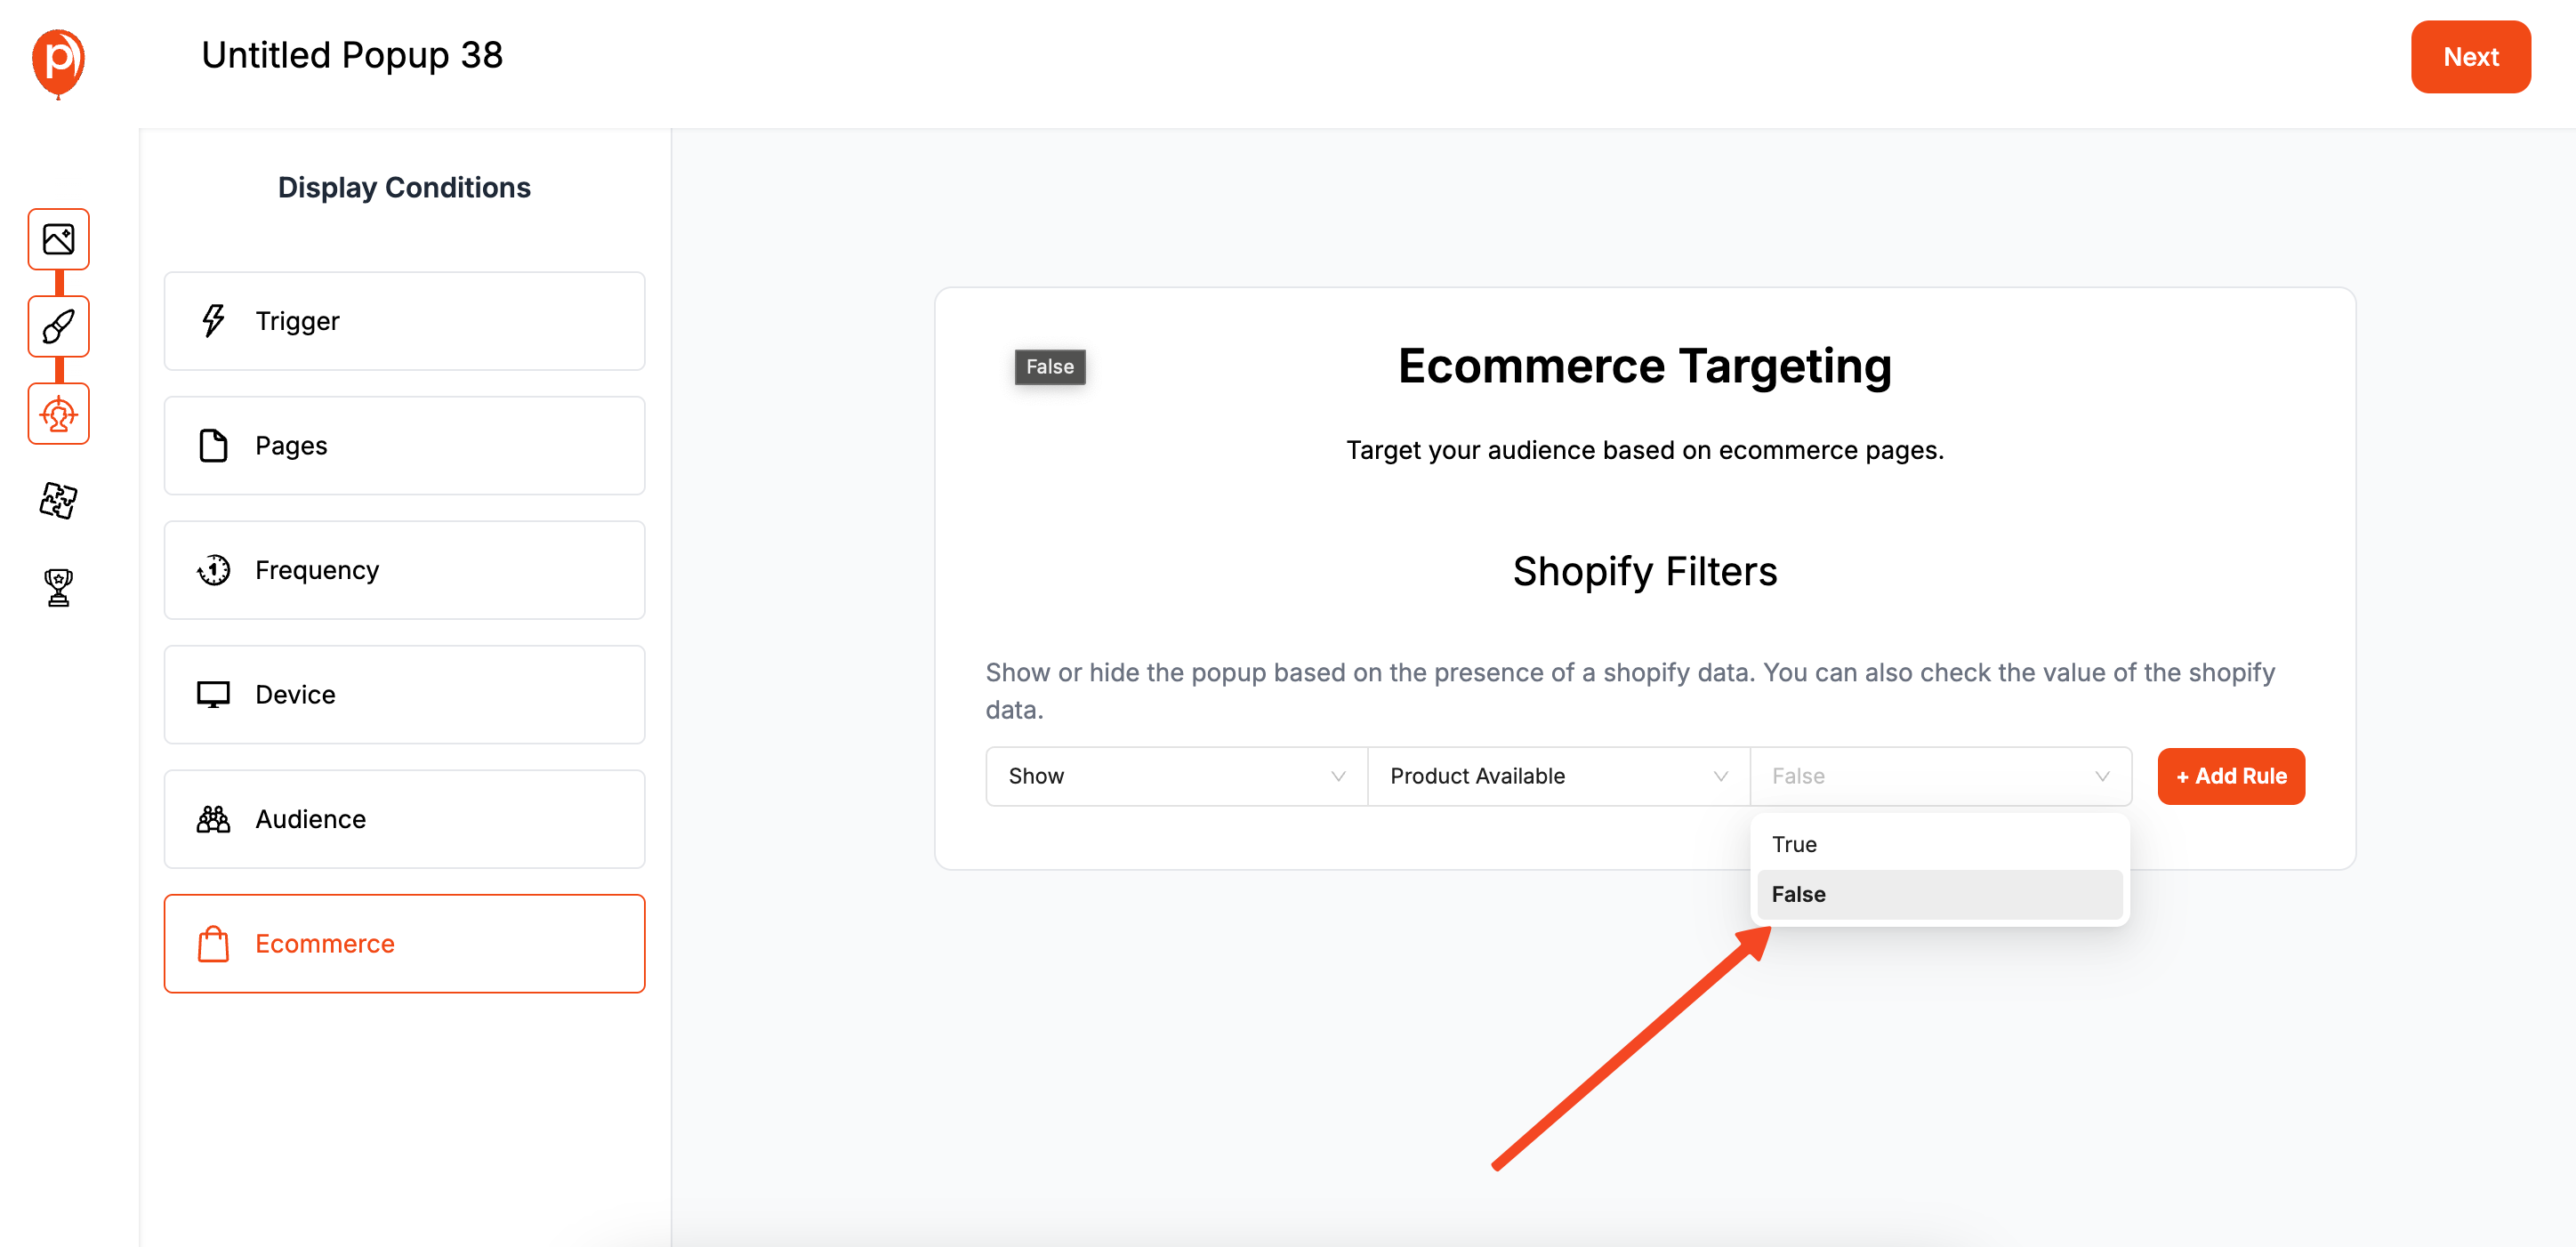
This powerful little setting tells Poper to only show this popup on product pages where the item is currently sold out.
Please note that for now, this eCommerce targeting works specifically for Shopify stores.
Step 4: Connect Your Popup to Klaviyo
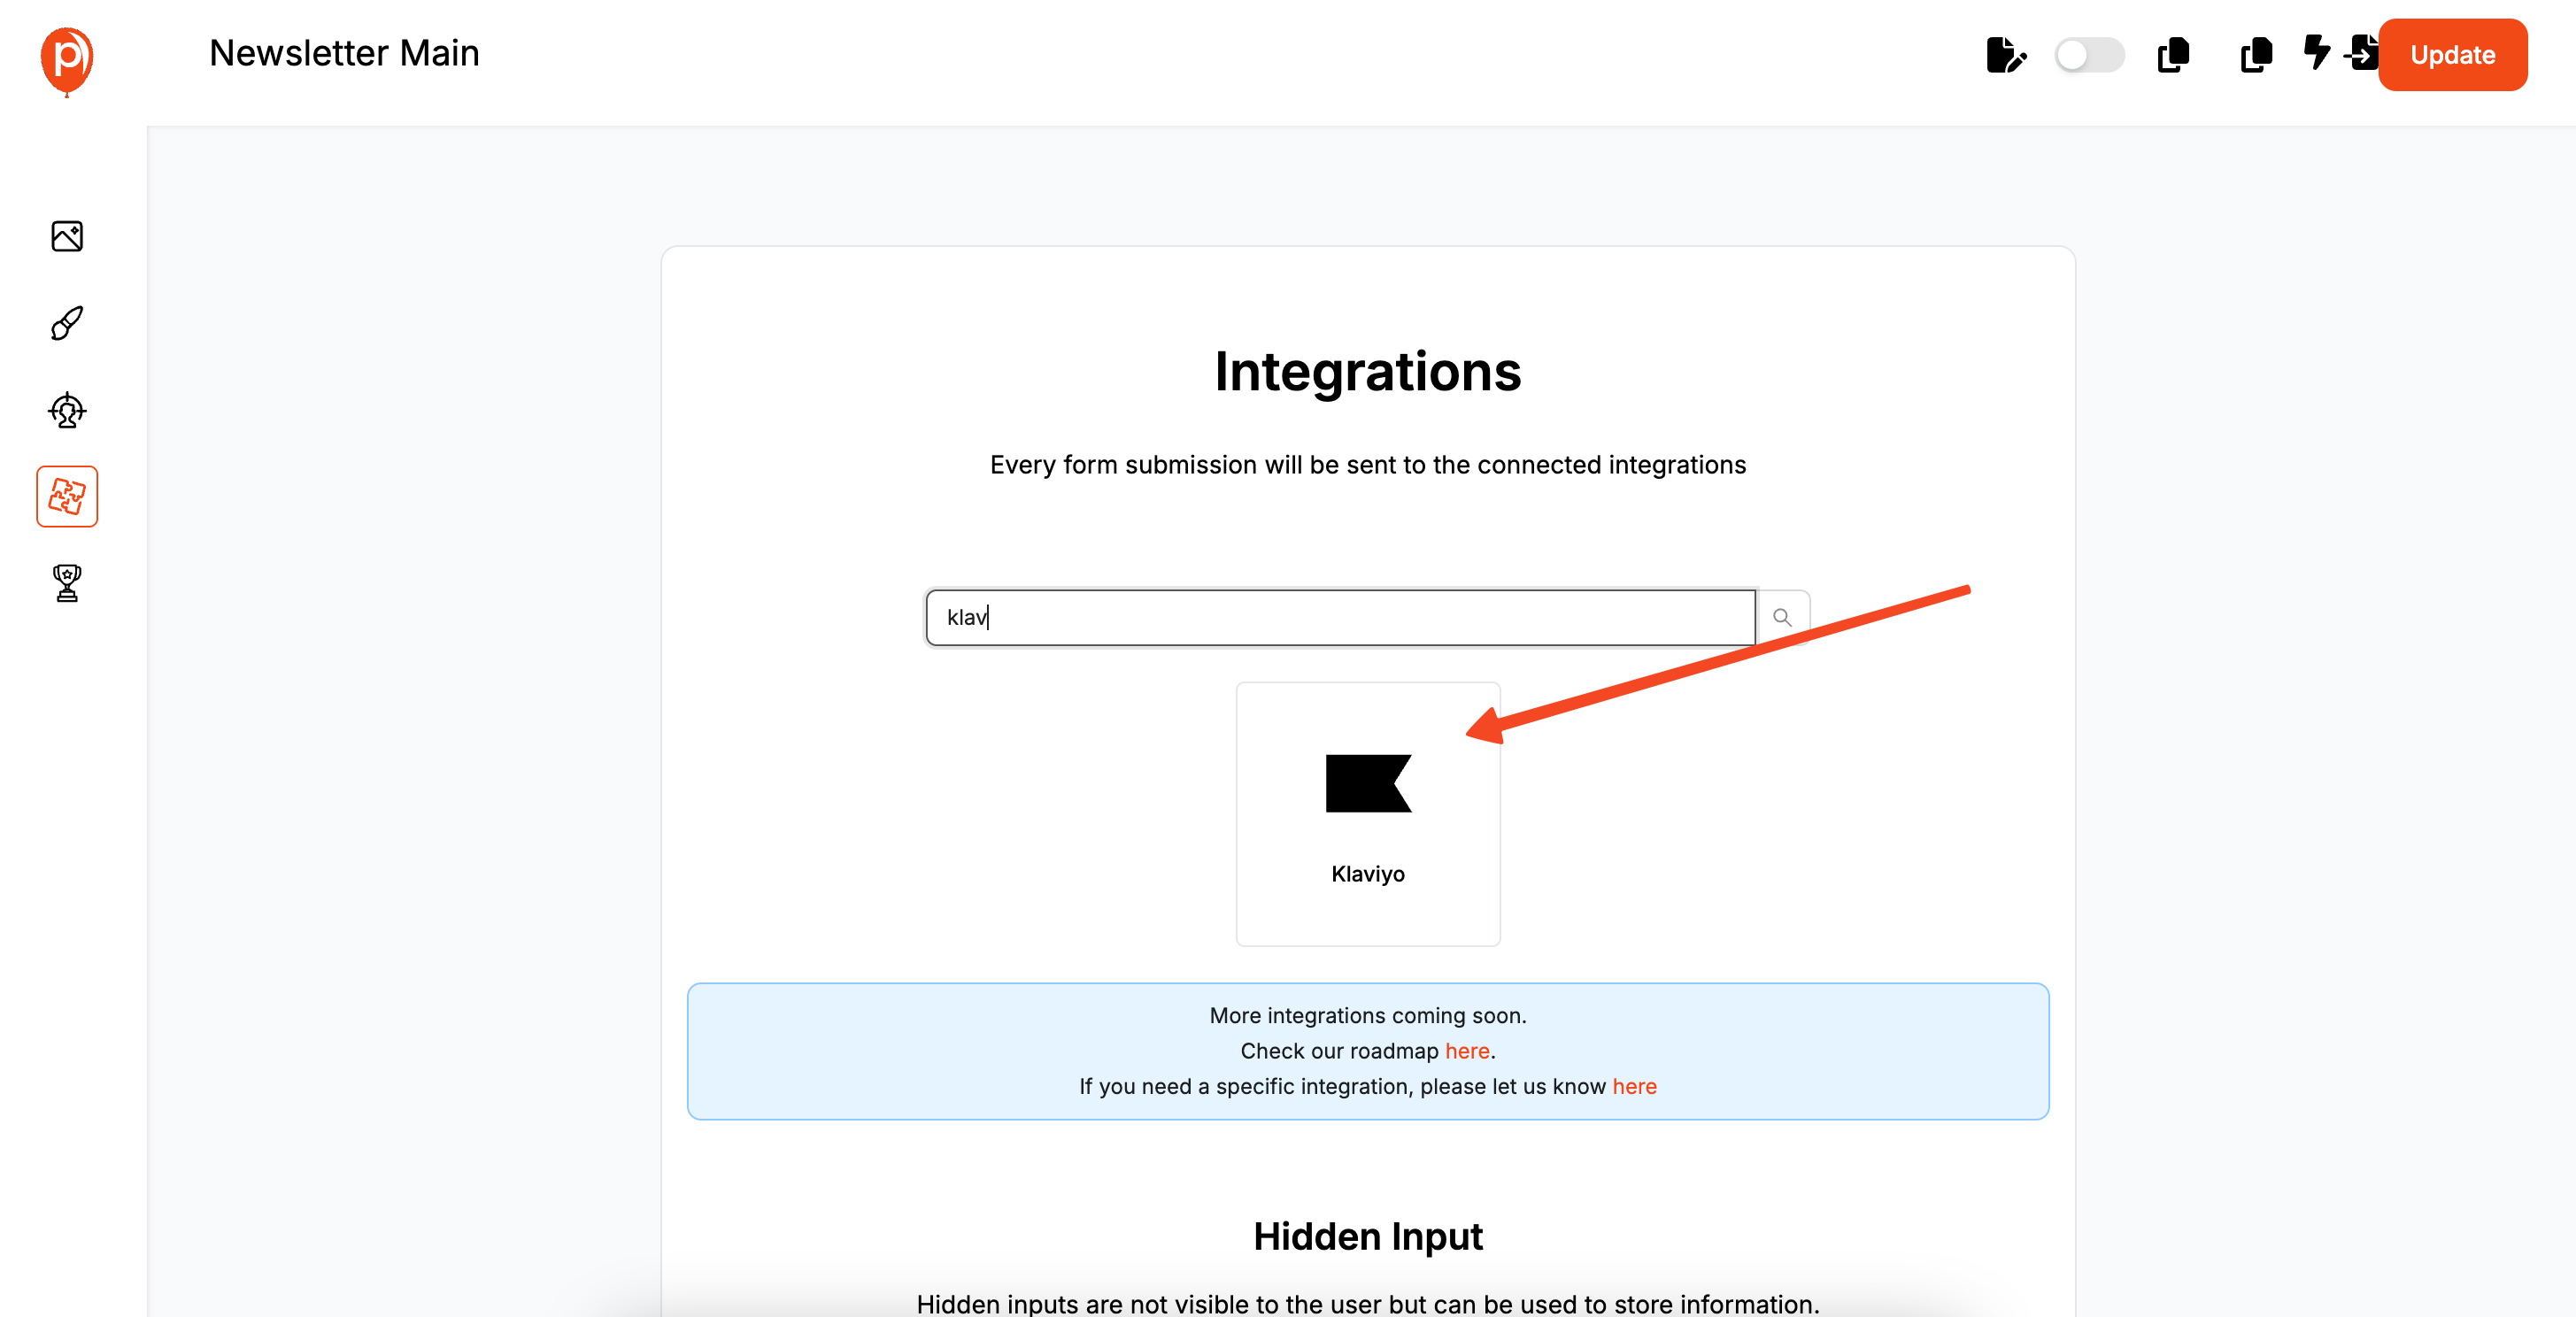
After setting your display rules, click "Next" to go to the Integrations page. This is where you’ll connect the email form to your Klaviyo account. Follow our easy guide to connecting Klaviyo with Poper for step-by-step instructions.
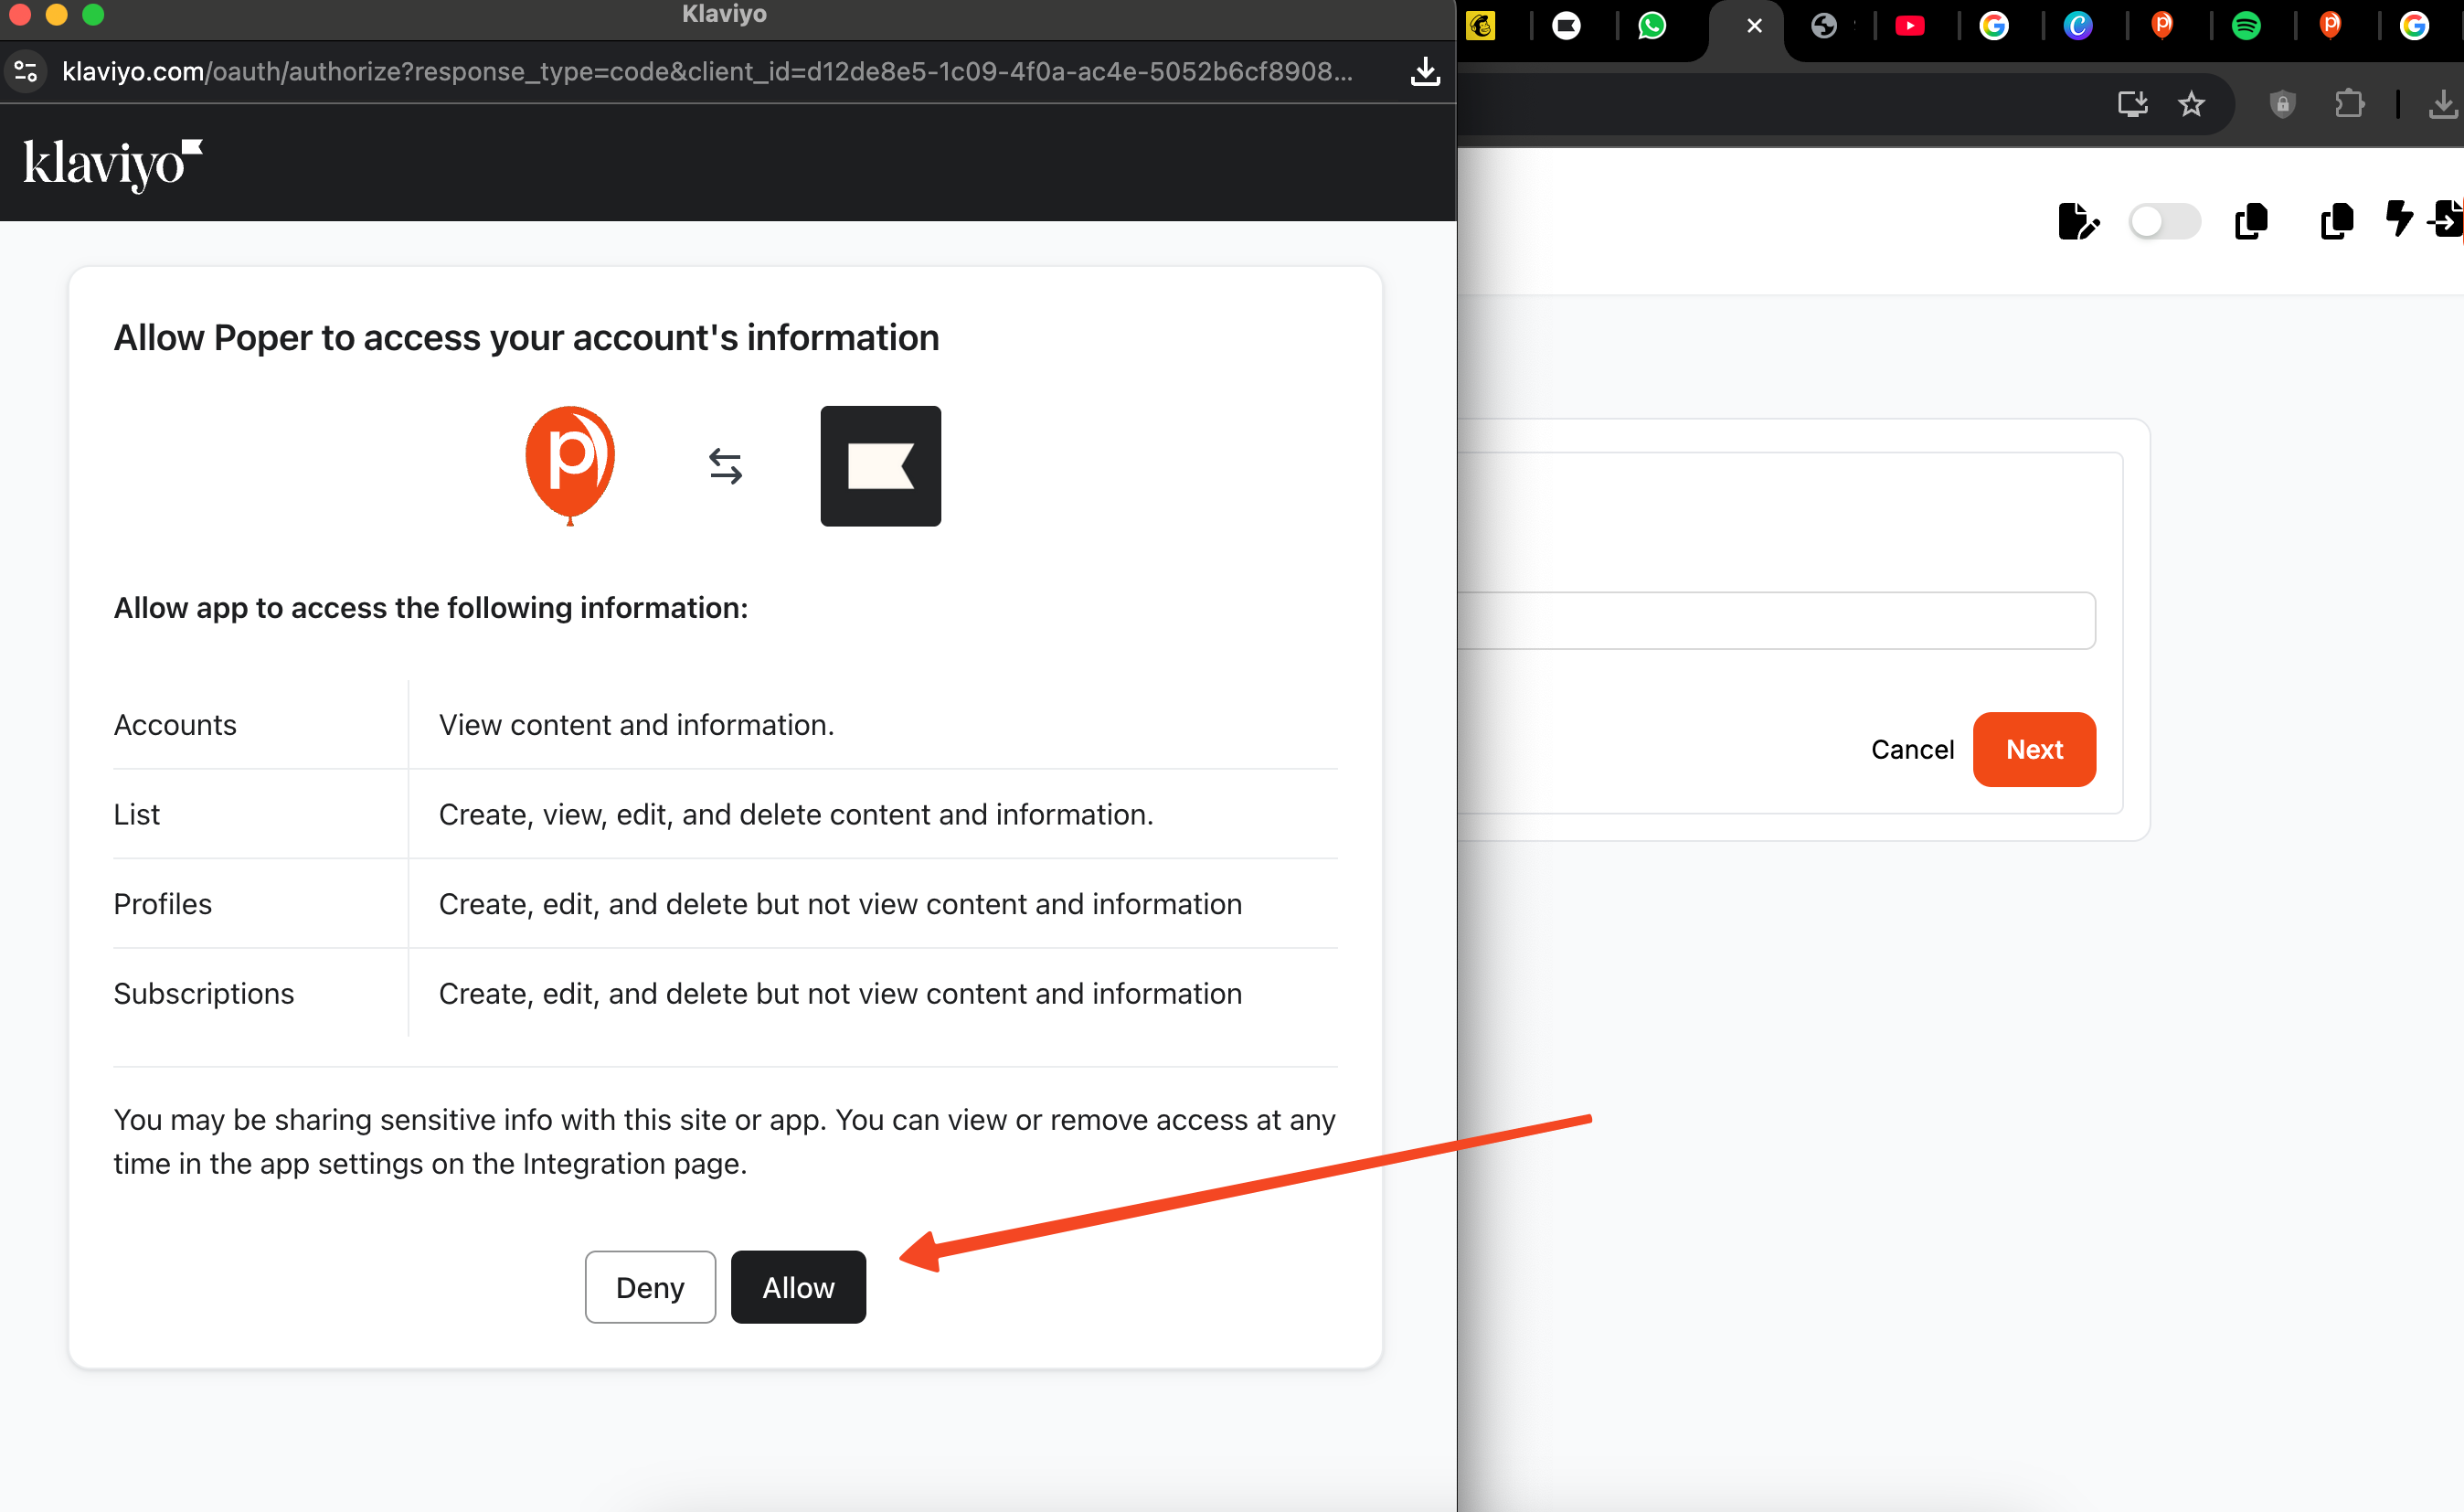
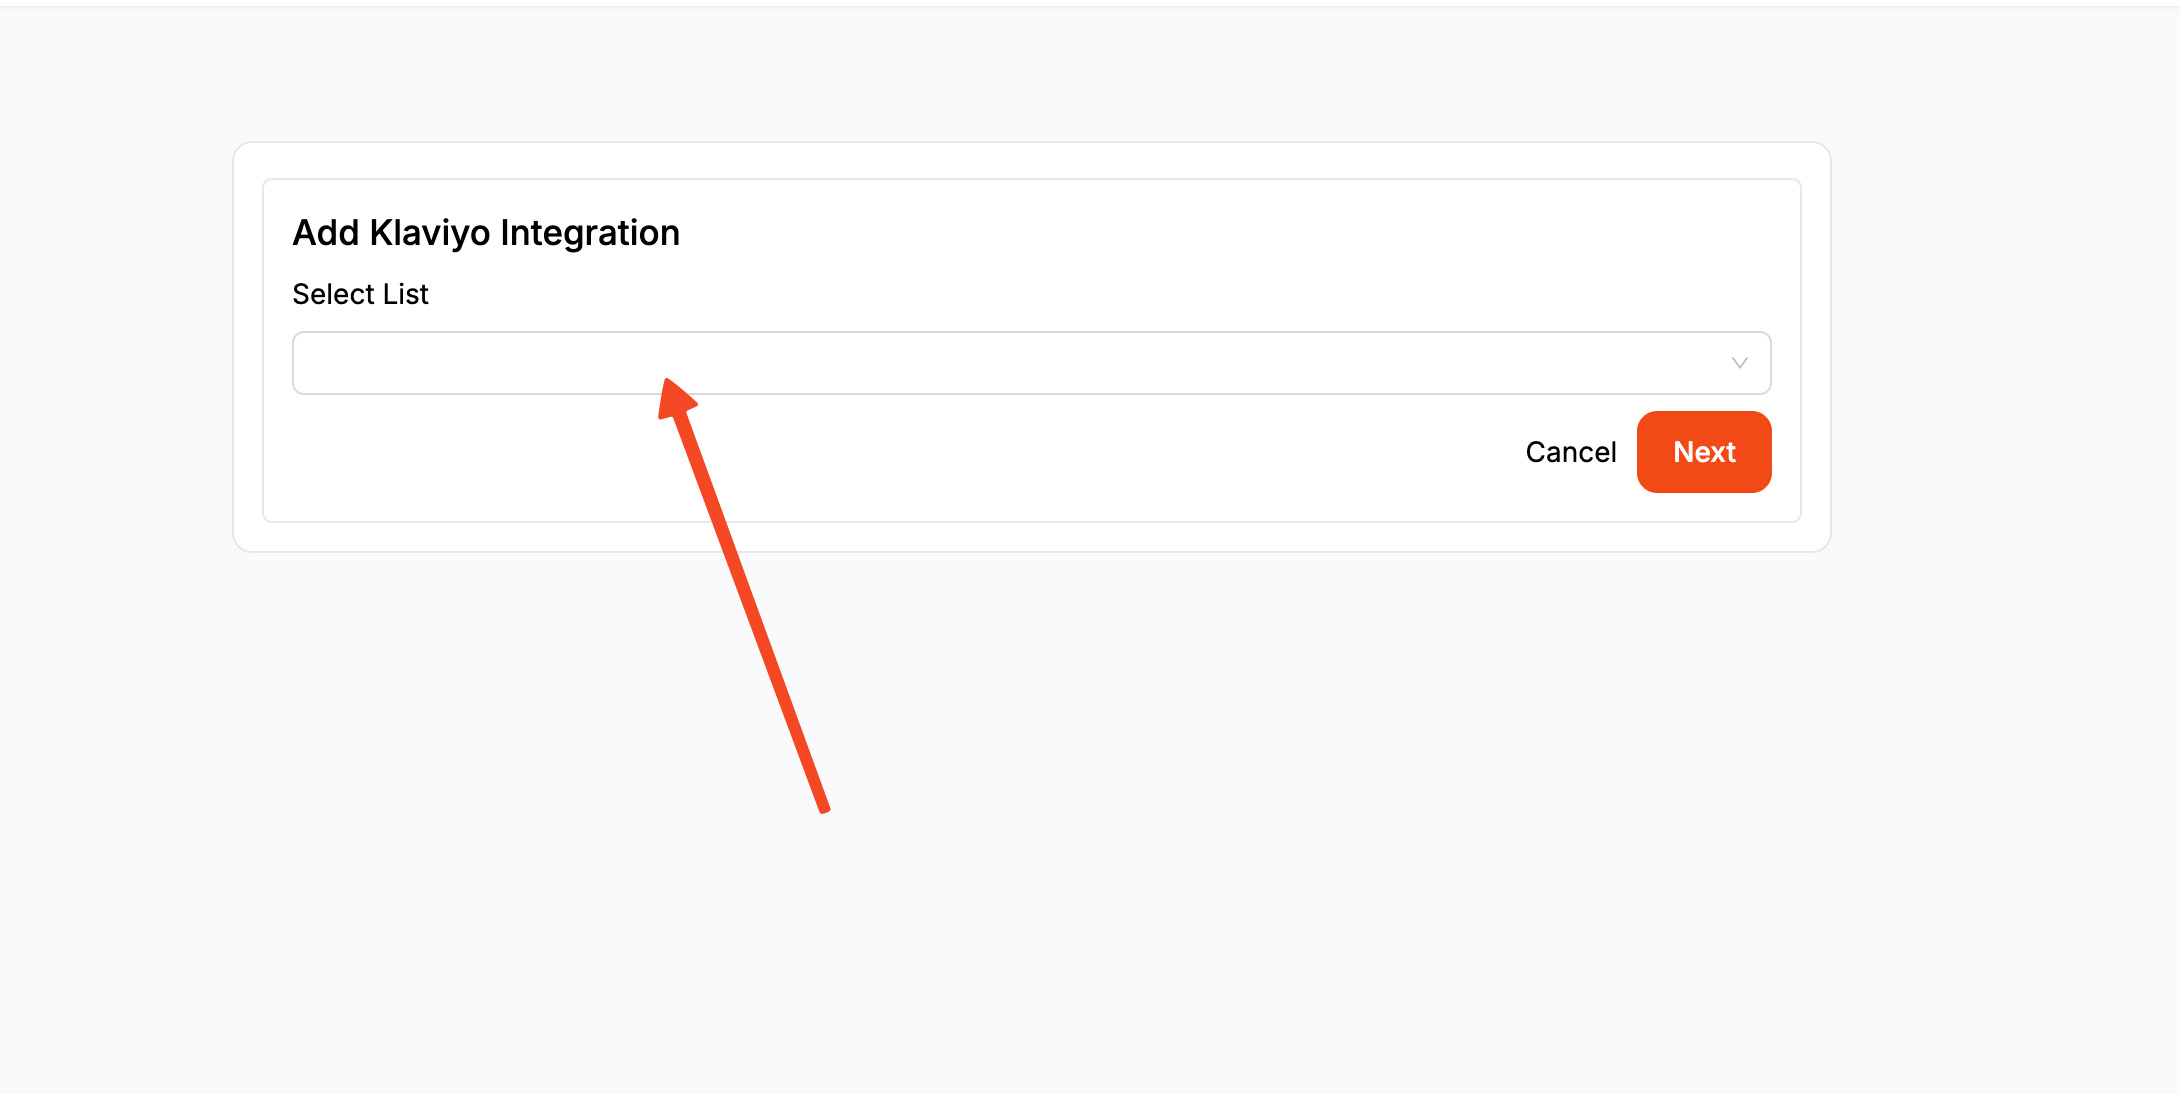
Select Klaviyo from the list of integrations and follow the prompts to log in and authorize your account. You’ll then be asked to choose the specific Klaviyo list where you want to add your subscribers and assign any tags you might need for segmentation.
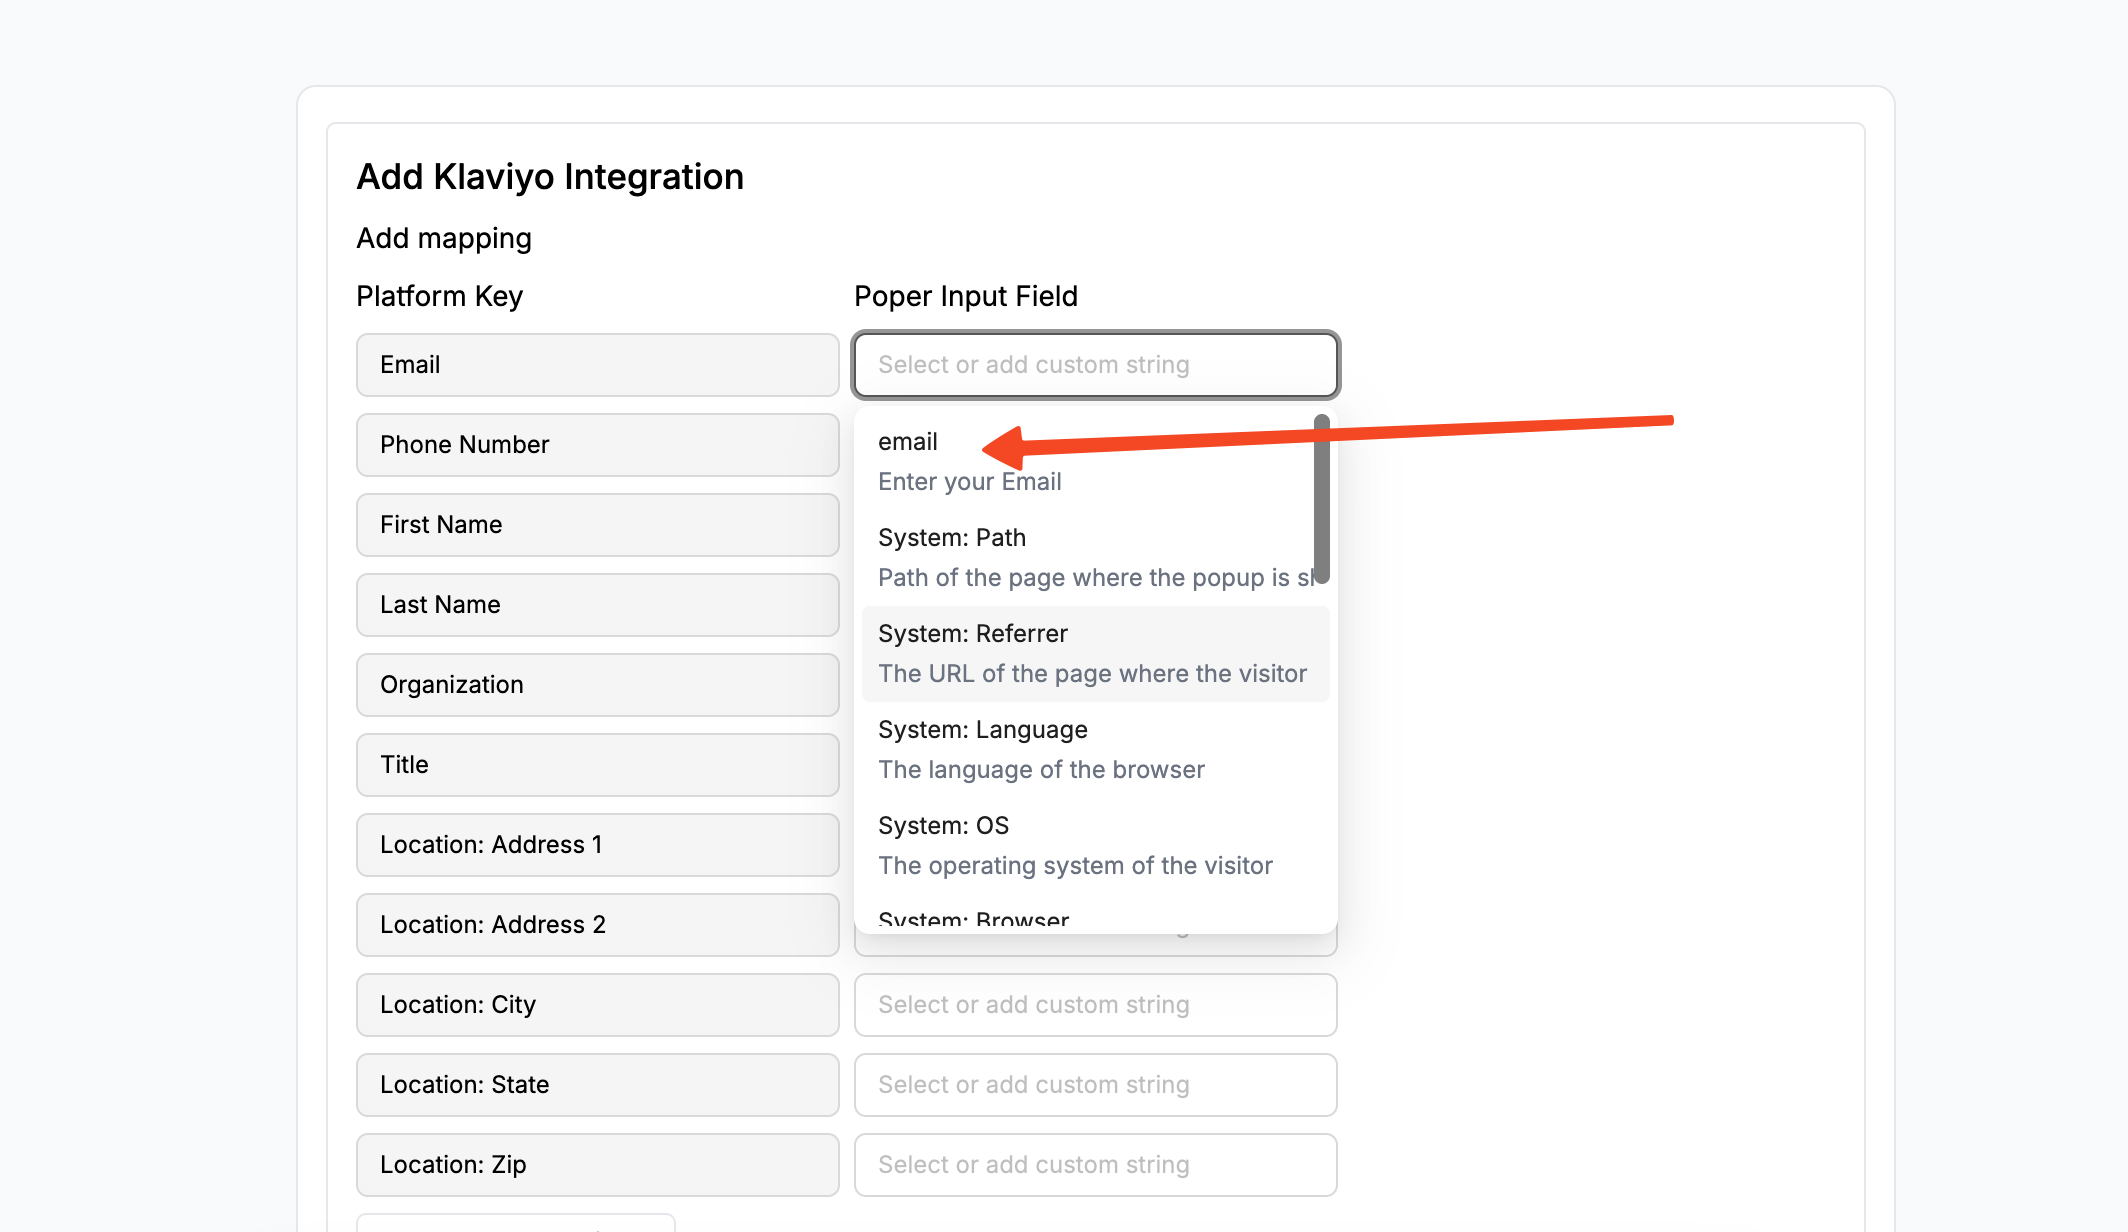
Finally, you’ll map the fields. This just means telling Poper that the "Email" field in your popup should send the data to the "Email" field in Klaviyo.
For a more detailed walkthrough, you can always check out our Klaviyo integration guide. If you're considering running A/B tests on your forms to increase your results, learn how to A/B test Klaviyo forms effectively.
Step 5: Publish Your Campaign

With everything set up, the last step is to bring your campaign to life. Head back to your Poper dashboard and click "Save & Publish" on your new back-in-stock popup.
Step 6: Install the Poper Code on Your Shopify Store
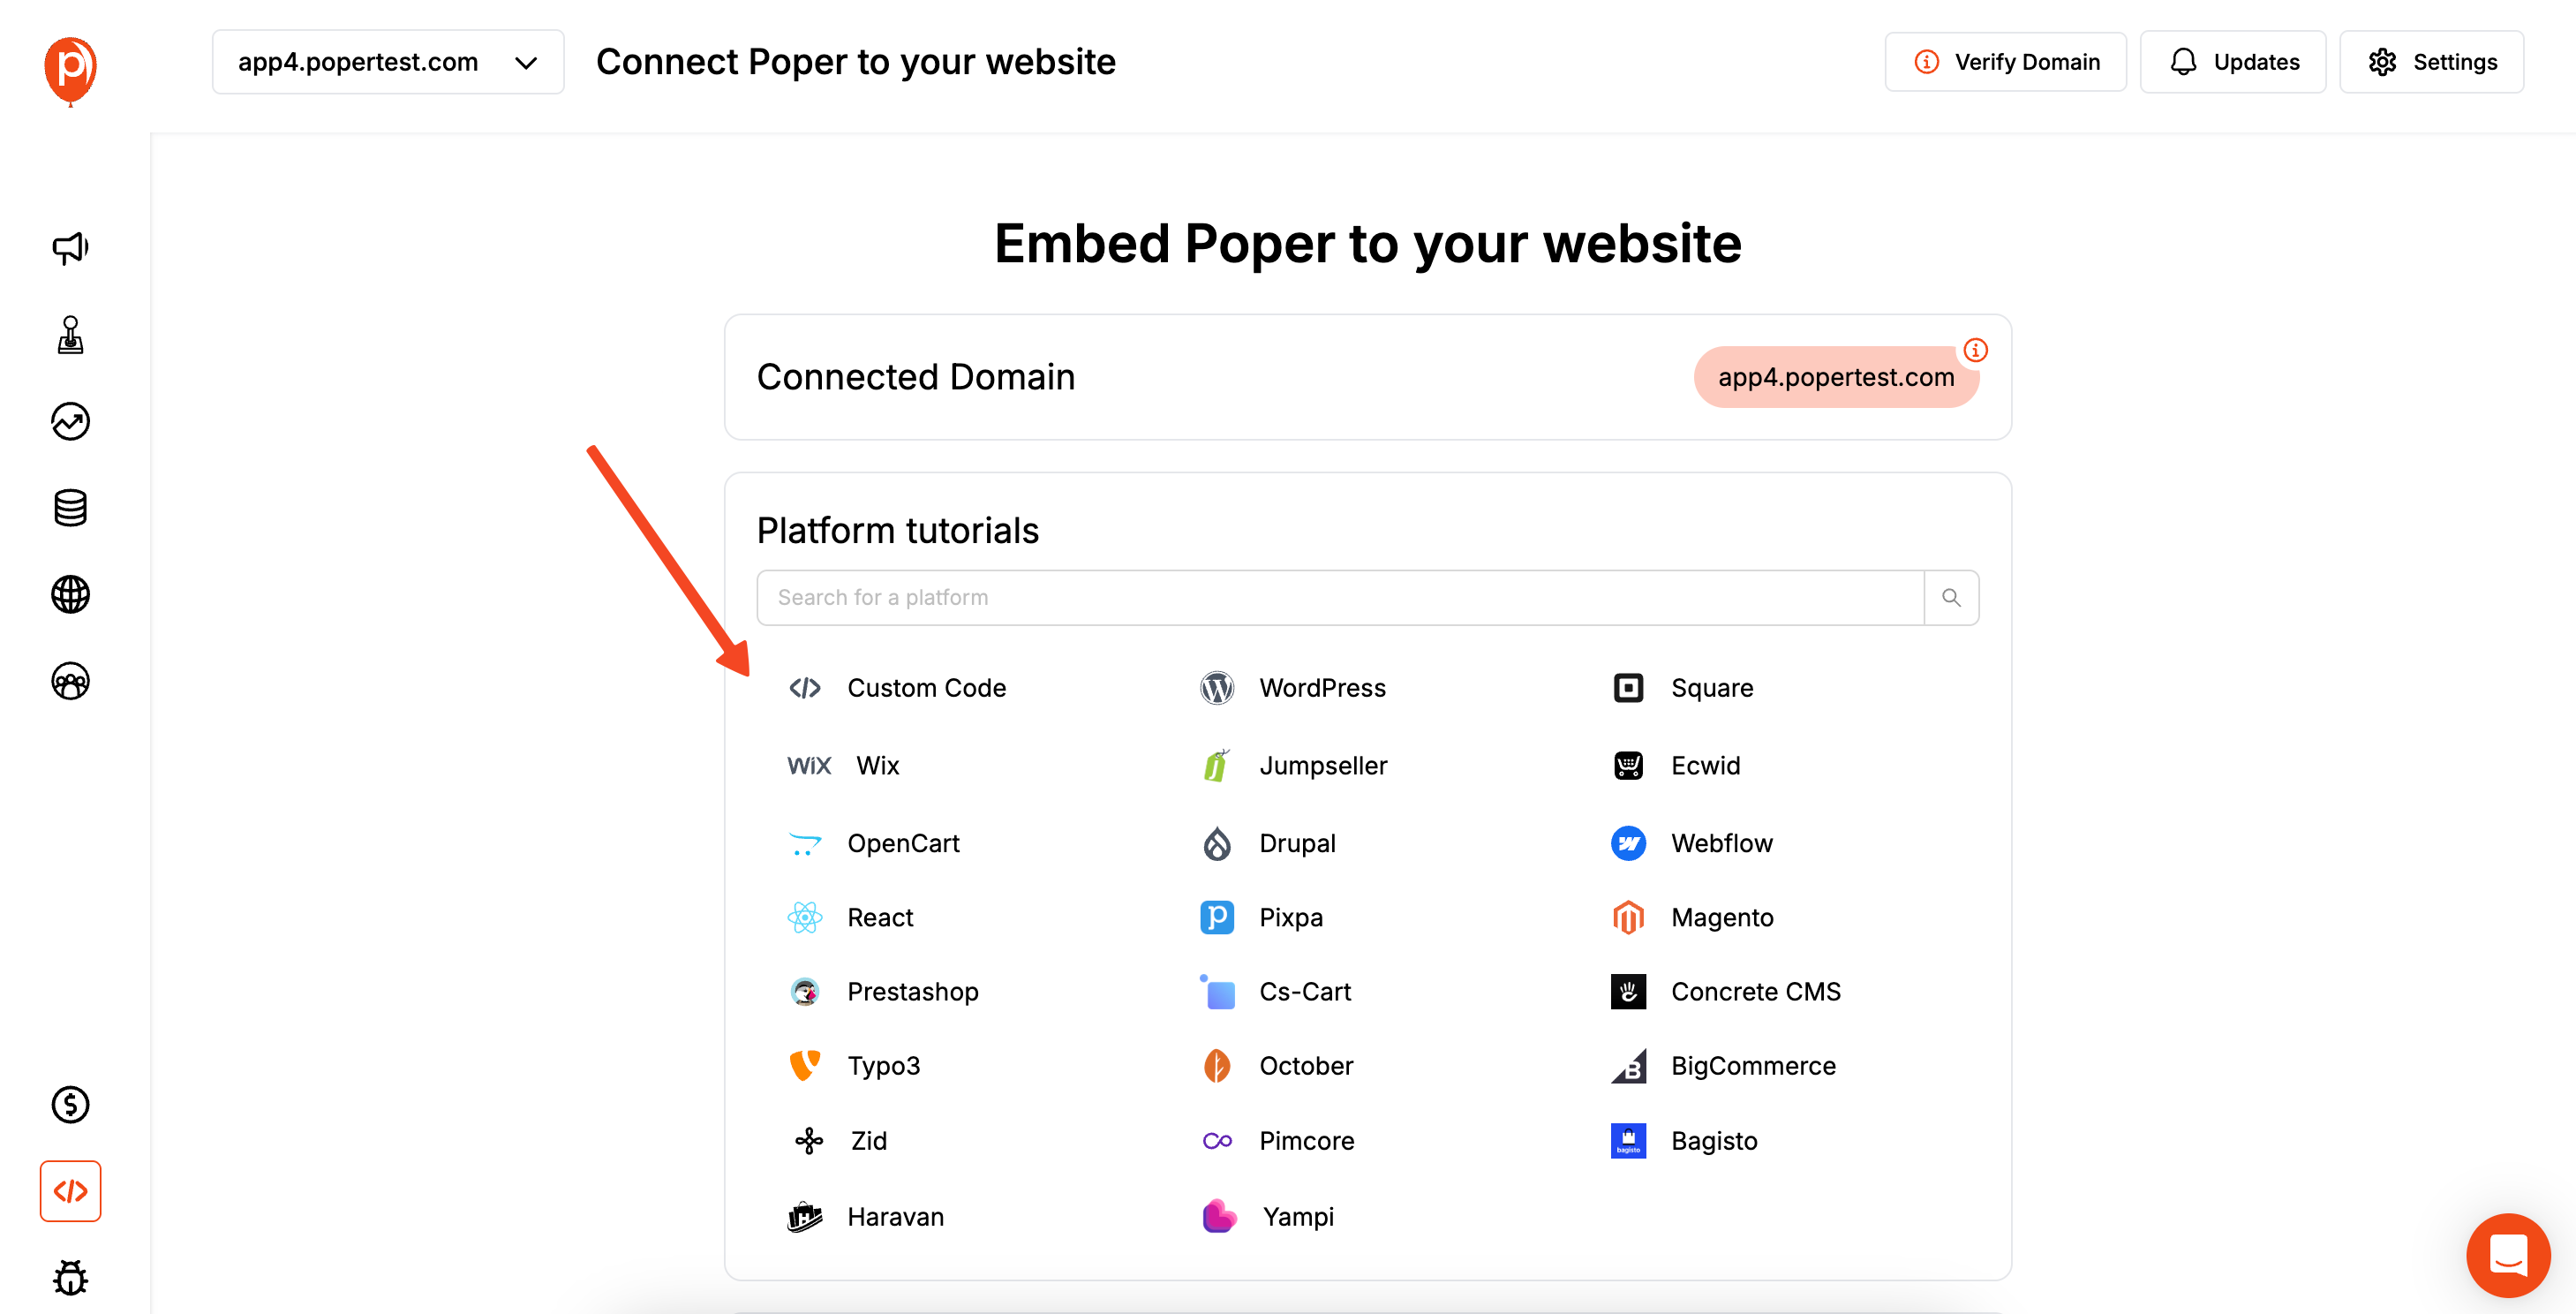
For your popups to appear on your site, you need to add your unique Poper code snippet to your store's theme. This is a one-time setup that you won't have to do again.
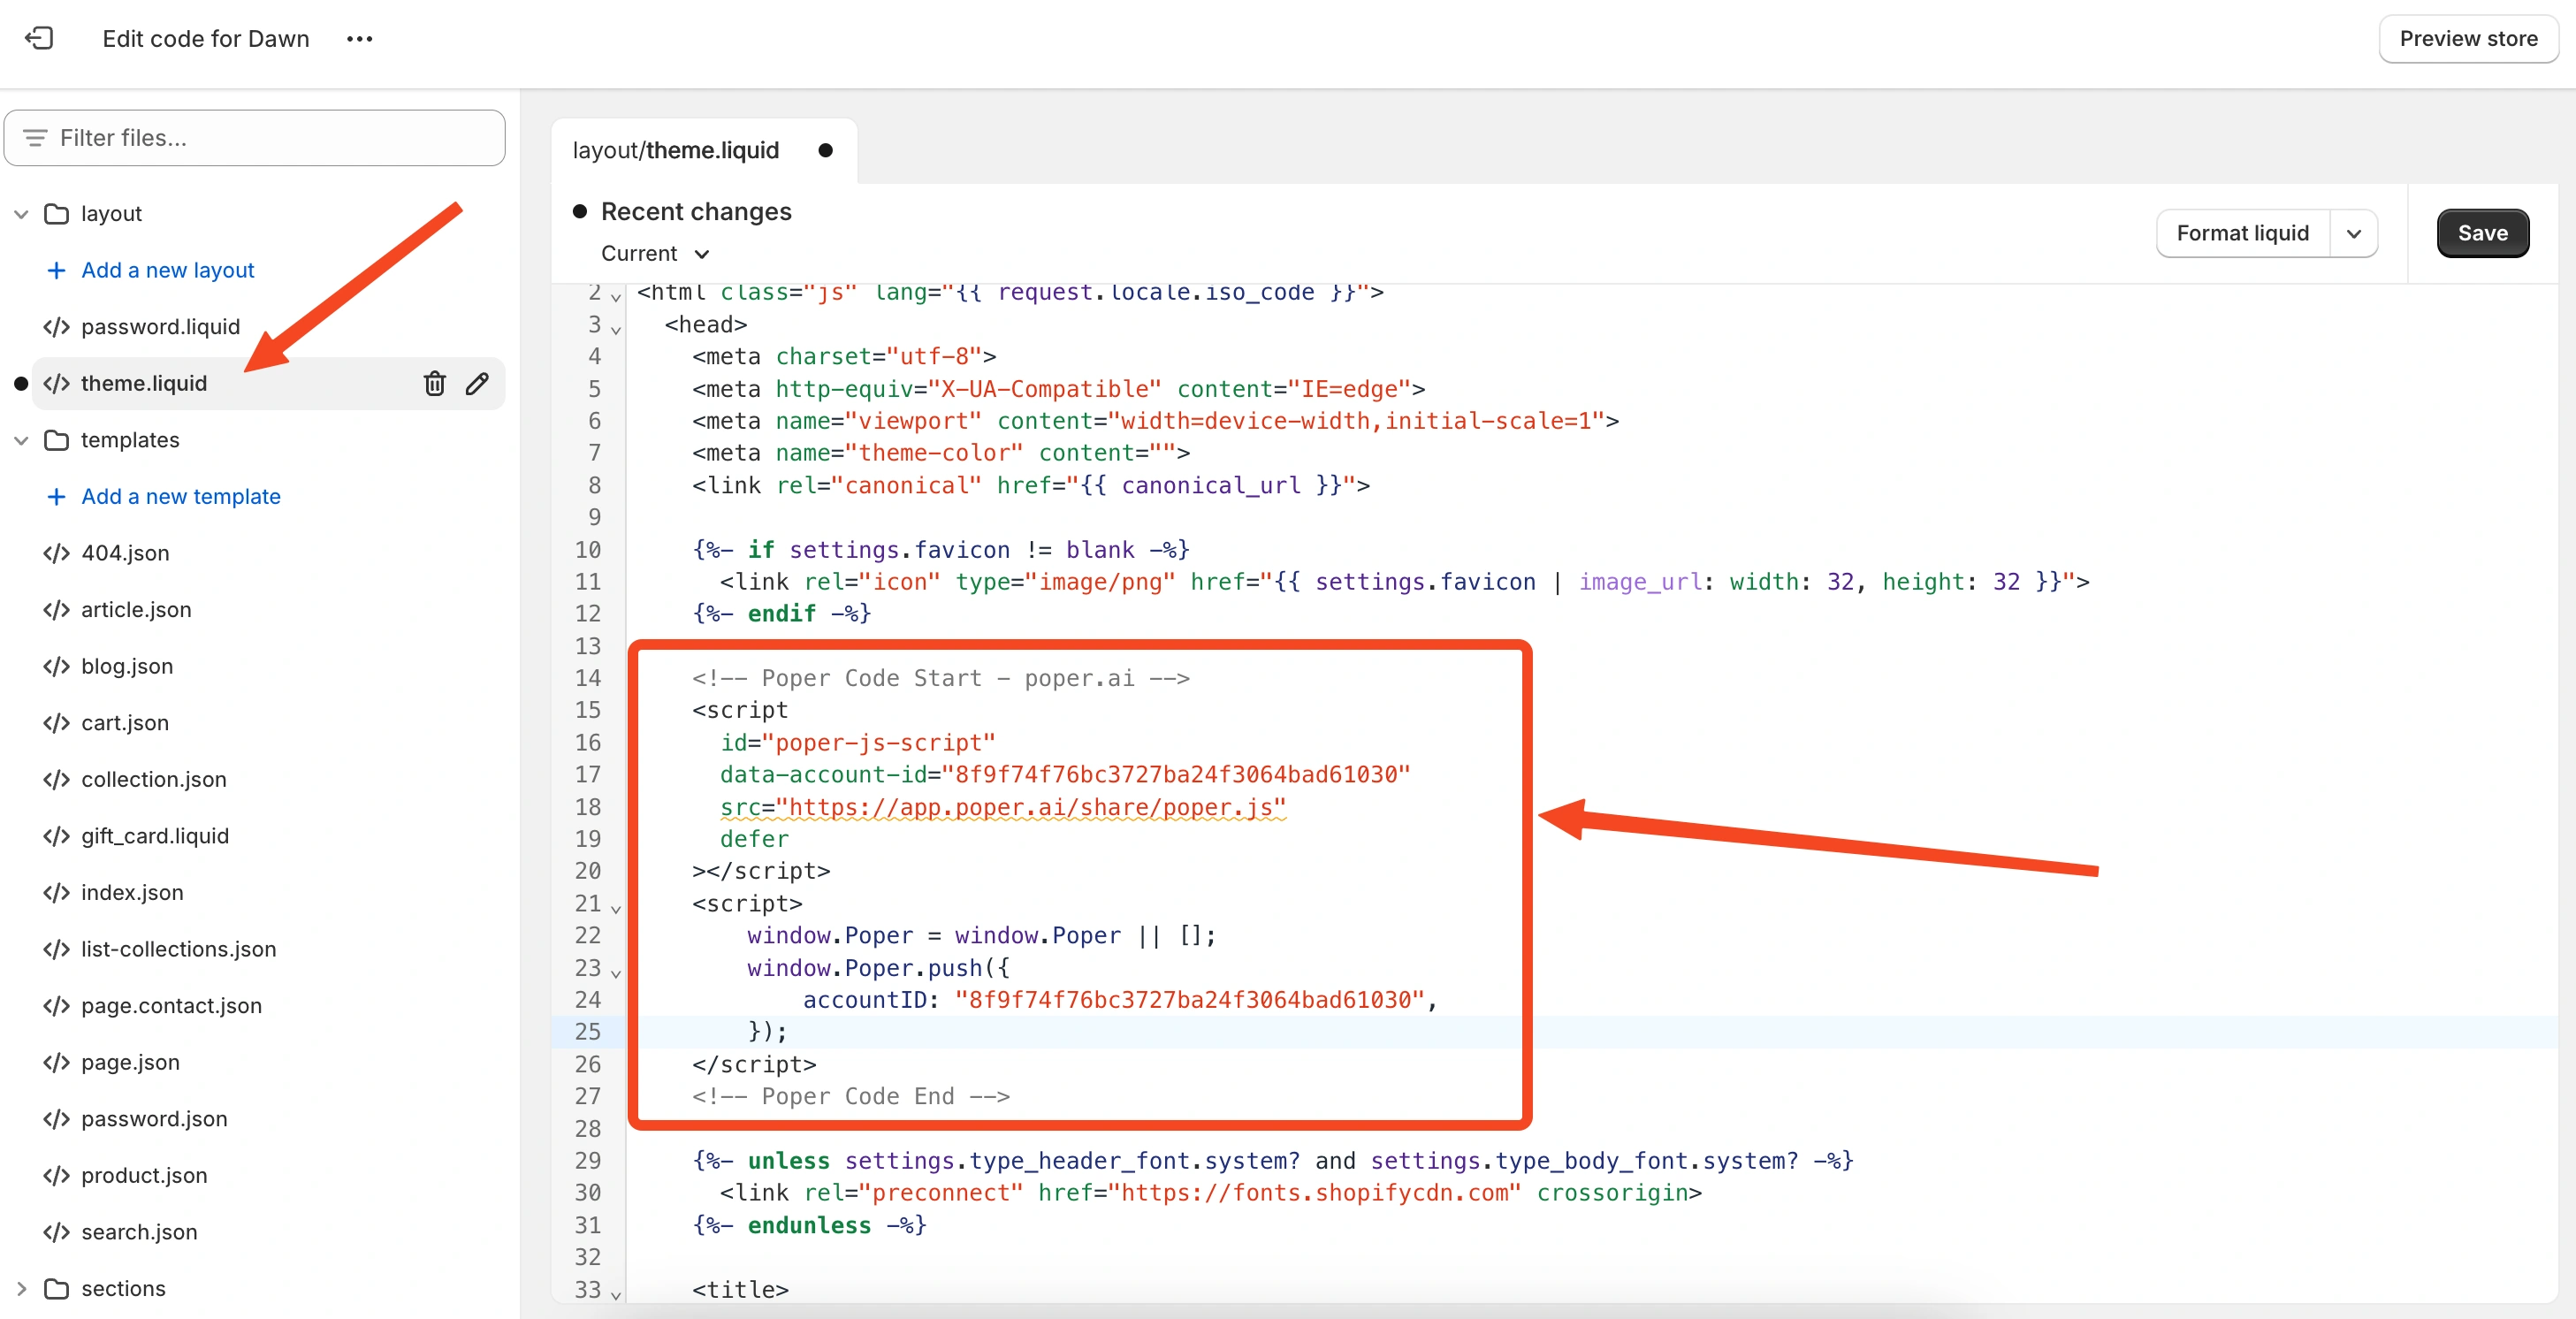
In the Poper dashboard, find the "Code" section in the left navigation bar. Copy the code snippet provided. Then, go to your Shopify admin dashboard, navigate to Online Store > Themes, and click Edit code. Find the theme.liquid or header.liquid file and paste the copied code within the <head> section. Click save.
And that’s it! Now, whenever a product is out of stock on your Shopify store, your new popup will appear, allowing customers to sign up for an alert. Those signups will flow directly into your chosen Klaviyo list, ready for you to notify them the moment the product is available again.
Method 1: Setting Up Klaviyo's Native Back in Stock Feature on Shopify
This is the most powerful and recommended method for Shopify users, as it leverages Klaviyo's deep integration to automate the entire process.
Step 1: Enable Klaviyo's On-Site Tracking for Shopify
Before you begin, ensure Klaviyo is correctly tracking activity on your Shopify store.
In your Klaviyo account, go to Integrations > Shopify.
Make sure the "Onsite tracking" (Klaviyo.js) setting is enabled.
Click "Update Settings." This script is essential for Klaviyo to know which products are out of stock and to display the sign-up form.
Step 2: Add the Back in Stock Snippet to Your Shopify Theme
Klaviyo requires a small code snippet to be added to your theme to display the "Notify Me When Available" button on out-of-stock product pages.
In Klaviyo, go to Sign-up Forms > Create Sign-up Form. While you aren't creating a traditional popup here, this area sometimes contains helpful links. The easiest way is often to follow Klaviyo's official documentation for their "Back in Stock" snippet.
The snippet typically looks like this:
`<script src="https://a.klaviyo.com/media/js/onsite/onsite.js"></script><script>
var klaviyo = klaviyo || [];
klaviyo.init({
account: "YOUR_PUBLIC_API_KEY",
platform: "shopify"
});
klaviyo.enable("backinstock",{
trigger: {
product_page_text: "Notify Me When Available",
product_page_class: "btn",
product_page_text_align: "center",
product_page_margin: ".5em 0"
},
modal: {
headline: "{product_name}",
body_content: "Register to receive a notification when this item is back in stock.",
email_field_label: "Email",
button_label: "Notify me",
subscription_success_label: "You're in! We'll let you know when it's back.",
... other customization options ...
}
});
</script>`Find Your Public API Key: In Klaviyo, go to Account & billing > Settings > API Keys. Copy your Public API Key.
Add to Shopify Theme:
- In your Shopify Admin, go to Online Store > Themes.
- Click the ... menu on your current theme and select Edit code.
- Find your main product template file, often named main-product.liquid, product-template.liquid, or similar, within the "Sections" folder.
- Paste the Klaviyo snippet where you want the "Notify Me When Available" button to appear (e.g., near the "Add to Cart" button, which is usually disabled when a product is sold out).
- Replace YOUR_PUBLIC_API_KEY with your actual key.
- Click "Save."
In your Shopify Admin, go to Online Store > Themes.
Click the ... menu on your current theme and select Edit code.
Find your main product template file, often named main-product.liquid, product-template.liquid, or similar, within the "Sections" folder.
Paste the Klaviyo snippet where you want the "Notify Me When Available" button to appear (e.g., near the "Add to Cart" button, which is usually disabled when a product is sold out).
Replace YOUR_PUBLIC_API_KEY with your actual key.
Click "Save."
Step 3: Test the Sign-Up Form
Navigate to a sold-out product on your live Shopify store.
You should now see a "Notify Me When Available" button.
Clicking this button should open Klaviyo's Back in Stock popup (modal), allowing you to enter an email address.
Submit a test email.
Step 4: Set Up the "Back in Stock" Automated Flow in Klaviyo
This is the email that gets sent when the product is available again.
In Klaviyo, go to Flows > Create Flow.
Search for and select the pre-built "Back in Stock" flow template.
The flow is pre-configured with the correct trigger: "Subscribed to Back in Stock." This means it will only start when someone signs up for an alert for a specific product.
Customize the Email:
- Click on the email template in the flow to edit it.
- Use Klaviyo's dynamic tags like {{ event.ProductName }} and {{ event.ProductURL }} to automatically pull in the specific product's name, image, and link. This is the magic of the native integration—it knows which product the user wanted.
- Customize the copy to create urgency and excitement.
Click on the email template in the flow to edit it.
Use Klaviyo's dynamic tags like {{ event.ProductName }} and {{ event.ProductURL }} to automatically pull in the specific product's name, image, and link. This is the magic of the native integration—it knows which product the user wanted.
Customize the copy to create urgency and excitement.
Turn the Flow Live: Once you're happy with the email, set the flow to "Live."
Now, when you update the inventory of a sold-out product in Shopify, Klaviyo will detect the change and automatically send the notification email to everyone who subscribed to an alert for that specific item.
Klaviyo Native Back in Stock vs. Poper for Back in Stock: Key Differences
| Feature | Klaviyo Native Back in Stock | Poper for Back in Stock (Klaviyo Integrated) |
| Automation | Fully automated (knows specific product, triggers email automatically) | Semi-automated (collects leads, requires manual email campaign for notification) |
| Product Specificity | Tracks interest for each specific SKU | Generally collects leads into one list for manual segmentation |
| Sign-up Form UI | Button on page that triggers a modal popup (design is customizable in Klaviyo) | High design flexibility (popup, slide-in, bar) with advanced Poper triggers (exit-intent) |
| Setup Complexity | Requires adding a code snippet to theme file and setting up a flow | Requires installing Poper's code snippet and setting up integrations |
| Best For | Shopify & BigCommerce stores wanting a fully automated, product-specific alert system | Stores wanting unique popup designs/triggers for alerts, or those on platforms without native Klaviyo BIS support |
Conclusion: Which Method is Best for a Klaviyo Back in Stock Popup?
For Shopify and BigCommerce store owners, Klaviyo's native Back in Stock feature is unequivocally the superior and recommended method. Its ability to tie a subscriber to a specific out-of-stock product and automatically trigger a notification upon restock is a powerful, revenue-recovering automation that is difficult to replicate manually. You can discover more options for Klaviyo vs Mailchimp popups if you're considering alternative platforms.
Using a tool like Poper for this purpose serves as a great alternative if:
You prioritize a highly custom or different style of sign-up form (e.g., an exit-intent popup) over the automated, product-specific notification.
You are on a platform that does not support Klaviyo's native Back in Stock functionality, and you need a way to collect interested leads into a general restock notification list.
By implementing a back-in-stock strategy—ideally Klaviyo's native one—you can transform a potential customer's disappointment into a high-intent lead, build brand loyalty, and recover significant sales revenue. For a deeper look at how popups support lead generation in e-commerce, check out this e-commerce lead generation guide.
Frequently Asked Questions (FAQ)
Does Klaviyo's Back in Stock feature work with all Shopify themes?
Yes, because it works by adding a code snippet directly to your theme's product template file, it is compatible with virtually all Shopify themes. You just need to find the right place to paste the code.
Will the Klaviyo "Notify Me When Available" button show up if the product is in stock?
No, the Klaviyo.js script is smart enough to only display the back-in-stock button/trigger when it detects that the product variant is unavailable (inventory <= 0).
Can I customize the look of Klaviyo's native Back in Stock popup modal?
Yes, within the Klaviyo snippet code itself, there are many properties you can change, such as headline, body_content, button_label, colors, and more, to match your brand.
Do I need a paid Klaviyo plan for the Back in Stock feature?
The Back in Stock flow is a standard feature. Your ability to send emails will depend on your Klaviyo plan's subscriber and email send limits.
What happens if a customer signs up for an alert for a product I never restock?
They will simply remain in Klaviyo's internal "waiting" list for that specific product but will not receive an email until its inventory is updated. You can view who is waiting for which products within Klaviyo.
Can I test the Klaviyo Back in Stock flow without actually restocking a product?
Yes. You can trigger the flow manually for a test profile in Klaviyo. Find your test profile, click "Trigger Flow," and select the "Back in Stock" flow to see how the email looks.

