
One of the biggest challenges for any e-commerce store is the dreaded abandoned cart. A visitor adds products, gets to the checkout, and then… disappears. As the CTO of Poper, I’ve built tools specifically to help you tackle this problem head-on. If you're interested in additional ways to remind shoppers and prevent missed revenue, see our cart abandonment reminders use case.
Let's walk through how you can create a powerful abandoned cart popup that not only stops visitors from leaving but also sends their details directly to your Klaviyo list for follow-up.
Step 1: Get Your Poper Code on Shopify
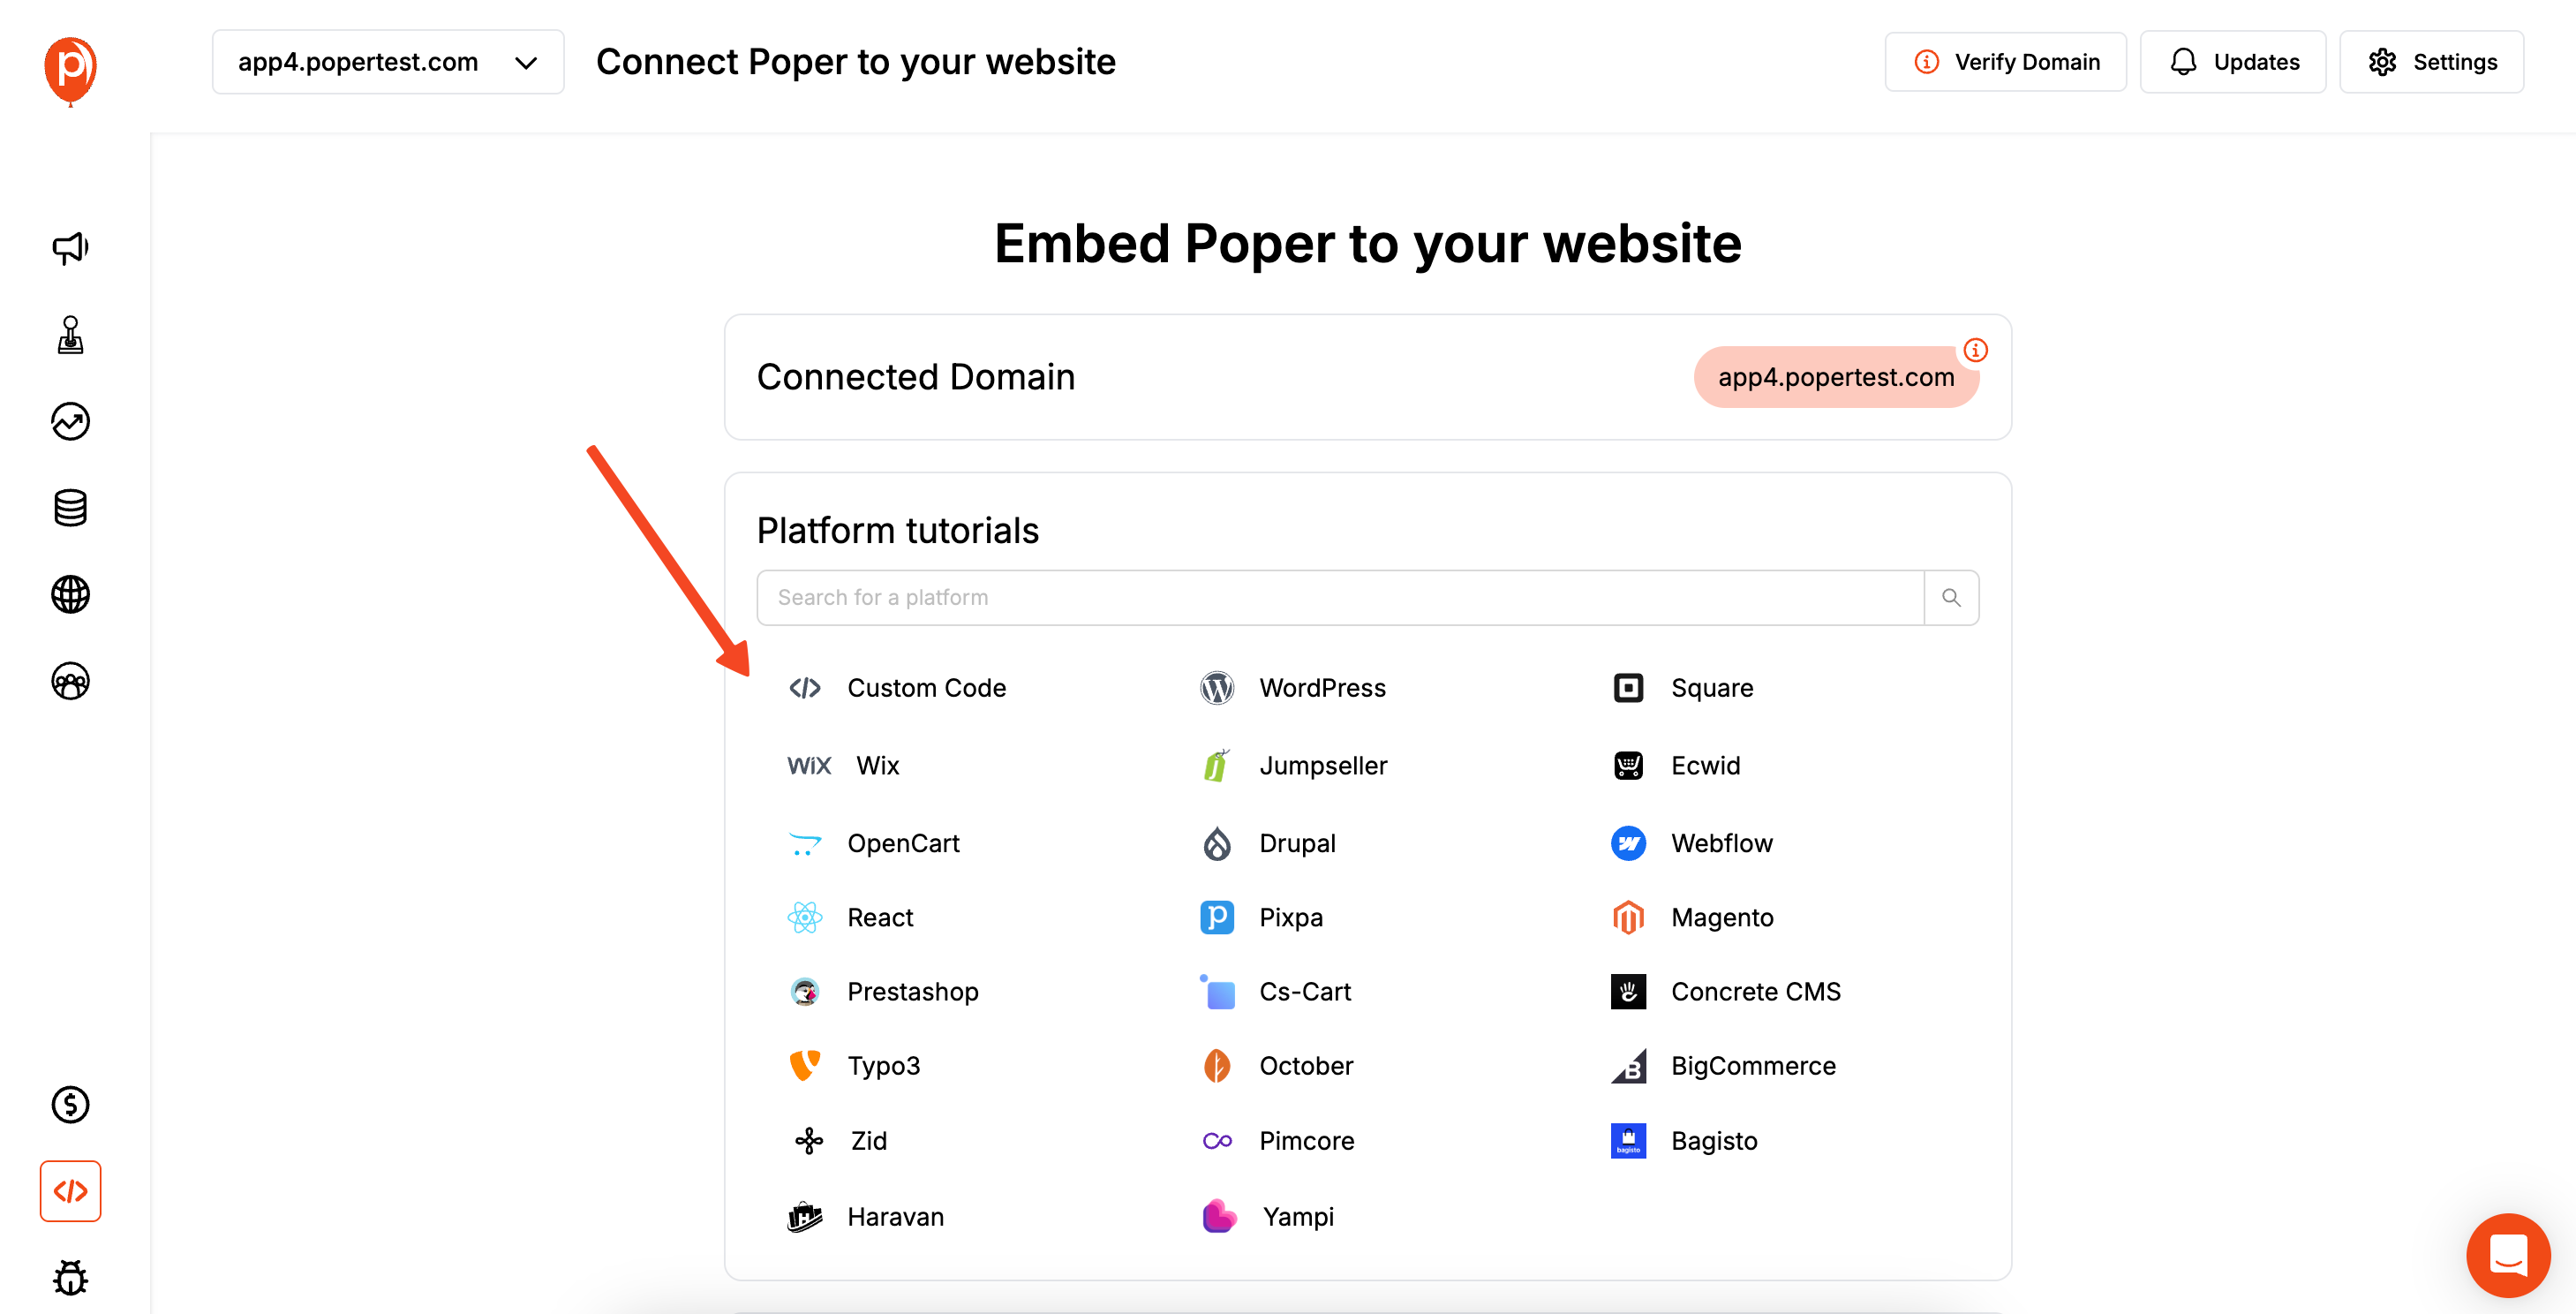
Before we build the popup, we need to make sure Poper can communicate with your Shopify store. If you haven't already, sign up for a Poper account and add your website domain. Then, go to the "Code" section in the left navigation bar and copy your unique workspace code. For a step-by-step guide to creating list-building popups on Shopify, see how to add a newsletter popup in Shopify.
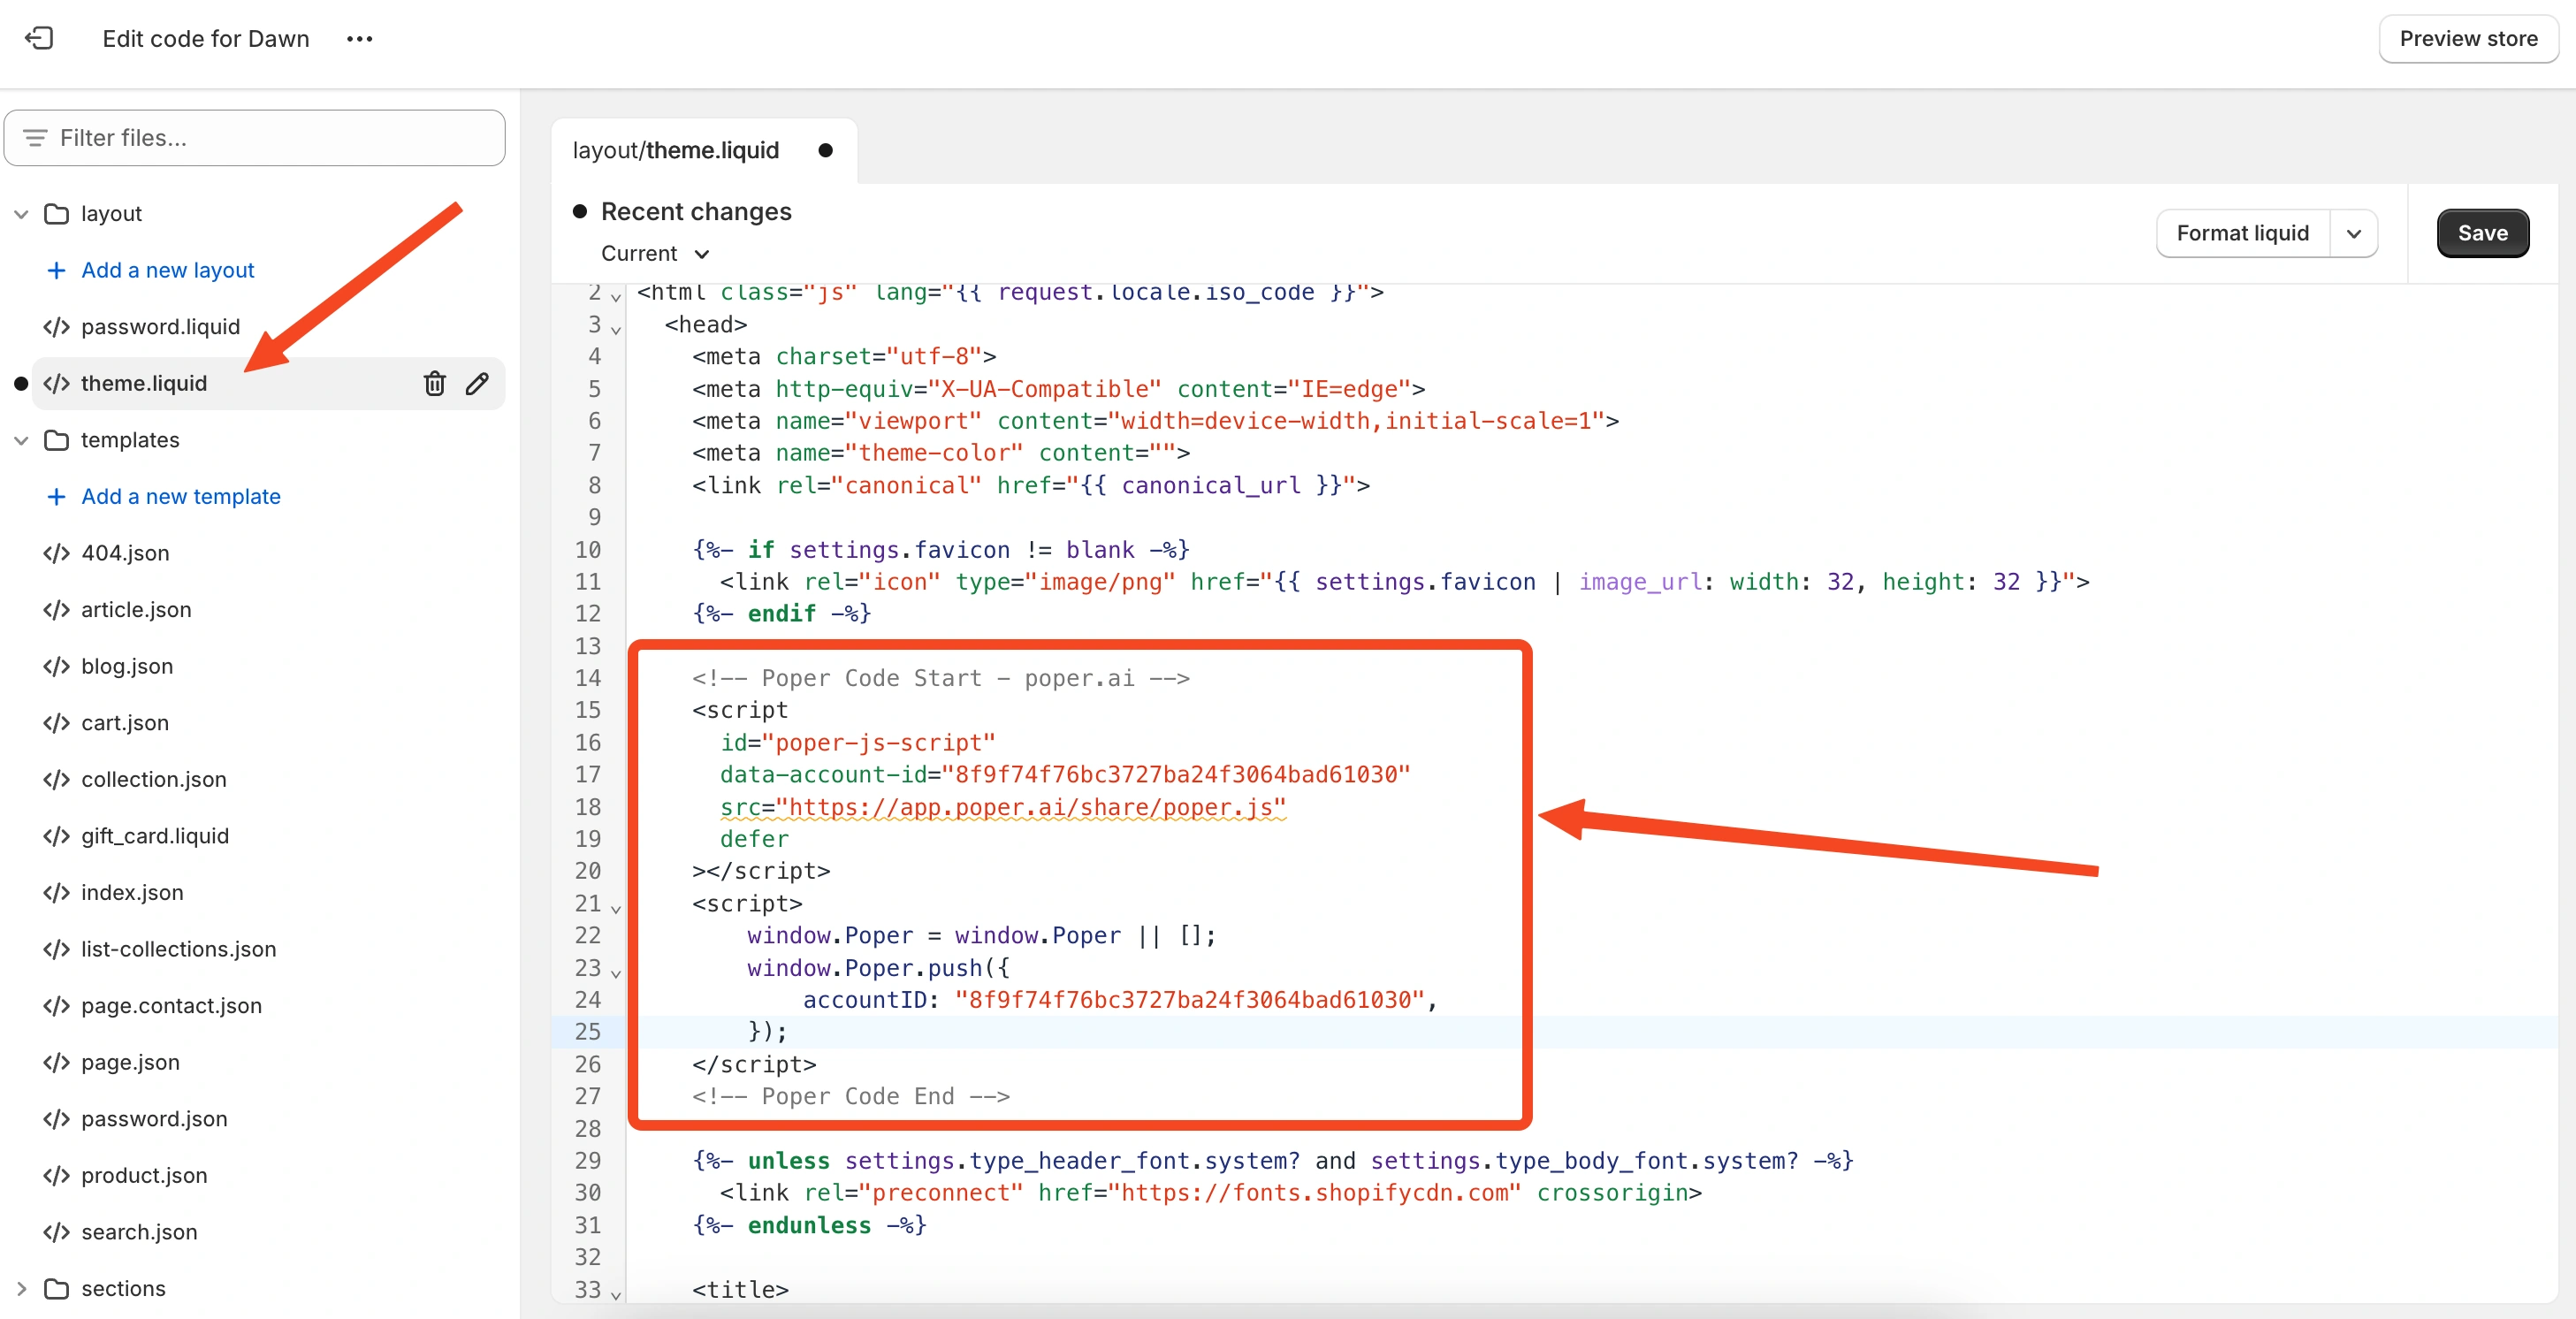
Head over to your Shopify admin dashboard, go to Online Store > Themes, and click Edit code. Find the theme.liquid file and paste the Poper code right before the closing </head> tag. This one-time step allows all your future Poper campaigns to work seamlessly on your site. For more Shopify-specific popup techniques, check out our guide on using Klaviyo Popup for Shopify.
Step 2: Start with an Abandoned Cart Template
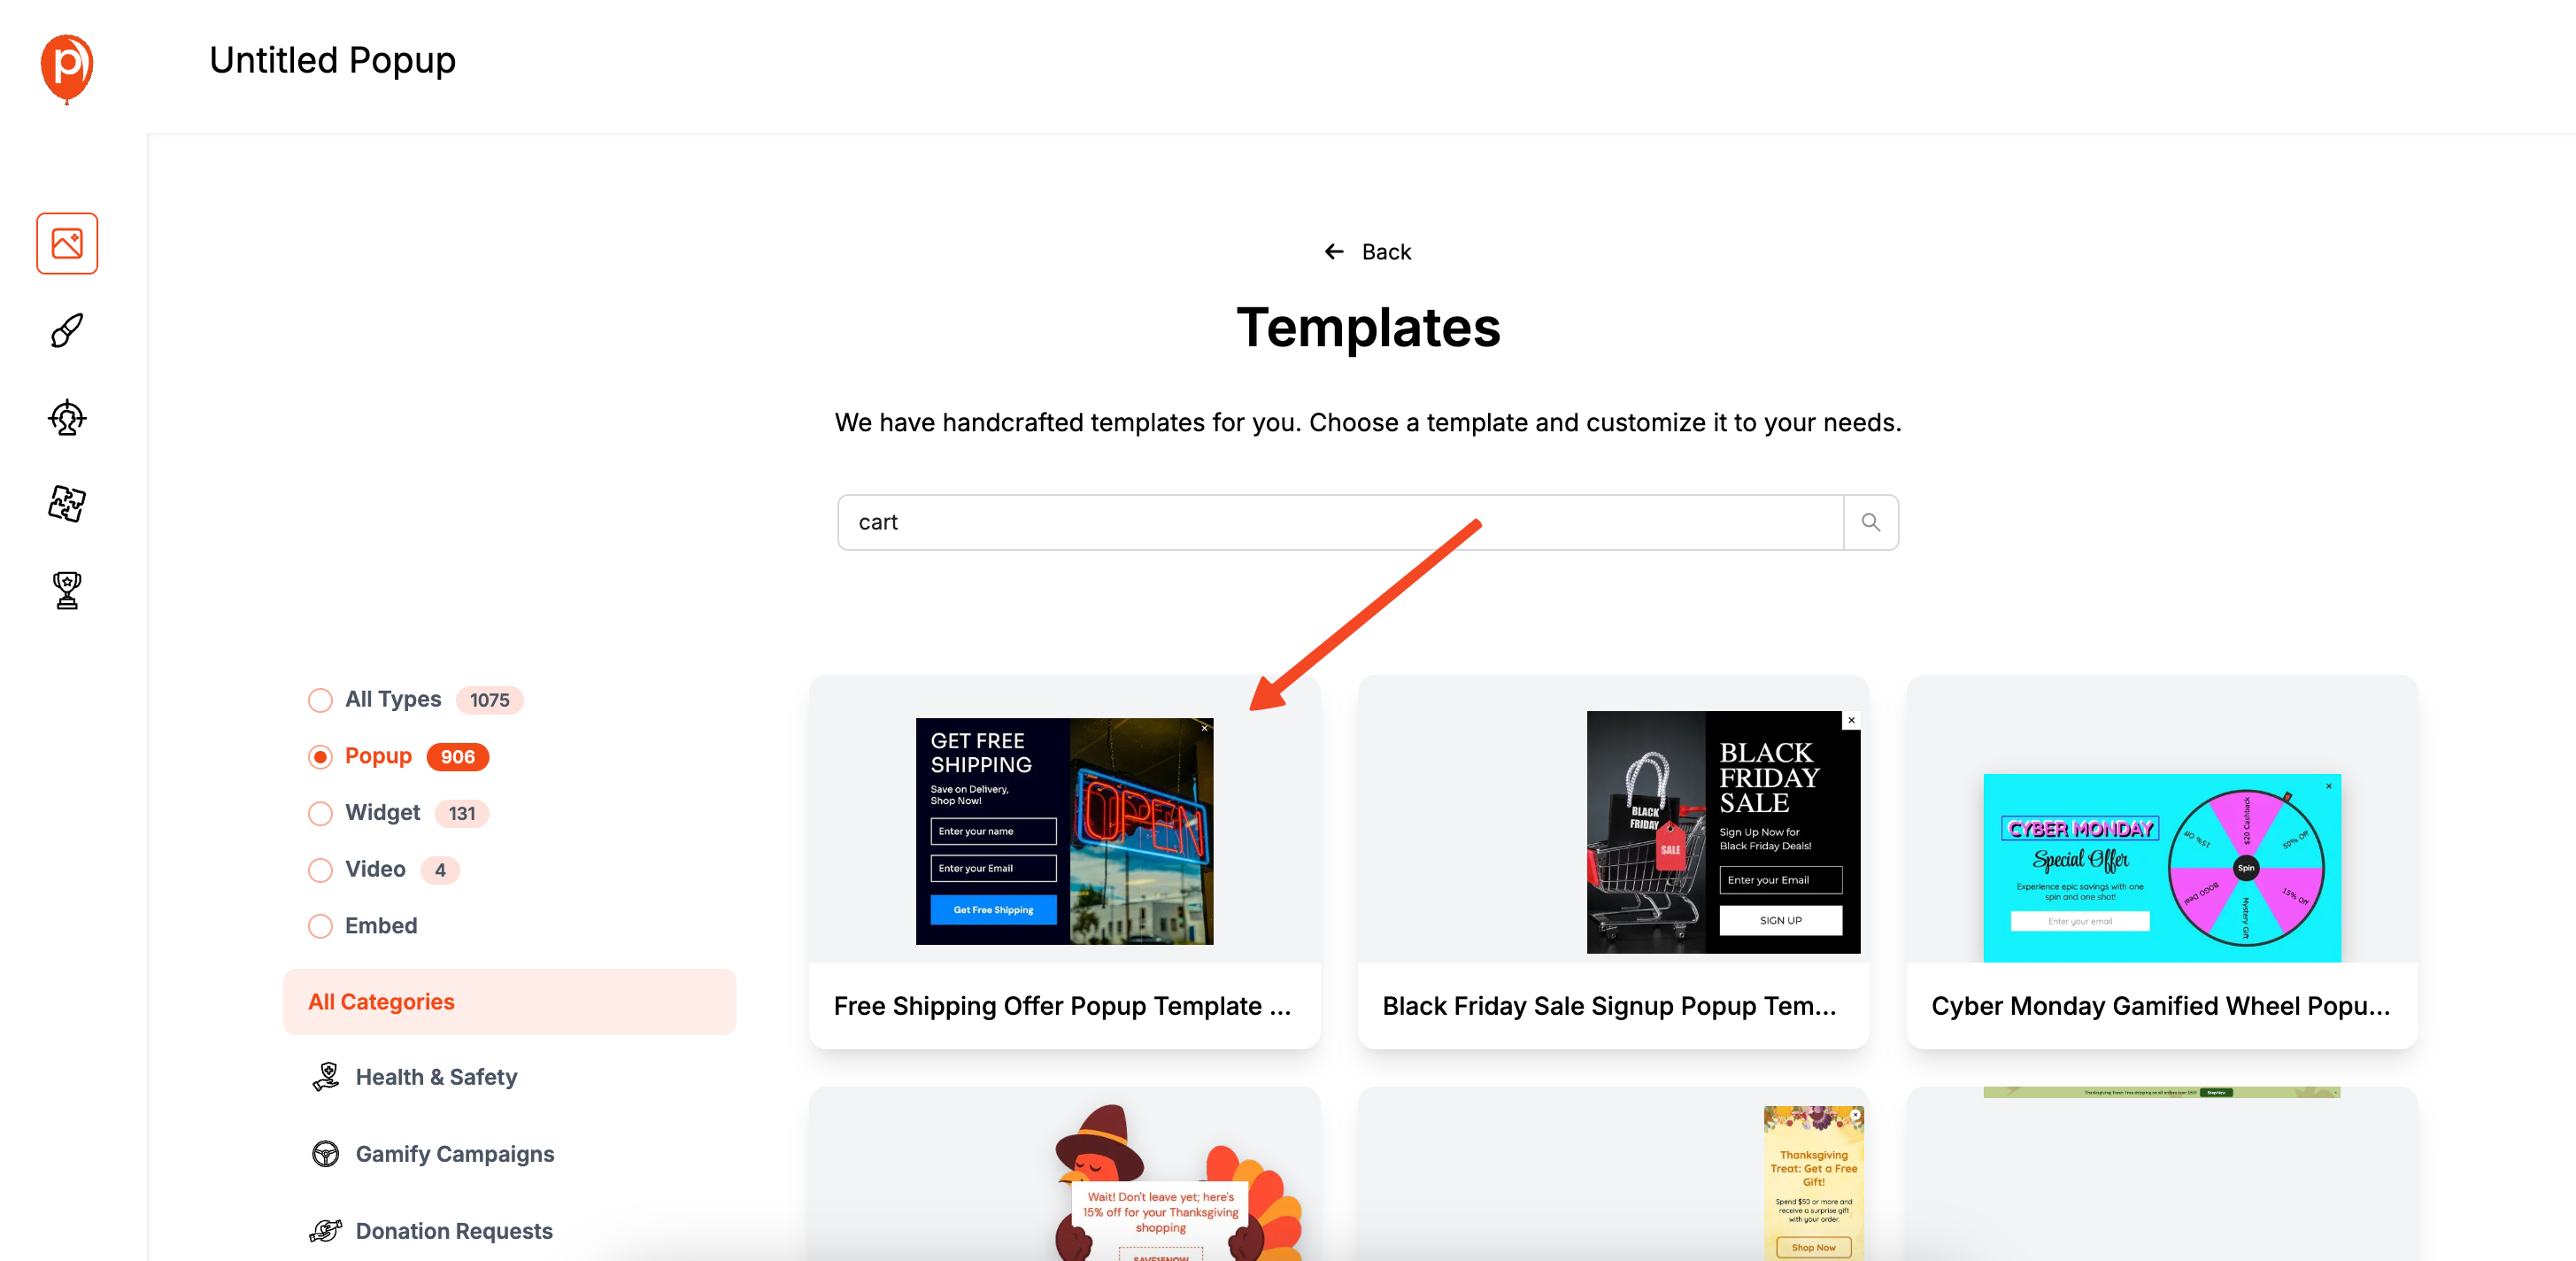
Now for the fun part. In your Poper dashboard, click "New Popup" to get started. I always recommend using our templates because they give you a huge head start. Click on "Choose from Templates" to open the library.
In the search bar, type terms like “Abandoned,” “Cart,” or “Exit” to find popups designed for this exact situation. I personally like the Product Offer Exit Intent Popup template because it's clean and has a clear call to action, including an email field we'll need for Klaviyo. If you'd like to explore more exit-intent strategies, see our full comparison on Amped vs Klaviyo Popup.
Step 3: Customize the Popup to Match Your Brand
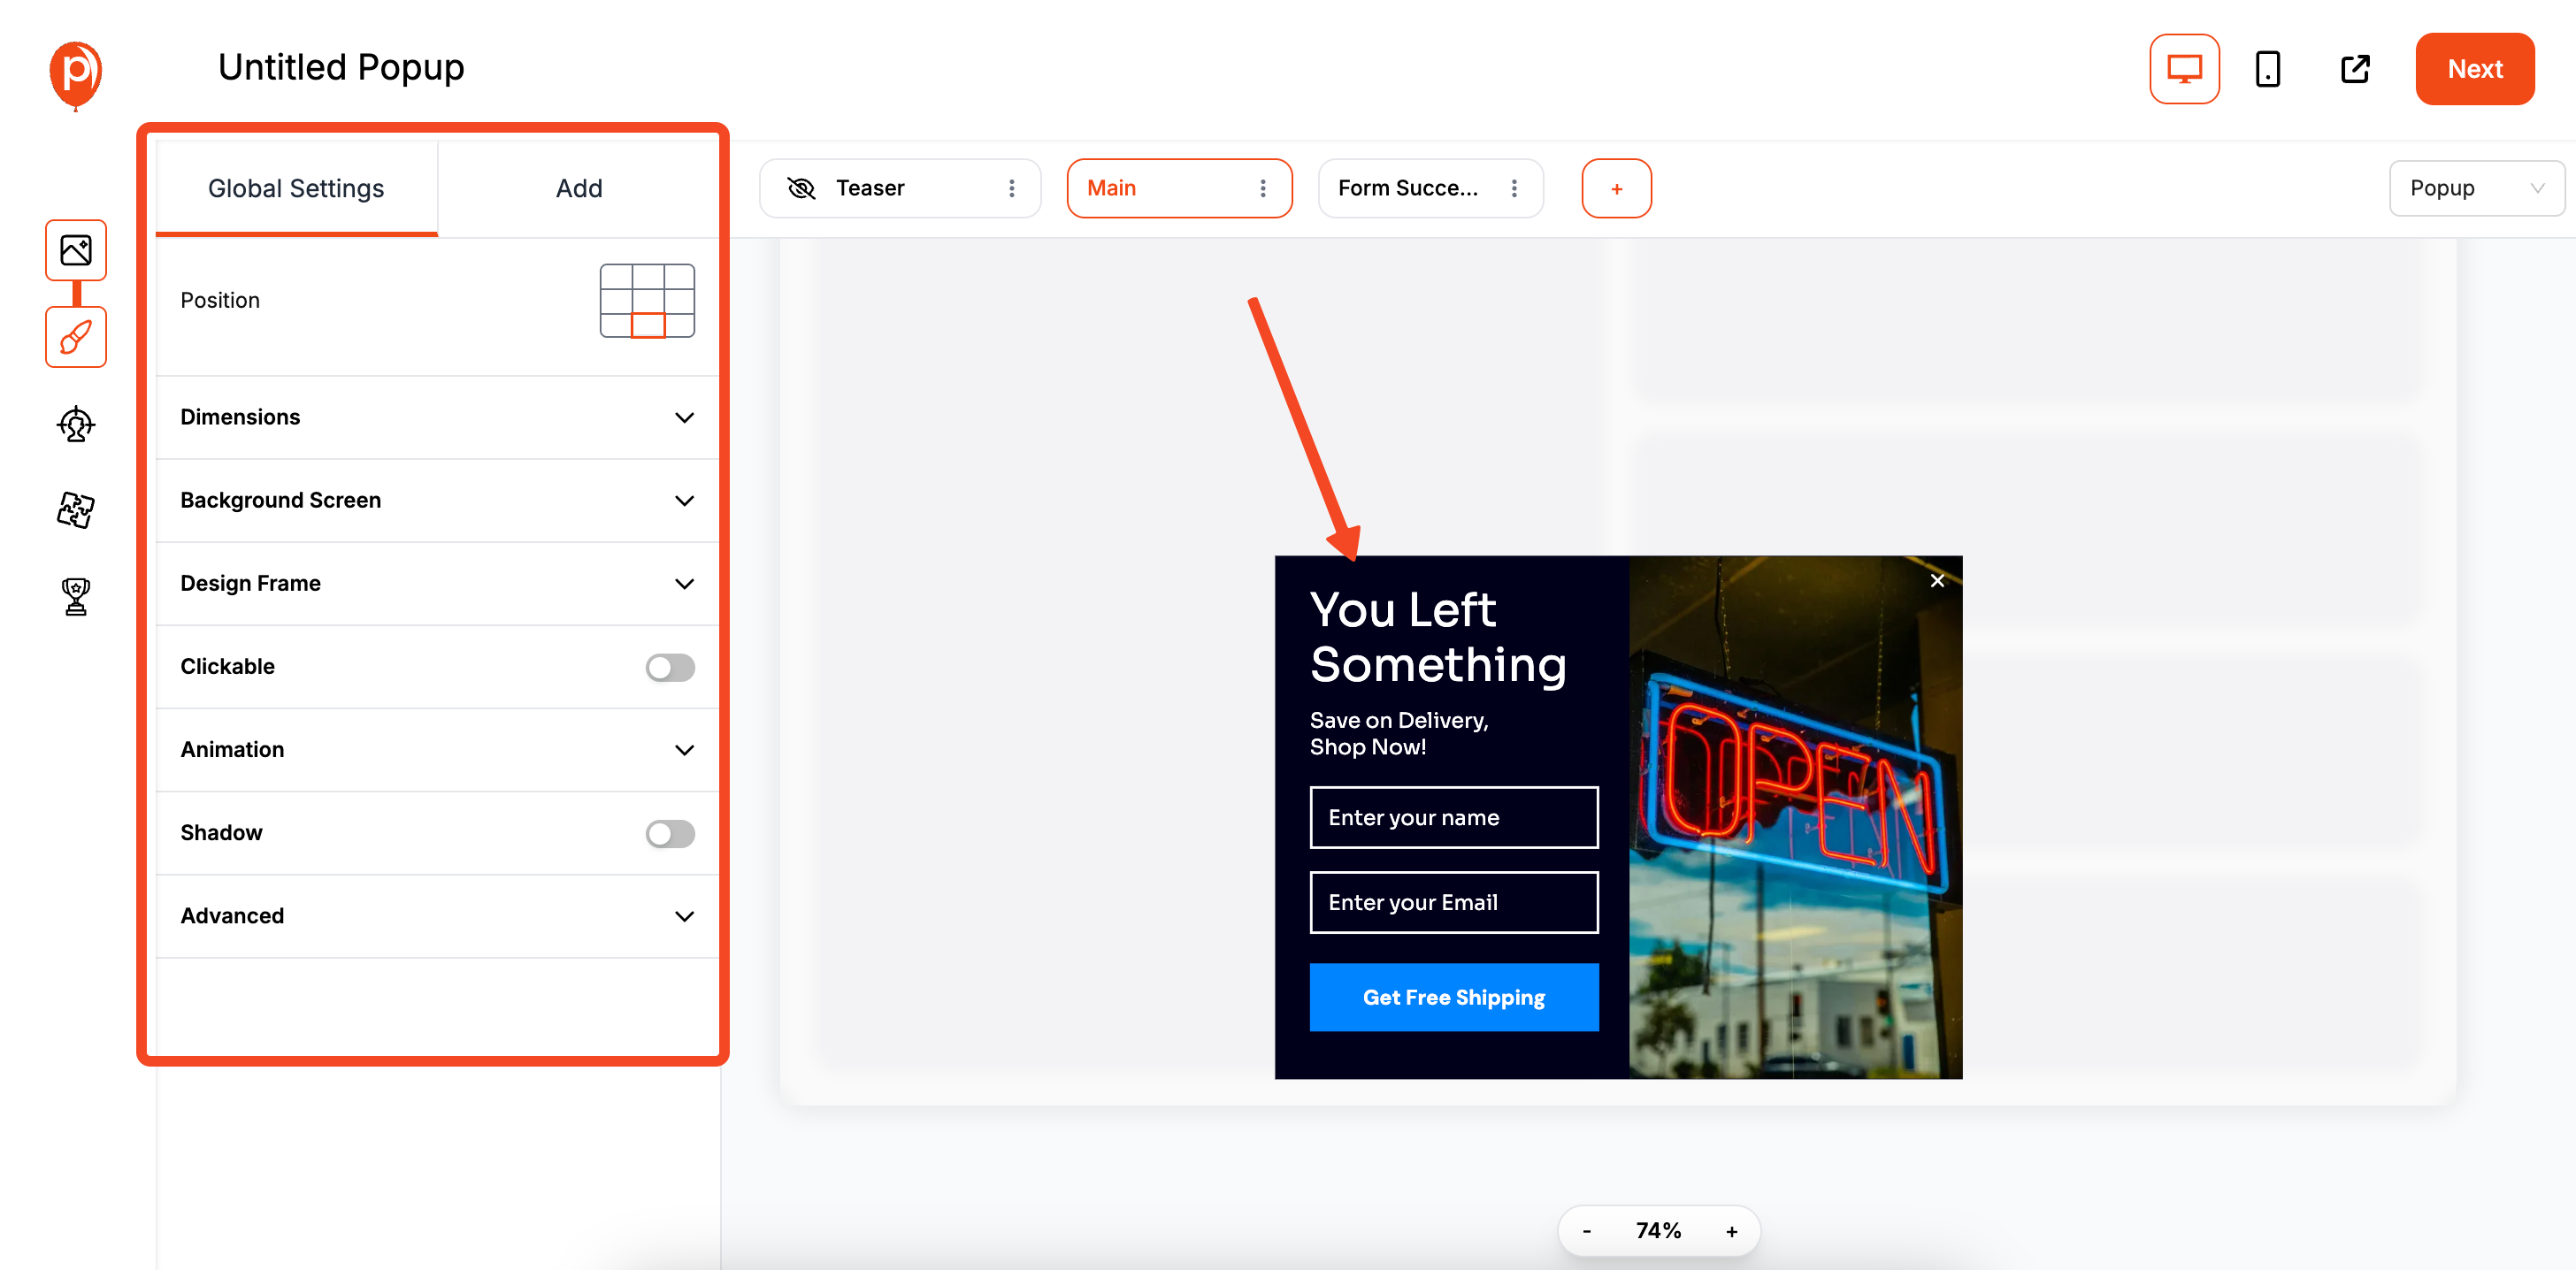
Once you’ve selected a template, it’s time to make it your own. Use the editor to change the colors, fonts, and images to perfectly match your brand’s look and feel. For inspiration on designs and high-converting formats, browse our popup template library.
Rewrite the text to reflect your offer. A compelling headline like "Wait! Don't Go Empty-Handed" or "Get 15% Off to Complete Your Order" works wonders. Keep the design simple and focused—the goal is to present a great offer, not overwhelm the visitor.
Step 4: Set Up the Exit-Intent Trigger.
Mastering exit-intent technology can help you reduce abandonment even further. For deeper strategy ideas, check out our article on exit intent popups.
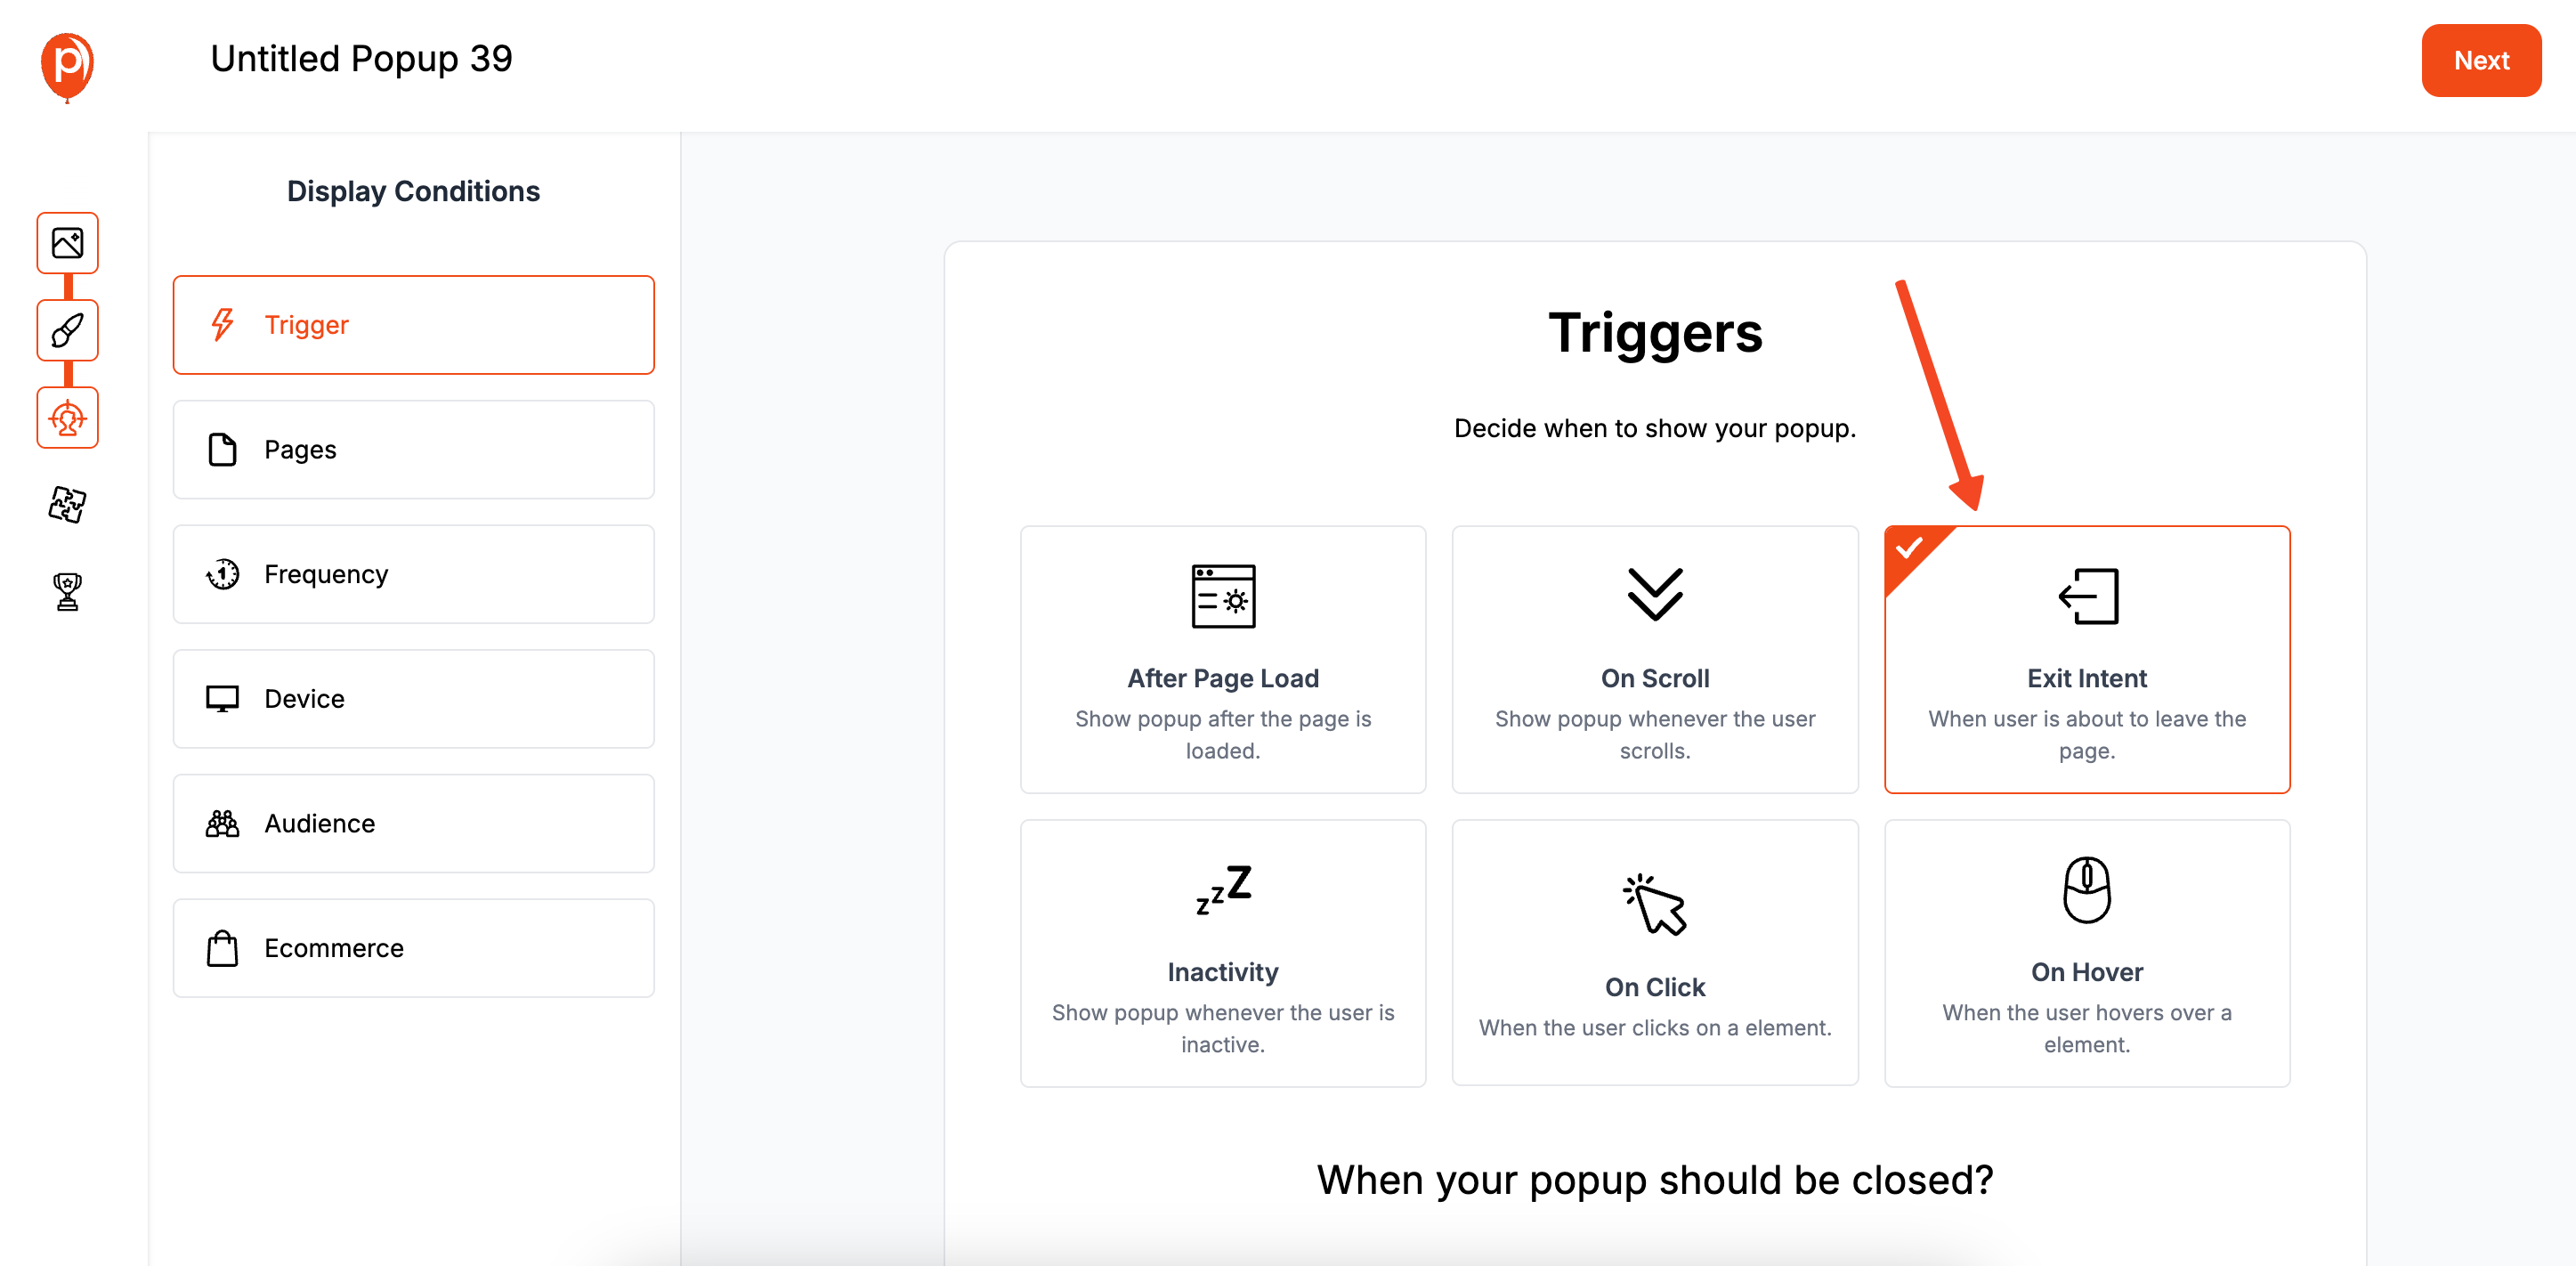
This is where the magic happens. After you’re happy with the design, click "Next" to go to the Display Conditions page. The most important setting here is the trigger. Select Exit-Intent from the options.
This trigger intelligently detects when a visitor’s mouse moves towards the top of the browser, signaling they’re about to leave your site. It’s the perfect, non-intrusive moment to present your offer and try to win them back.
Step 5: Add E-commerce Targeting Rules
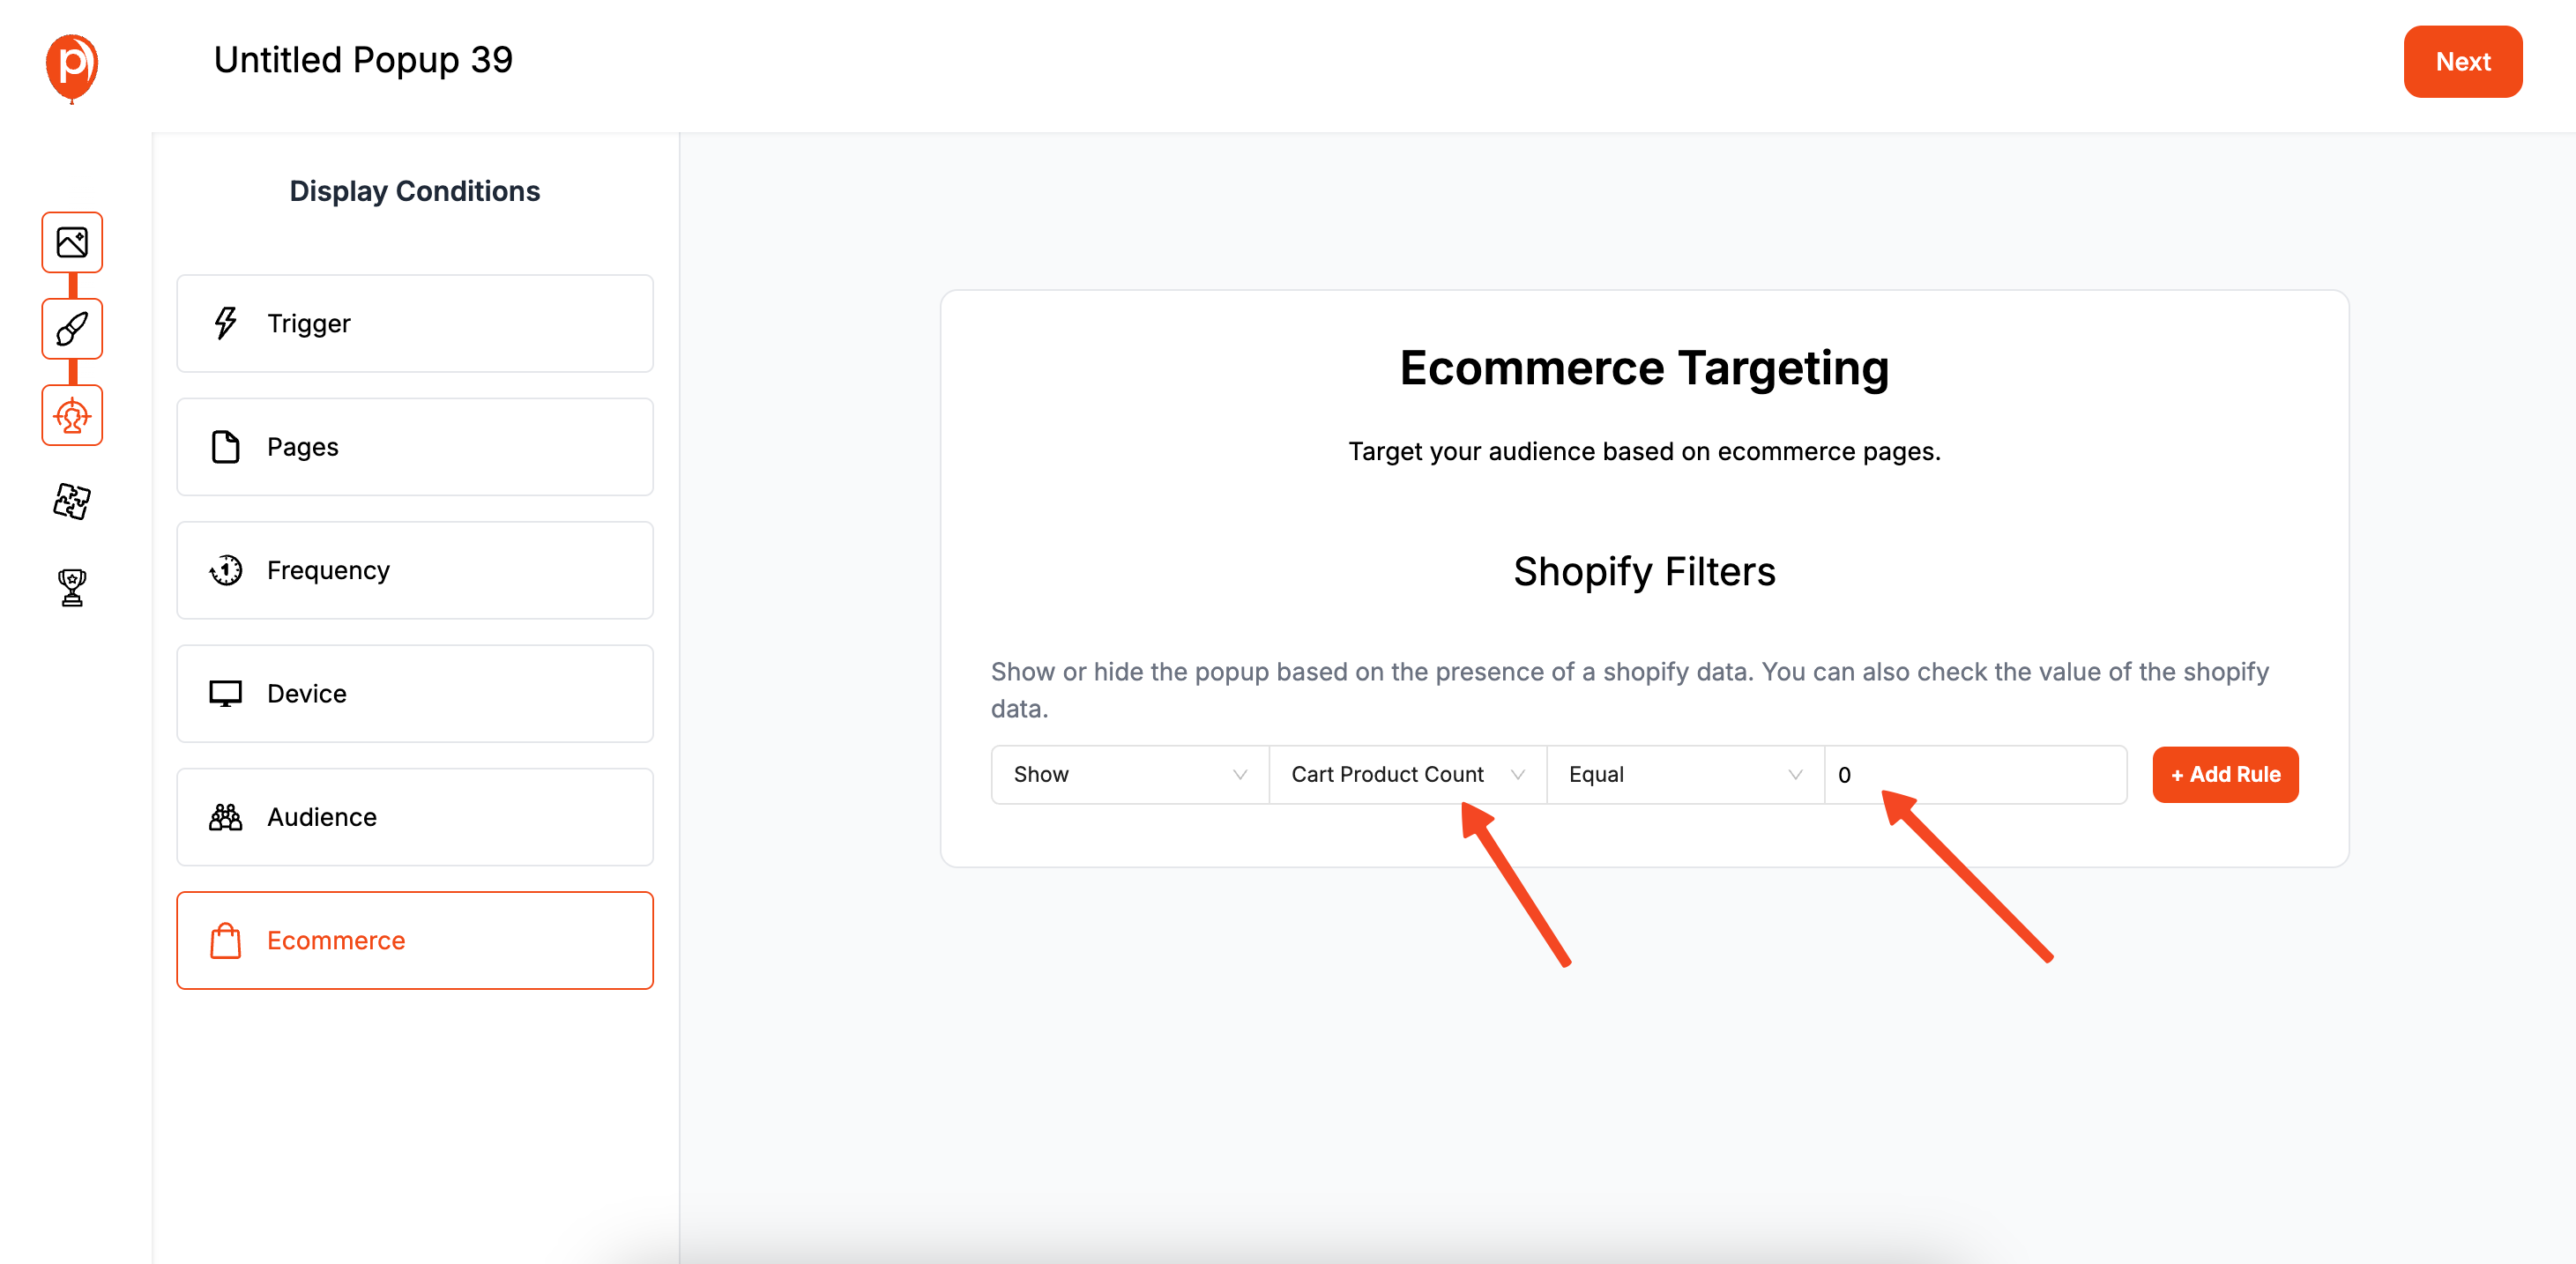
Next, we'll make sure this popup only shows to the right people. Scroll down to the E-commerce Targeting section. Here, set the condition to show when "Cart Product Count" is more than "0".
This simple rule is incredibly effective. It ensures your popup only appears for visitors who have actually added something to their cart and are about to leave. Please note, our e-commerce targeting features currently work best with Shopify.
This simple rule is incredibly effective. It ensures your popup only appears for visitors who have actually added something to their cart and are about to leave. Please note, our e-commerce targeting features currently work best with Shopify. For more on driving e-commerce conversions with popups, see our post about ecommerce popups or explore other effective popup conversion strategies.
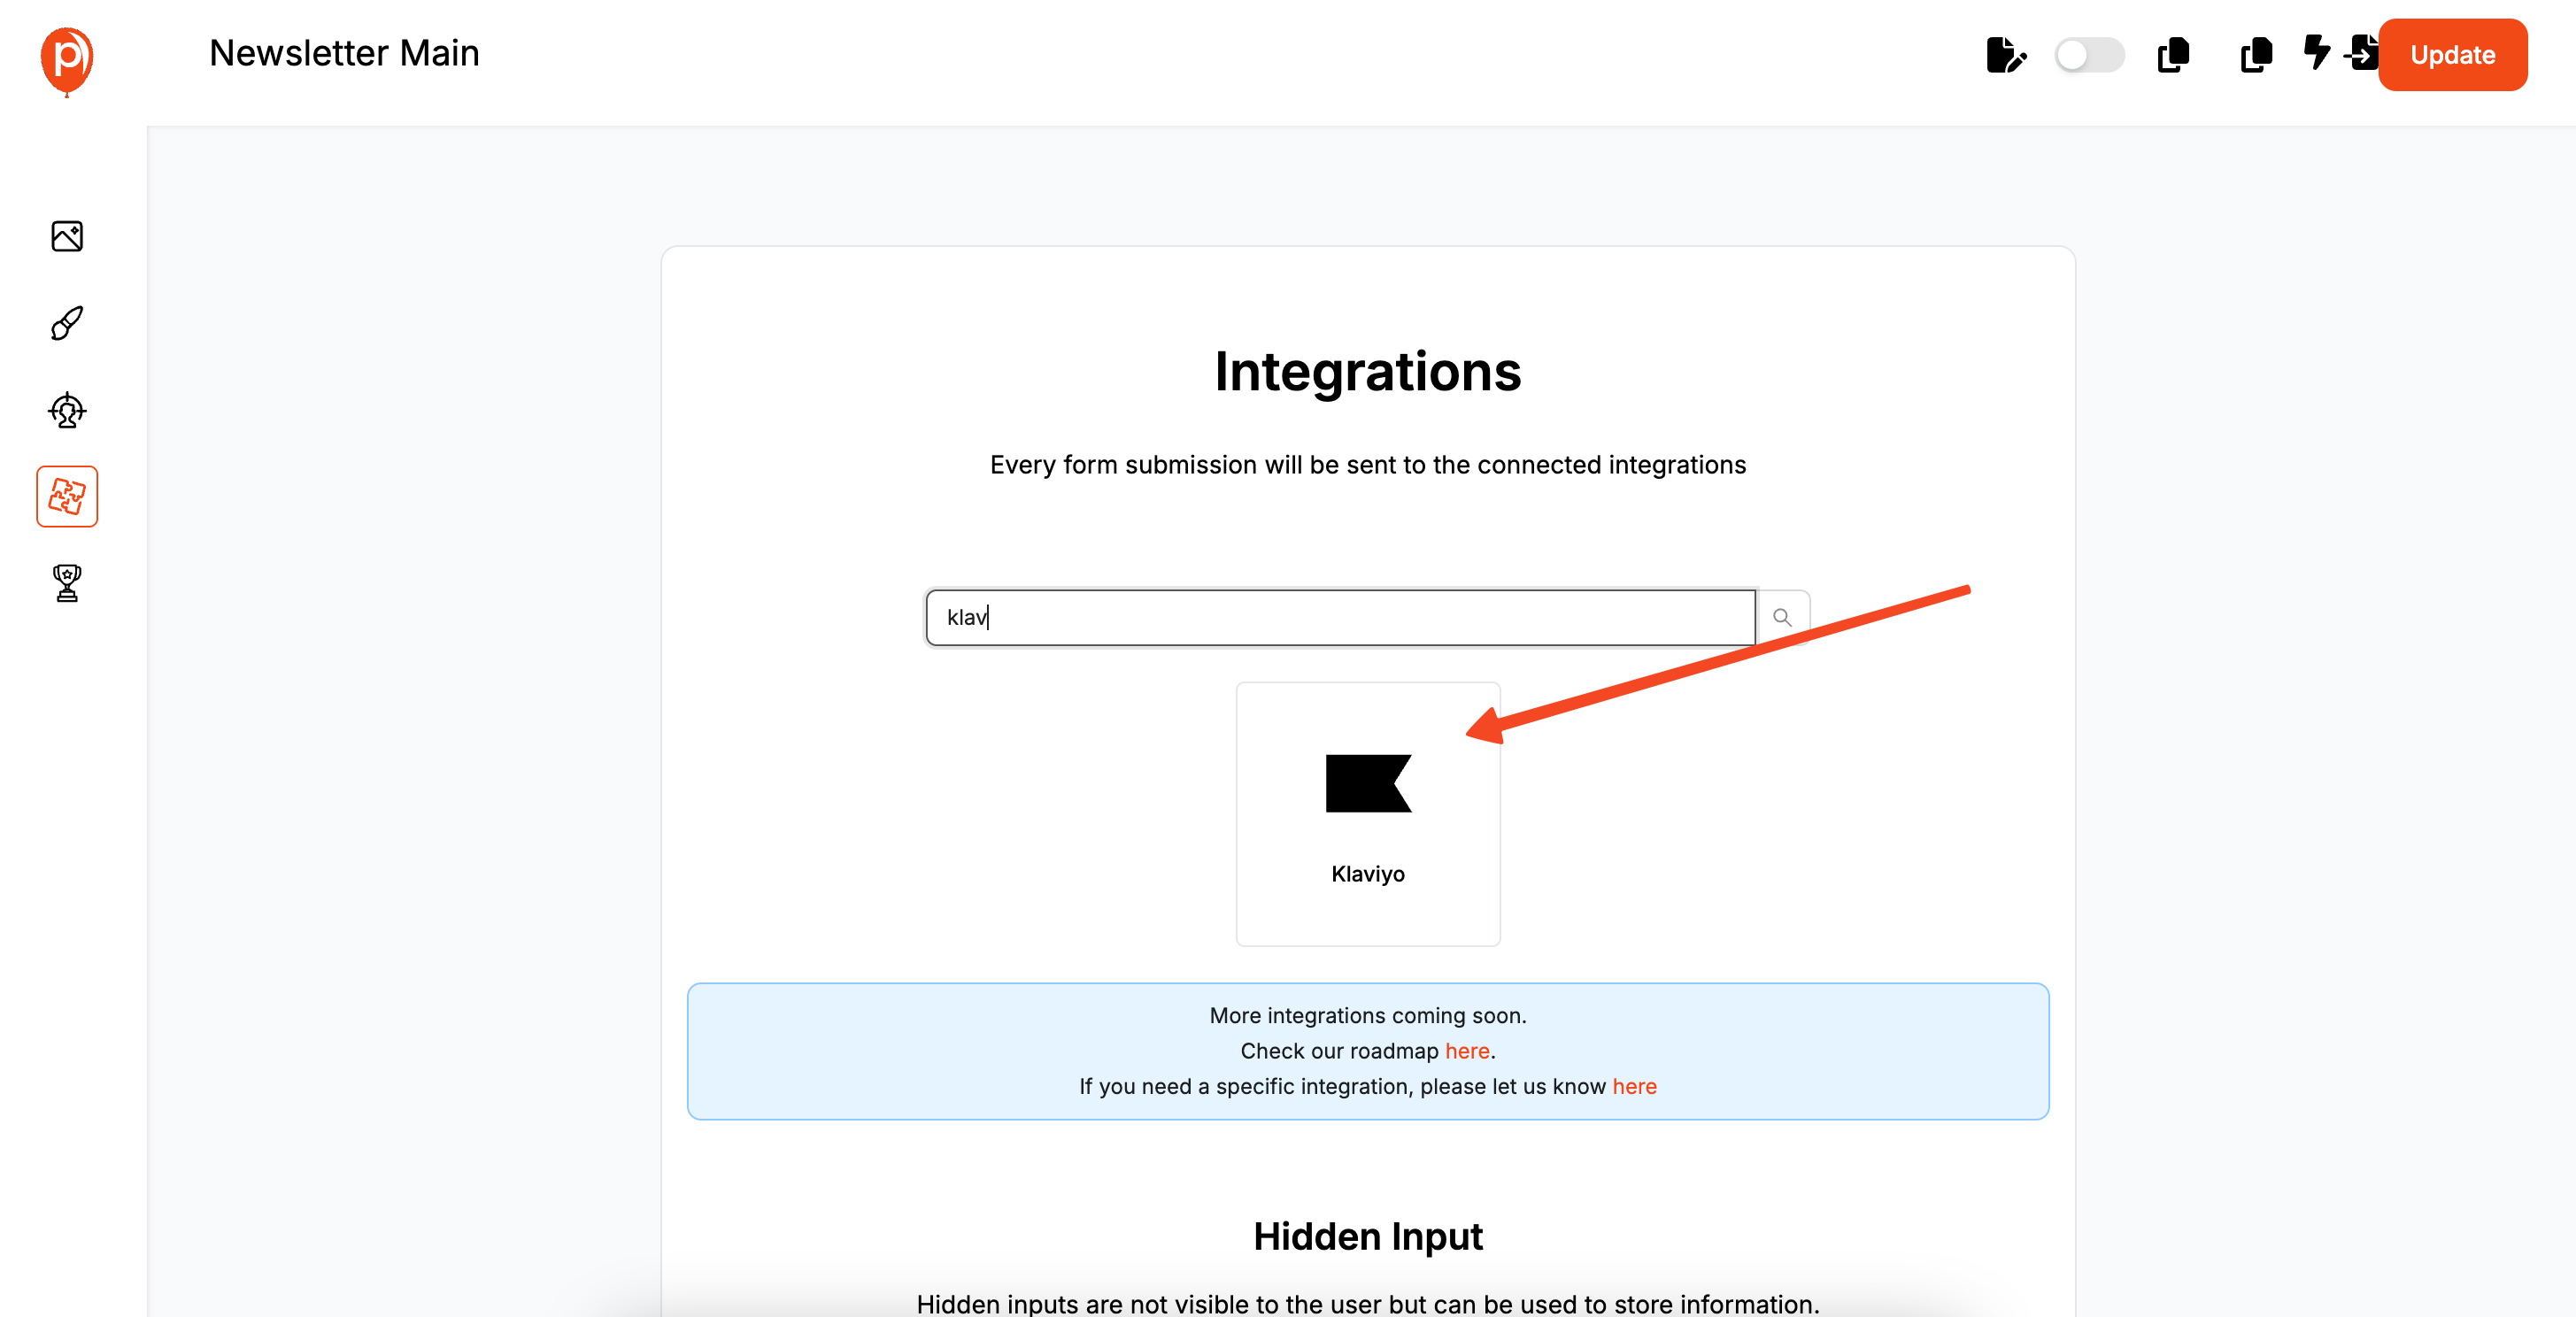
With your targeting set, click "Next" to move to the Integrations tab. Find and select Klaviyo from the list of available services. You’ll be prompted to enter an account name and log in to your Klaviyo account to authorize the connection. For a simple walkthrough of integrating Poper and Klaviyo, view our Connect Klaviyo With Poper Easy Guide.
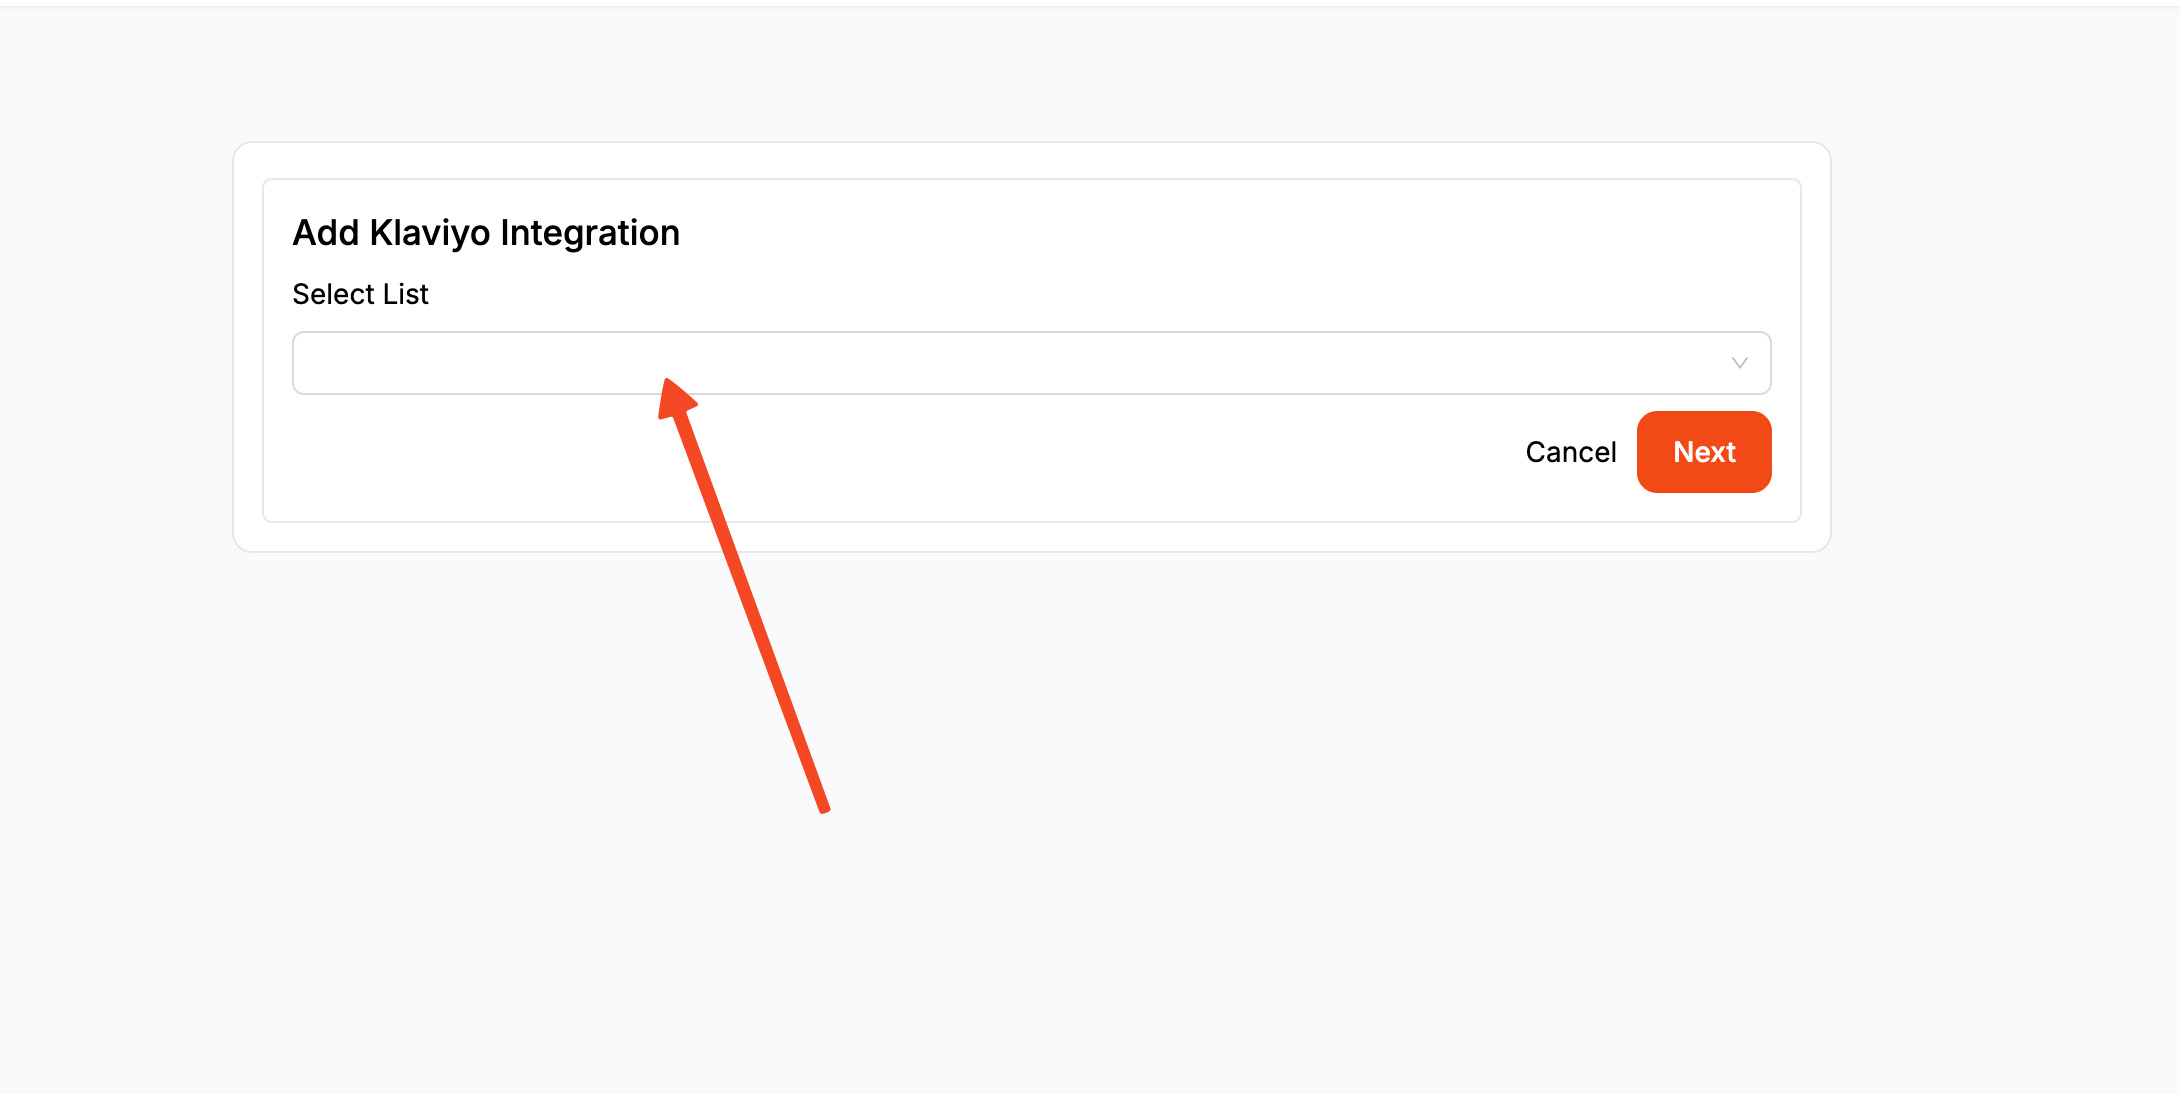
Once connected, you can choose which Klaviyo list you want to add new contacts to. You can even assign tags, which helps you segment your audience for targeted email campaigns later on.
Step 7: Map Your Fields for a Smooth Handoff
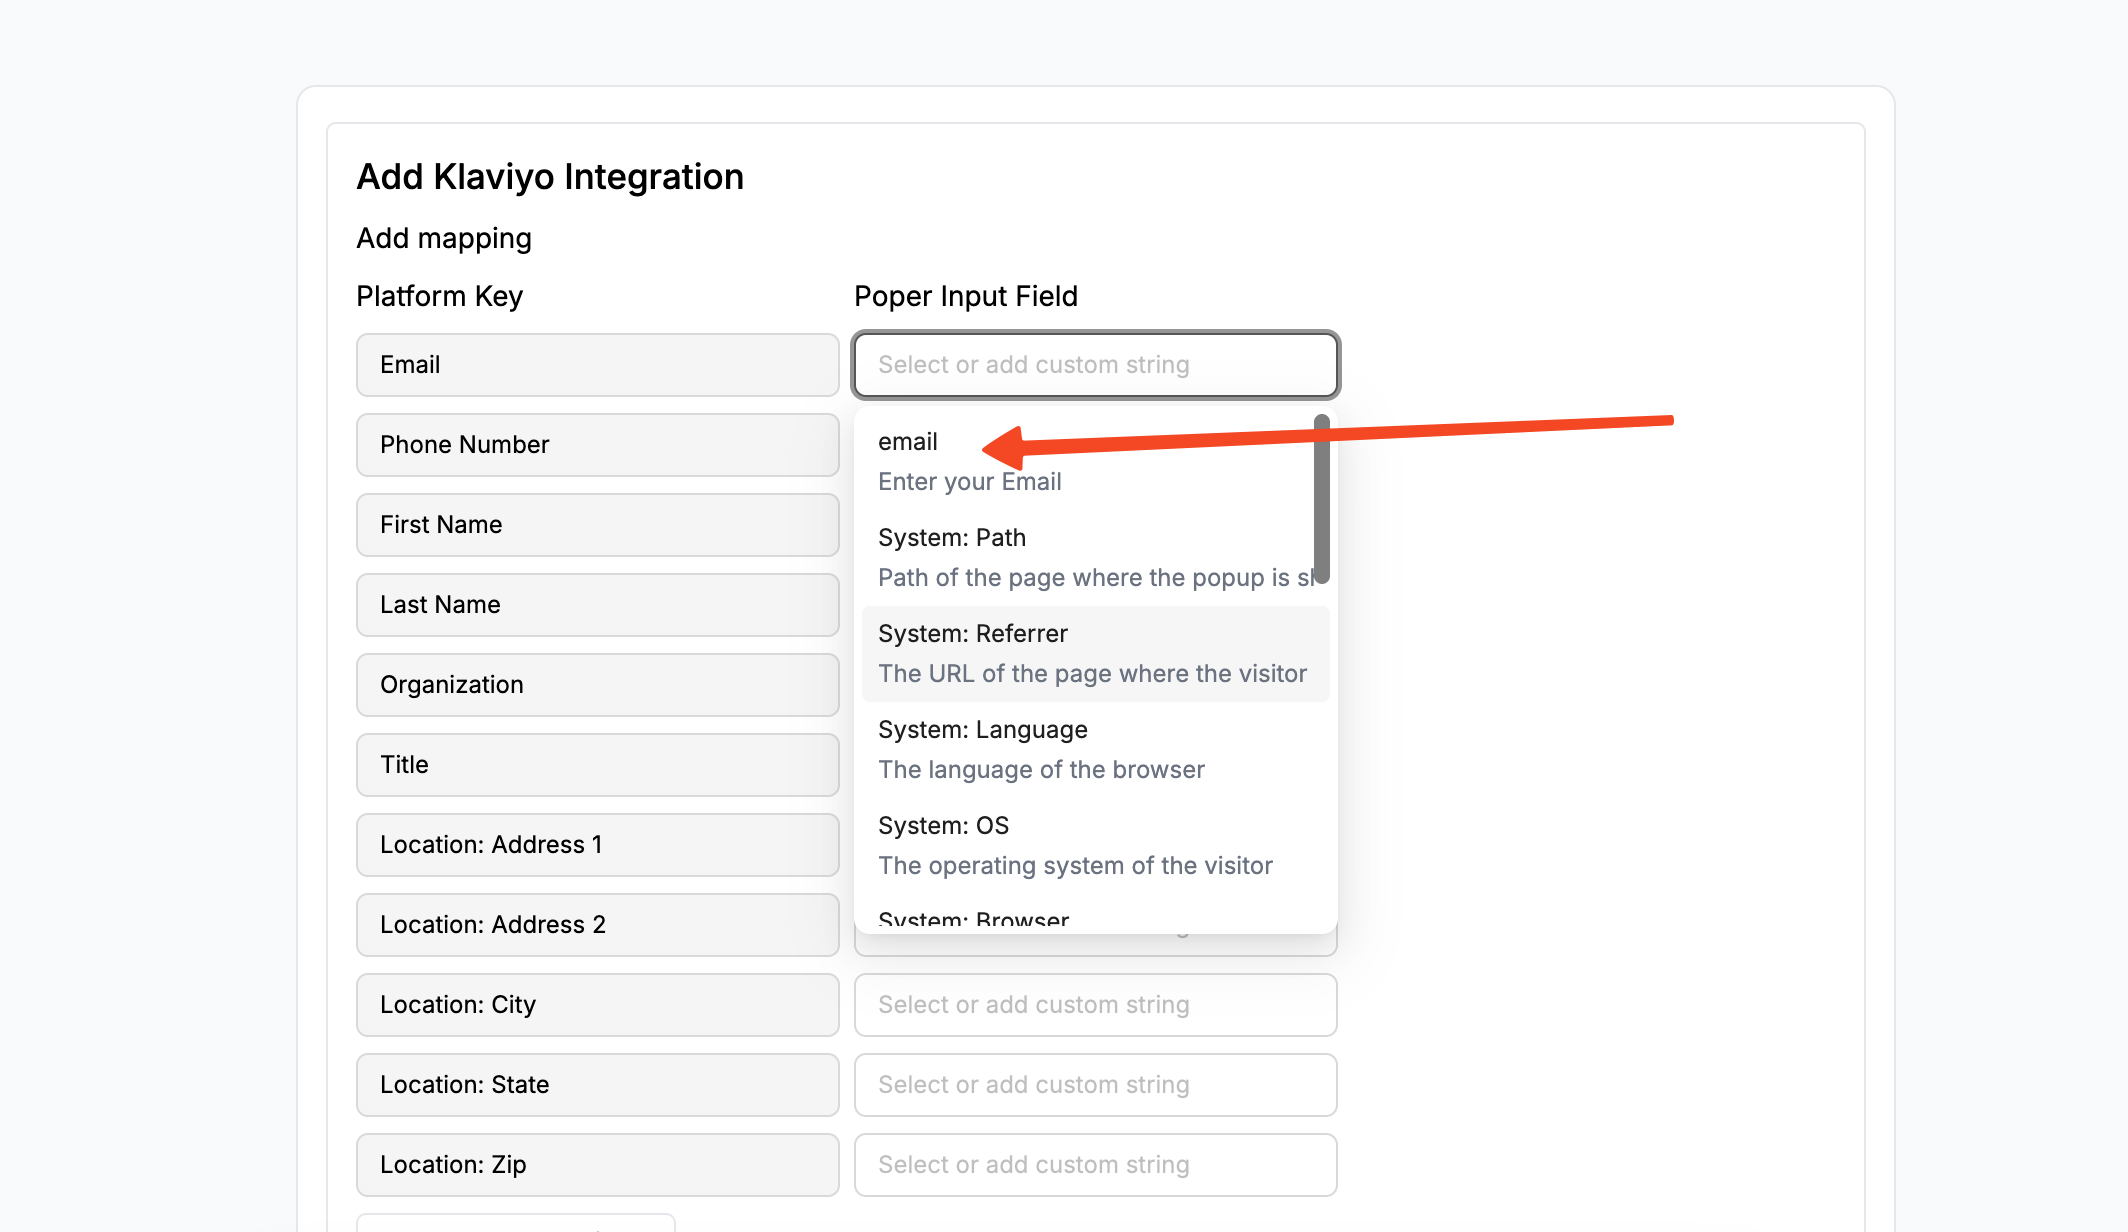
This is a final, crucial step for the integration. You need to tell Poper which form fields should go where in Klaviyo. Simply map the email field from your popup form to the corresponding email field in your Klaviyo account.
This ensures the contact information you collect is passed over correctly. For a more detailed walkthrough of all the options, you can check out our full Klaviyo integration guide here: https://support.poper.ai/en/articles/10095430-klaviyo-integration.
Step 8: Save and Publish Your Campaign

Everything is now in place! All that's left to do is hit Save & Publish. Your popup is now live on your site, ready to catch abandoning visitors and grow your Klaviyo list.
You’ve just set up an automated system to recover potentially lost sales. Well done
Method 2: Setting Up Klaviyo's Native Abandoned Cart Flow (The Core Campaign)
This automated email sequence is the heart of your revenue recovery strategy.
Step 1: Enable Klaviyo's On-Site Tracking for Your Store (Crucial for "Added to Cart")
Ensure your e-commerce platform (e.g., Shopify, BigCommerce, Magento) is fully integrated with Klaviyo.
In Klaviyo, navigate to your store's integration settings (e.g., Integrations > Shopify).
Verify that "Onsite tracking" is enabled. For the "Added to Cart" trigger, you must also install the corresponding "Added to Cart" event snippet on your Shopify theme. Klaviyo provides detailed instructions for this. Without this snippet, your flow will only trigger at checkout.
Step 2: Create the Abandoned Cart Flow in Klaviyo
In your Klaviyo account, go to Flows > Create Flow.
Use the search bar to find and select Klaviyo's pre-built "Abandoned Cart Reminder" flow template. This template is already configured with the correct trigger and best-practice email timing.
Choose the Trigger: Klaviyo will ask you to select a trigger. Choose the "Added to Cart" metric if you have the tracking snippet installed for the most proactive flow. If not, you can use the "Started Checkout" metric.
Flow Filters: Klaviyo automatically adds filters to ensure the flow stops if the person places an order or starts another checkout.
Step 3: Customize Your Abandoned Cart Emails
The pre-built flow will typically have 2-4 emails. You need to customize them:
First Email (1-4 hours after abandonment): A gentle reminder.
- Content: Use Klaviyo's dynamic product block to automatically pull in the exact items the shopper left in their cart, including images, names, and prices. The {{ event.extra.checkout_url }} tag is essential to link them directly back to their pre-filled cart.
- Copy: Keep it helpful and customer-service-oriented. "Did you forget something?" or "Your items are waiting!"
Content: Use Klaviyo's dynamic product block to automatically pull in the exact items the shopper left in their cart, including images, names, and prices. The {{ event.extra.checkout_url }} tag is essential to link them directly back to their pre-filled cart.
Copy: Keep it helpful and customer-service-oriented. "Did you forget something?" or "Your items are waiting!"
Second Email (24 hours after abandonment): Create urgency or address common concerns.
- Content: Remind them of the items again. You could add social proof like customer reviews or address common barriers like shipping policy or return information.
Content: Remind them of the items again. You could add social proof like customer reviews or address common barriers like shipping policy or return information.
Third Email (48-72 hours after abandonment): The final offer.
- Content: This is the best place to introduce a discount or free shipping offer as a final incentive to convert. Use a unique, single-use coupon code generated by Klaviyo for better tracking.
Content: This is the best place to introduce a discount or free shipping offer as a final incentive to convert. Use a unique, single-use coupon code generated by Klaviyo for better tracking.
Step 4: Turn the Flow Live
Once you've customized your emails, switch the status of each email and the overall flow to "Live." Your Klaviyo Abandoned Cart Campaign is now active for all known visitors.
The Problem: What About Anonymous Visitors?
Klaviyo's flow only works if it knows the visitor's email address. If a new, anonymous visitor adds an item to their cart and leaves, you've lost them. This is where an exit-intent popup becomes essential. To maximize your email collection from popups, review our advice on email opt-in popups.
Conclusion
A successful Klaviyo Abandoned Cart Campaign is a two-part strategy:
First, set up Klaviyo's native Abandoned Cart Flow (using the "Added to Cart" trigger if possible) to automatically recover known shoppers and customers. This is your most powerful tool.
Second, implement a targeted exit-intent popup using a tool like Poper to capture the emails of anonymous visitors who have items in their cart. By integrating Poper with Klaviyo, you can feed these high-intent leads into your marketing ecosystem for follow-up.
By combining Klaviyo's powerful automation with a smart popup strategy, you create a comprehensive system that significantly reduces cart abandonment and recovers substantial revenue for your e-commerce store.
Frequently Asked Questions (FAQ)
What's the main difference between Klaviyo's Abandoned Cart flow and a popup?
The flow is the automated email sequence sent to known users after they abandon their cart. The popup is the on-site tool used to capture the email address of an anonymous user before they abandon their cart, allowing you to add them to your lists so they can receive follow-up emails.
Do I need a paid Klaviyo plan for the Abandoned Cart flow?
The Abandoned Cart flow is a standard feature in Klaviyo. Your ability to use it will depend on your plan's limits for active contacts and email sends.
Is Klaviyo's "Added to Cart" tracking hard to set up on Shopify?
Klaviyo provides detailed step-by-step instructions. It involves copying a specific code snippet and pasting it into your Shopify theme's product template file. While it requires editing theme code, it's a well-documented process.
Can I use Klaviyo's native popups for abandoned carts?
Yes, you can configure a Klaviyo sign-up form to appear on exit intent. You can also add targeting rules within Klaviyo to only show it on certain pages or to users who are not yet identified. Tools like Poper may offer more advanced targeting (like the direct "Cart Product Count" rule) and design flexibility.
What is a good offer for an abandoned cart popup?
A percentage discount (10-15%), a fixed dollar amount off, or free shipping are the most effective offers. The goal is to provide a compelling enough incentive to overcome whatever objection caused them to leave.

