

I know many Business owners who love WordPress and Elementor for building their sites but struggle when it comes to creating effective popups. Many plugins feel clunky, slow down your site, or just don't offer the design freedom you need.
I designed Poper to solve this exact problem. It’s built to work seamlessly with your WordPress site, letting you create and manage powerful campaigns without touching a line of code or wrestling with complicated settings. Let’s walk through how to connect Poper to your Elementor site in just a few minutes.
Why Add a Popup to Your Elementor Site?
Grow Your Email List: Display newsletter sign-up forms.
Promote Sales & Offers: Announce discounts and drive traffic to product pages.
Generate Leads: Offer lead magnets like e-books or checklists.
Create Login/Registration Forms: Build custom login popups.
Display Announcements: Share important news or updates.
Part 1: Creating Your First Popup in Poper
Before we connect anything to WordPress, let's build the popup itself. This is where the magic starts.
Step 1: Create a Poper Account and Add Your Website
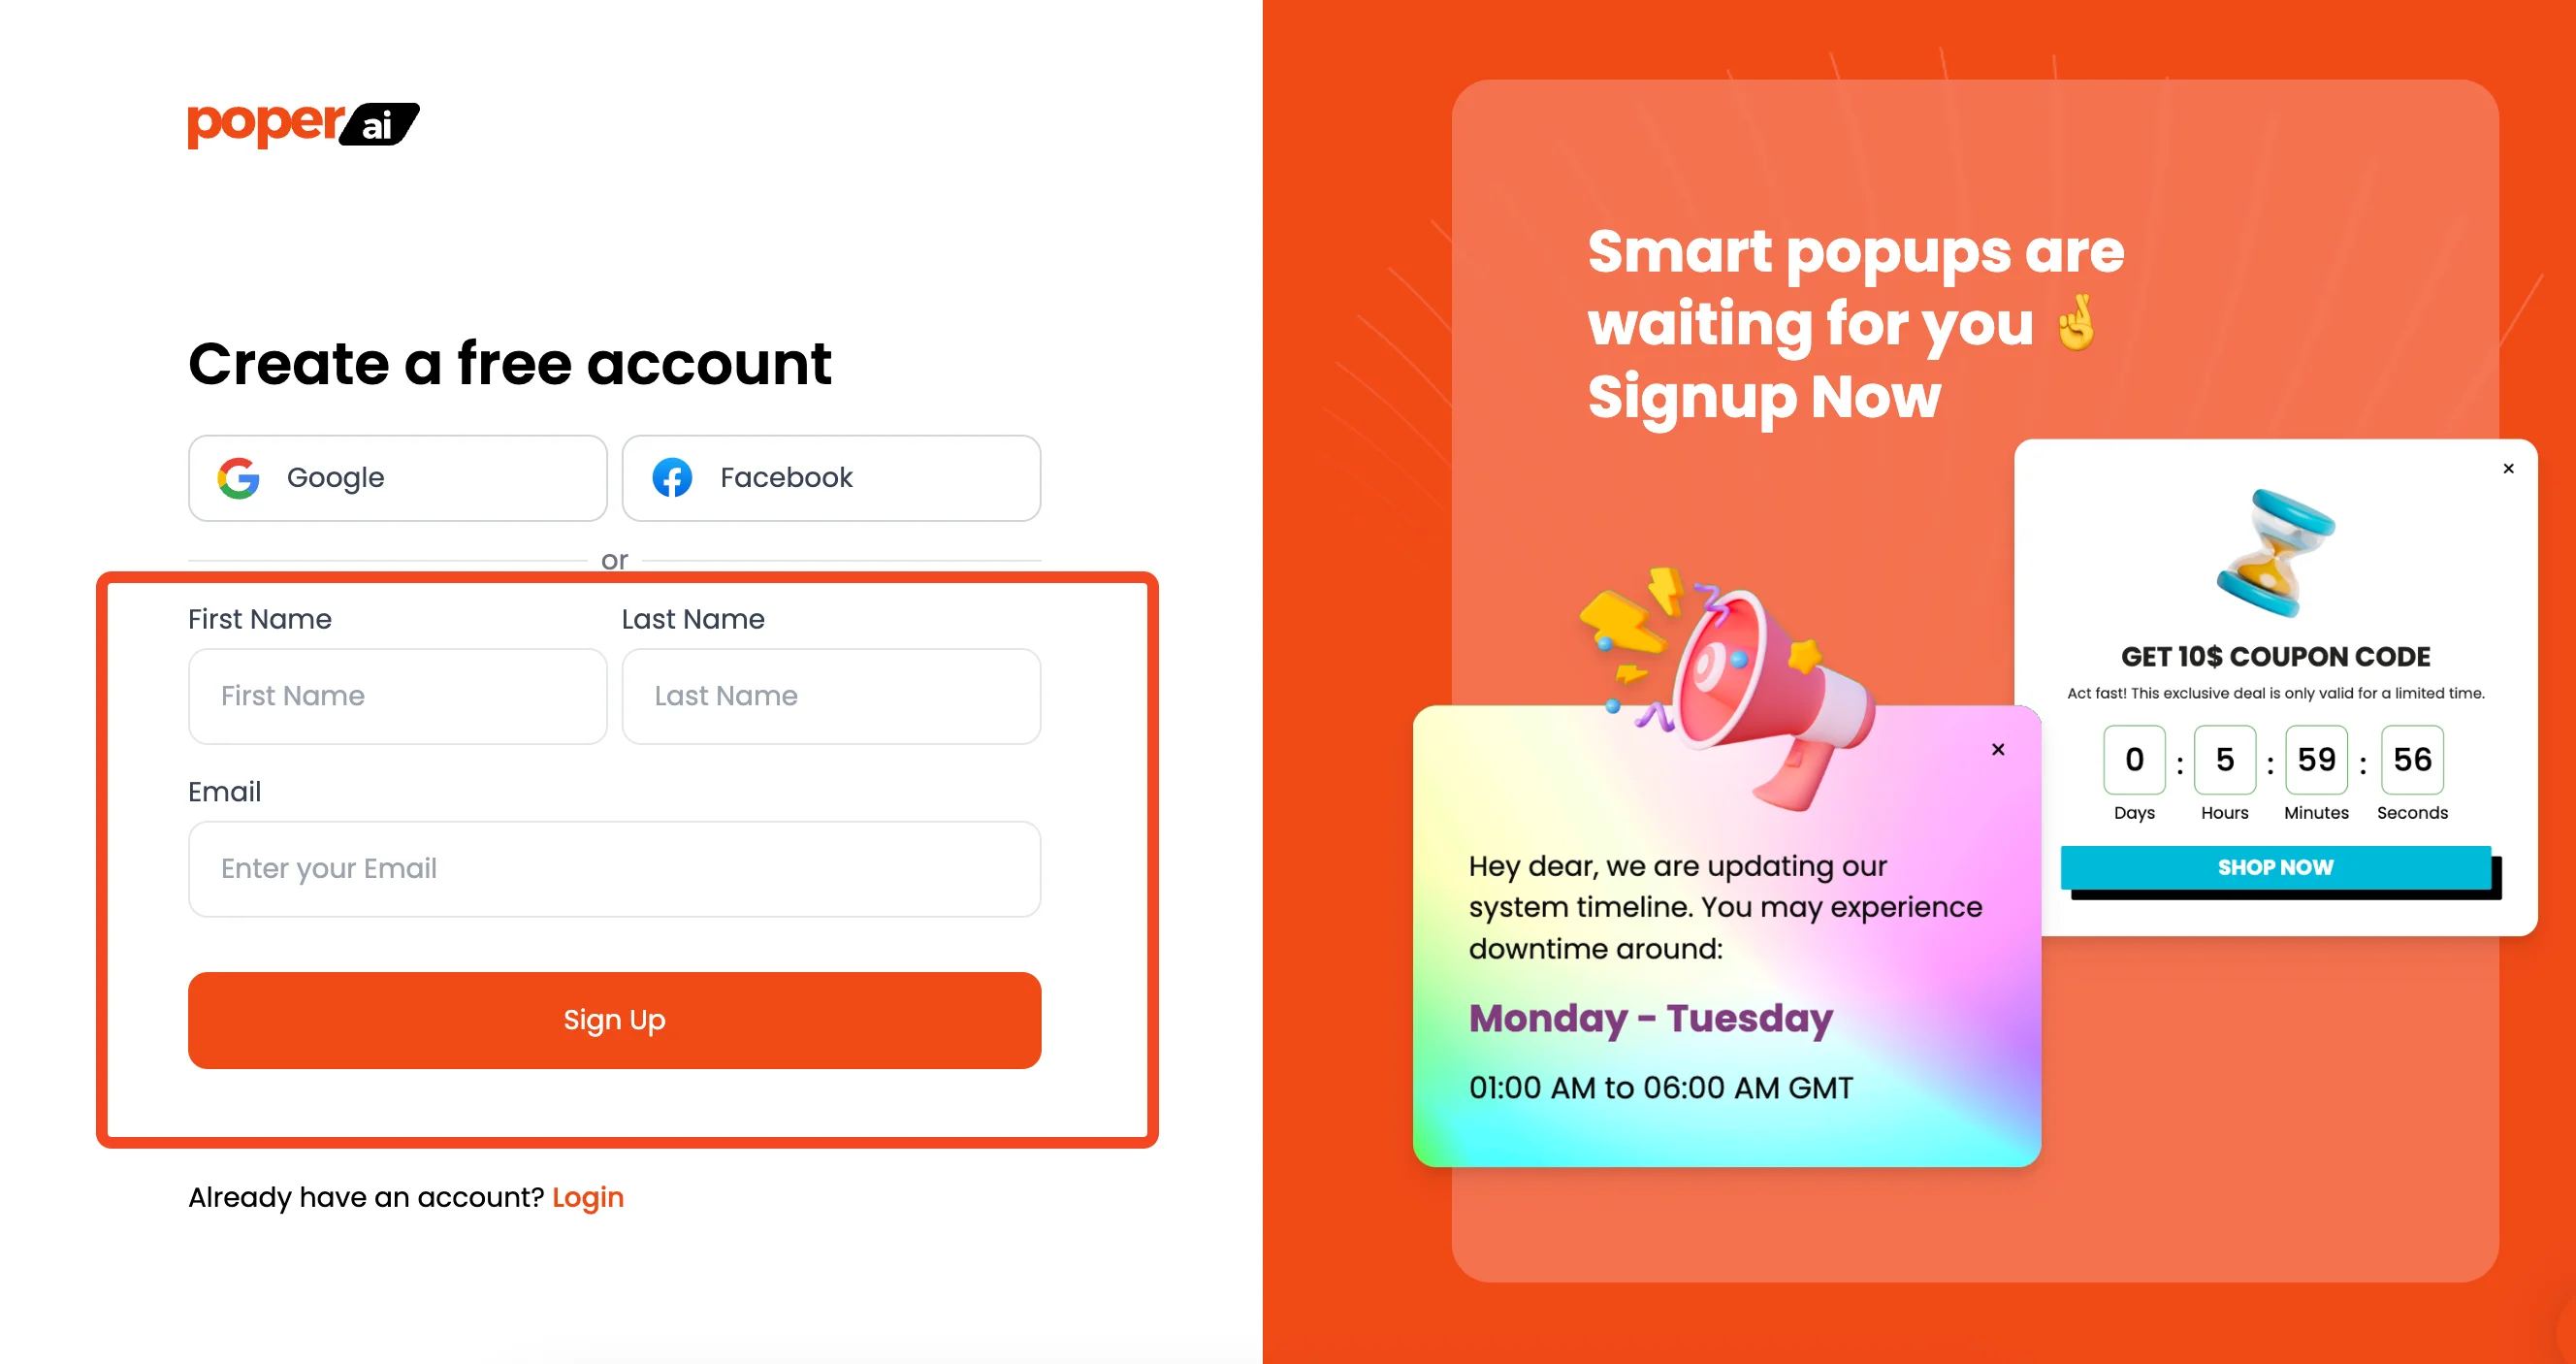
First things first, head over to the Poper website and sign up for an account. During the setup, you’ll be asked to add your website's domain. This is an important step because it tells Poper which site your popups belong to, ensuring they only show up where you want them.
Step 2: Choose a Template That Fits Your Goal
Once you're in, click the "New Campaign" button and you'll see our template library. I made sure we have over 800 templates so you never have to start from scratch. Think about your goal—are you collecting emails, announcing a sale, or guiding visitors?
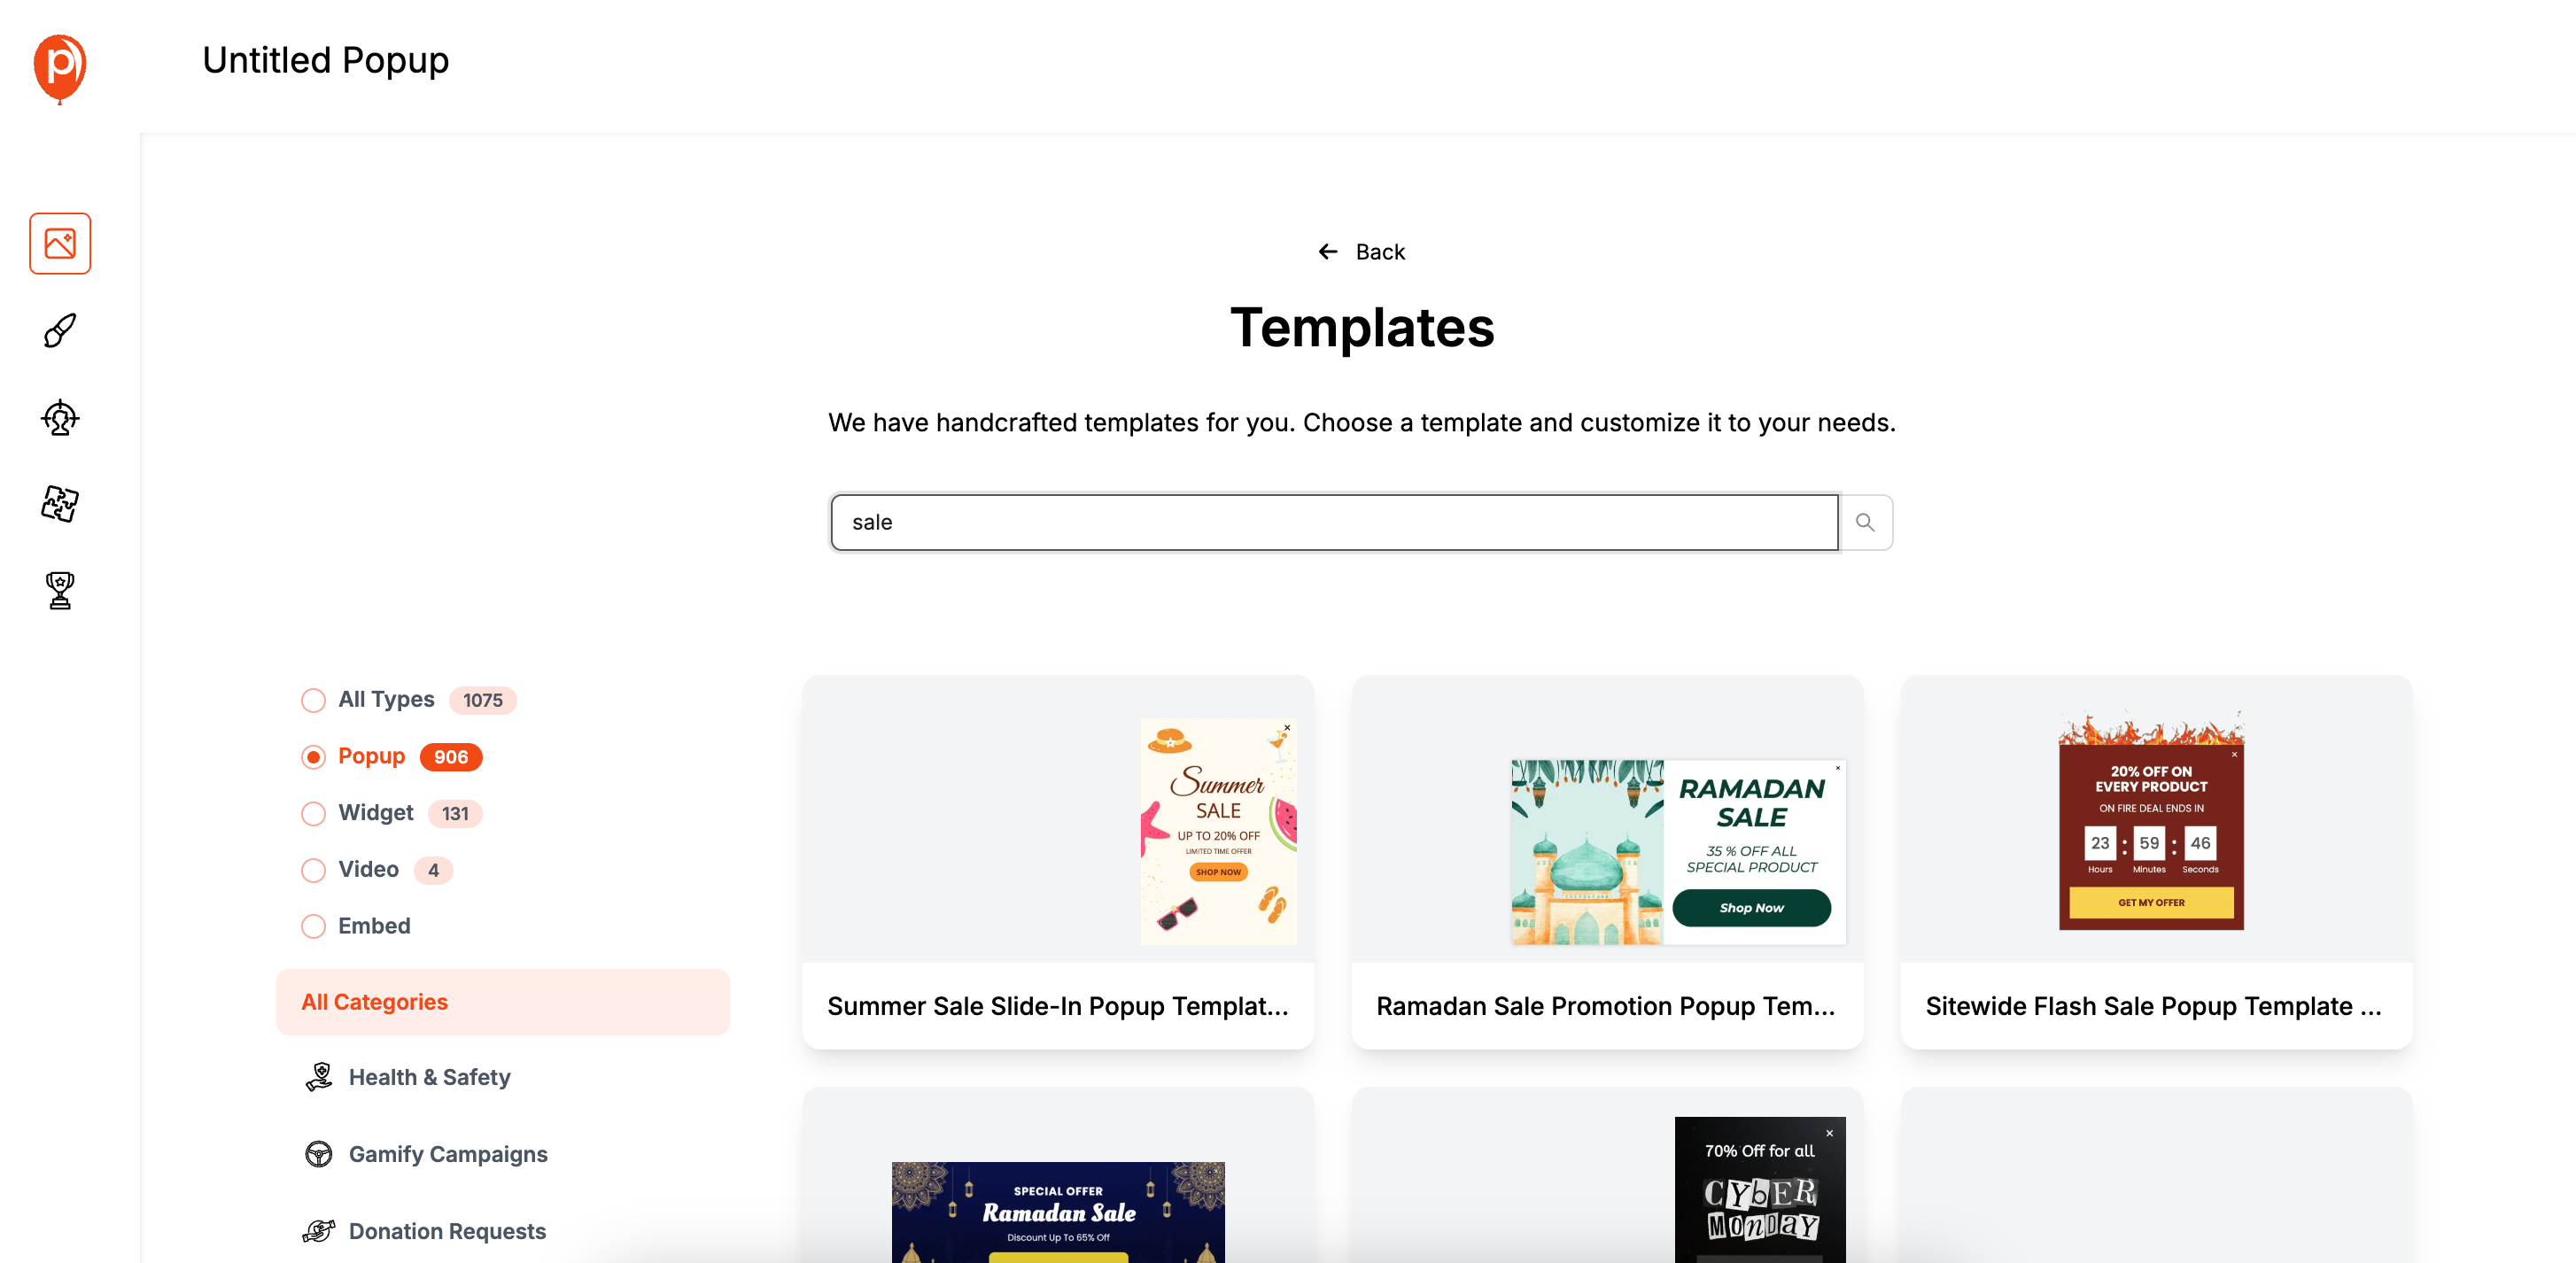
For example, if you’re promoting a 20% discount, search for “sales” or “discount” templates to find a design that’s already built to convert. Choosing a template gives you a huge head start.
Step 3: Customize Your Popup in the Editor
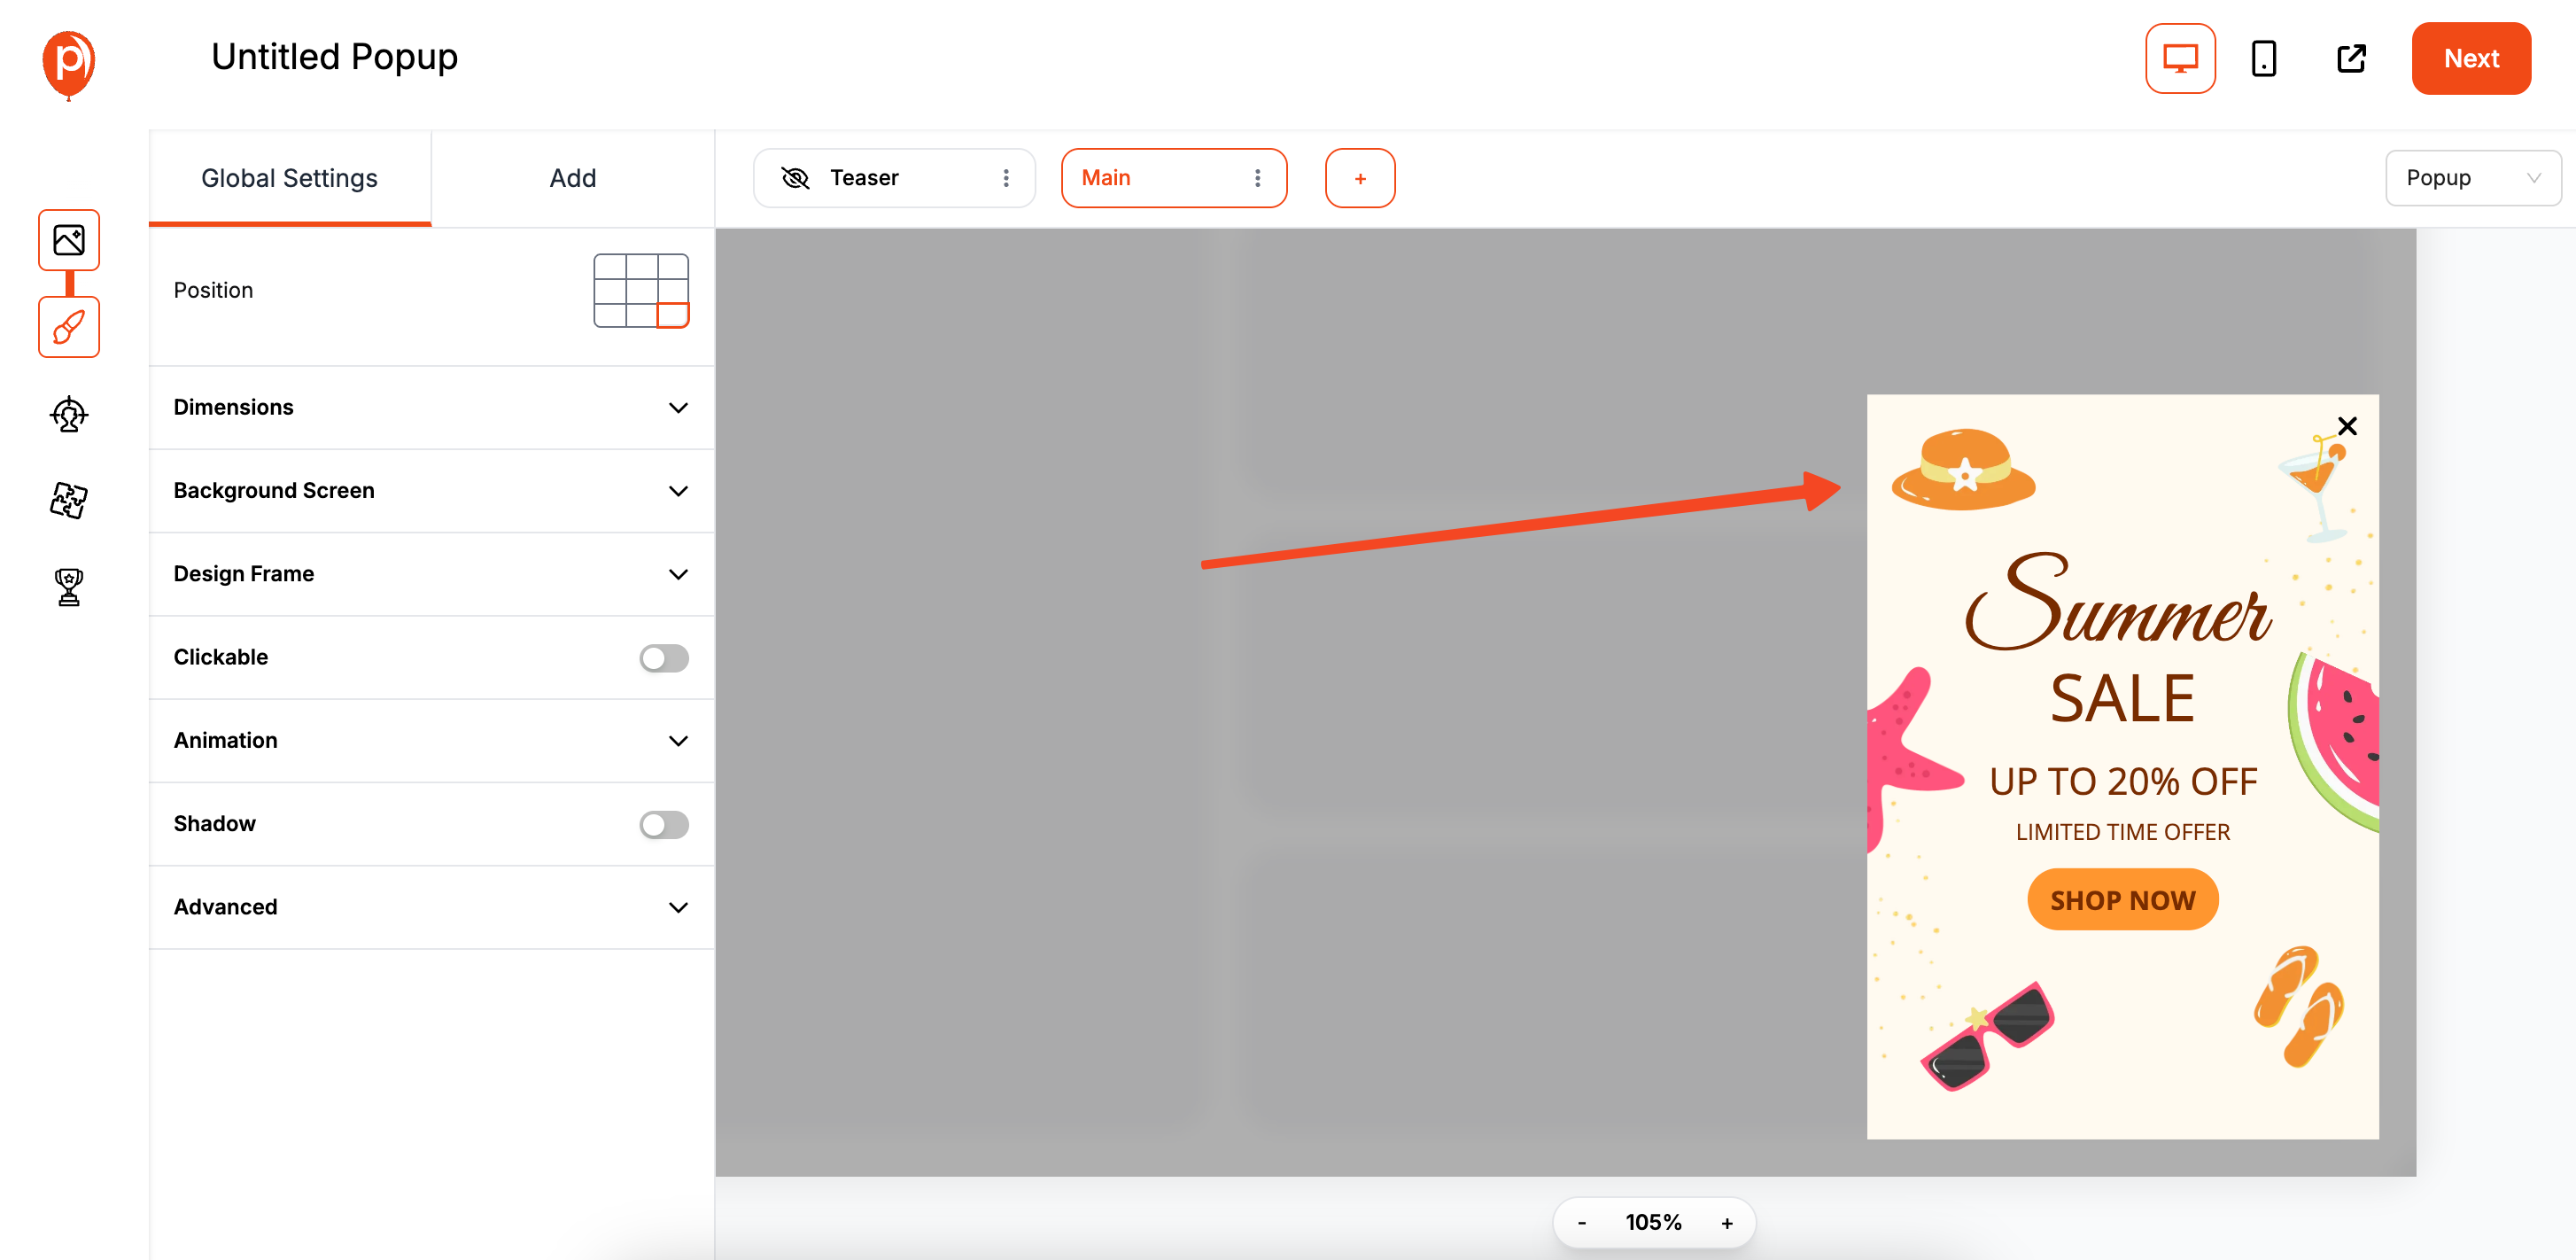
Now you’ll be in our editor. This is where you can make the popup truly yours. You can change everything from the fonts and colors to the images and button text. My advice is to match the popup’s design to your website’s branding for a professional and trustworthy look.
Keep it simple and focused. A clear headline, a brief description, and a single call-to-action button work best. Avoid overcrowding your popup with too much text or too many images.
Step 4: Set Your Display Conditions
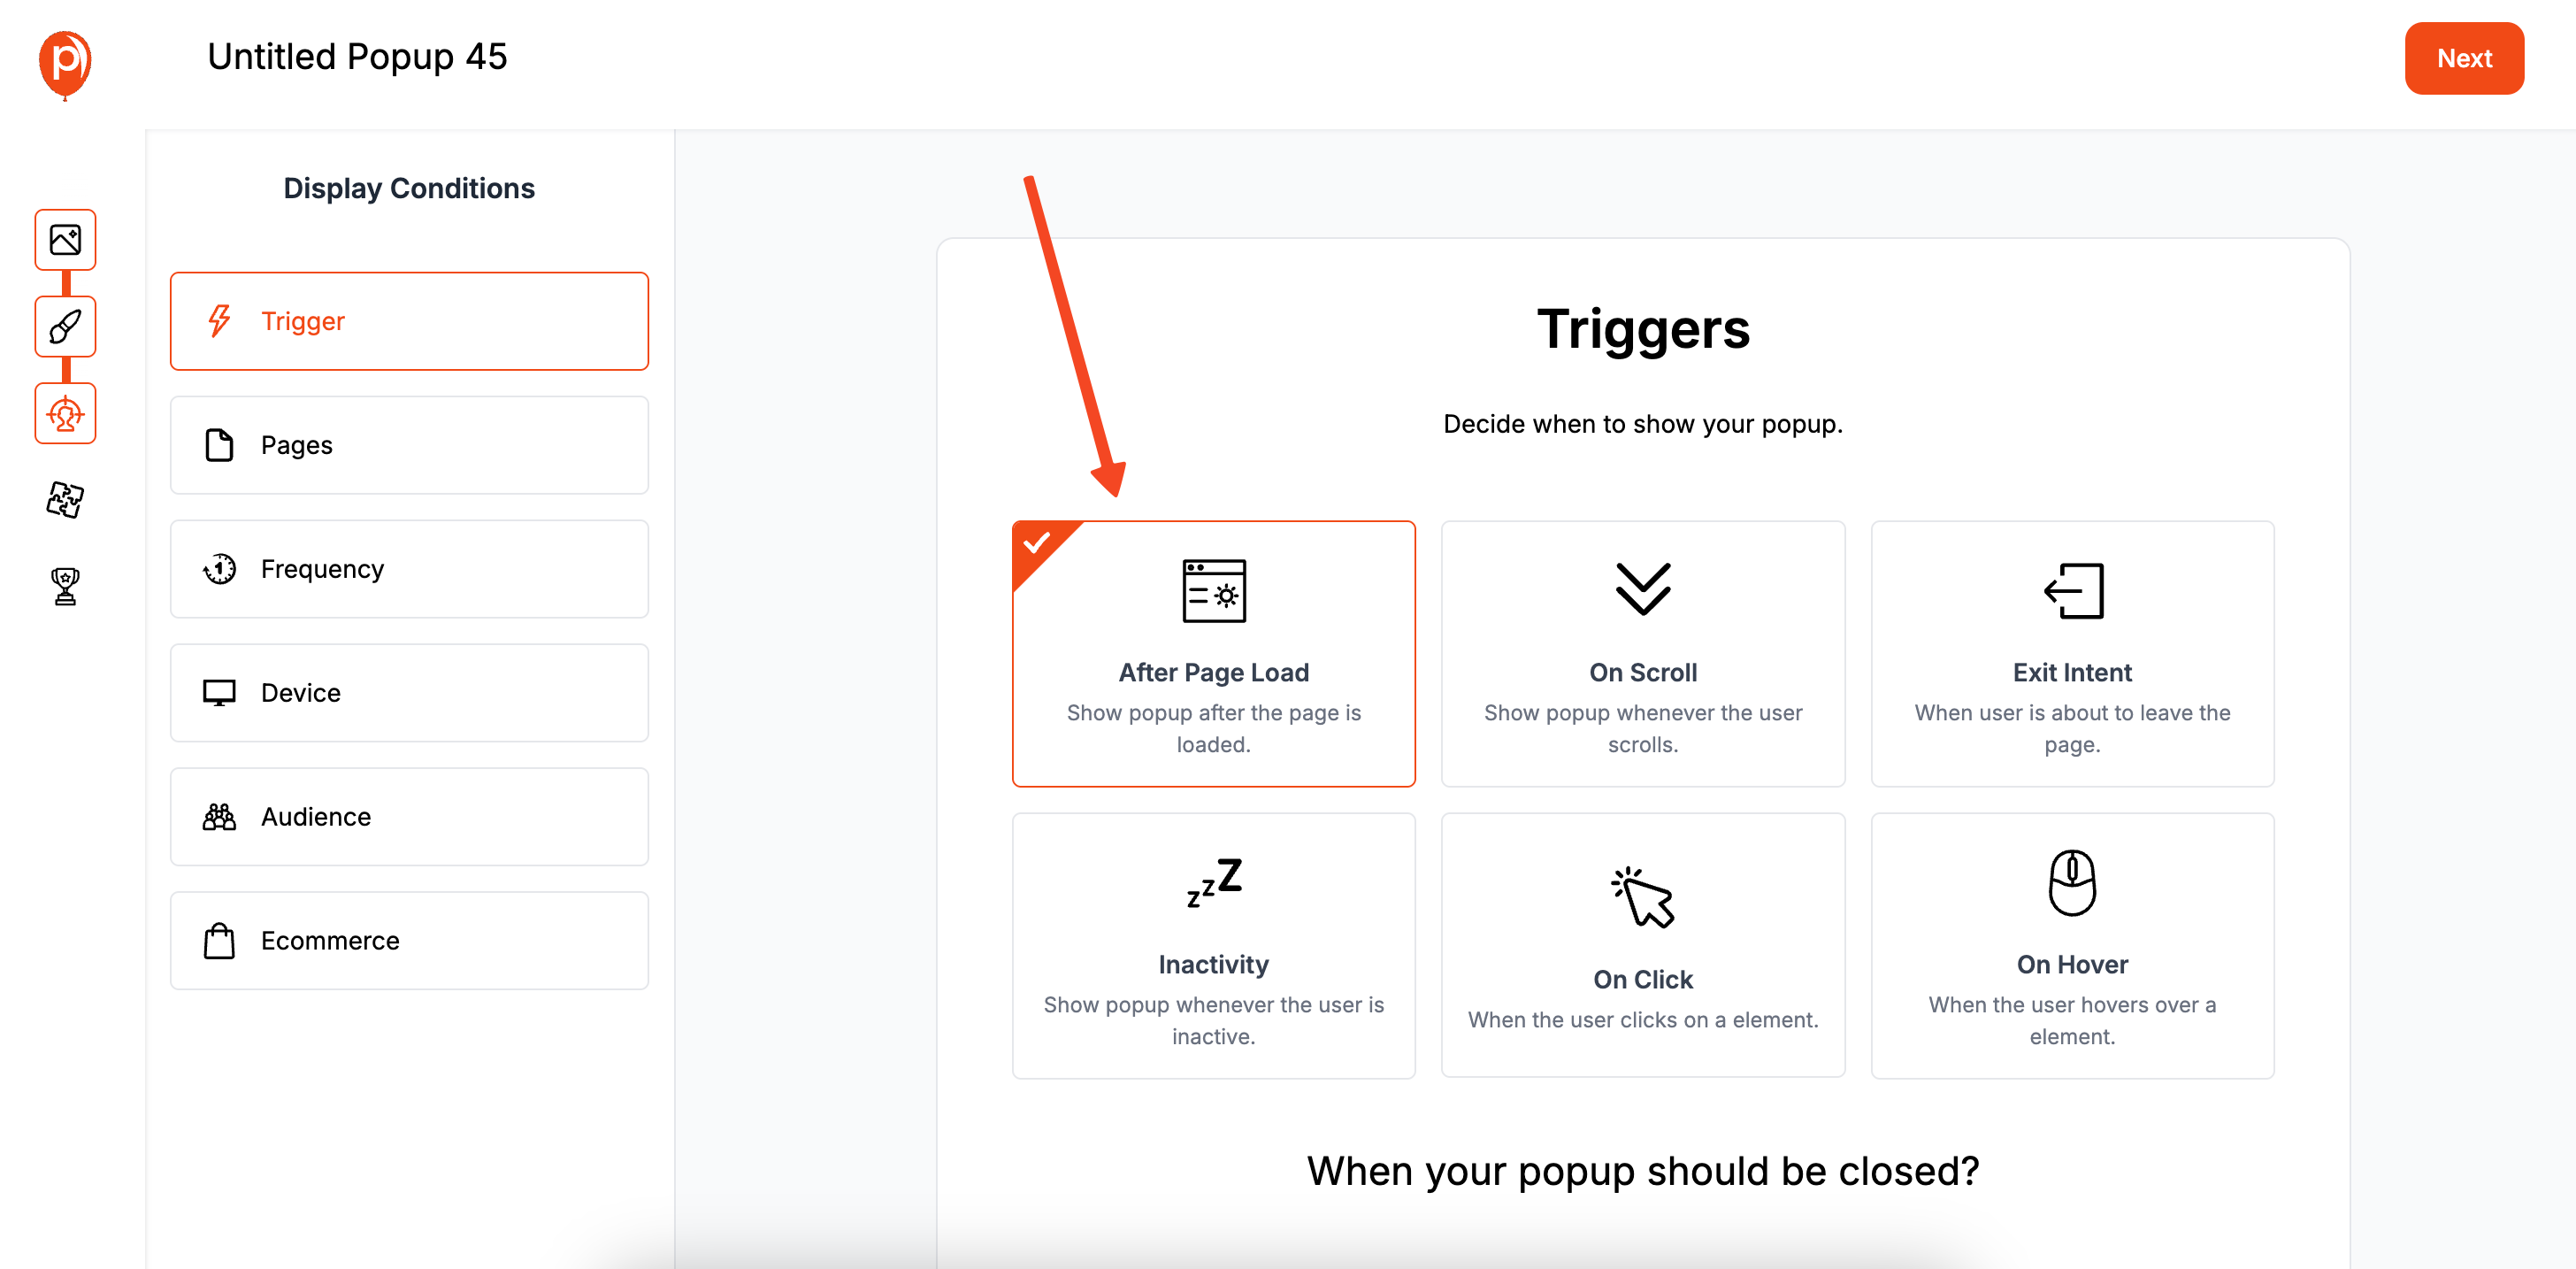
After designing, you’ll move to the "Display Conditions" screen. This is a powerful feature that prevents you from annoying your visitors. Instead of showing a popup to everyone, you can choose exactly who sees it and when. For tips on segmenting audiences and maximizing relevance, explore our article on segmenting audiences for popup campaigns.
For instance, you can set your popup to appear only on specific pages (like your blog), to visitors from a certain country, or after they've scrolled 50% down the page. This ensures your message is relevant and timely. Want to learn more about scroll-based triggers? Dive into our guide on scroll trigger popups.
Step 5: Connect Your Favorite Tools
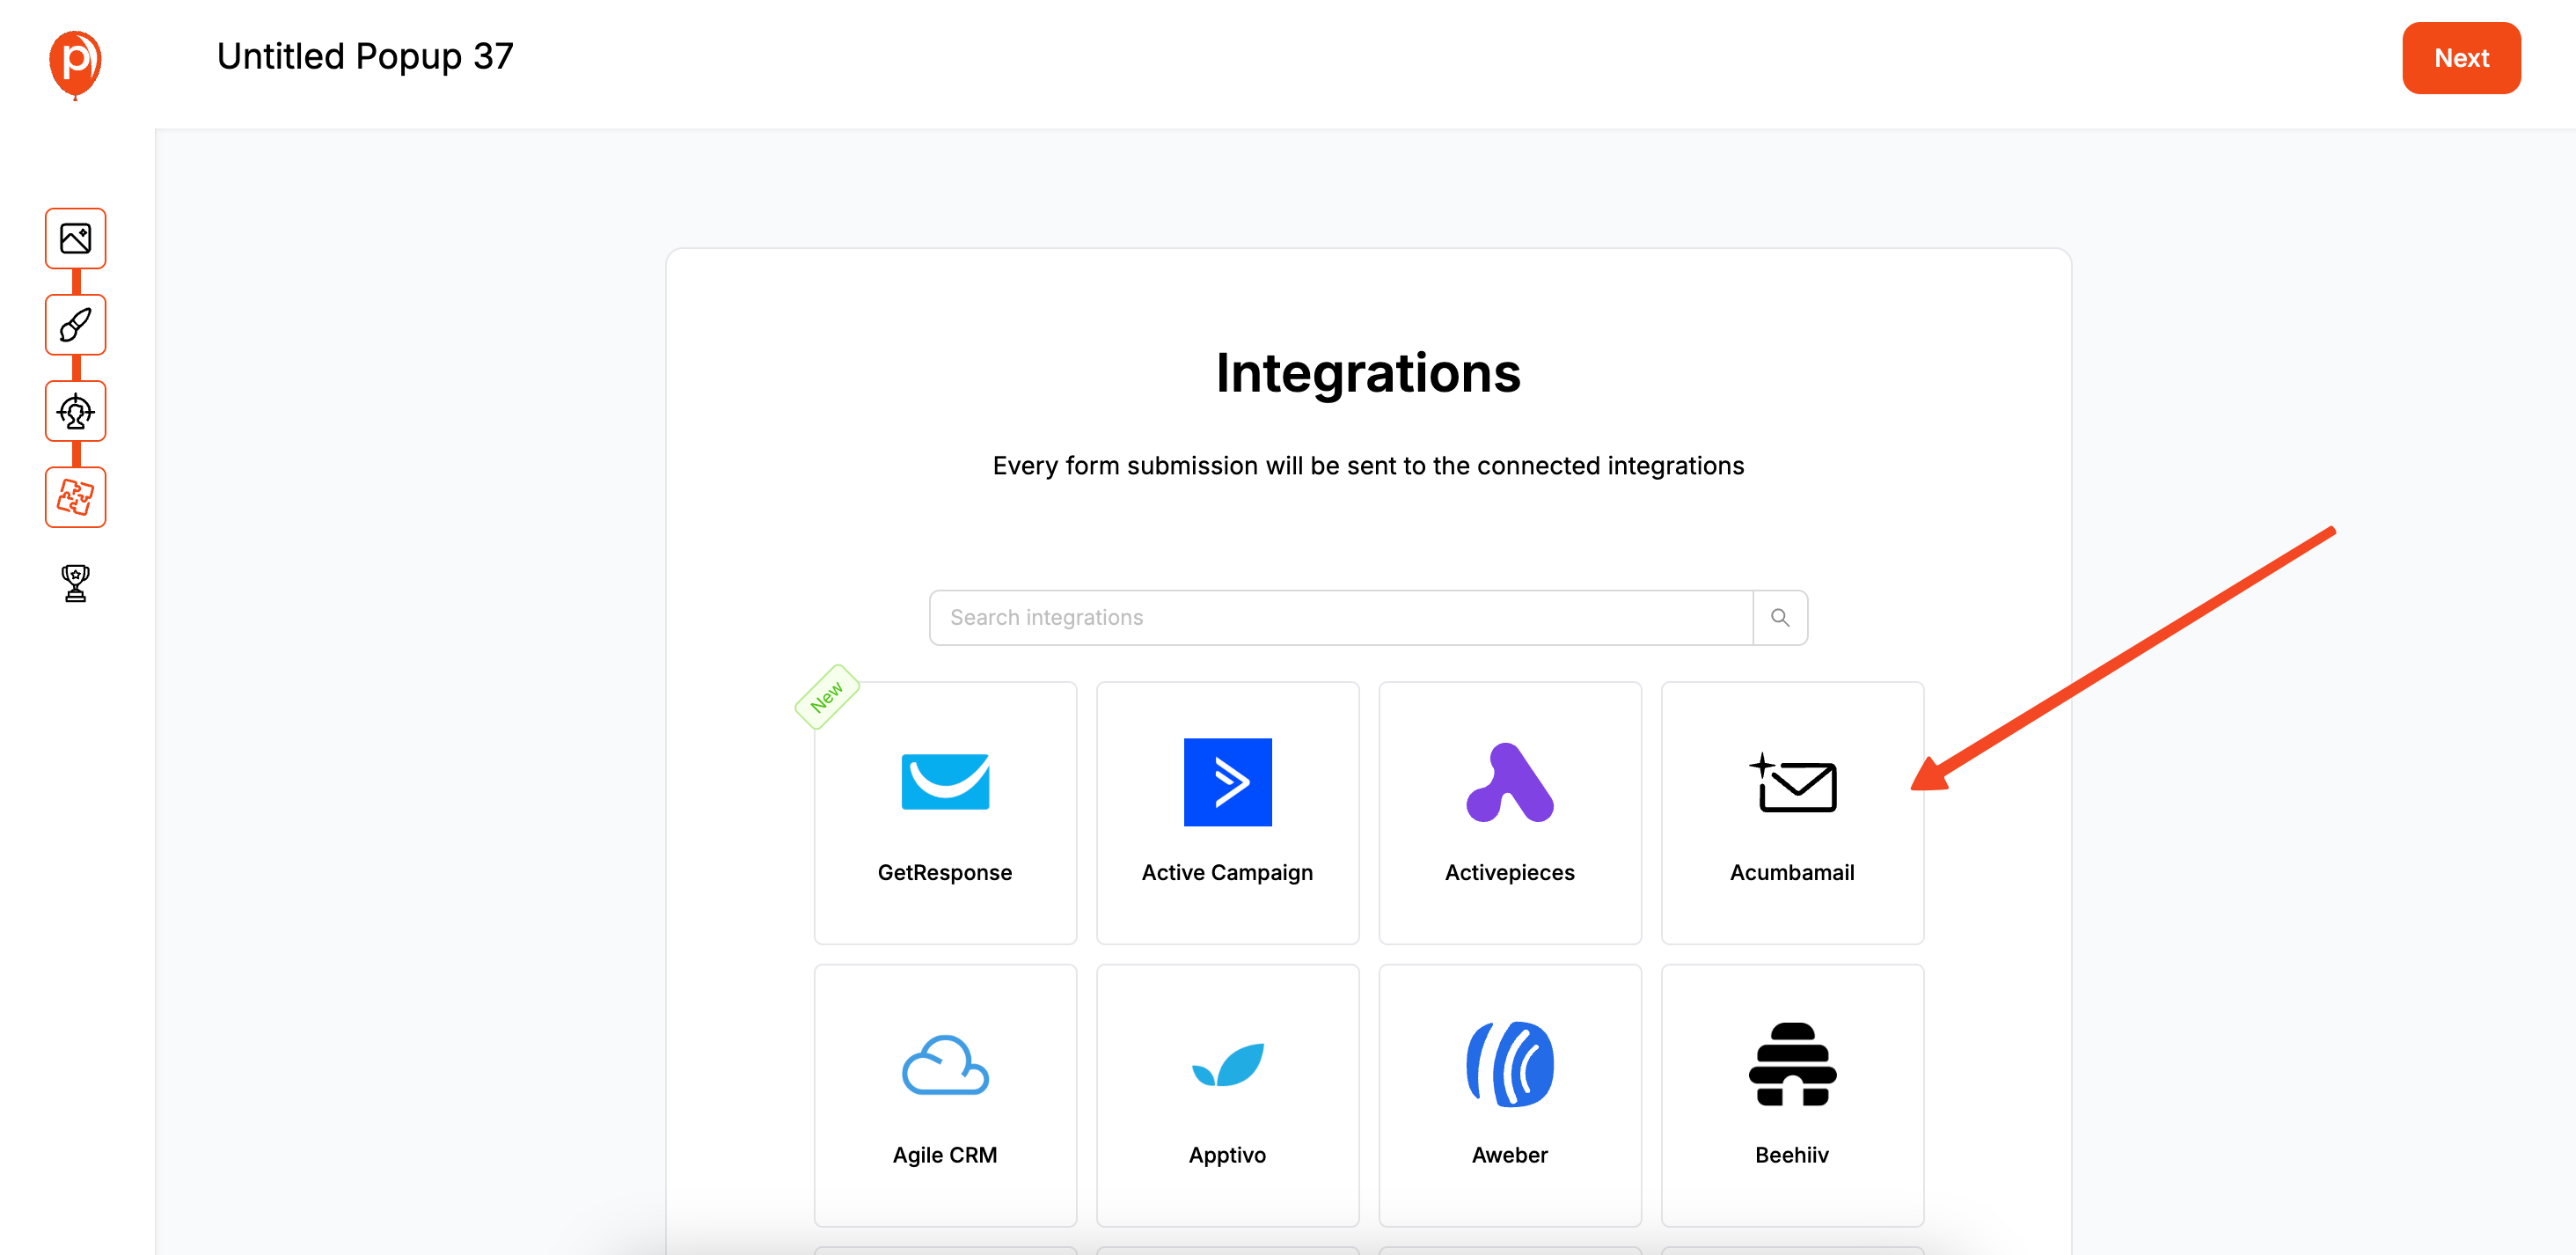
Next up are integrations. If you're collecting leads, you’ll want to send them directly to your email marketing tool. On the "Integrations" page, you can connect Poper to services like Mailchimp, Klaviyo, and many others.
Connecting your tools is simple and means new leads are automatically added to your lists, ready for your email campaigns. It’s a huge time-saver.
Step 6: Save and Publish Your Campaign

Once you’re happy with the design, targeting, and integrations, just hit "Save & Publish." This makes your popup live in our system, ready to be displayed on your website as soon as we connect it in the next part.
Part 2: Connecting Poper to Your Elementor Site
With your popup ready to go, the final step is linking Poper to WordPress. It takes about two minutes.
Step 7: Install the Poper Plugin on WordPress
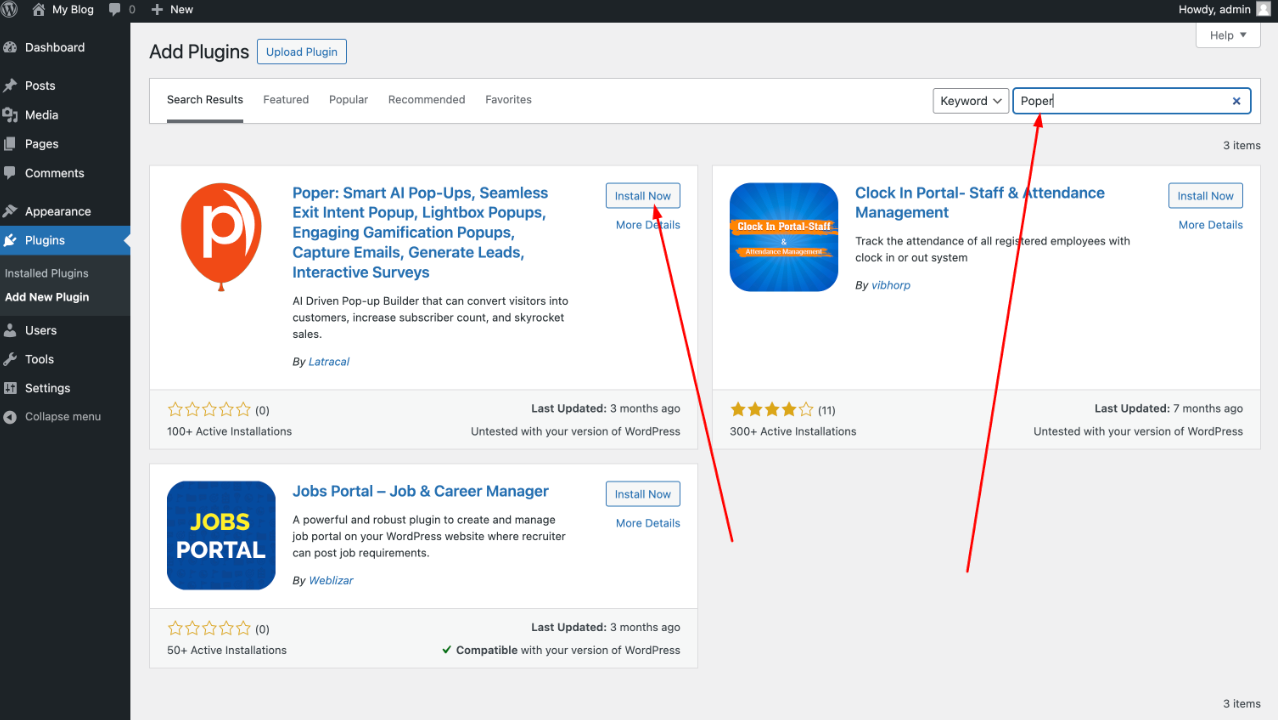
Log in to your WordPress dashboard. In the left-hand menu, go to "Plugins" > "Add New." In the search bar, type "Poper" and you’ll see our official plugin. Click "Install Now" and then "Activate."
Step 8: Connect Your Account
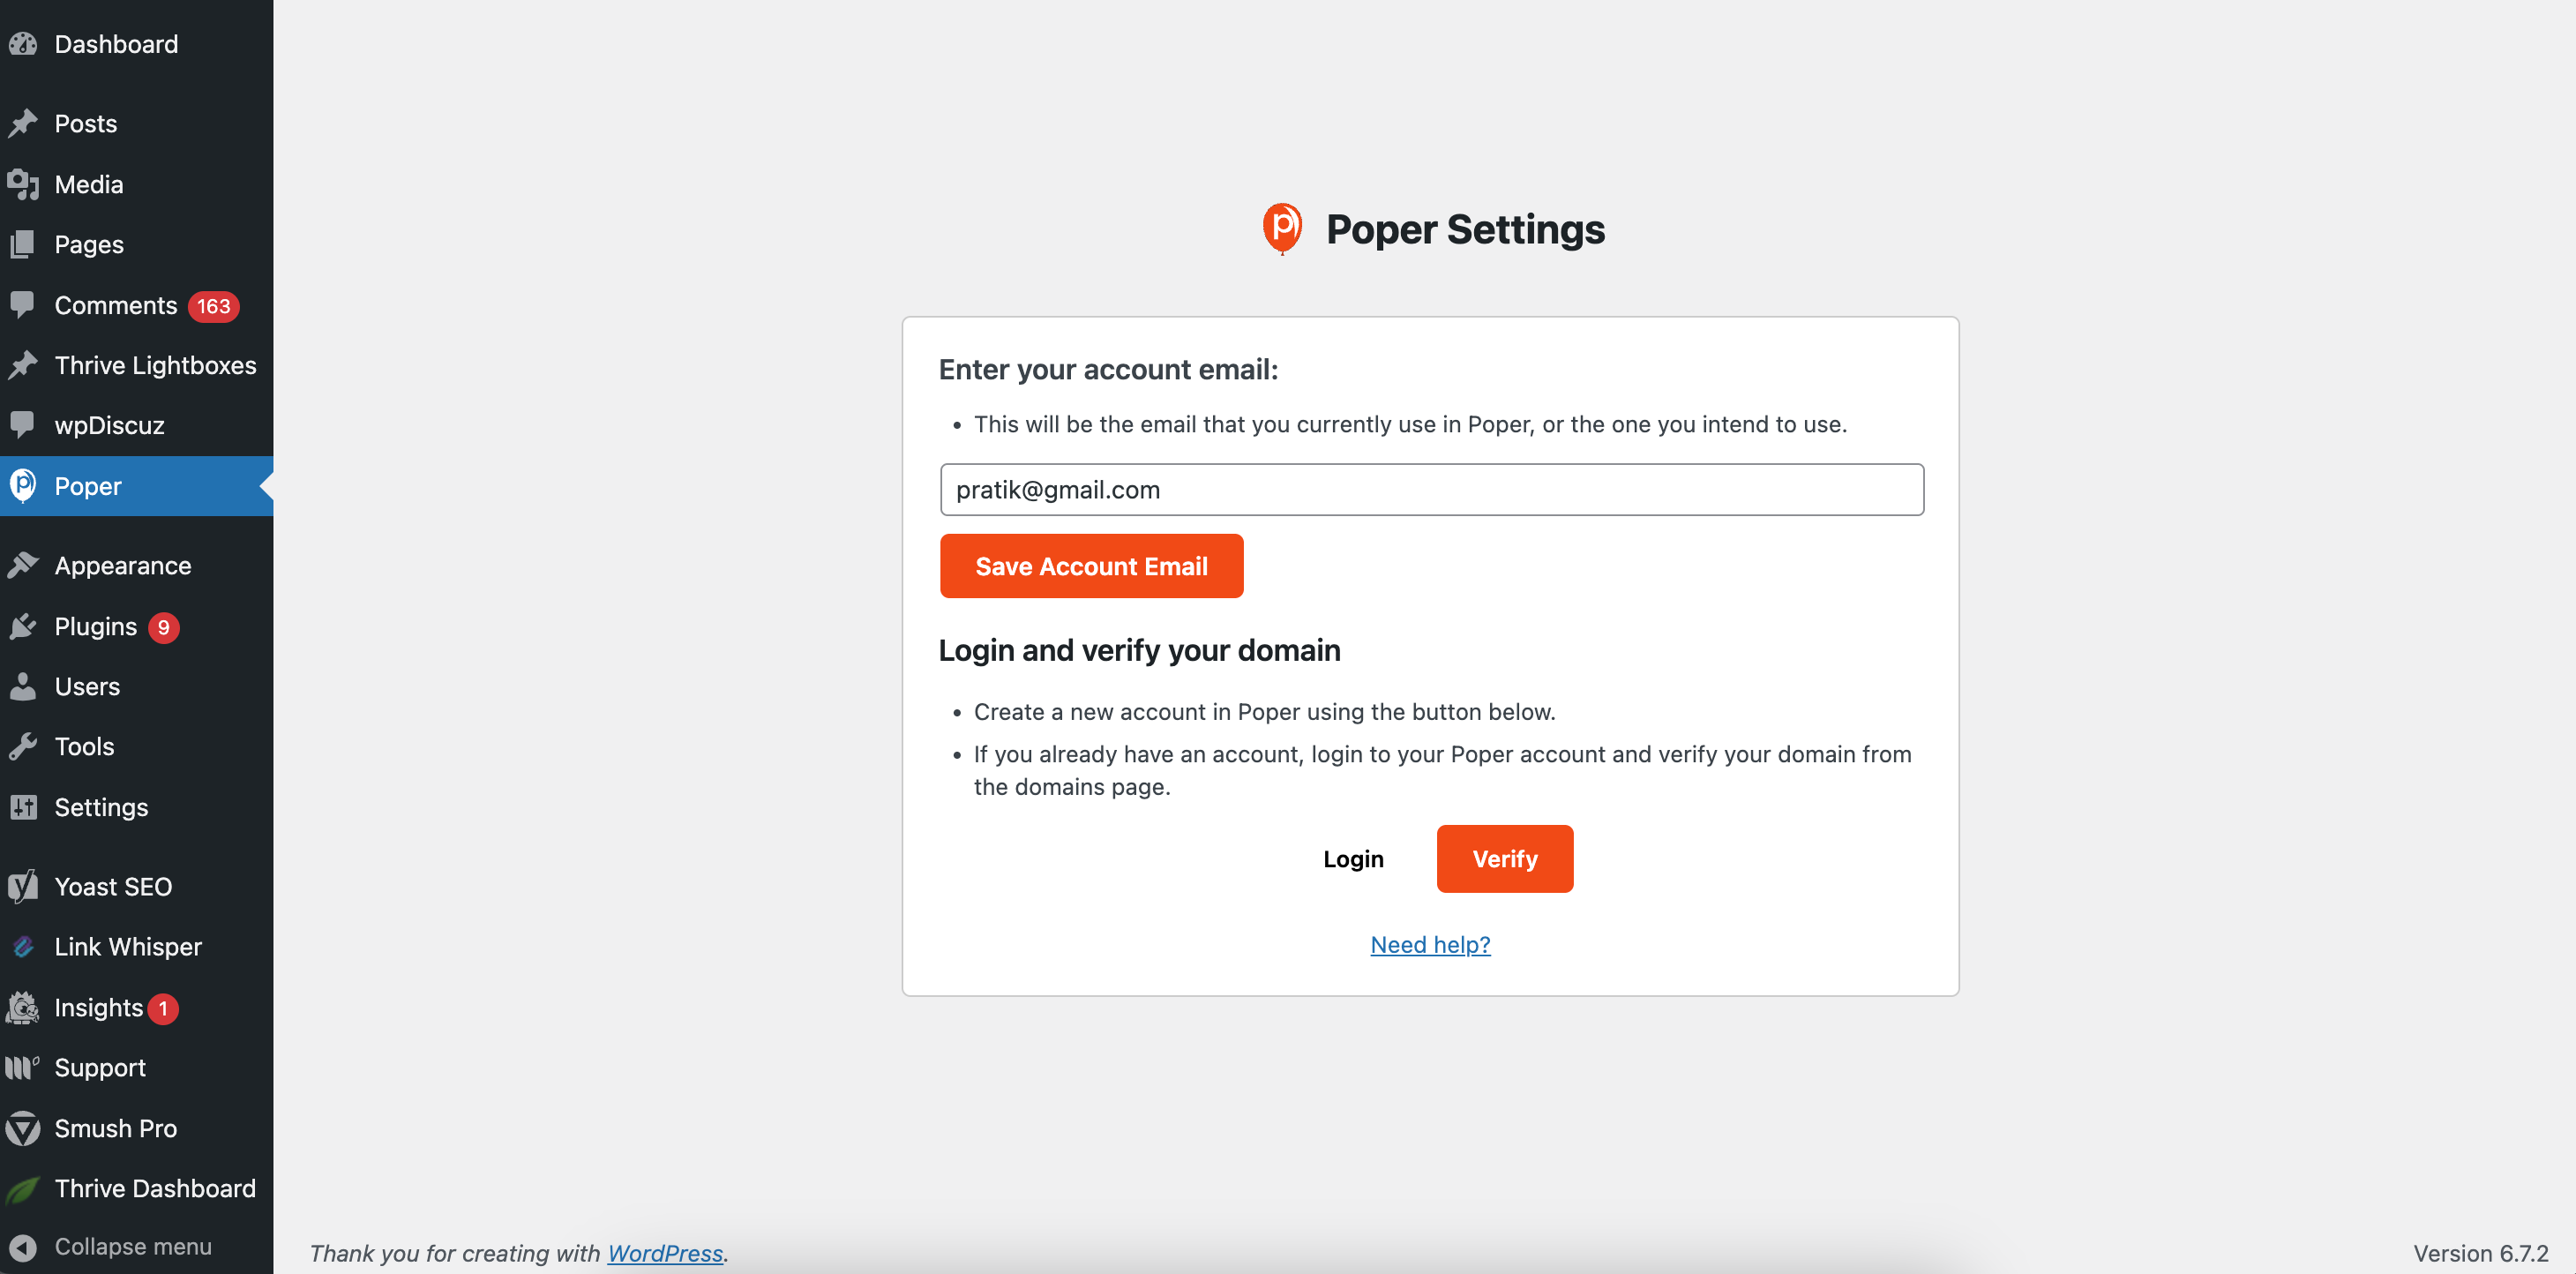
After activating the plugin, you'll see a new "Poper" menu item in your WordPress sidebar. Click on it. The page will ask for the email address you used to sign up for Poper. Enter it and click "Save."
This simple step is what links your WordPress site to your Poper account, telling it which popups you've created and published.
Step 9: Verify the Installation in Poper
Finally, head back to your Poper dashboard. There will be a prompt or button to "Verify Installation." Clicking this sends a signal to your website to confirm the connection is active. Once it shows a success message, you're all set!
That’s it! Your Poper popups are now live on your WordPress Elementor website. They will start appearing to visitors based on the display conditions you set. You can now manage all your campaigns directly from your Poper dashboard without ever needing to edit your website again.
Method 2: Using the Elementor Pro Popup Builder (Most Integrated Method)
If you have a license for Elementor Pro, you already have access to one of the most powerful and seamlessly integrated popup builders available for WordPress. If you want to explore more popup tools and compare them against Elementor Pro, see our round-up of the best popup plugins for WordPress.
Step 1: Create a New Popup in Elementor
From your WordPress dashboard, navigate to Templates > Popups.
Click "Add New Popup."
A window will appear. Choose the template type "Popup" and give your popup a descriptive name (e.g., "Homepage Welcome Popup"). Click "Create Template."
Step 2: Choose a Pre-Designed Template or Start from Scratch
Elementor will open its library of professionally designed popup templates. You can choose one that fits your goal (Lead Generation, Promotion, Welcome, etc.) and click "Insert."
Alternatively, you can close the library and design your popup from a blank canvas using the familiar Elementor drag-and-drop editor.
Step 3: Design Your Popup with the Elementor Editor
This is the best part of using Elementor Pro—you can use all the widgets you know and love (headings, images, forms, buttons, videos) to design your popup with complete freedom.
For Lead Capture: Drag in the "Form" widget and customize its fields, button, and actions (e.g., set an "Action After Submit" to connect to your email marketing service like Mailchimp or Klaviyo).
Style Everything: Use the Style tab to adjust colors, fonts, backgrounds, borders, and animations to perfectly match your brand.
Step 4: Configure Publish Settings (Triggers, Rules, and Conditions)
Once your design is ready, click the "Publish" button. This will open Elementor's powerful display conditions settings.
Conditions:
- Choose where you want the popup to display. You can include it on your entire site, singular pages, specific posts, or pages with certain categories or tags.
Choose where you want the popup to display. You can include it on your entire site, singular pages, specific posts, or pages with certain categories or tags.
Triggers:
- Define what action makes the popup appear. Options include:
- On Page Load: After a set number of seconds.
- On Scroll: After the user scrolls a certain percentage.
- On Scroll to Element: When the user reaches a specific element.
- On Click: When a user clicks a button (you'll assign a specific class).
- After Inactivity: After a period of user inactivity.
- On Page Exit Intent: When the user is about to leave the site.
- Define what action makes the popup appear. Options include:
Define what action makes the popup appear. Options include:
- On Page Load: After a set number of seconds.
- On Scroll: After the user scrolls a certain percentage.
- On Scroll to Element: When the user reaches a specific element.
- On Click: When a user clicks a button (you'll assign a specific class).
- After Inactivity: After a period of user inactivity.
- On Page Exit Intent: When the user is about to leave the site.
On Page Load: After a set number of seconds.
On Scroll: After the user scrolls a certain percentage.
On Scroll to Element: When the user reaches a specific element.
On Click: When a user clicks a button (you'll assign a specific class).
After Inactivity: After a period of user inactivity.
On Page Exit Intent: When the user is about to leave the site.
Advanced Rules:
- Set frequency caps (e.g., show X times, don't show after closing), target by device (desktop/mobile/tablet), show to logged-in/out users, or target visitors from specific URLs.
Set frequency caps (e.g., show X times, don't show after closing), target by device (desktop/mobile/tablet), show to logged-in/out users, or target visitors from specific URLs.
Step 5: Save & Close
Once you've set your conditions, triggers, and rules, click "Save & Close." Your popup is now live on your Elementor site and will appear according to your precise settings.
Which Method is Right for You?
| Method | Best For | Pros | Cons |
| Elementor Pro Popup Builder | Users who already have Elementor Pro | Perfectly integrated, uses familiar editor, powerful & flexible | Requires a paid Elementor Pro license |
| Free Elementor + Plugin | Users on the free version of Elementor | Free to start, many plugin options available | Popups are managed in a separate interface, potential for conflicts |
| Poper (Dedicated Tool) | Users wanting a centralized dashboard, advanced features, or a platform-agnostic solution | Works on any site, powerful features, easy-to-use plugin for connection | Requires a separate subscription (may have a free plan) |
Conclusion
When you need to add a popup in WordPress Elementor, you have excellent options tailored to your needs and budget. If you're interested in advanced popup strategies or want inspiration for your next campaign, don't miss our curated popup strategies and best practices.
If you have Elementor Pro, its built-in Popup Builder is the most powerful and seamlessly integrated solution. It's the recommended choice for anyone already in the Pro ecosystem.
If you're using the free version of Elementor, a quality third-party popup plugin from the WordPress repository is your best bet.
If you're a marketer who values a centralized, platform-agnostic tool with its own unique templates and features, Poper provides a fantastic experience that connects effortlessly to your Elementor site.
By choosing the right method, you can create high-converting popups that enhance your website, grow your audience, and drive your business forward.
Frequently Asked Questions (FAQ)
Do I need Elementor Pro to create any popups in Elementor?
To use Elementor's native Popup Builder, yes, you need Elementor Pro. If you are using the free version of Elementor, you can still have popups on your site by using a separate popup plugin from the WordPress repository.
How do I make a popup open when a button is clicked in Elementor Pro?
In the Elementor Popup Builder, set the trigger to "On Click." Then, edit the button on your page, go to the "Link" option, click the "Dynamic Tags" icon, and select "Popup." From there, you can choose the specific popup you want that button to open.
Can I use Elementor Pro popups to show different content to logged-in vs. logged-out users?
Yes. Under the "Advanced Rules" in the popup's display settings, you can set rules to show or hide the popup based on user roles, including logged-in or logged-out status.
If I use a tool like Poper, can I still edit my pages with Elementor?
Absolutely. Poper works alongside Elementor. You continue to build and edit your pages with Elementor as usual. Poper simply adds its popups on top of those pages based on the rules you set in the Poper dashboard.

