
We all know the struggle. You want to capture leads on your E-commerce site, but the moment you mention "custom forms," it turns into a long conversation with developers.
I built Poper specifically to bridge this gap. My goal is to let you, the marketer or business owner, launch campaigns quickly without touching a single line of code.
While there are plenty of apps in the Ecwid ecosystem, I want to show you how to use Poper to create a seamless, embedded signup form. This method helps you grow your email list and engage customers right where they are shopping. Let’s get this set up.
Installing Poper on Your Store
Step 1: Add the Poper App from Ecwid
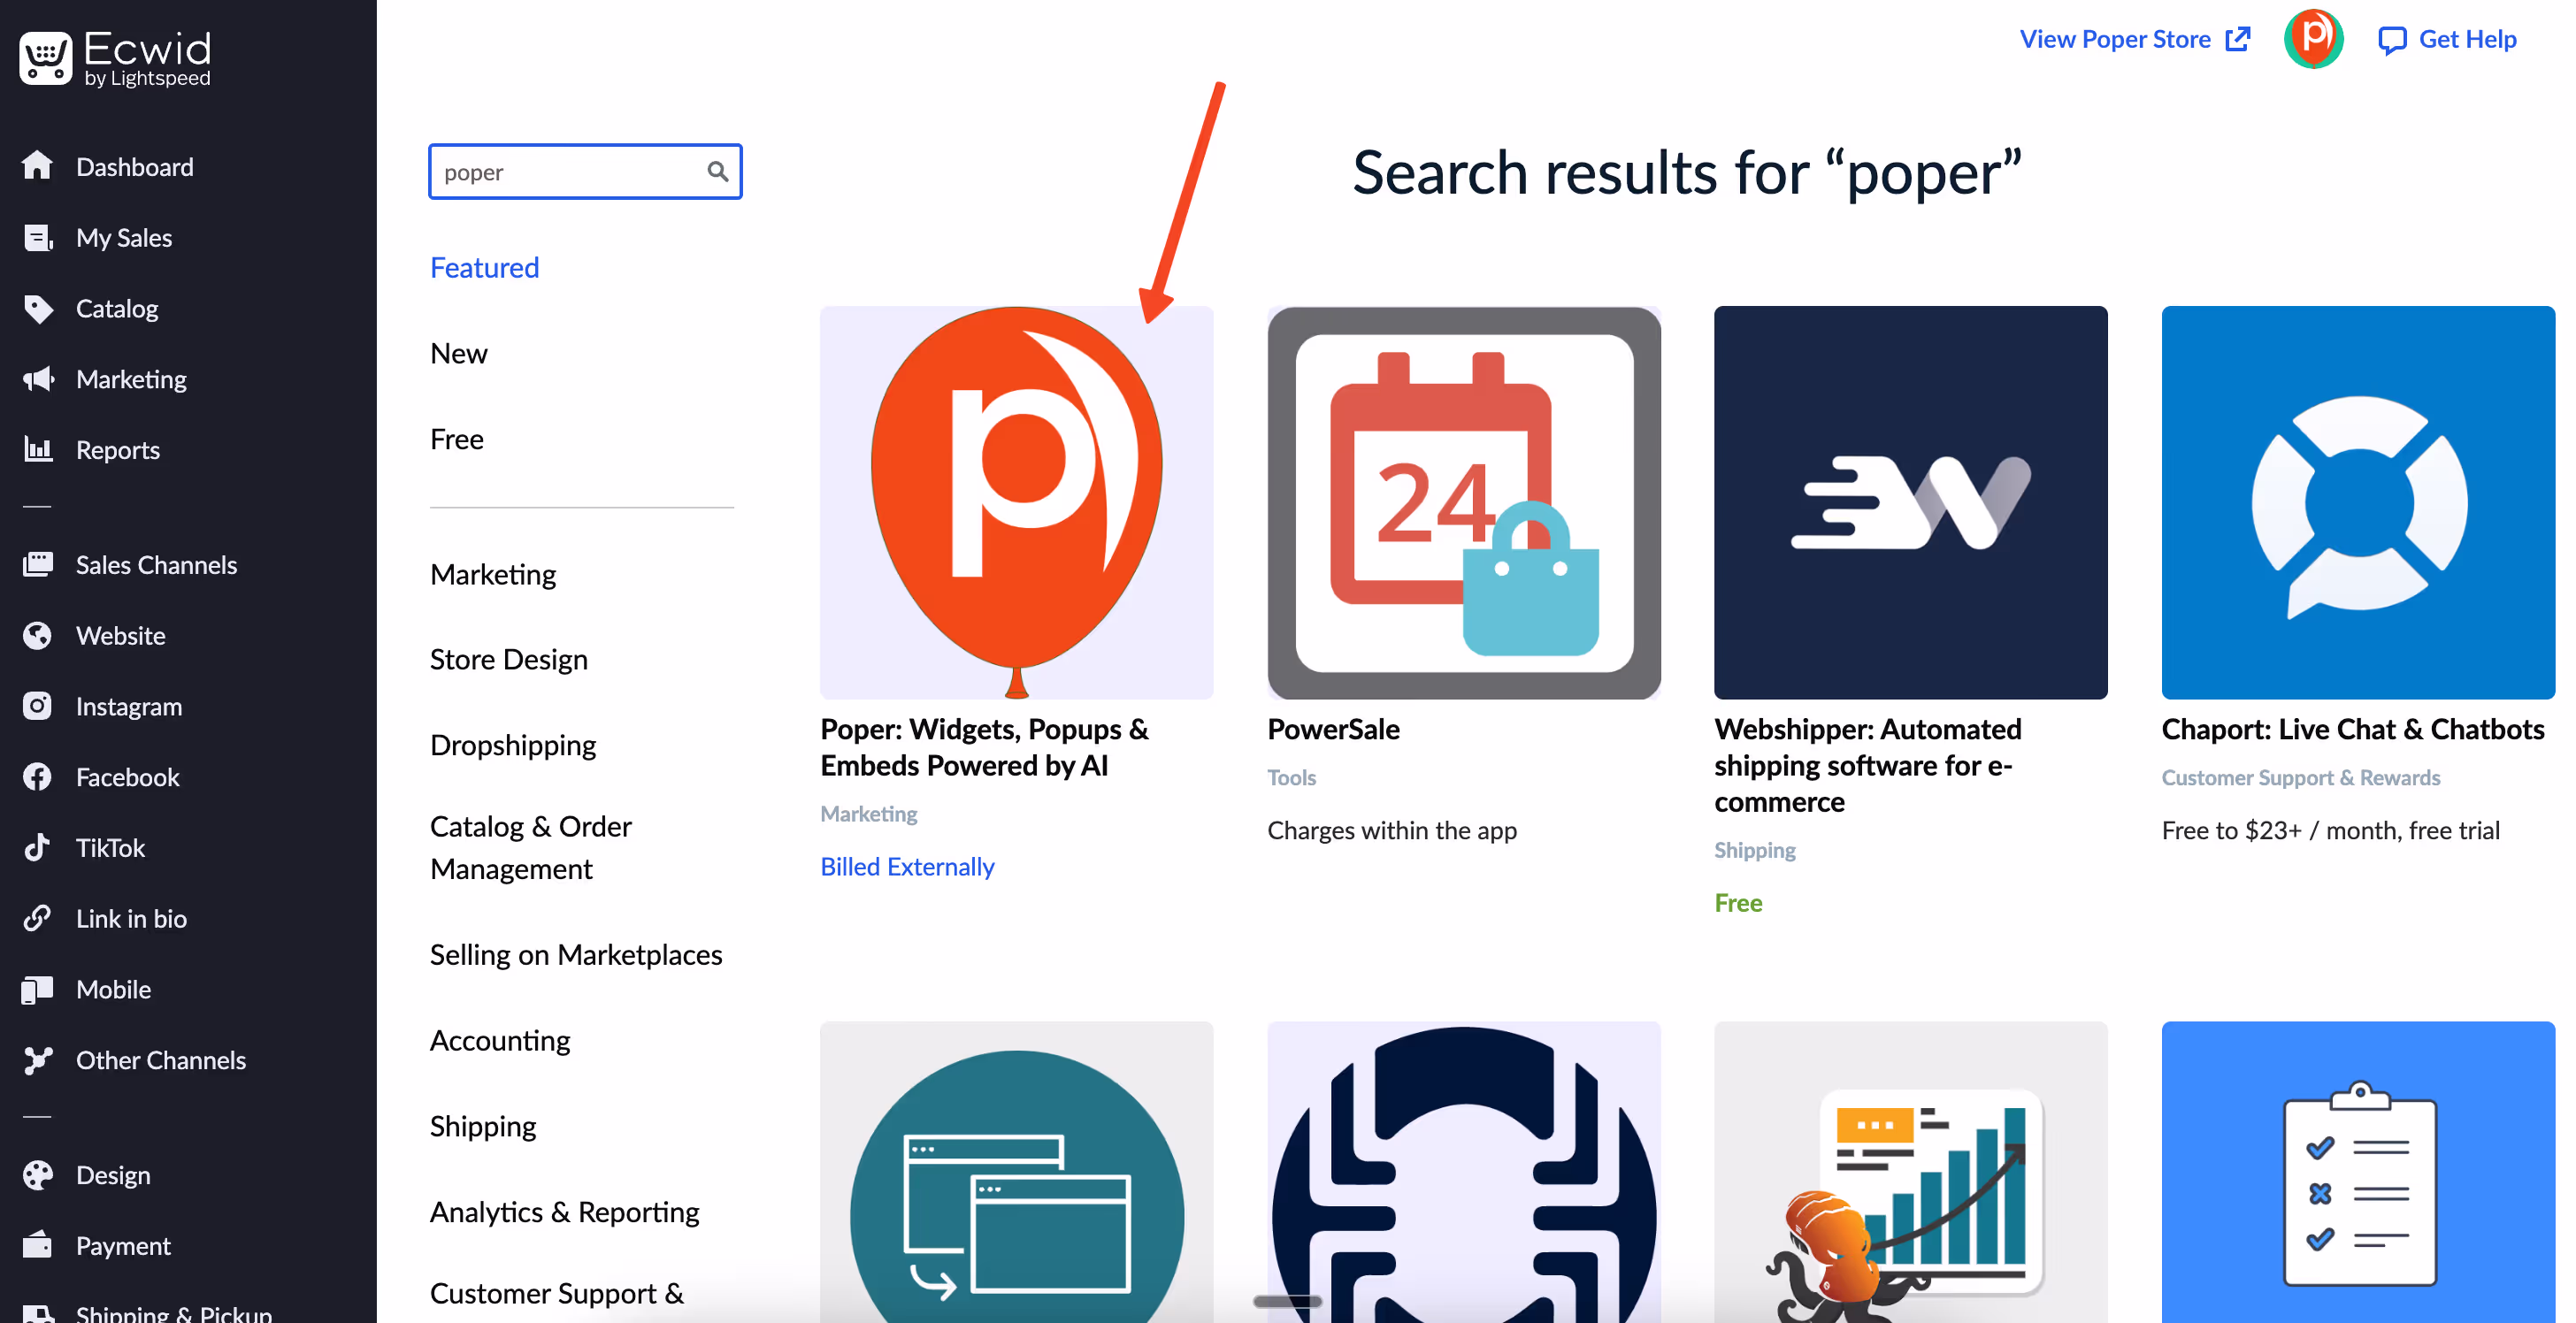
The first thing we need to do is get Poper talking to your Ecwid store. Log in to your Ecwid dashboard and head over to the "Apps" section. Search for "Poper" and click install. I’ve designed this flow to be automatic, so it will redirect you to our platform immediately.
Once you are redirected, simply sign up using your email address. We handle the heavy lifting in the background, automatically installing the necessary scripts onto your website. You don’t need to copy-paste any code snippets manually; just sign up, and you are ready to build.
Designing Your Form
Step 2: Choose a Newsletter Template

Now that you are in the Poper dashboard, let's create your campaign. Click on the "New Popup" button and select "Choose from templates." I know starting from scratch can be daunting, so we have stocked the library with hundreds of designs.
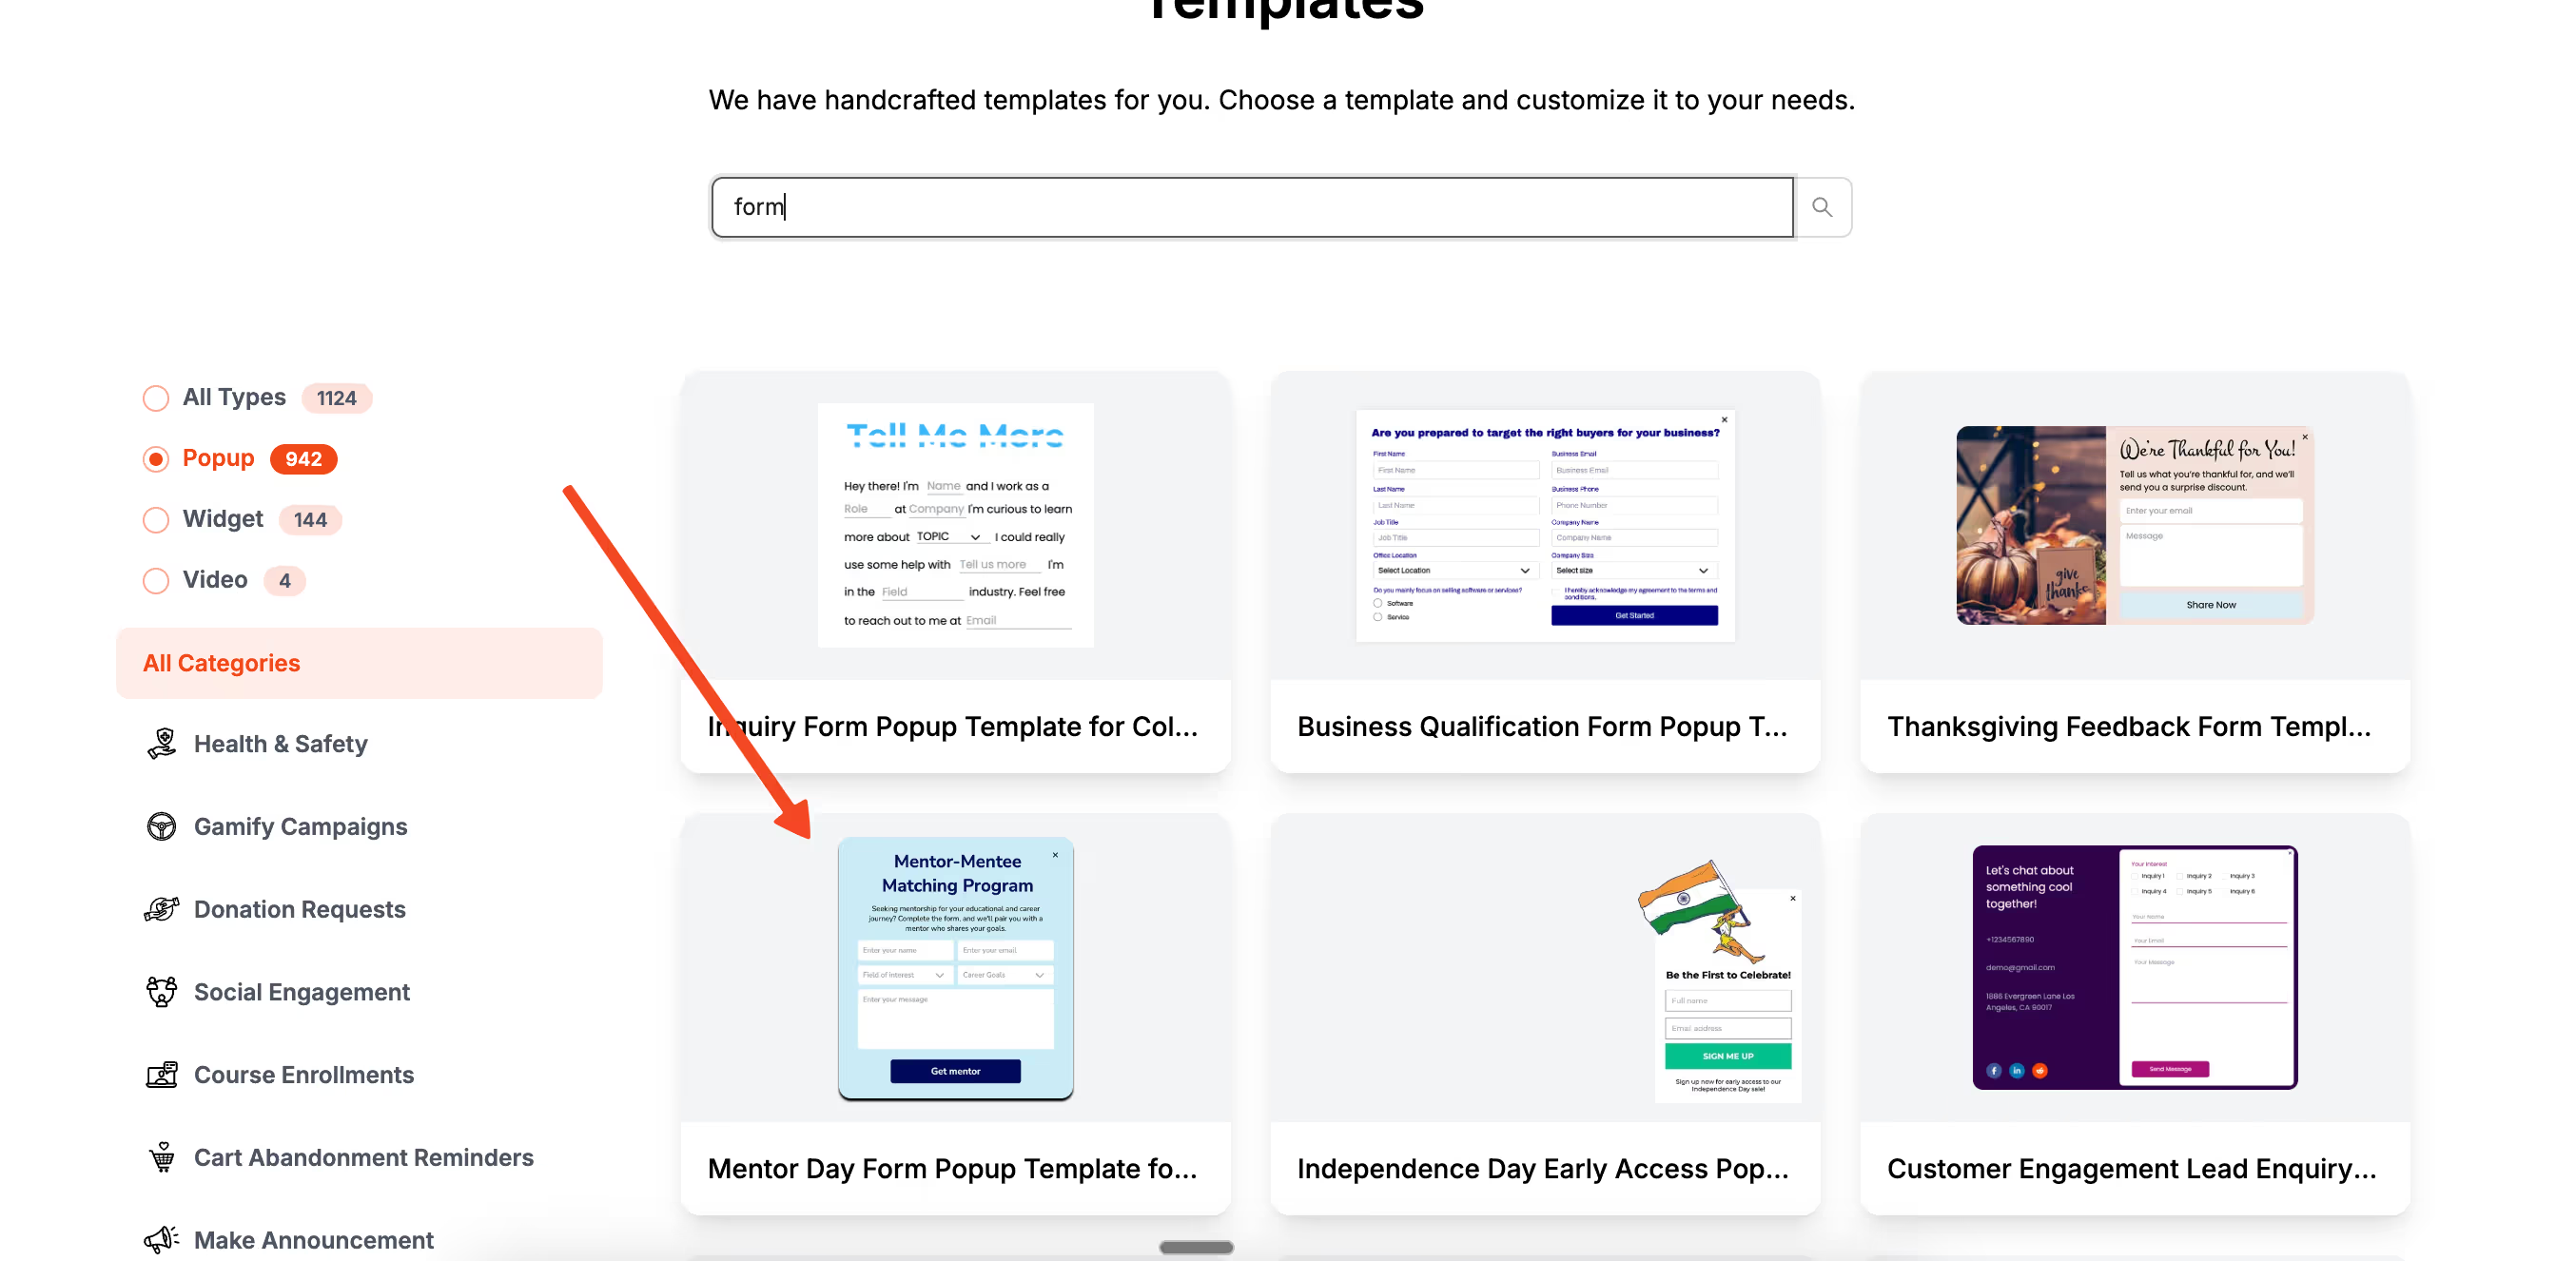
Type "newsletter" in the search bar to filter the results. You will see a variety of styles ranging from minimal layouts to vibrant designs. Pick the one that matches your brand’s vibe. Don’t worry about the exact colors yet; we will tweak those in the next step.
Step 3: Convert the Popup to an Embed
By default, the template loads as a popup overlay, but for a signup form, you might want it embedded directly into a specific part of your page (like a footer or sidebar).

In the editor, look for the dropdown menu in the top right corner and switch the mode from "Popup" to "Embed."
This changes how the campaign behaves, making it a static part of your website layout rather than an overlay. Once you have switched modes, use the editor to change fonts, button colors, and text. I recommend keeping the copy short and punchy to encourage more signups.
Positioning and Targeting
Step 4: Define Your Audience and Rules
Once you are happy with the design, click "Next" to enter the Display Conditions settings. This is where you tell Poper who should see your form. You can target specific pages, device types, or even audience demographics.
For a general signup form, you might want it visible on all pages. However, if you are running a special offer, you might only want it to appear on specific product categories. This control ensures you aren't showing irrelevant forms to your shoppers.
Step 5: Position the Form with CSS Selectors
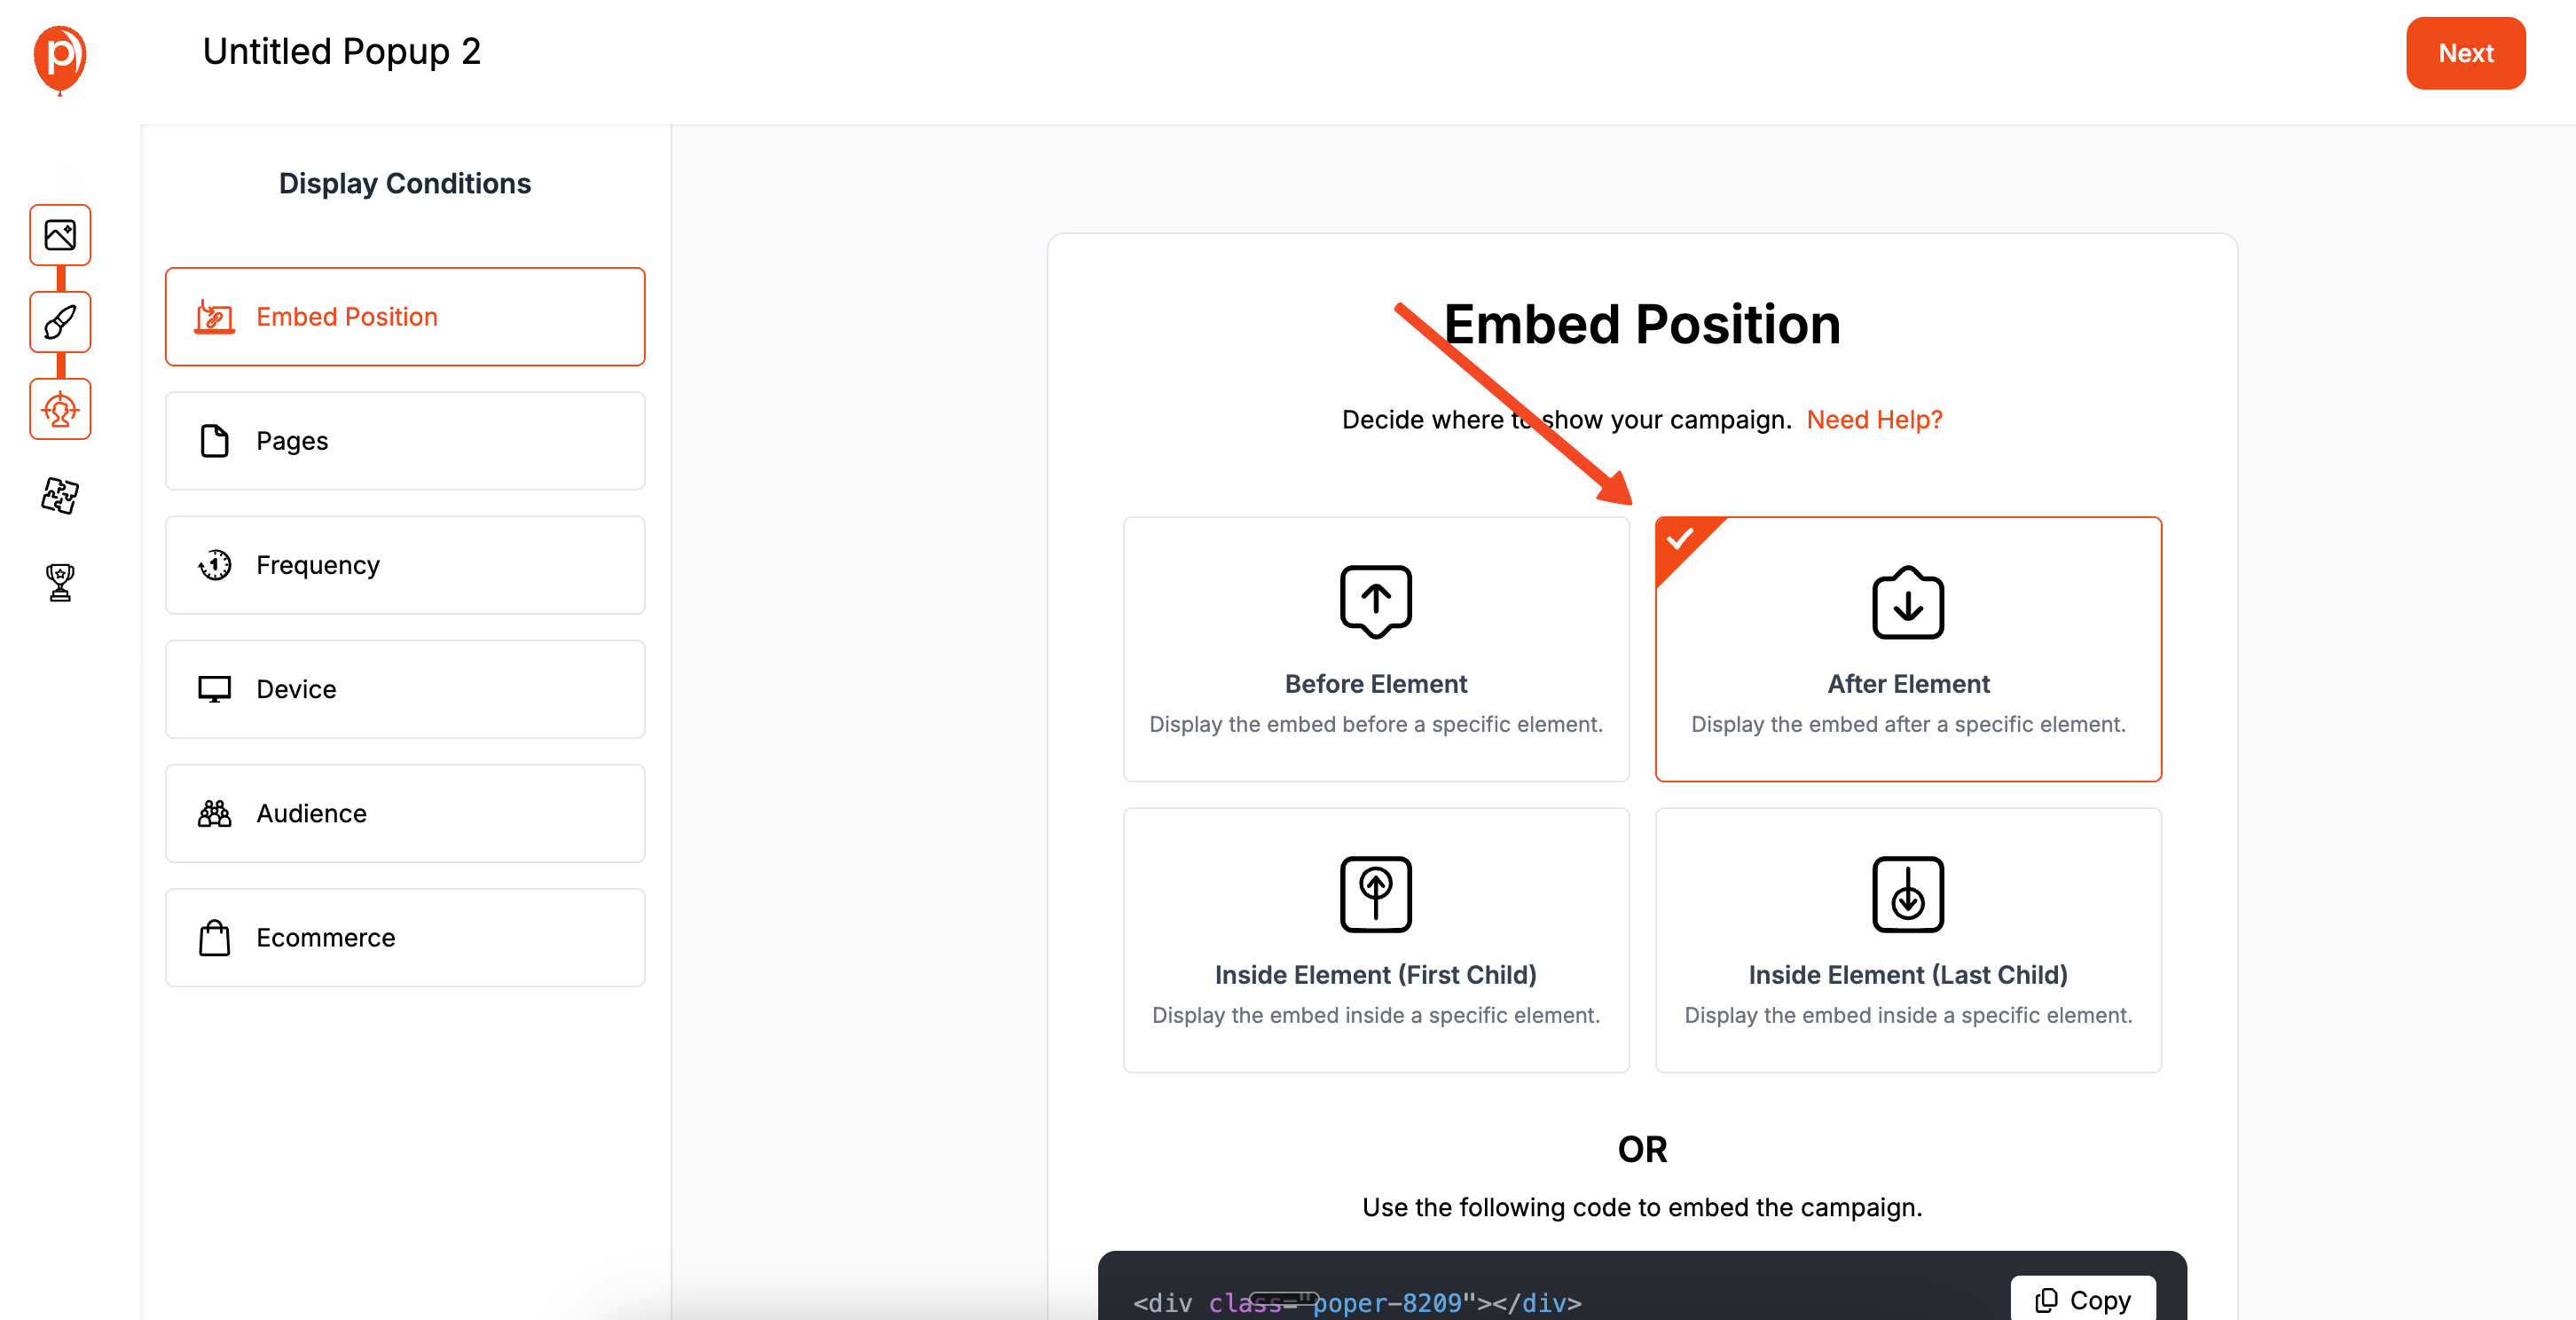
Since we are creating an embedded form, we need to tell the website exactly where to place it. We do this using the "Embed Position" feature. This might sound technical, but it is just a way of pointing to a spot on your page.
You will need to input the CSS selector of the element where you want the form to appear. If you aren't sure how to find this, we have a simple guide in our help center on finding CSS selectors. This step ensures your form sits perfectly within your content, looking like a native part of your Ecwid store.
Connecting and Launching
Step 6: Integrate Your Email Tools

Click "Next" to head to the Integrations tab. A signup form is useless if the data doesn't go anywhere. Here, you can connect Poper to your favorite email marketing platforms like Omnisend, Mailchimp, or Klaviyo.
Select your provider and follow the prompts to authorize the connection. This ensures that every time someone fills out your form, their email is instantly sent to your marketing lists, allowing you to trigger welcome emails or nurture sequences automatically.
Step 7: Save and Publish
We are at the finish line. Click on "Save & Publish" to make your campaign live. I always recommend opening your Ecwid store in a new tab or an incognito window to see how it looks in real-time.

If the form isn't appearing exactly where you want it, double-check your CSS selector from Step 5. Otherwise, you are all set! You have successfully added a professional lead capture form to your store without writing any code.

