
I’ve spent years thinking about what makes a popup, banner, or widget truly effective. It’s not about interrupting people; it’s about showing the right message to the right person at exactly the right moment.
HubSpot provides a comprehensive set of tools designed to work together to convert visitors. The primary ones include:
Forms: The core tool for collecting information, which can be embedded on any page.
Pop-up Forms: Overlay forms designed to grab attention with various trigger options.
Lead Flows (Non-pop-up): Slide-in boxes or drop-down banners that are less intrusive than traditional pop-ups.
CTAs (Calls-to-Action): Design-able buttons and links you can place anywhere to guide visitors to a form or landing page.
Live Chat & Chatbots: Interactive tools for engaging visitors in real-time and capturing information conversationally.
Landing Pages: Dedicated, distraction-free pages built to host your forms and convert traffic.
Now, let's dive into the 10 core strategies.
Strategy 1: The High-Value Content Offer (Lead Magnet)
This is the most classic lead capture strategy. You offer a valuable piece of content (an e-book, whitepaper, checklist, webinar) in exchange for a visitor's contact information.
How to Implement in HubSpot:
Create a Landing Page: Go to Marketing > Landing Pages and build a dedicated page for your offer. Keep it focused, with a compelling headline, benefit-oriented bullet points, and no main site navigation to distract visitors.
Create a Form: Go to Marketing > Lead Capture > Forms. Build a form to collect contact details. For a content download, Name and Email are often sufficient.
Embed the Form on the Landing Page: Add your newly created form to the landing page.
Create a Thank You Page: Build a separate page where users can download the resource after submitting the form.
Set Up the Form Action: In the form's settings, set the post-submit action to redirect to your Thank You Page.
Use HubSpot CTAs: Create a CTA button (e.g., "Download Your Free Guide Now") and place it in relevant blog posts, on your homepage, and in your sidebars to drive traffic to your landing page.
Strategy 2: The Exit-Intent Popup Offer
Capture visitors who are about to leave your site with a last-chance offer. This is one of the most effective ways to recover otherwise lost leads.
How to Implement in HubSpot:
Go to Marketing > Lead Capture > Forms and choose to create a "Pop-up form."
Design the Offer: Create a compelling, low-friction offer. A discount ("Wait! Get 15% Off Your First Order") or a valuable, easy-to-consume lead magnet works best.
Set the Trigger: In the pop-up form's "Triggers" tab, select "On exit intent."
Set Targeting: In the "Targeting" tab, define which pages it should appear on. For an e-commerce store, targeting product or cart pages is highly effective. You can also exclude it from pages like your blog, where a different offer might be more relevant.
Strategy 3: The Newsletter Signup (Embedded & Pop-up)
Every website needs a way to capture newsletter subscribers.
How to Implement in HubSpot:
Embedded Footer Form: Create a simple HubSpot Form asking only for an email address. Embed this form's code directly into your website's footer template so it appears on every page. This is a low-friction, persistent capture point.
Blog Subscriber Pop-up: Create a HubSpot Pop-up Form or a Lead Flow (Slide-in) that offers a compelling reason to subscribe (e.g., "Get our best articles delivered weekly"). In the "Targeting" settings, set this to appear only on URLs that contain /blog/.
Strategy 4: The Contact Us & "Request a Quote" Forms
These are bottom-of-the-funnel forms for visitors with high intent.
How to Implement in HubSpot:
Create a Form: Build a more detailed form in HubSpot that includes fields to help you qualify the lead (e.g., Company Size, What Service Are You Interested In?, Budget). Use HubSpot's dependent fields to show relevant questions based on previous answers.
Embed on Key Pages: Place this form on your dedicated "Contact Us," "Request a Quote," or "Pricing" pages.
Set Up Automation: Use a HubSpot Workflow to:
- Send an immediate auto-responder email confirming receipt.
- Notify the correct sales rep or team member internally.
- Create a deal in your HubSpot sales pipeline.
Send an immediate auto-responder email confirming receipt.
Notify the correct sales rep or team member internally.
Create a deal in your HubSpot sales pipeline.
Strategy 5: The Conversational Chatbot
Engage visitors who might not want to fill out a form but are willing to chat.
How to Implement in HubSpot:
Go to Conversations > Chatflows.
Create a new Chatflow. You can choose to build a "Live Chat" (for your team to answer) or a "Bot."
Build a Bot: Use the chatbot builder to create a conversational flow. A great lead capture bot can:
- Ask qualifying questions ("Are you looking for help with marketing or sales?").
- Book meetings directly on your sales team's calendar.
- Capture an email address to "send them more information."
Ask qualifying questions ("Are you looking for help with marketing or sales?").
Book meetings directly on your sales team's calendar.
Capture an email address to "send them more information."
Targeting: Set the chatflow to appear on key pages, like your homepage or pricing page.
Strategy 6: The "Gated" Video
Use a form to "gate" premium video content, requiring an email to watch or continue watching.
How to Implement in HubSpot:
This strategy requires a HubSpot-compatible video hosting platform like Wistia or Vidyard.
Integrate your video platform with HubSpot in the App Marketplace.
Upload your video to Wistia or Vidyard.
Within the video player's settings (in Wistia/Vidyard), look for a feature called "Turnstile" or "Email Capture."
Select a HubSpot Form to use as the gate. You can set the form to appear at the beginning, middle, or end of the video. When a viewer submits the form, their contact information is passed directly to HubSpot.
Strategy 7: The Content Upgrade
Offer a hyper-relevant bonus asset within a specific blog post. This converts at a very high rate because the offer is directly related to the content being consumed.
How to Implement in HubSpot:
Create your bonus asset (e.g., a PDF checklist that summarizes the blog post).
Create a HubSpot Form to capture emails for this specific upgrade.
Create a Thank You Page where users can download the asset. Configure the form to redirect to this page.
Go to Marketing > Lead Capture > CTAs. Create a new CTA button or link (e.g., "Download the Free Checklist").
Place this CTA directly within the body of your blog post. Link the CTA to a landing page with your form, or have it trigger a pop-up form for the content upgrade.
Strategy 8: The Webinar Registration Form
Use HubSpot to manage the entire lead capture and communication process for a live or on-demand webinar.
How to Implement in HubSpot:
Create a Landing Page: Build a dedicated landing page in HubSpot for your webinar, detailing the topic, speakers, date, and benefits.
Create a Registration Form: Build a HubSpot form that collects the necessary information (Name, Email, Company, etc.).
Embed the Form: Place the form on your webinar landing page.
Create a Workflow: Go to Automation > Workflows. Create a workflow triggered by submission of the webinar registration form. This workflow should:
- Send a confirmation email with the webinar link.
- Send one or two reminder emails leading up to the event.
- Send a follow-up email after the webinar with a recording.
Send a confirmation email with the webinar link.
Send one or two reminder emails leading up to the event.
Send a follow-up email after the webinar with a recording.
Strategy 9: The Slide-in "Subscribe" Box (Lead Flow)
For a less intrusive alternative to a full popup, use a HubSpot Lead Flow that slides in from the corner.
How to Implement in HubSpot:
Go to Marketing > Lead Capture > Forms (Lead Flows are often created from the same area as pop-up forms, depending on your HubSpot UI version).
When creating your form, choose a type like "Slide-in box left" or "Slide-in box right."
Design the Form: Keep it simple for a newsletter sign-up.
Set the Trigger: Go to the "Triggers" tab. A scroll-based trigger (e.g., "On 50% page scroll") is highly effective for slide-ins on blog posts, as it targets engaged readers.
Targeting: Set the display rules to show only on your blog pages.
Strategy 10: Smart CTAs for Personalized Offers
Show different calls-to-action to different types of visitors, personalizing their experience and increasing relevance.
How to Implement in HubSpot:
Go to Marketing > Lead Capture > CTAs.
Create a new CTA and choose the "Smart CTA" option.
Set Smart Rules: Define your segmentation criteria. You can create different versions of the CTA based on:
- Contact List Membership: Show one CTA to prospects and another to existing customers.
- Lifecycle Stage: Show a "Download E-book" CTA to a Lead but a "Request Demo" CTA to a Marketing Qualified Lead (MQL).
- Device Type, Country, or Referral Source.
Contact List Membership: Show one CTA to prospects and another to existing customers.
Lifecycle Stage: Show a "Download E-book" CTA to a Lead but a "Request Demo" CTA to a Marketing Qualified Lead (MQL).
Device Type, Country, or Referral Source.
Design Each Version: Create a different design and link for each smart rule.
Place the single smart CTA embed code on your website. HubSpot will automatically show the correct version to each visitor based on the rules you set.
The Poper Alternative: When You Need More
Setting Up Smart Triggers: When to Show Your Popup
Timing is everything. A well-timed popup feels helpful, while a poorly timed one feels intrusive. I’ve designed Poper with flexible triggers so you can find that perfect moment.
Step 1: Capture Leaving Visitors with an Exit-Intent Trigger
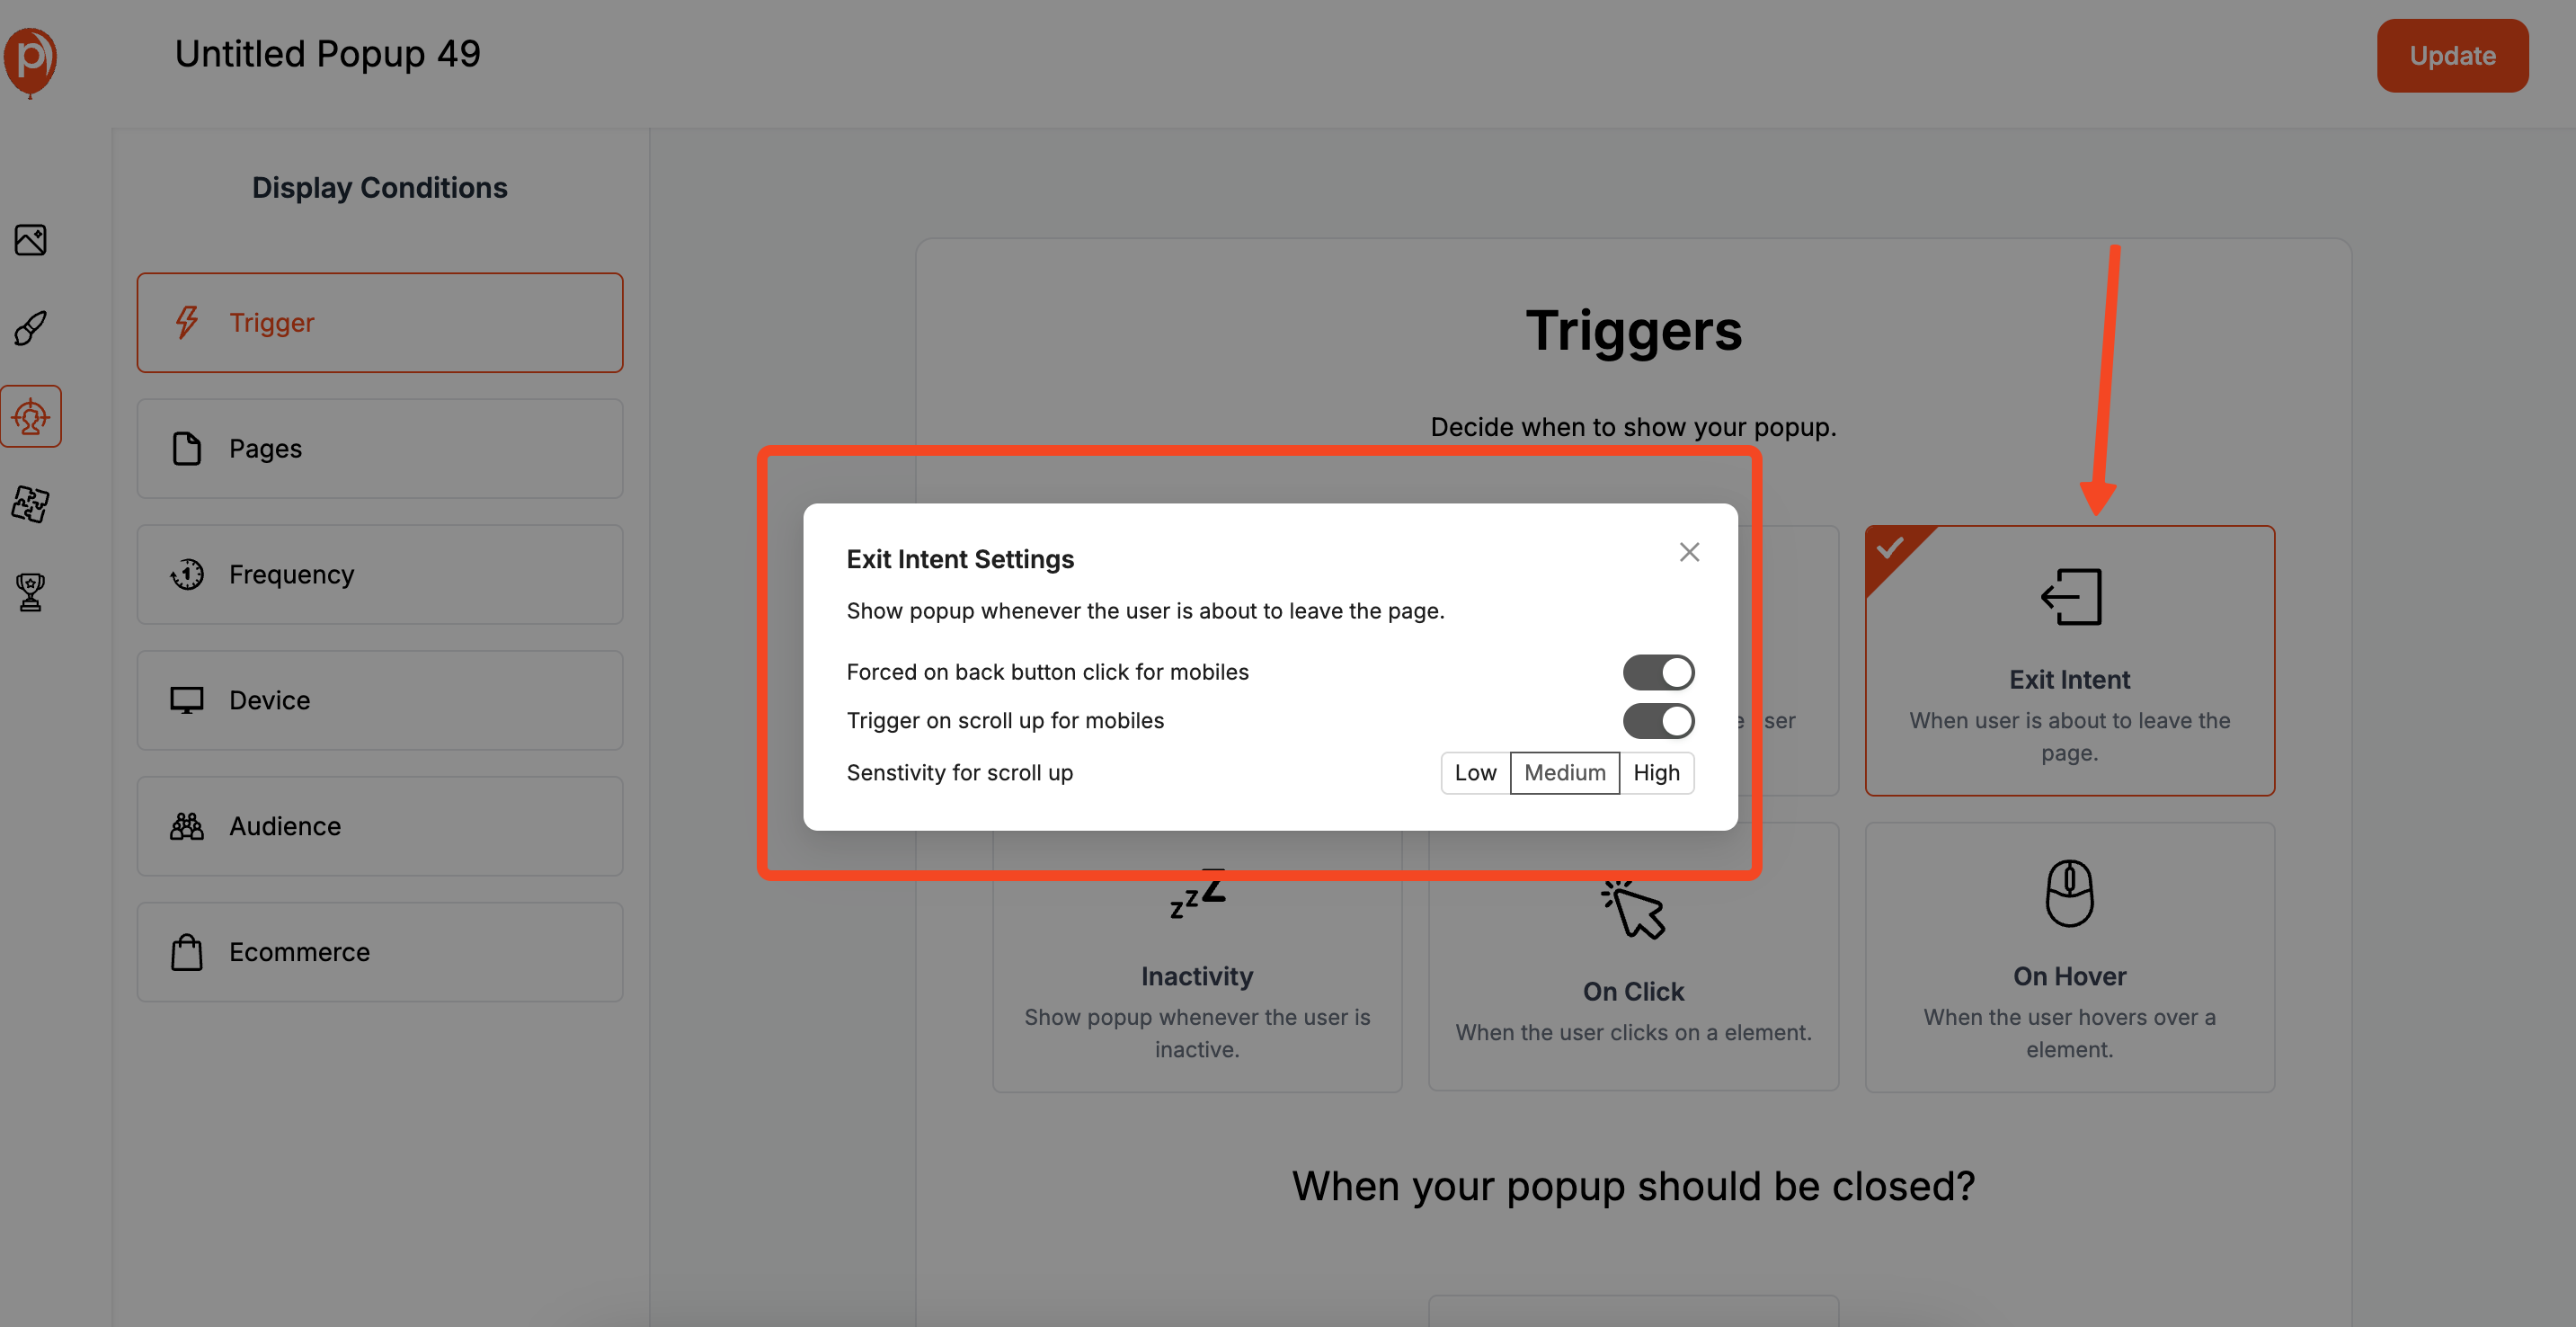
The Exit-Intent trigger is your last chance to make an offer before a visitor leaves your site.
On a desktop, it activates when a user’s cursor moves toward the close button on their browser. It’s a powerful, low-risk way to capture otherwise lost leads.
On mobile, we mimic this by triggering the popup when a user scrolls up quickly or hits the back button. It’s perfect for offering a last-minute discount or a free guide to get them to stay.
Step 2: Use a Time Delay for Engaged Readers
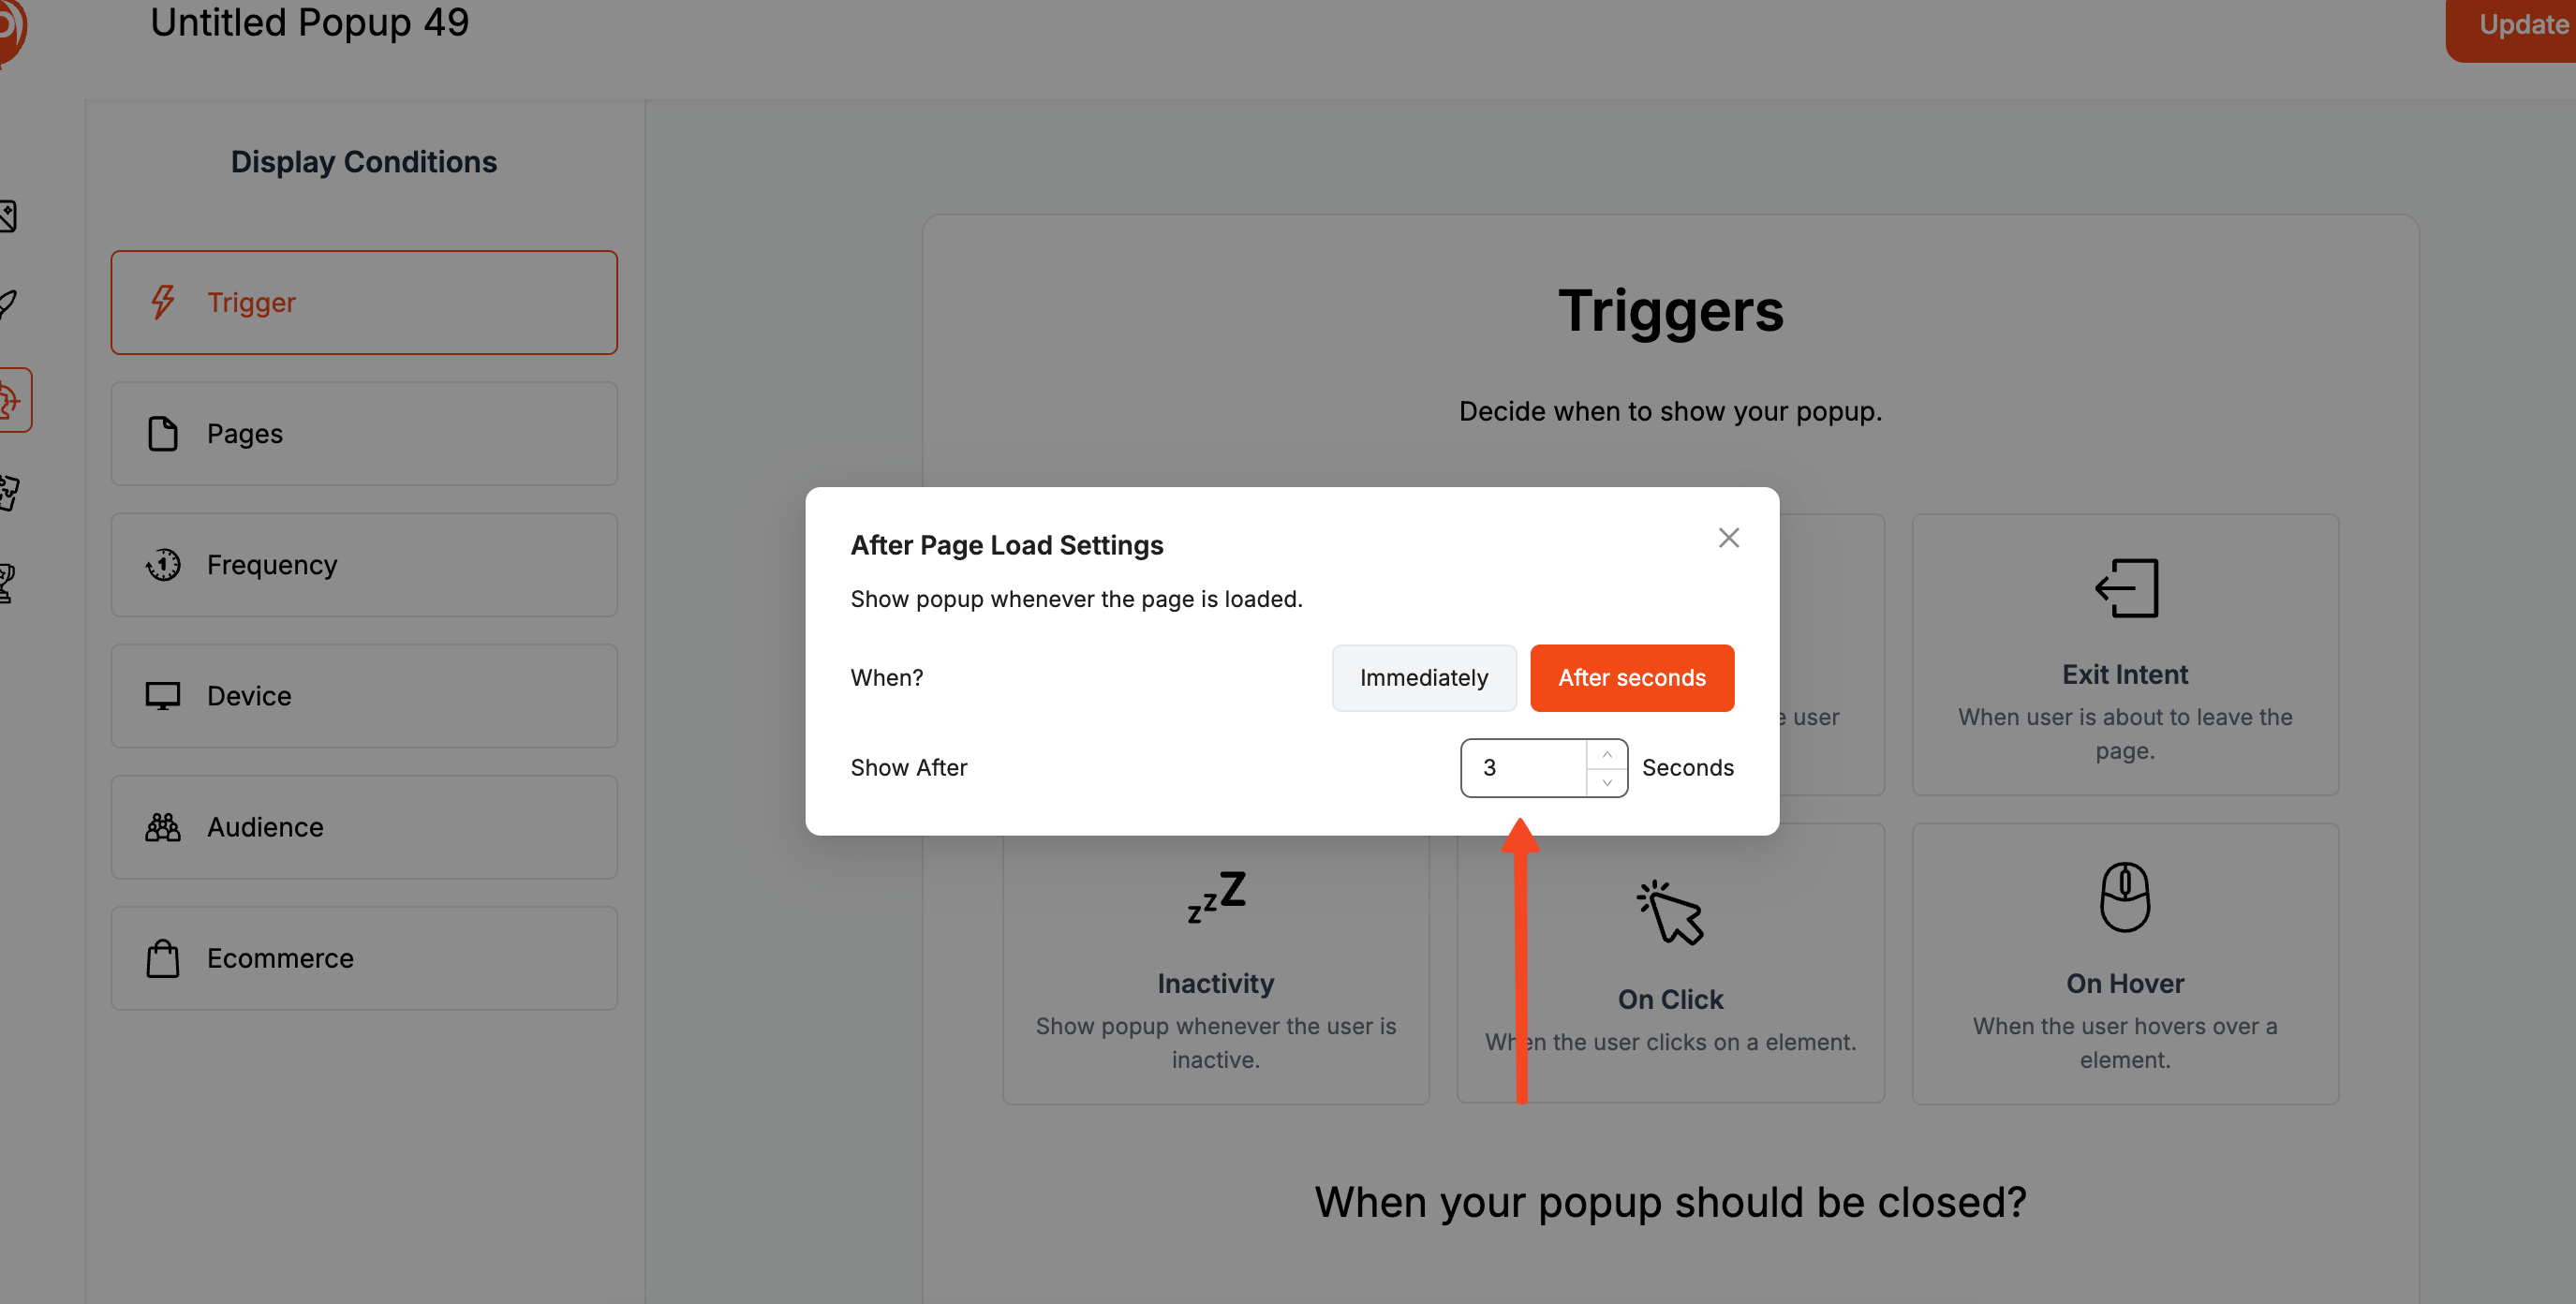
Sometimes, the best approach is to just wait a moment. Setting a time delay gives your visitors a chance to get familiar with your page content before you present an offer.
I recommend starting with a delay between 7 and 30 seconds. This ensures you’re engaging someone who has shown interest, not just someone who landed on the page by accident. You can find this setting under the ‘Triggers’ tab in your campaign setup.
Step 3: Trigger Popups Based on Scroll Depth
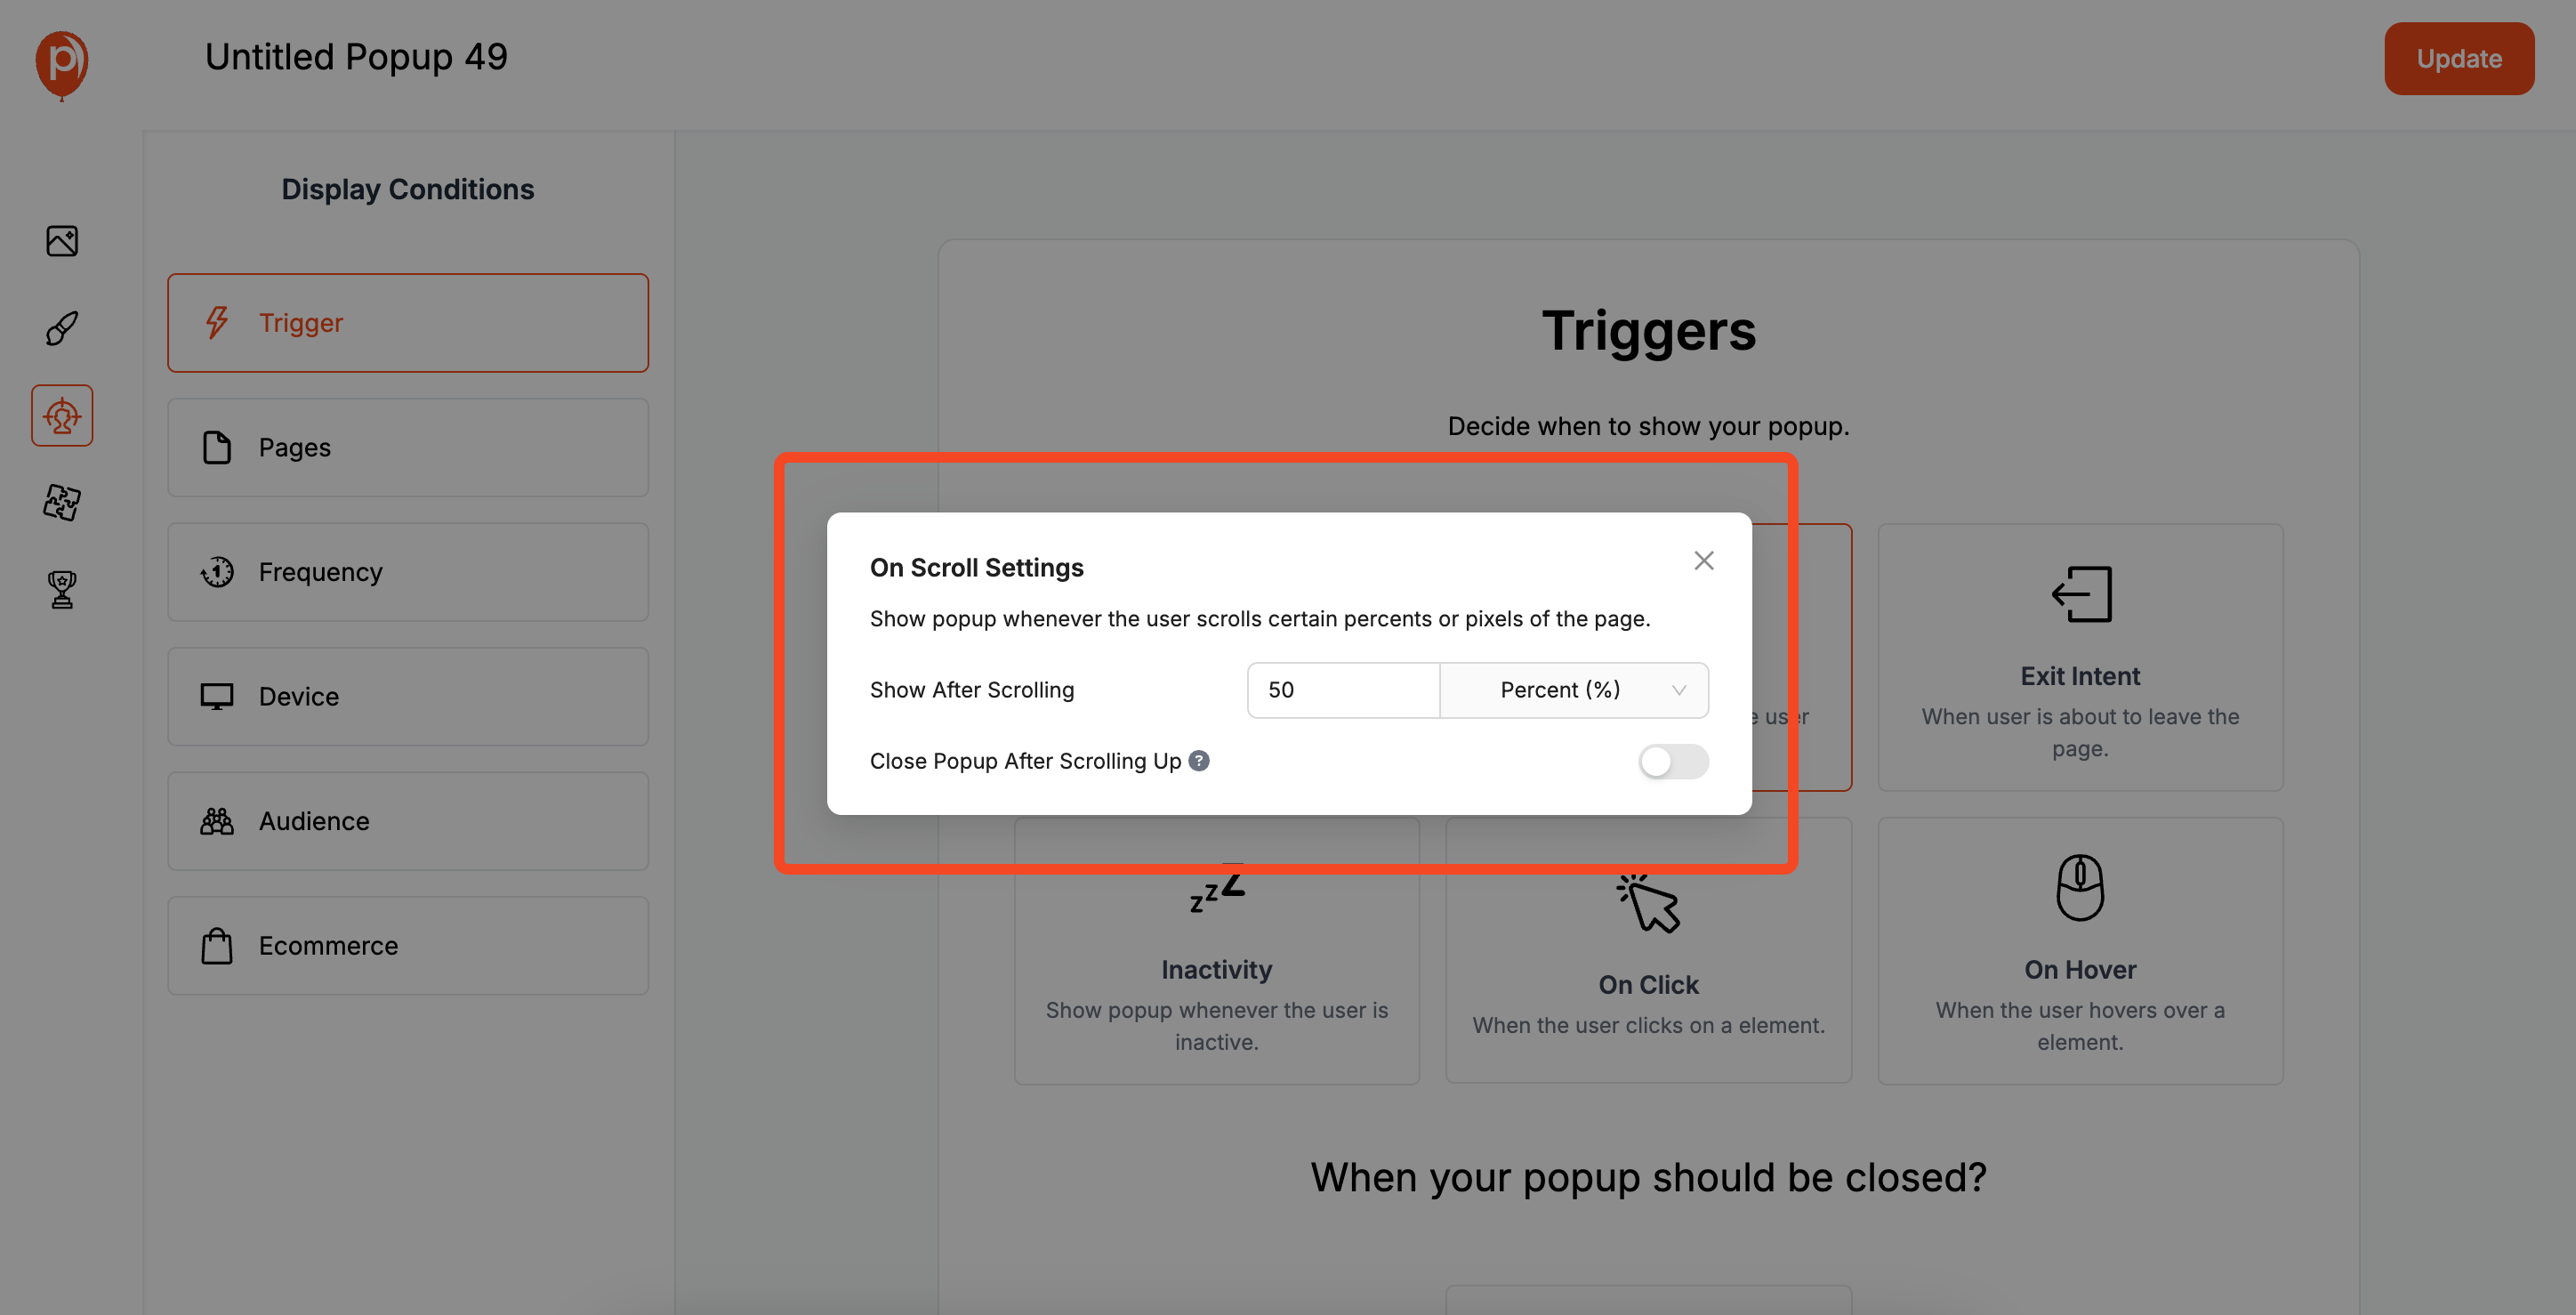
A scroll-based trigger is my favorite way to target highly engaged visitors. You can set a popup to appear only after a user has scrolled past a certain percentage of the page, for example, 50%.
This is incredibly effective on long blog posts or detailed product pages. If someone has read that far, they are clearly interested. That’s the perfect time to offer a related resource, like a whitepaper or a special discount on the product they’re viewing.
Step 4: Set a Frequency Cap to Respect Your Visitors
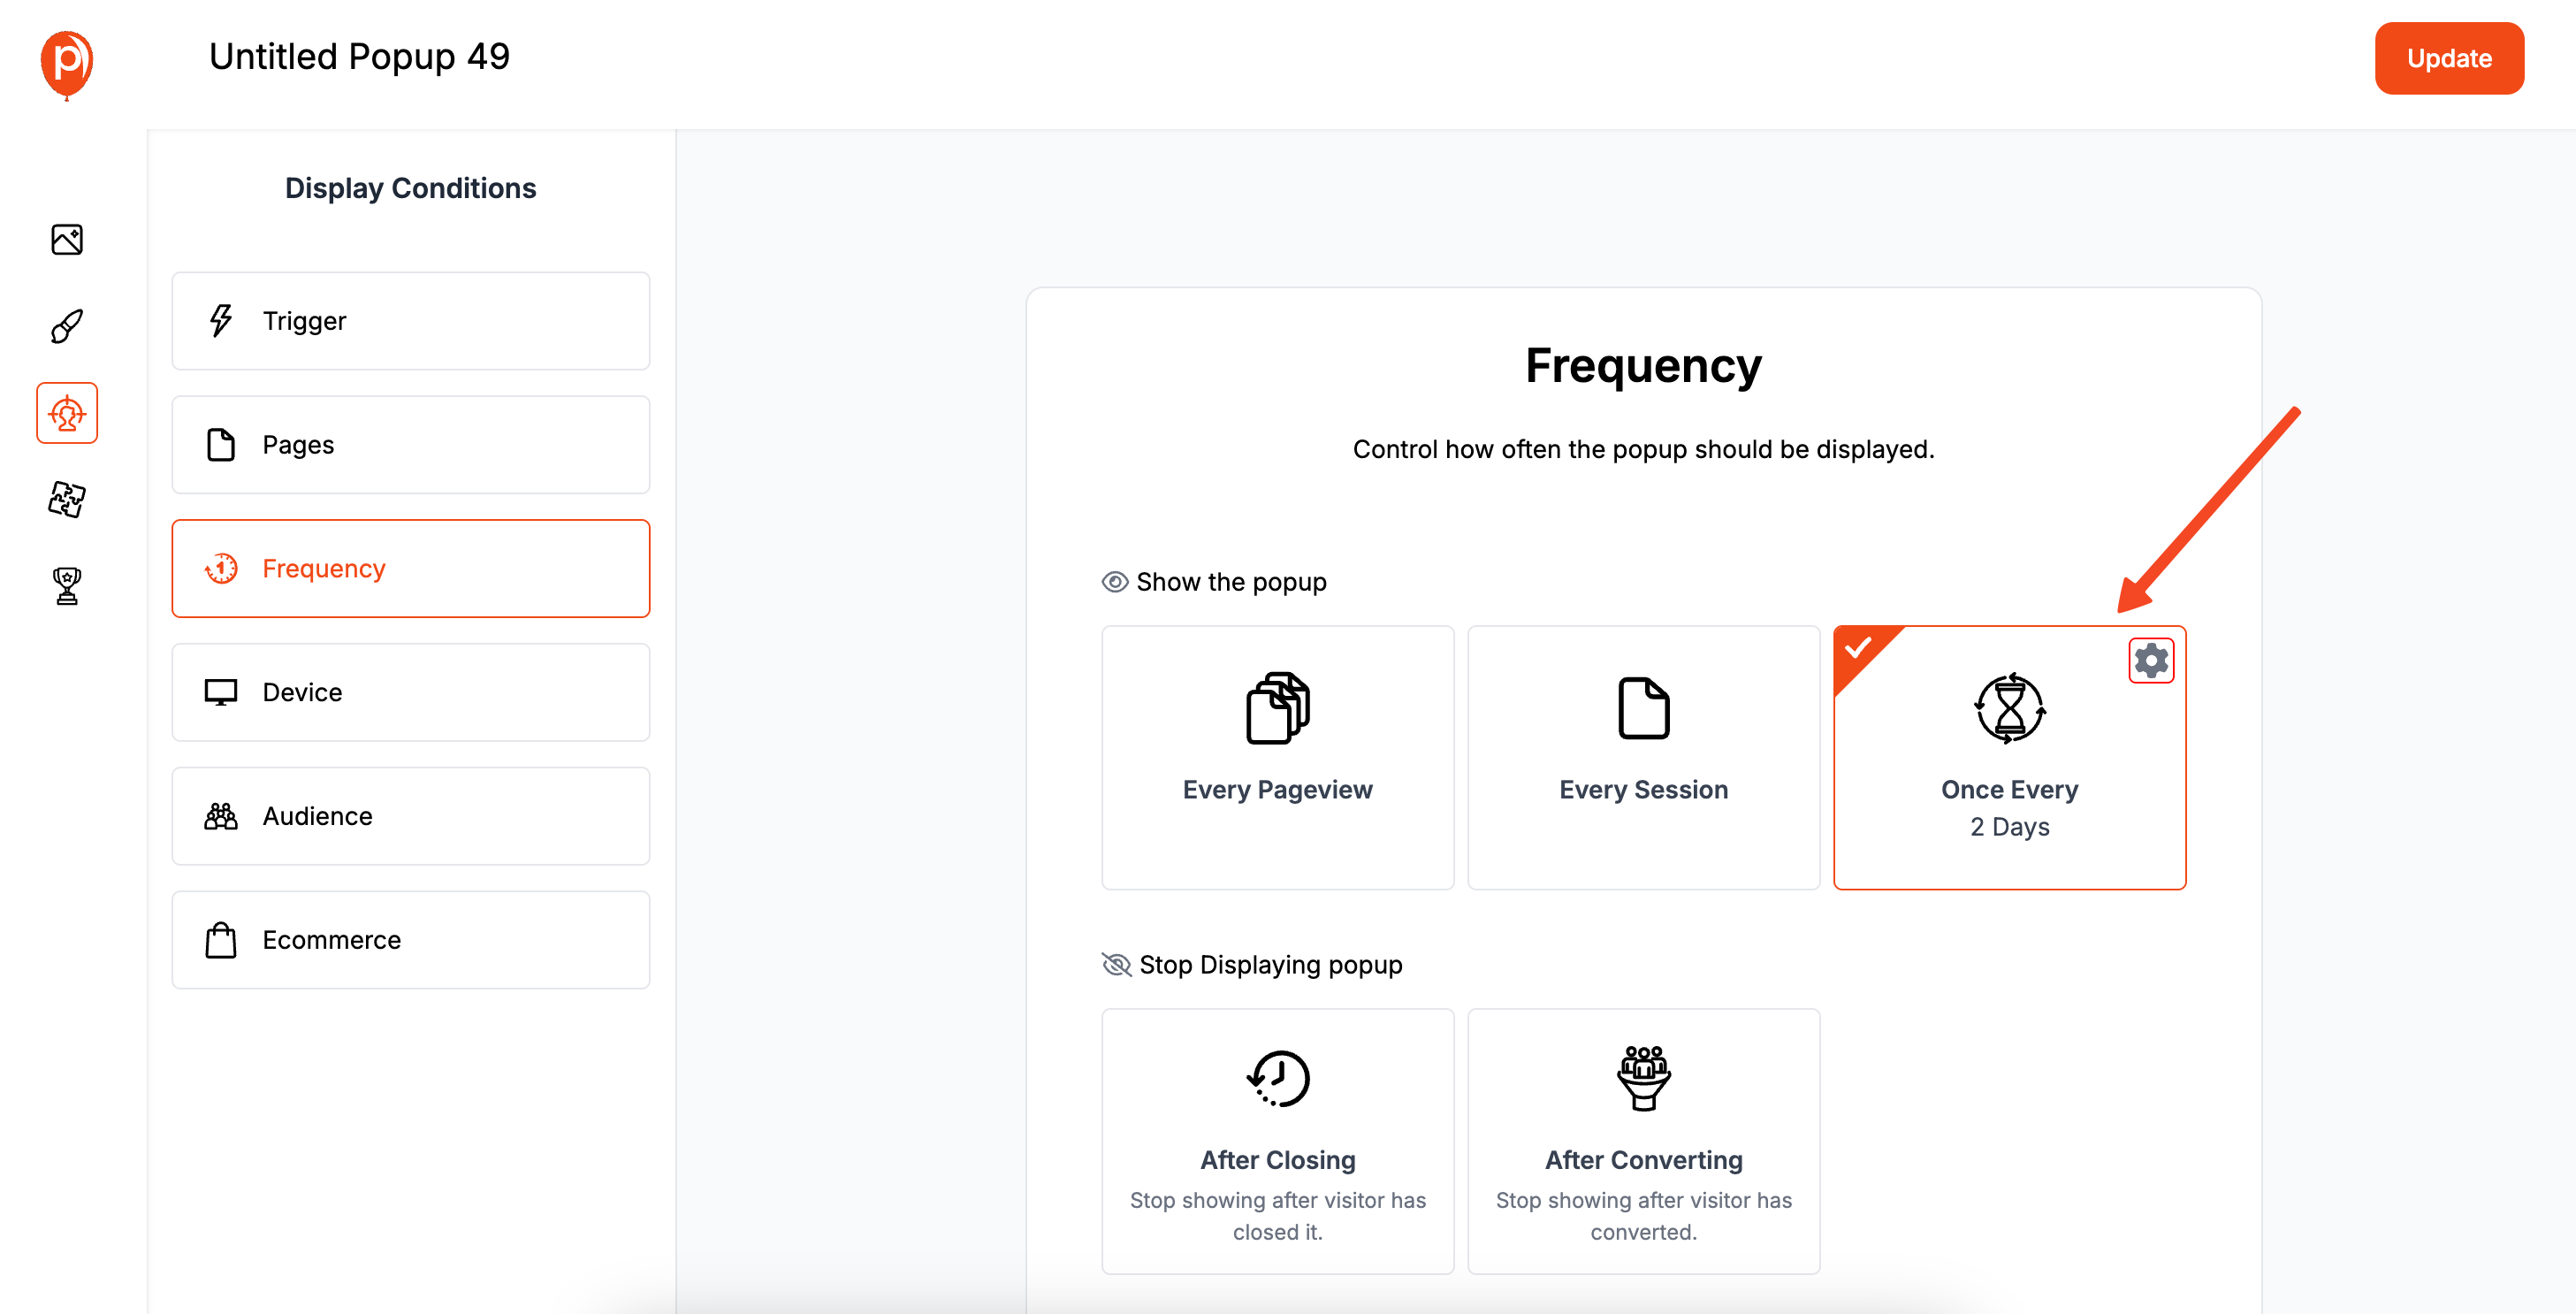
Nothing is more annoying than closing a popup only to have it reappear moments later. That’s why we built a "cooldown" feature. In your campaign settings, you can set a rule to not show the popup again for a set number of days after a visitor dismisses it.
This simple step shows respect for your audience’s choices and keeps your site experience clean and user-friendly.
Designing Popups That Actually Convert
A great popup is simple, clear, and on-brand. The goal is to communicate value instantly. Here’s how you can design your popups in Poper for maximum impact.
Step 1: Start with a Bold Headline and a Clear Offer
Your headline is the most important part of your popup. It needs to immediately answer the question, “What’s in it for me?” Avoid generic phrases like “Sign Up.” Instead, be specific and benefit-focused, like “Get Your Free Ebook” or “Claim Your 20% Discount.”
Your call-to-action (CTA) button should be just as clear. Use action-oriented text like “Download Now” or “Get My Offer.” Go to ‘Design Settings’ > ‘Buttons’ to customize the text and color to make it pop.
Step 2: Keep Your Forms Short and Simple
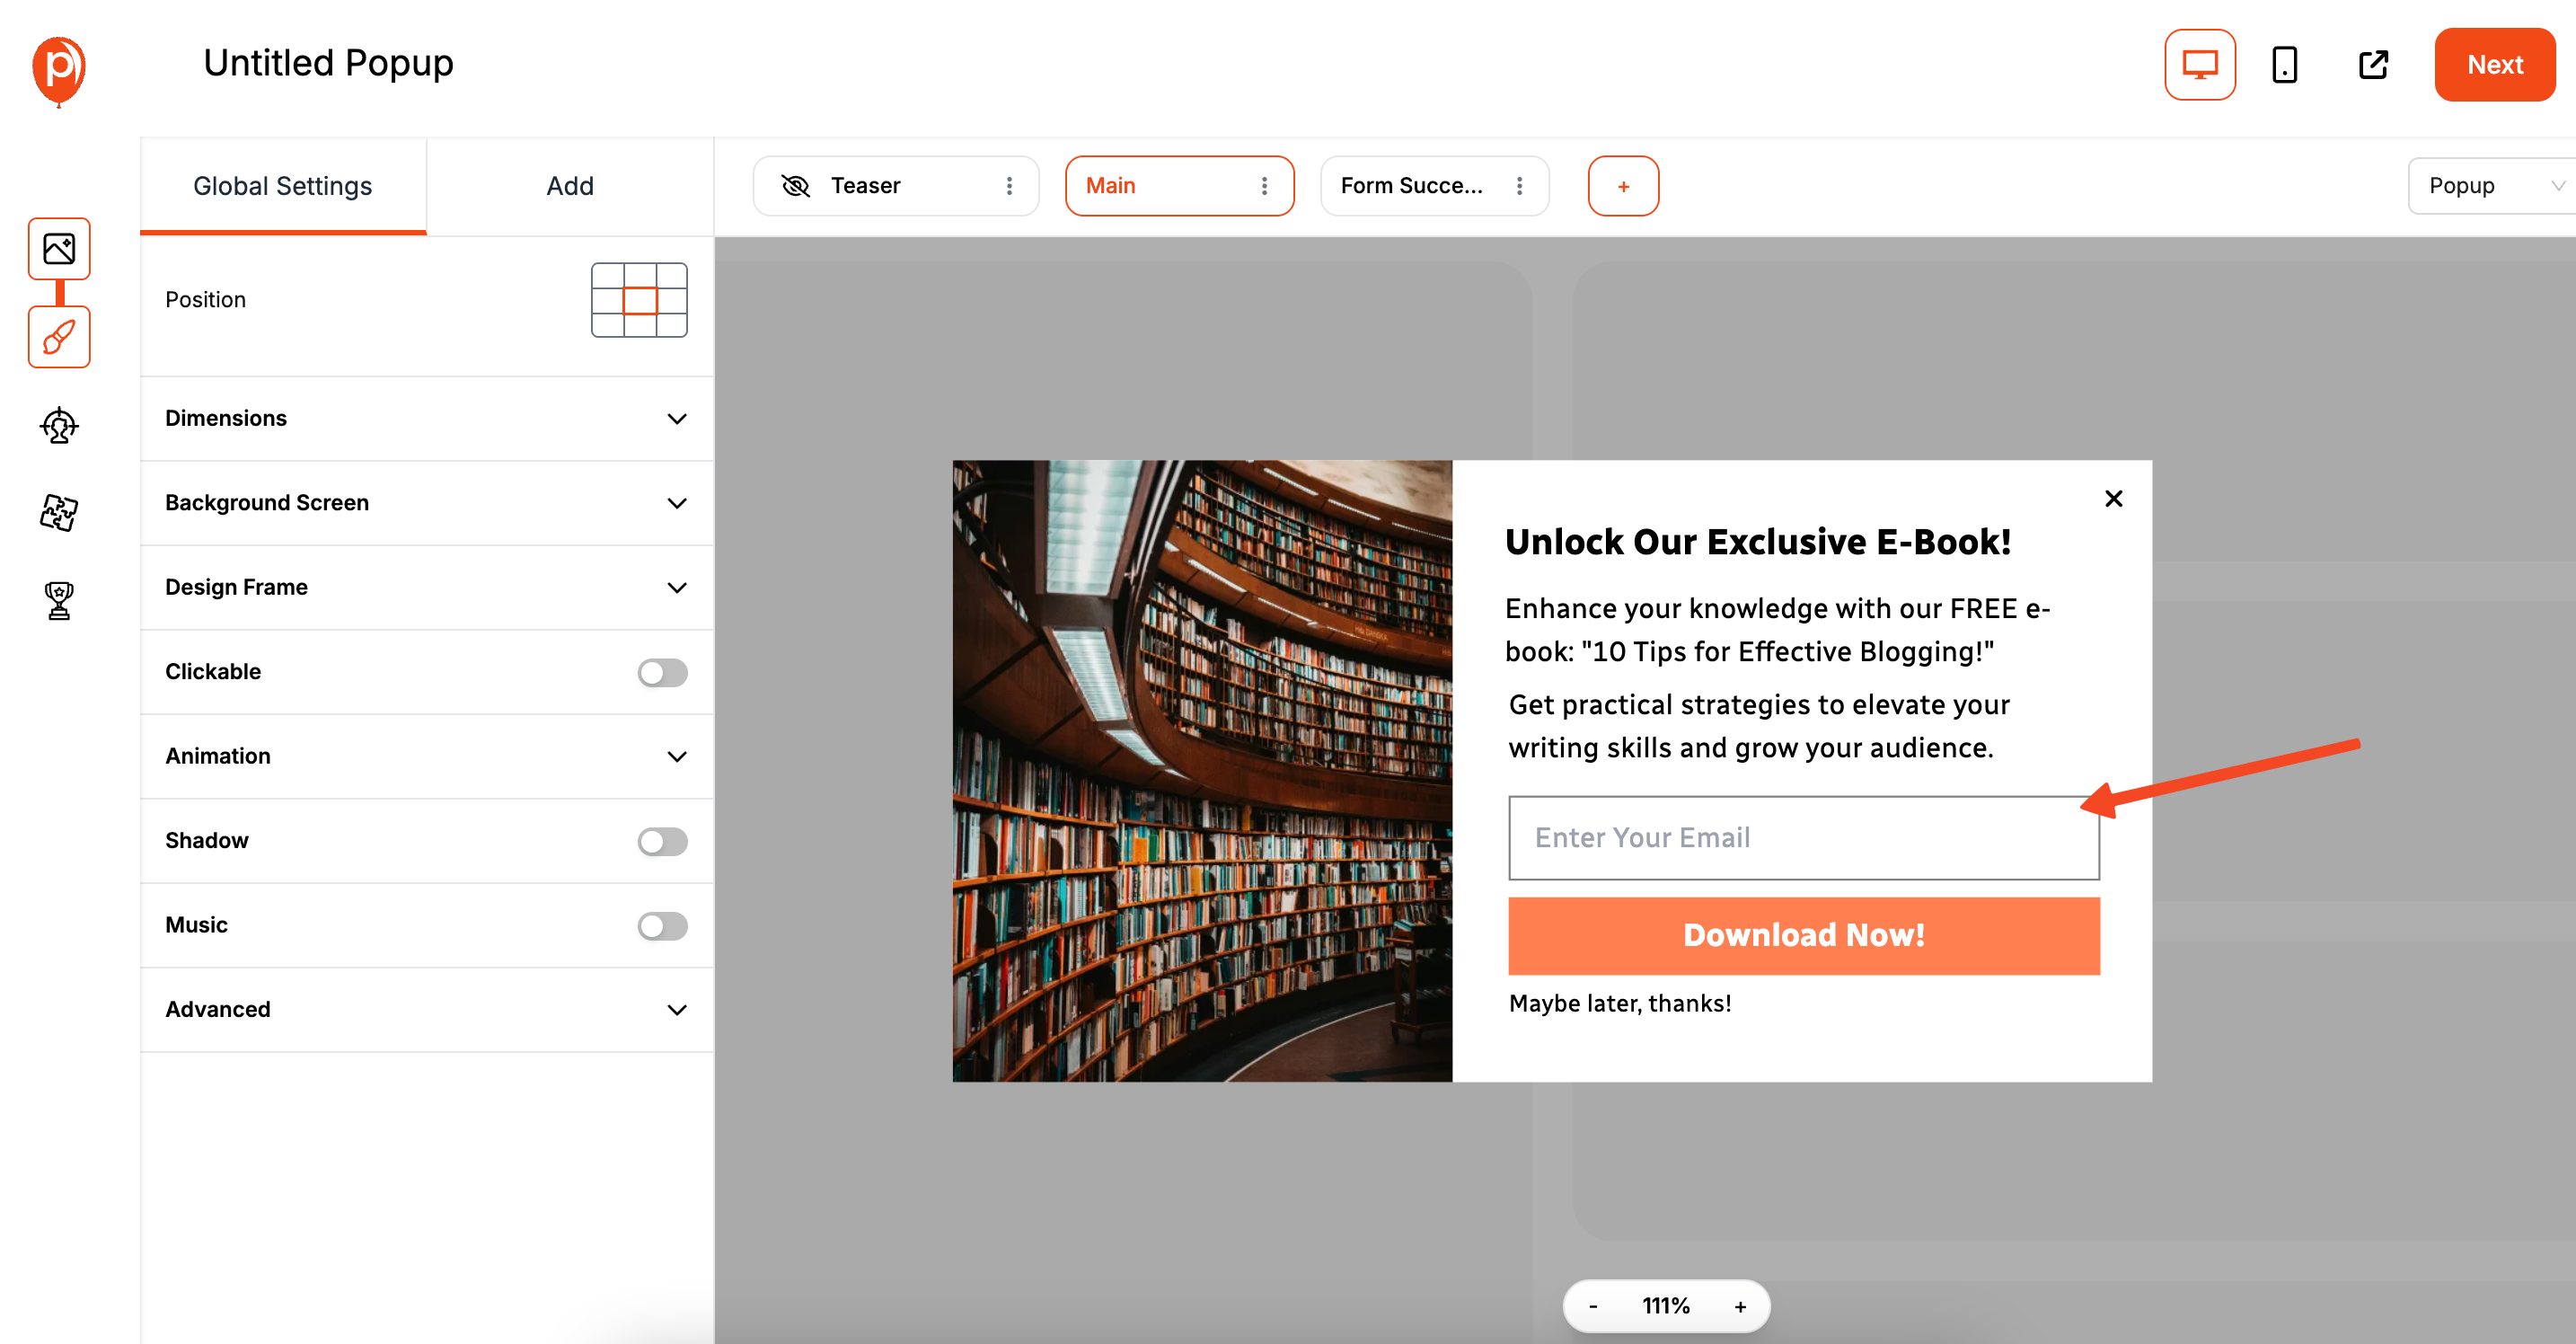
To reduce friction, only ask for the information you absolutely need. For most lead capture popups, a single email field is enough. Every additional field you add will slightly lower your conversion rate.
Of course, if you’re offering something of high value like a one-on-one demo, you can ask for more details like a name or company. Just remember to keep it focused.
Step 3: Use Clean Visuals That Support Your Message
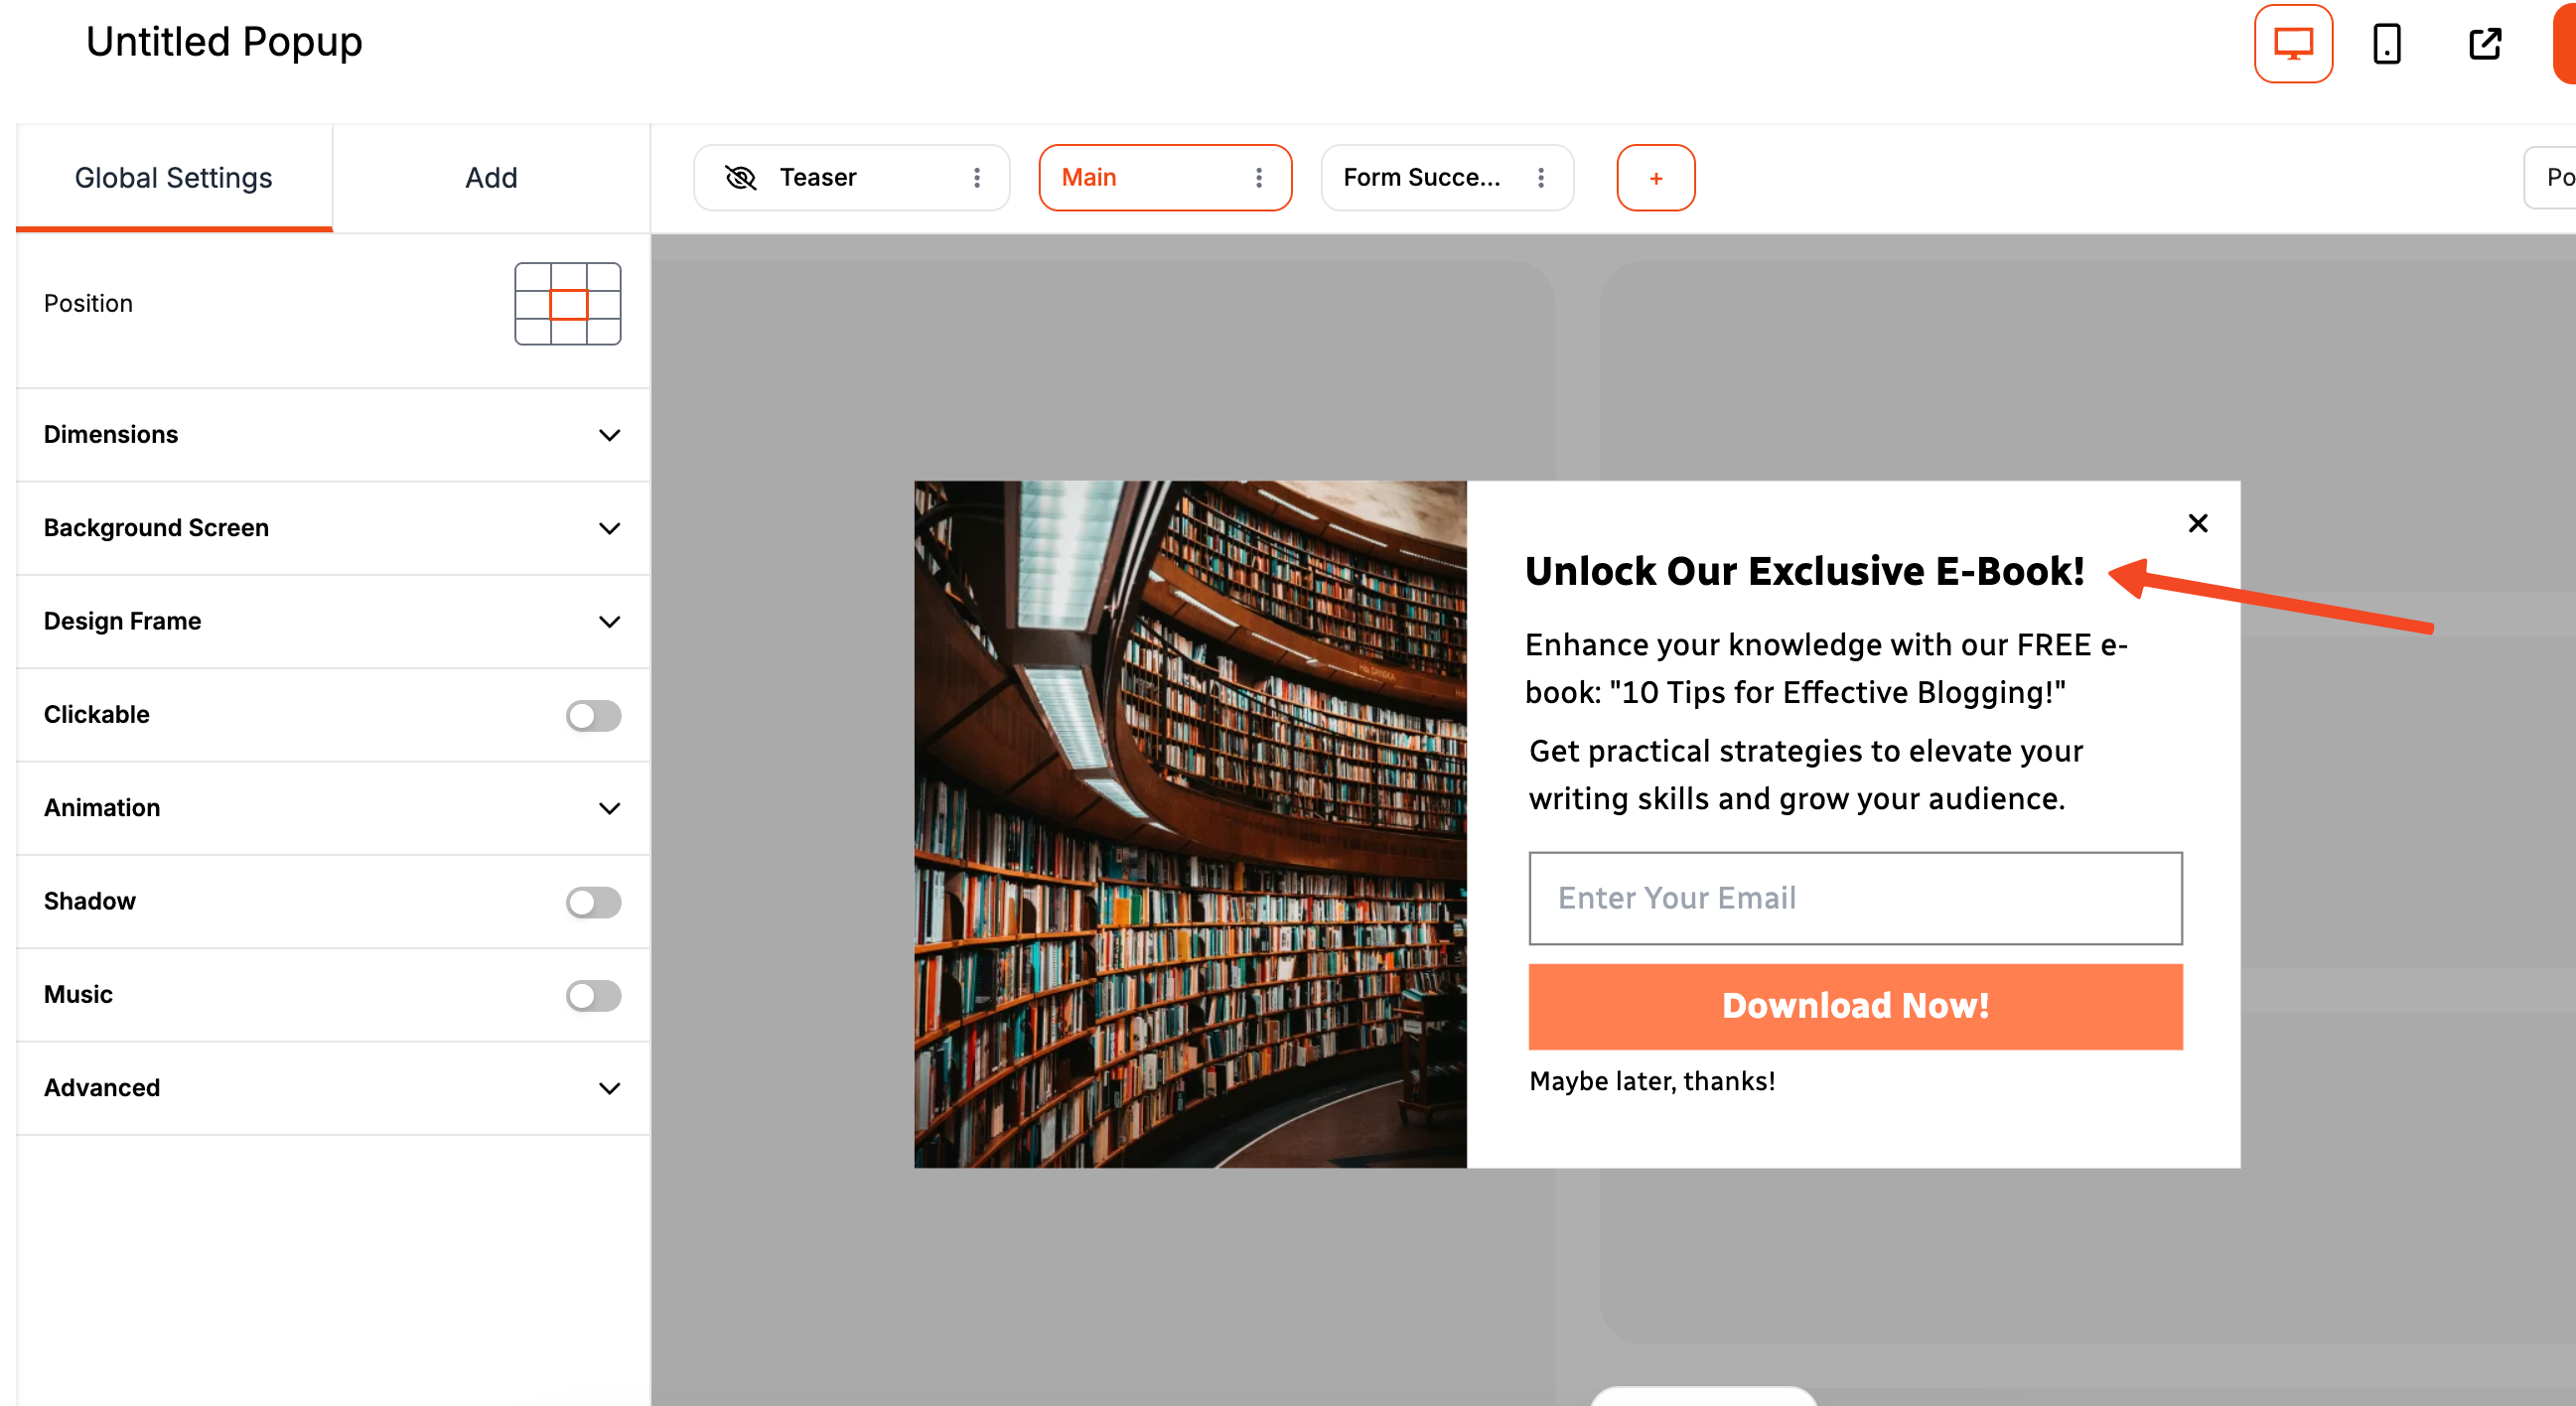
A good image can reinforce your offer, but a bad one can be a distraction. If you’re promoting a guide, use an image of the cover. If it’s a product, show the product.
In the Poper editor, you can upload a featured image and adjust its placement. Make sure your text and CTA button are still easy to see and that the overall design feels clean, not cluttered.
Step 4: Make It Easy to Close the Popup
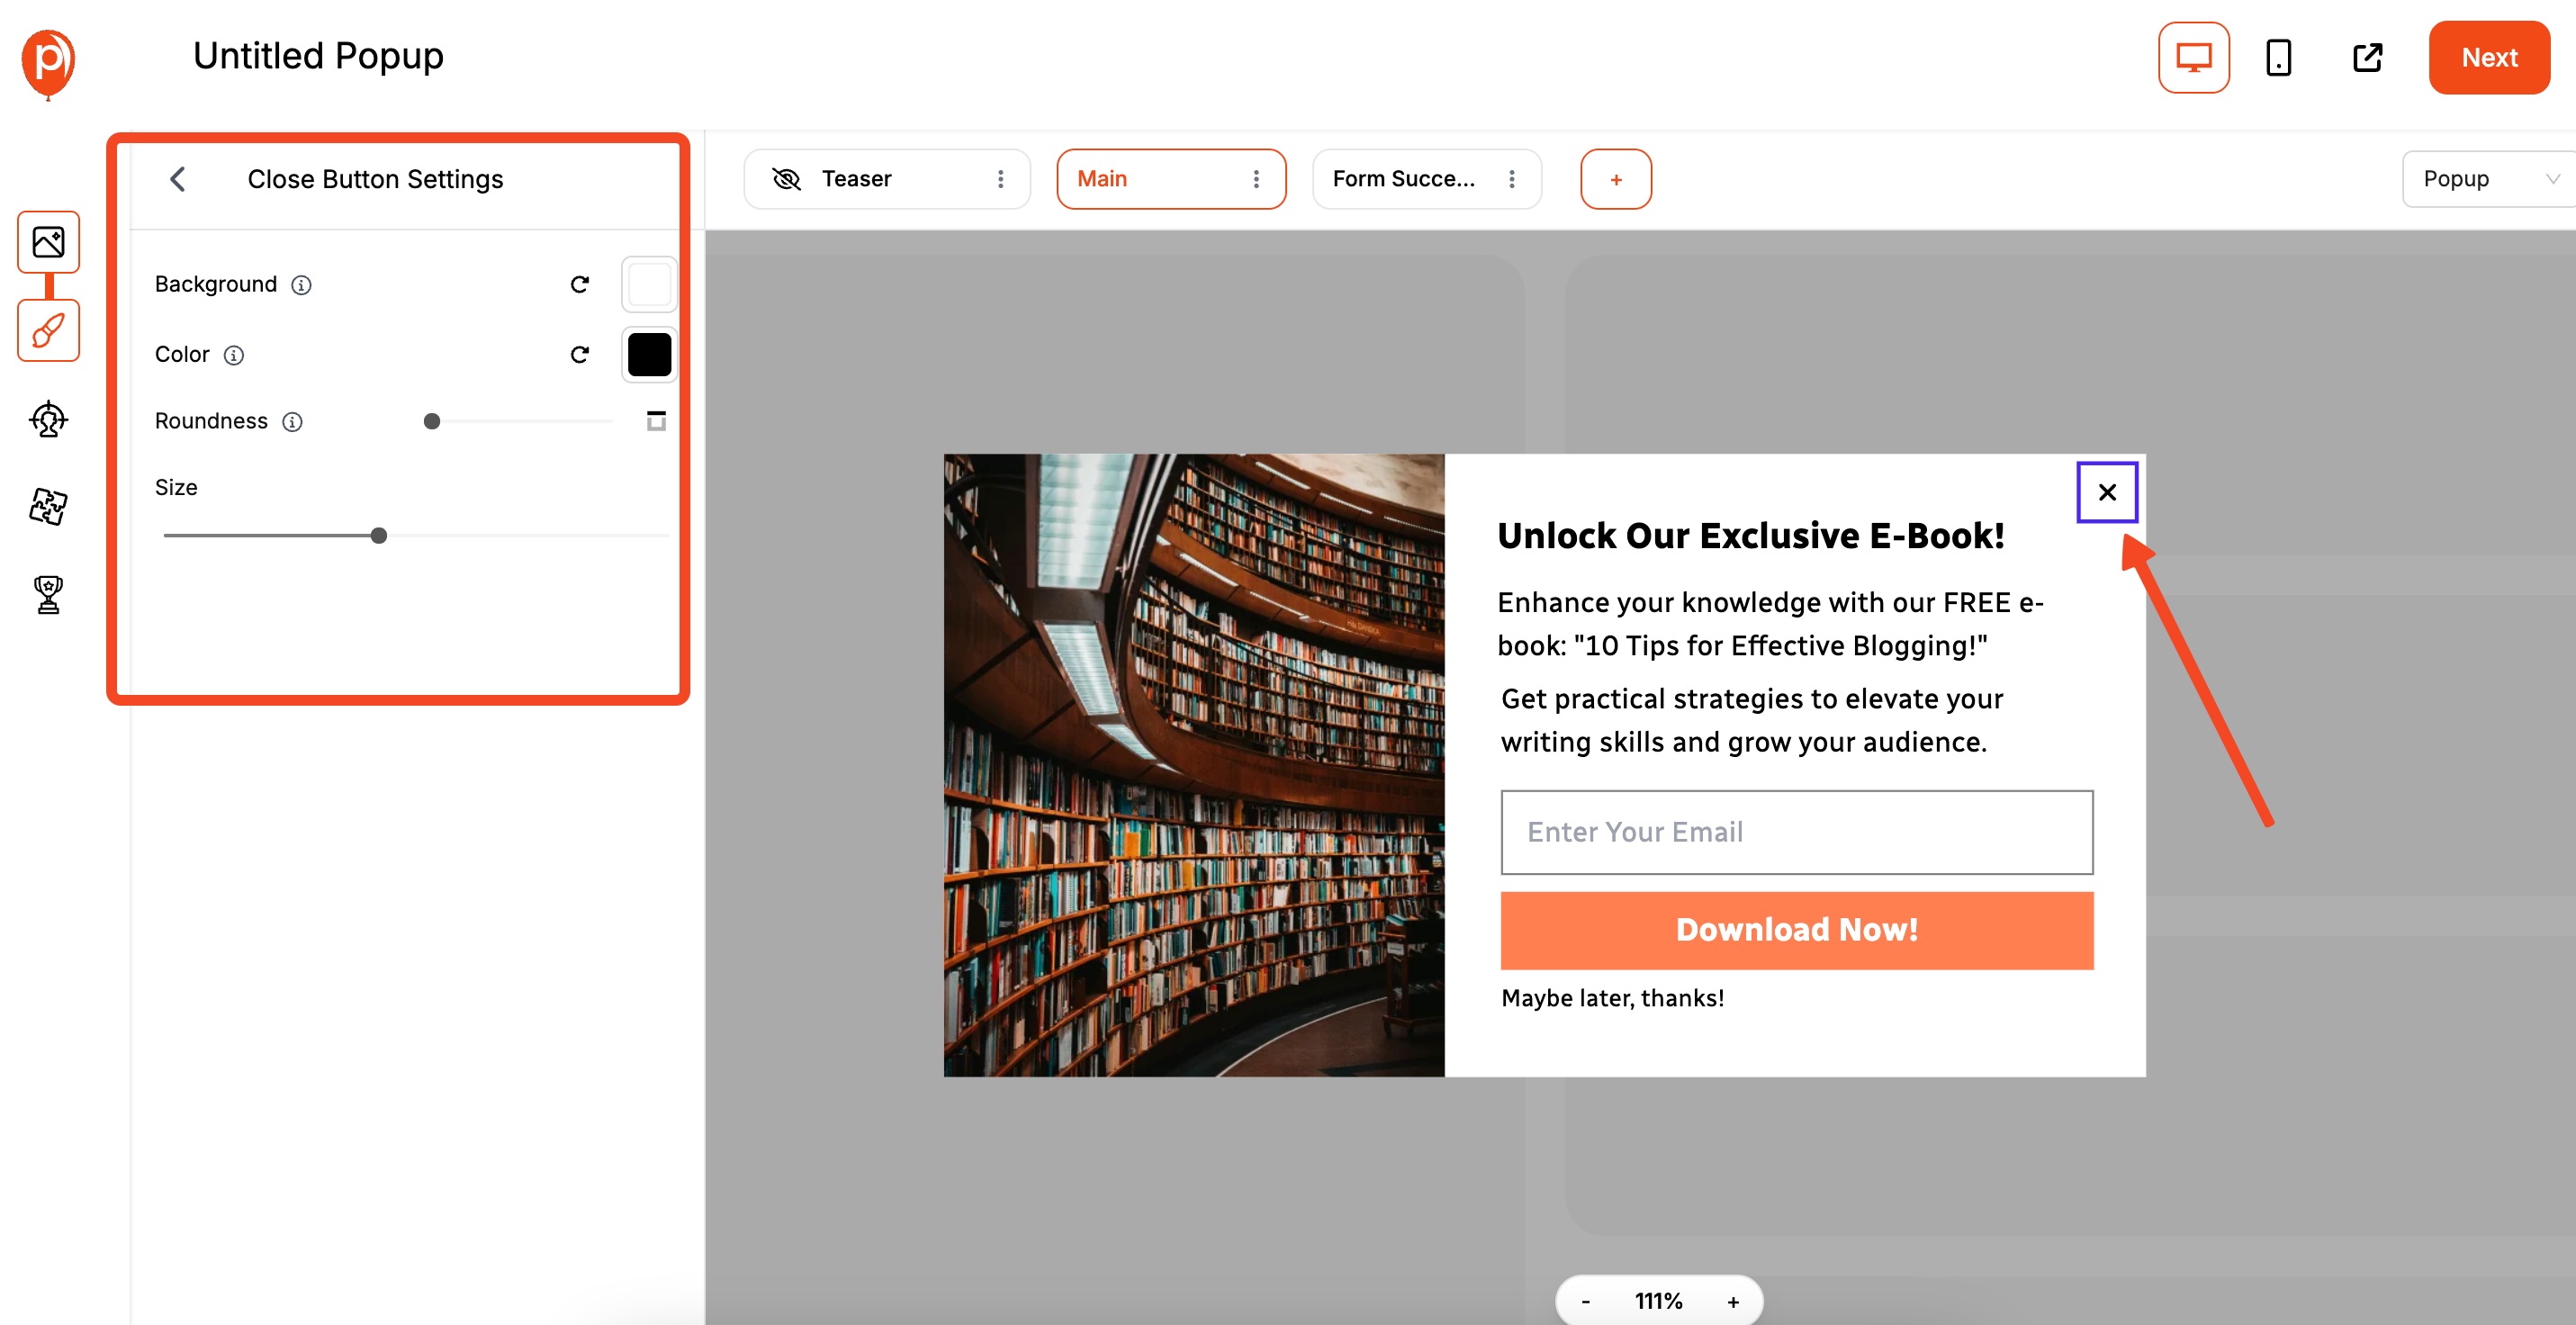
This is a non-negotiable rule of good design. Always provide a clear and obvious way for visitors to close your popup, usually with an ‘X’ icon in the corner. Trapping users on your site creates a negative experience and can cause them to leave for good.
Step 5: Check How Your Popup Looks on Mobile
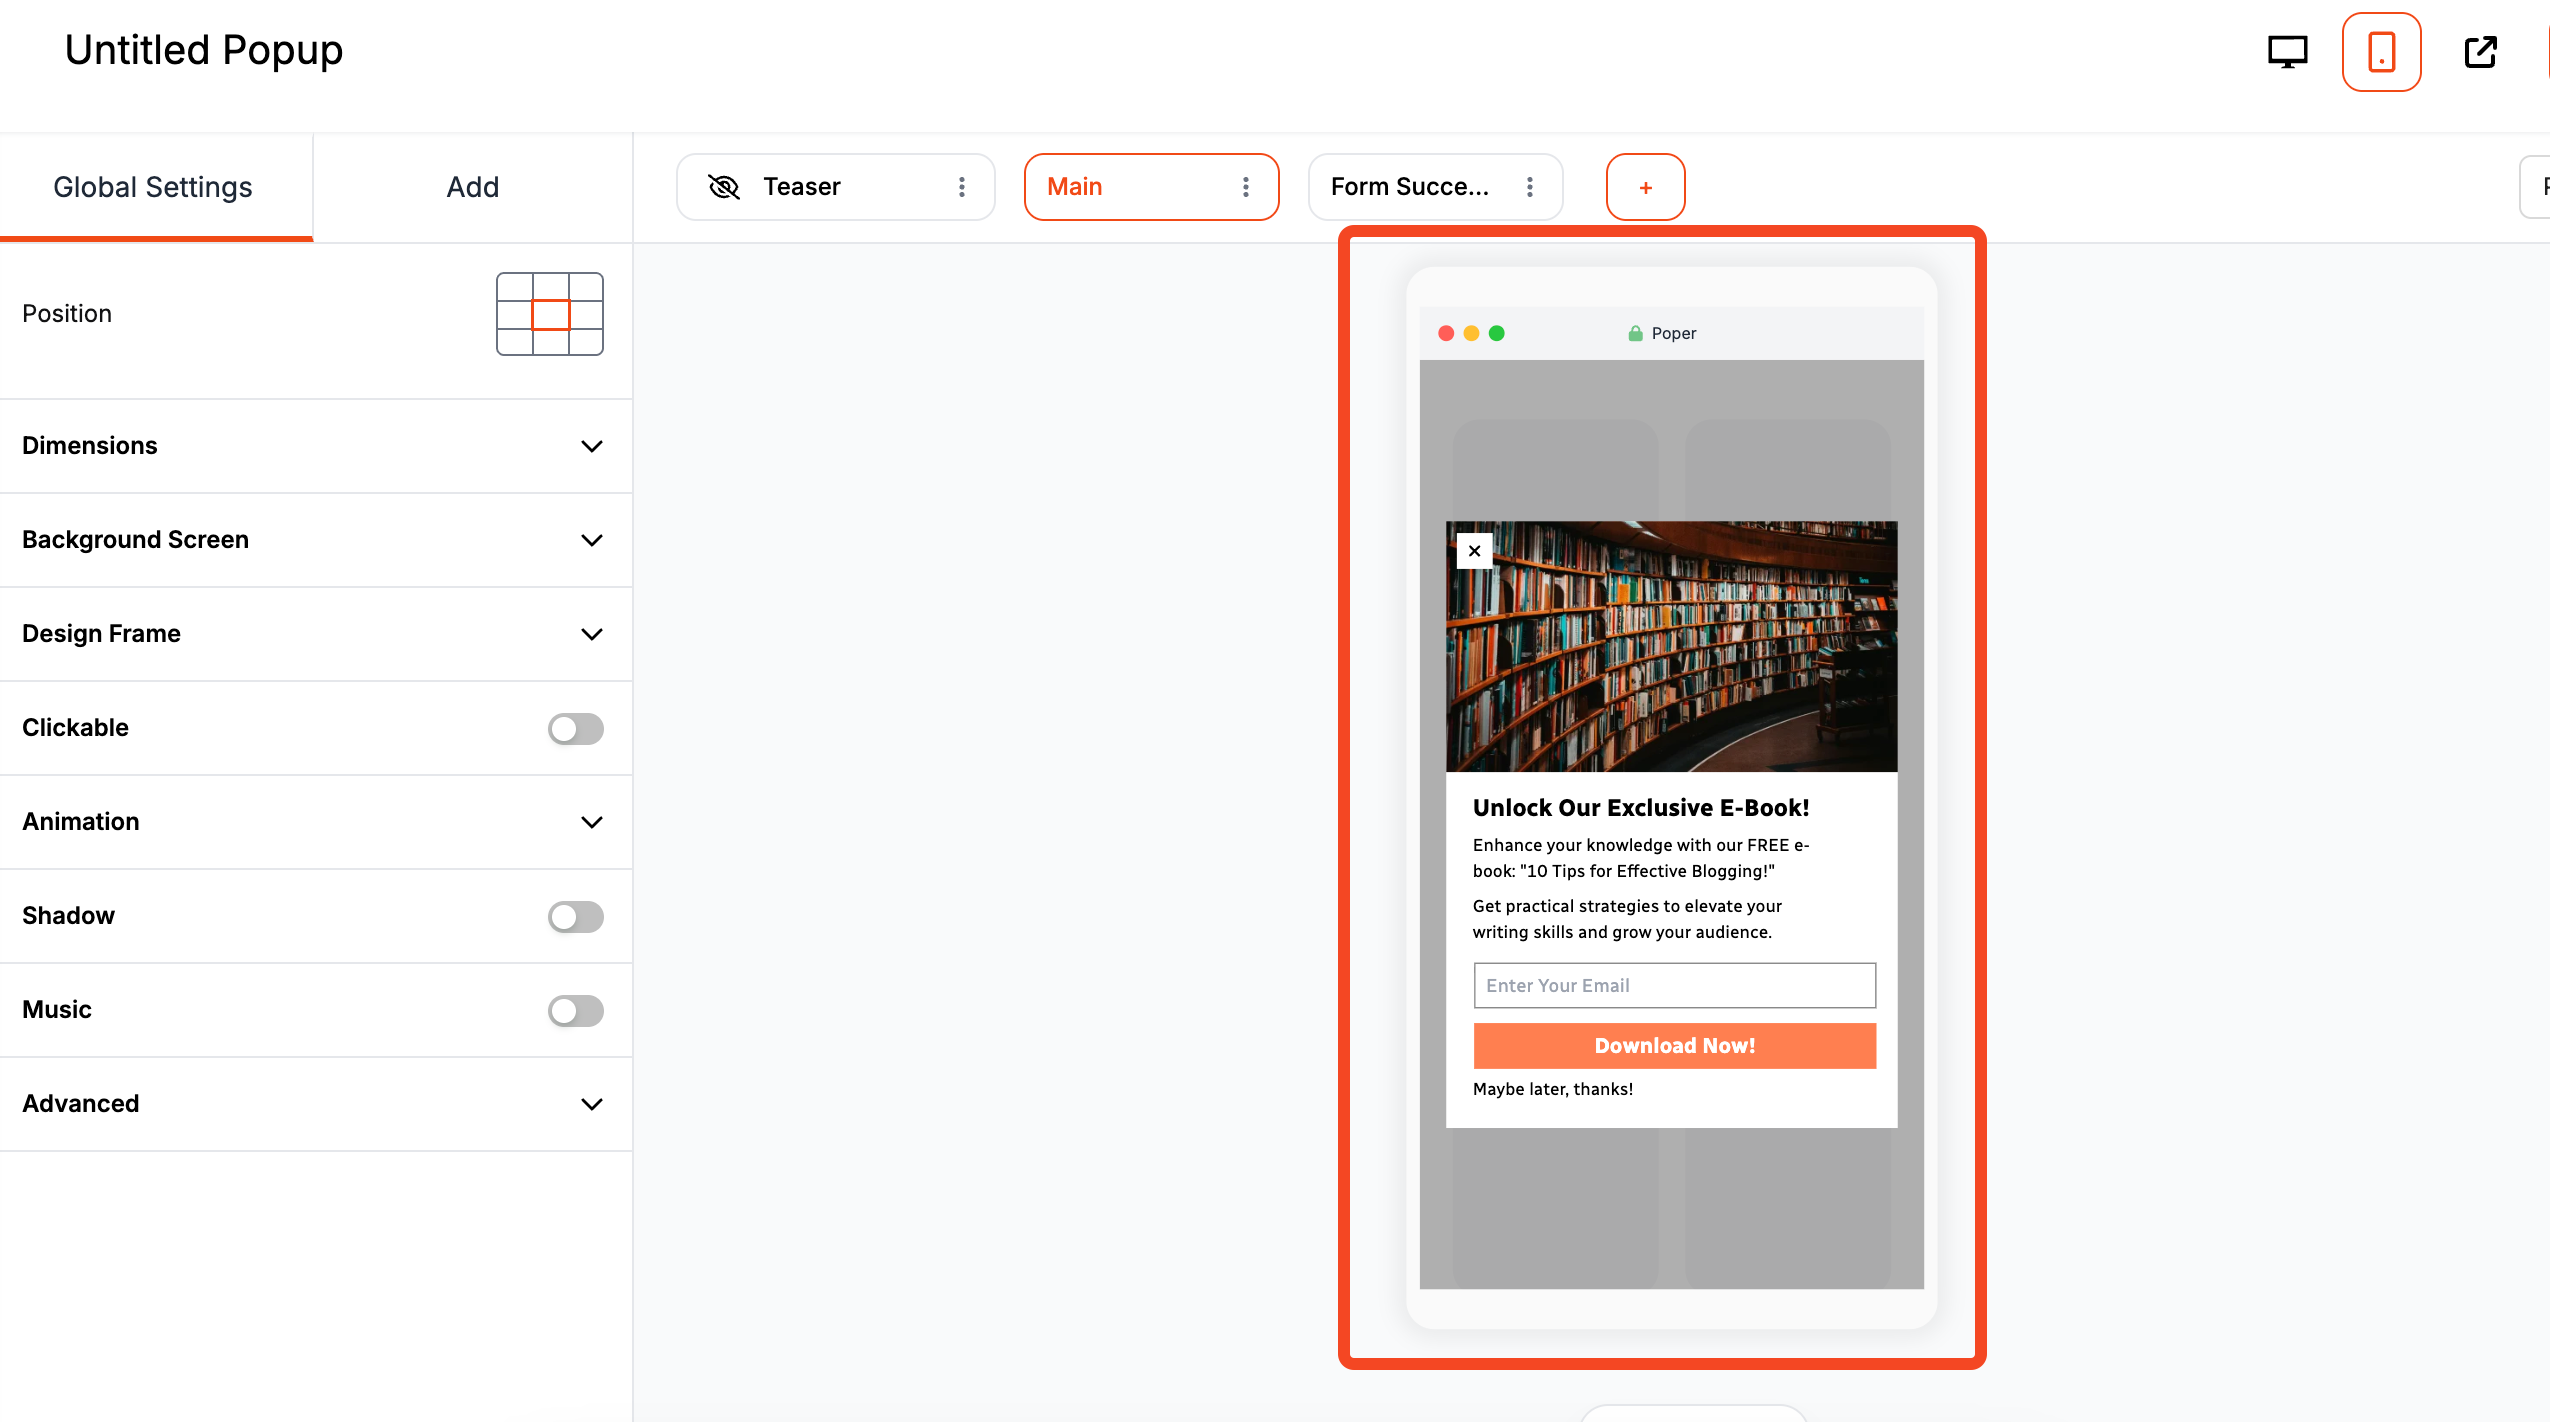
More than half of all web traffic is on mobile, so it’s crucial your designs look great on small screens. In Poper’s editor, you can switch between desktop and mobile previews.
Because Google can penalize sites for intrusive mobile popups, consider using a less disruptive format like a slide-in or a banner for mobile users. You can even set rules to disable certain popups on smaller devices entirely.
Targeting the Right Audience at the Right Time
Personalization is what separates a good campaign from a great one. Poper gives you powerful tools to show your popups only to the most relevant visitors.
Step 1: Show Popups on Specific Pages
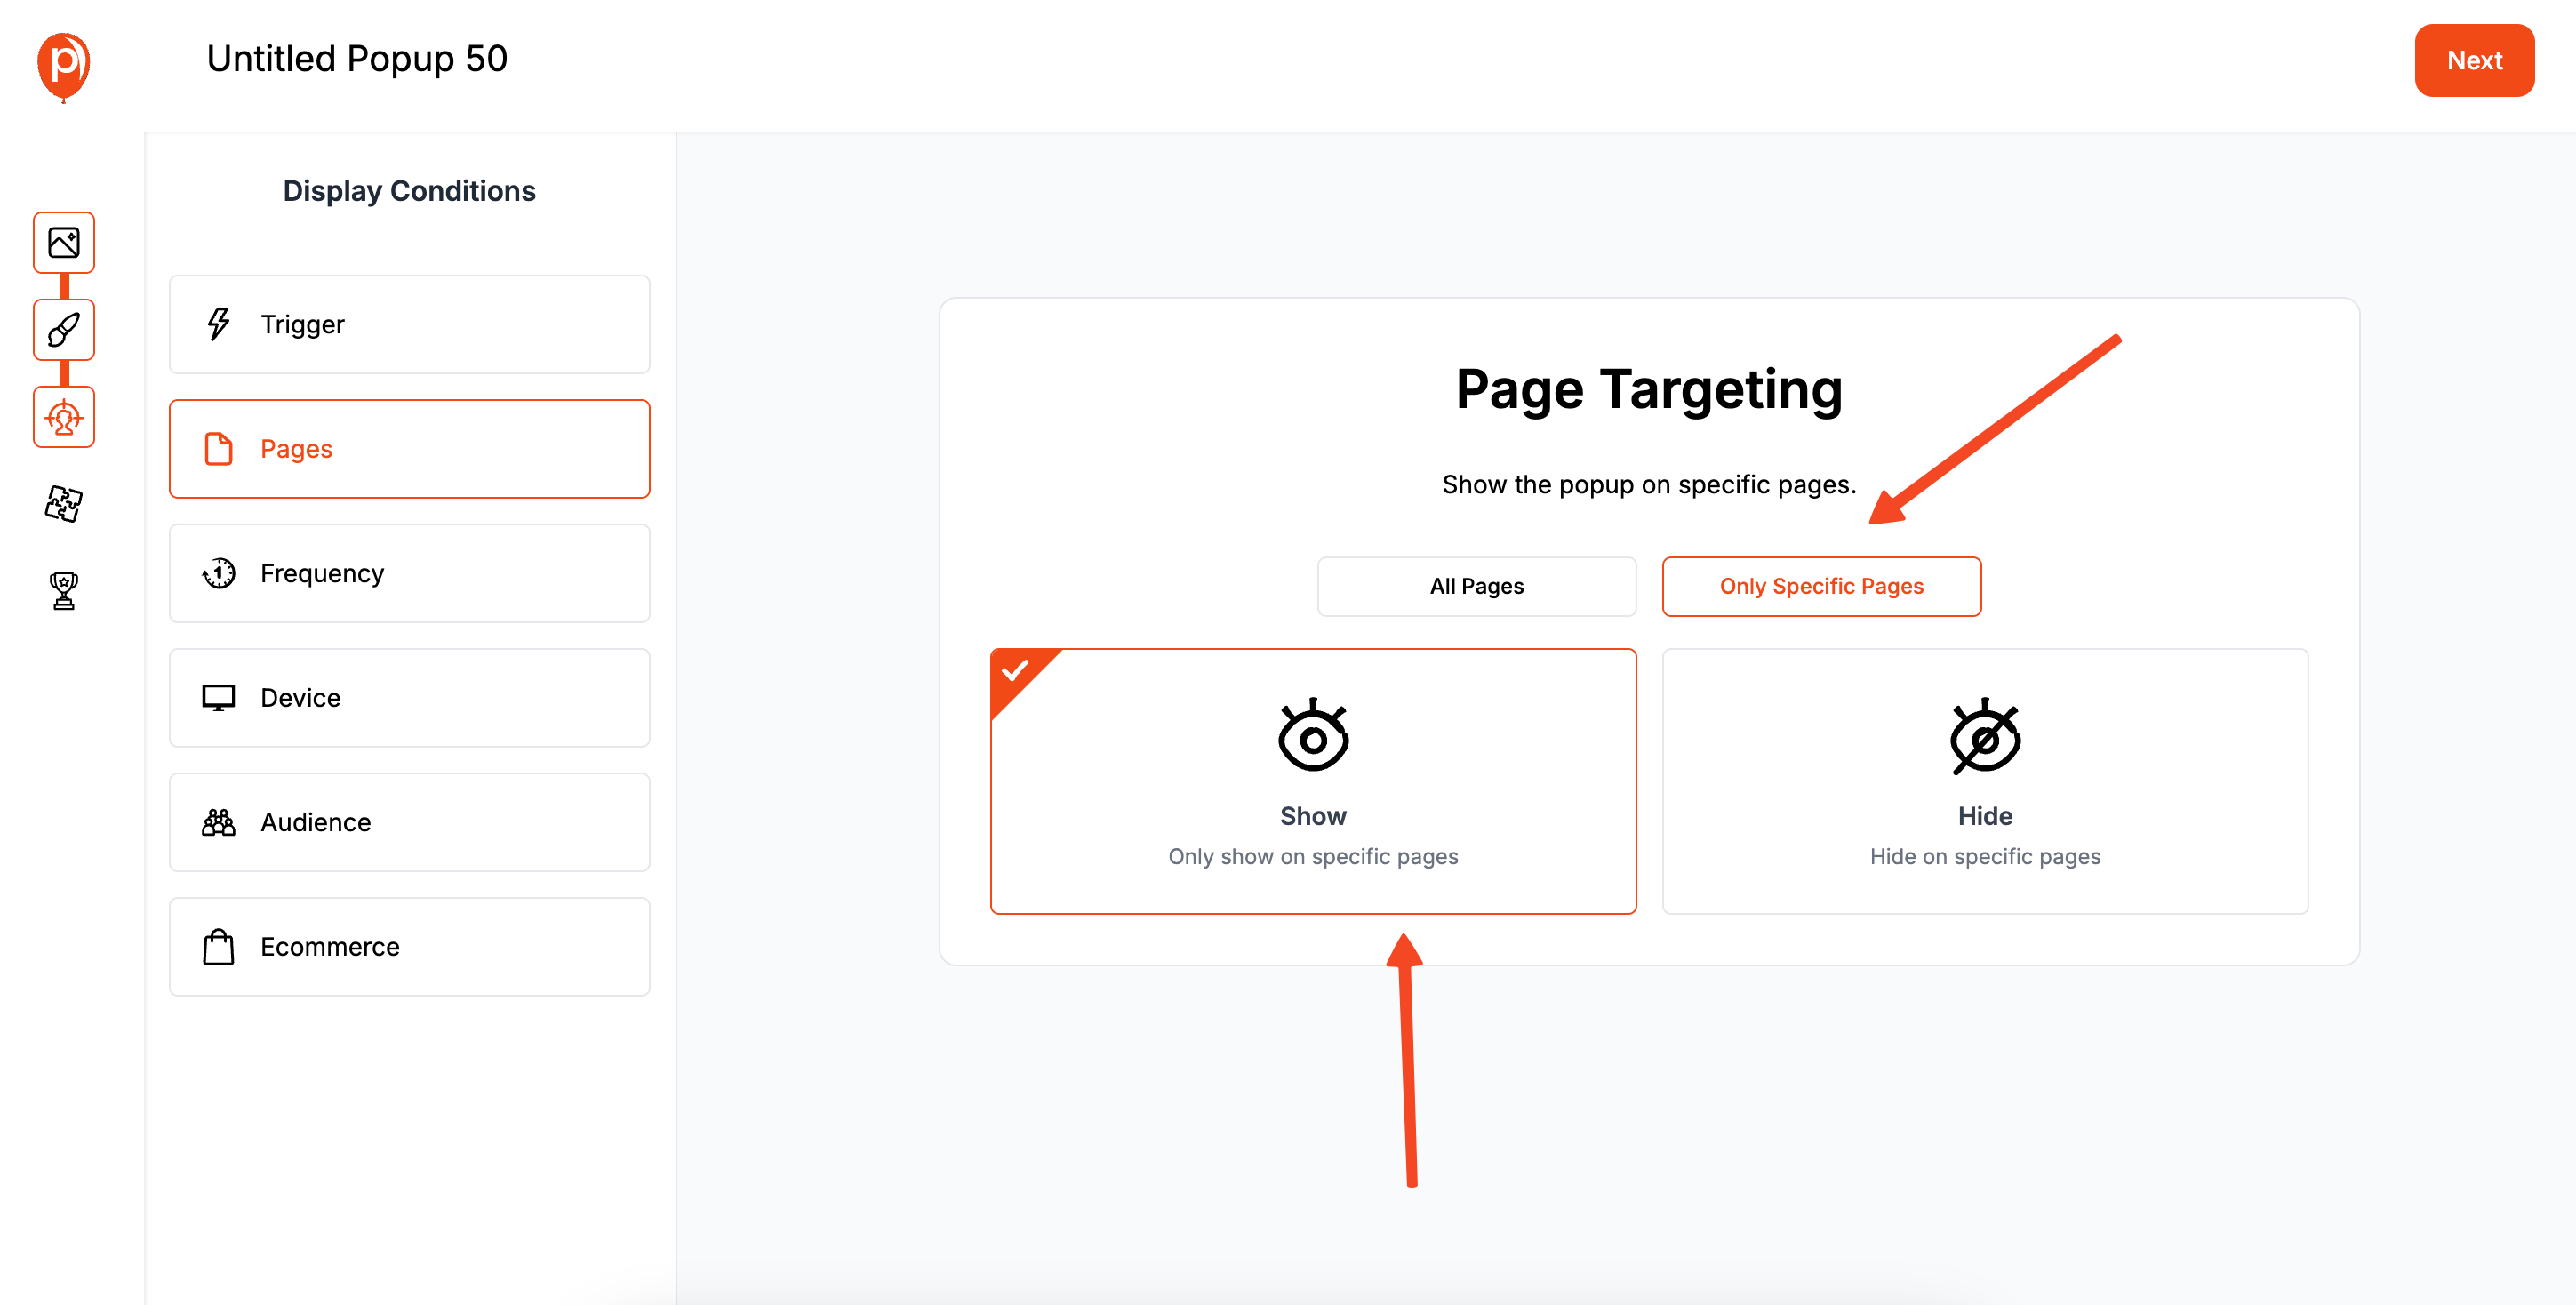
You wouldn’t show an ad for a lawnmower in a bookstore. The same logic applies here. Use our URL targeting rules to ensure your offers are contextually relevant.
For example, set your “Download Our Free SEO Guide” popup to appear only on blog posts with “SEO” in the URL. Exclude it from appearing on pages where it doesn’t make sense, like your ‘Careers’ or ‘Contact Us’ pages.
Step 2: Segment Your Visitors for a Personal Touch
Poper lets you create different experiences for different types of visitors. You can show one offer to first-time visitors and a completely different one to returning customers.
For example, you could show a “Join Our Newsletter” popup to new visitors but hide it from people who are already on your mailing list. This small touch makes your marketing feel much smarter and more personal.
Step 3: Schedule Your Campaigns for Timely Offers
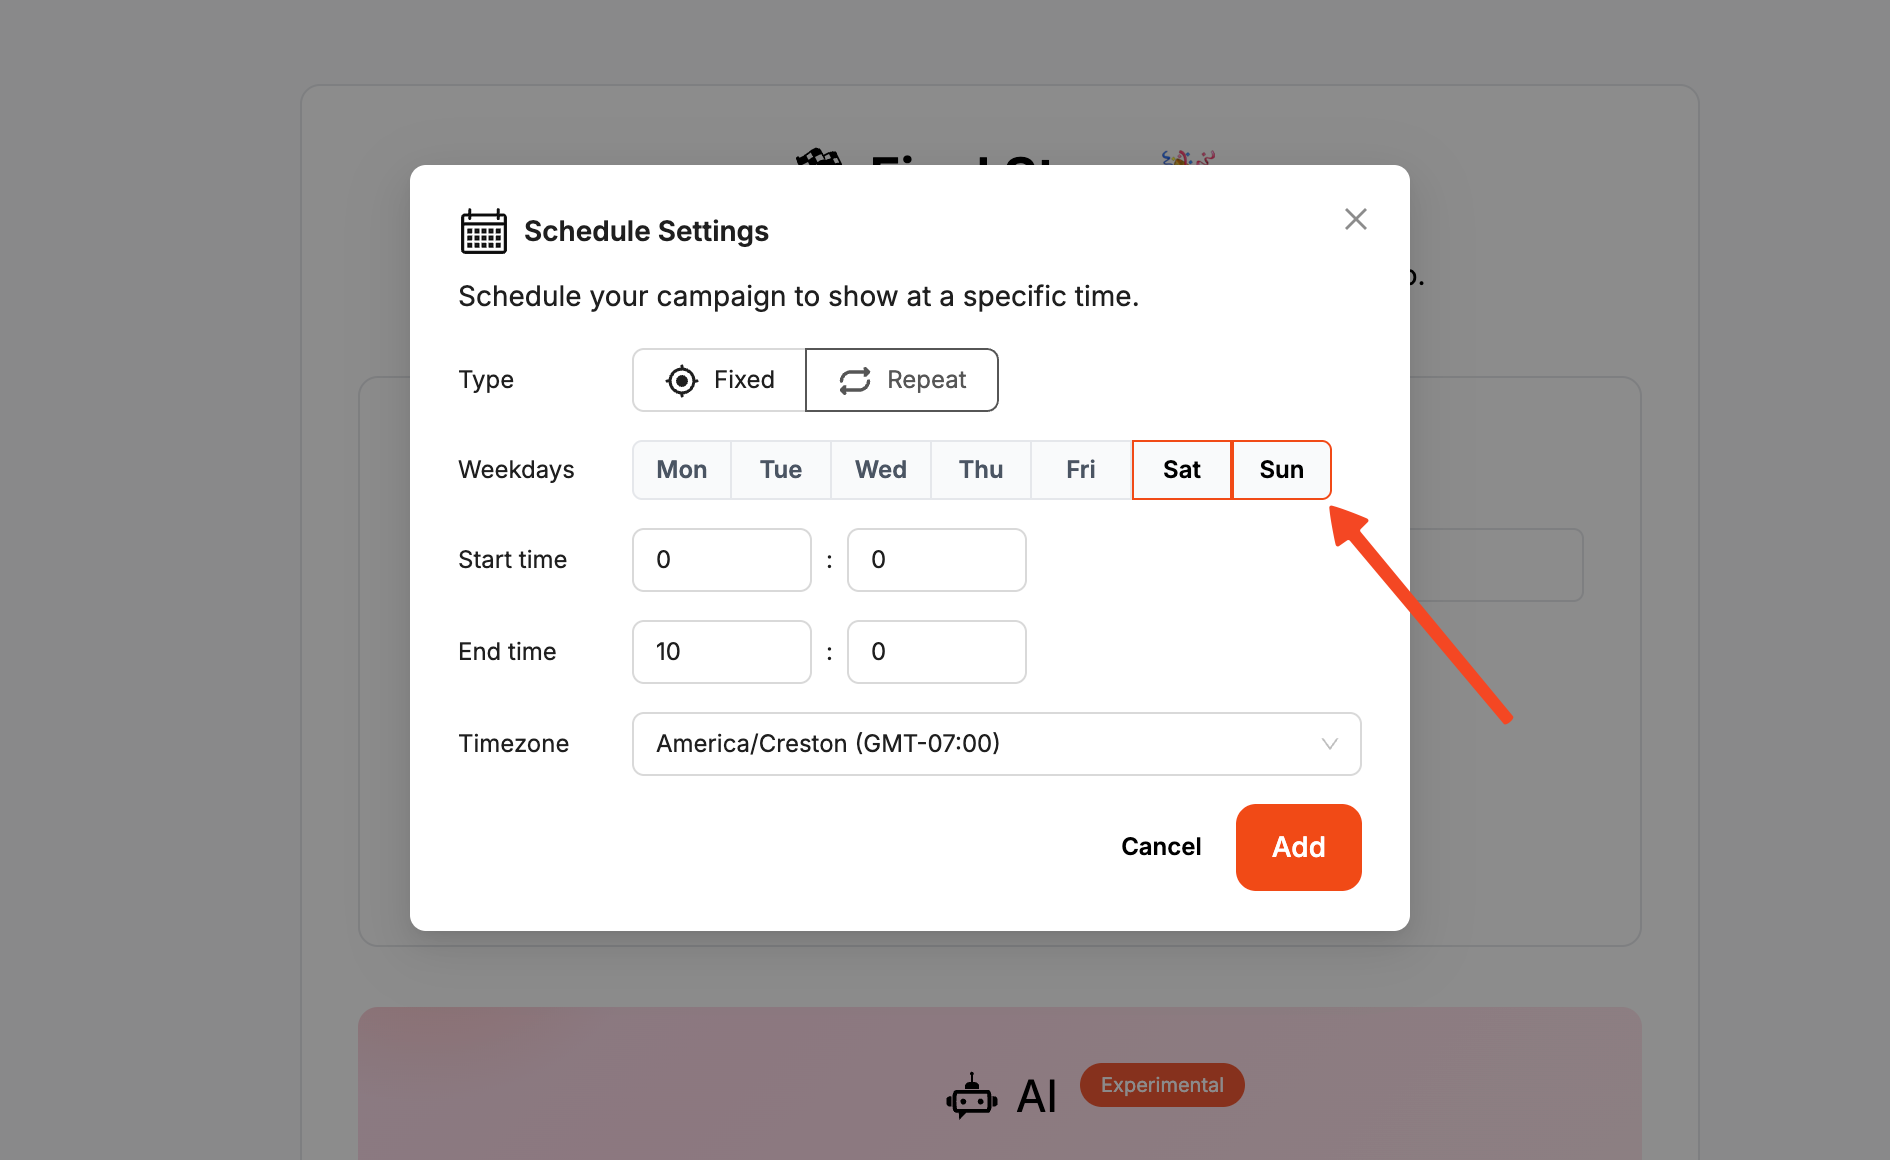
If you’re running a promotion that is time-sensitive, use our scheduling feature. You can set a start and end date for any campaign, so your popups will automatically run only when they’re supposed to.
This is perfect for holiday sales, webinar promotions, or any other offer that has a specific timeline. Just set it once, and we’ll handle the rest.
Frequently Asked Questions (FAQ)
What is the single most important lead capture strategy in HubSpot?
While it depends on the business, a high-value content offer (lead magnet) on a dedicated landing page, promoted by CTAs, is often the most effective and foundational strategy for generating high-quality leads.
Are HubSpot pop-up forms bad for SEO?
When used correctly, no. HubSpot's pop-up form tool allows you to set delays and use less intrusive triggers like exit intent. To comply with Google's guidelines, avoid large, intrusive popups that appear immediately on mobile page load and are difficult to close.
What's the difference between a HubSpot Form and a Pop-up Form?
A Form is the core data collection element that you can embed anywhere. A Pop-up Form is a specific type of form that is designed to be displayed as an overlay (popup) and comes with built-in triggering and targeting rules (like time delay and exit intent).
Can I A/B test my lead capture forms in HubSpot?
Yes, HubSpot (typically in Professional and Enterprise tiers) has A/B testing capabilities for landing pages, CTAs, and forms, allowing you to test different variations to see what converts best.
How do I know which lead capture strategy is working?
Use HubSpot's powerful reporting tools. You can build dashboards to track form submission rates, CTA click-through rates, and view which channels (e.g., blog, social media) are driving the most lead captures.

