
I know that growing your email list is one of the most powerful things you can do for your business. Using popups to grow your email list is a proven strategy, and a well-placed, great-looking signup form can be the difference between a visitor who leaves and a loyal subscriber.
I’m going to walk you through creating an embedded form with Poper and hooking it up directly to your ConvertKit account. This way, every new lead goes straight into your funnel without any extra work. Let’s get it set up.
Understanding ConvertKit's Form Types
ConvertKit offers several types of forms to suit different strategic needs for your newsletter sign-up. If you'd like to explore more ways email signup popups can help, check out our blog on email opt-in popups.
Inline Form:
- What it is: A form that is embedded directly within the content of your page or post. It sits statically as part of the page.
- Best for: Placing at the end of a blog post, in your website's footer, or on a dedicated "Subscribe" page.
What it is: A form that is embedded directly within the content of your page or post. It sits statically as part of the page.
Best for: Placing at the end of a blog post, in your website's footer, or on a dedicated "Subscribe" page.
Modal Form (Popup):
- What it is: An overlay that appears on top of the page content, demanding the visitor's attention.
- Best for: High-impact calls to action, such as offering a lead magnet or a welcome discount.
What it is: An overlay that appears on top of the page content, demanding the visitor's attention.
Best for: High-impact calls to action, such as offering a lead magnet or a welcome discount.
Slide-in Form:
- What it is: A smaller form that slides into view from the side or corner of the screen. It's less intrusive than a full modal popup.
- Best for: A persistent but gentle reminder to subscribe that doesn't completely block the page content.
What it is: A smaller form that slides into view from the side or corner of the screen. It's less intrusive than a full modal popup.
Best for: A persistent but gentle reminder to subscribe that doesn't completely block the page content.
Sticky Bar:
- What it is: A thin bar that "sticks" to the top or bottom of the screen as the user scrolls.
- Best for: A site-wide, non-intrusive call to action.
What it is: A thin bar that "sticks" to the top or bottom of the screen as the user scrolls.
Best for: A site-wide, non-intrusive call to action.
Step 1: Start Your New Campaign in Poper
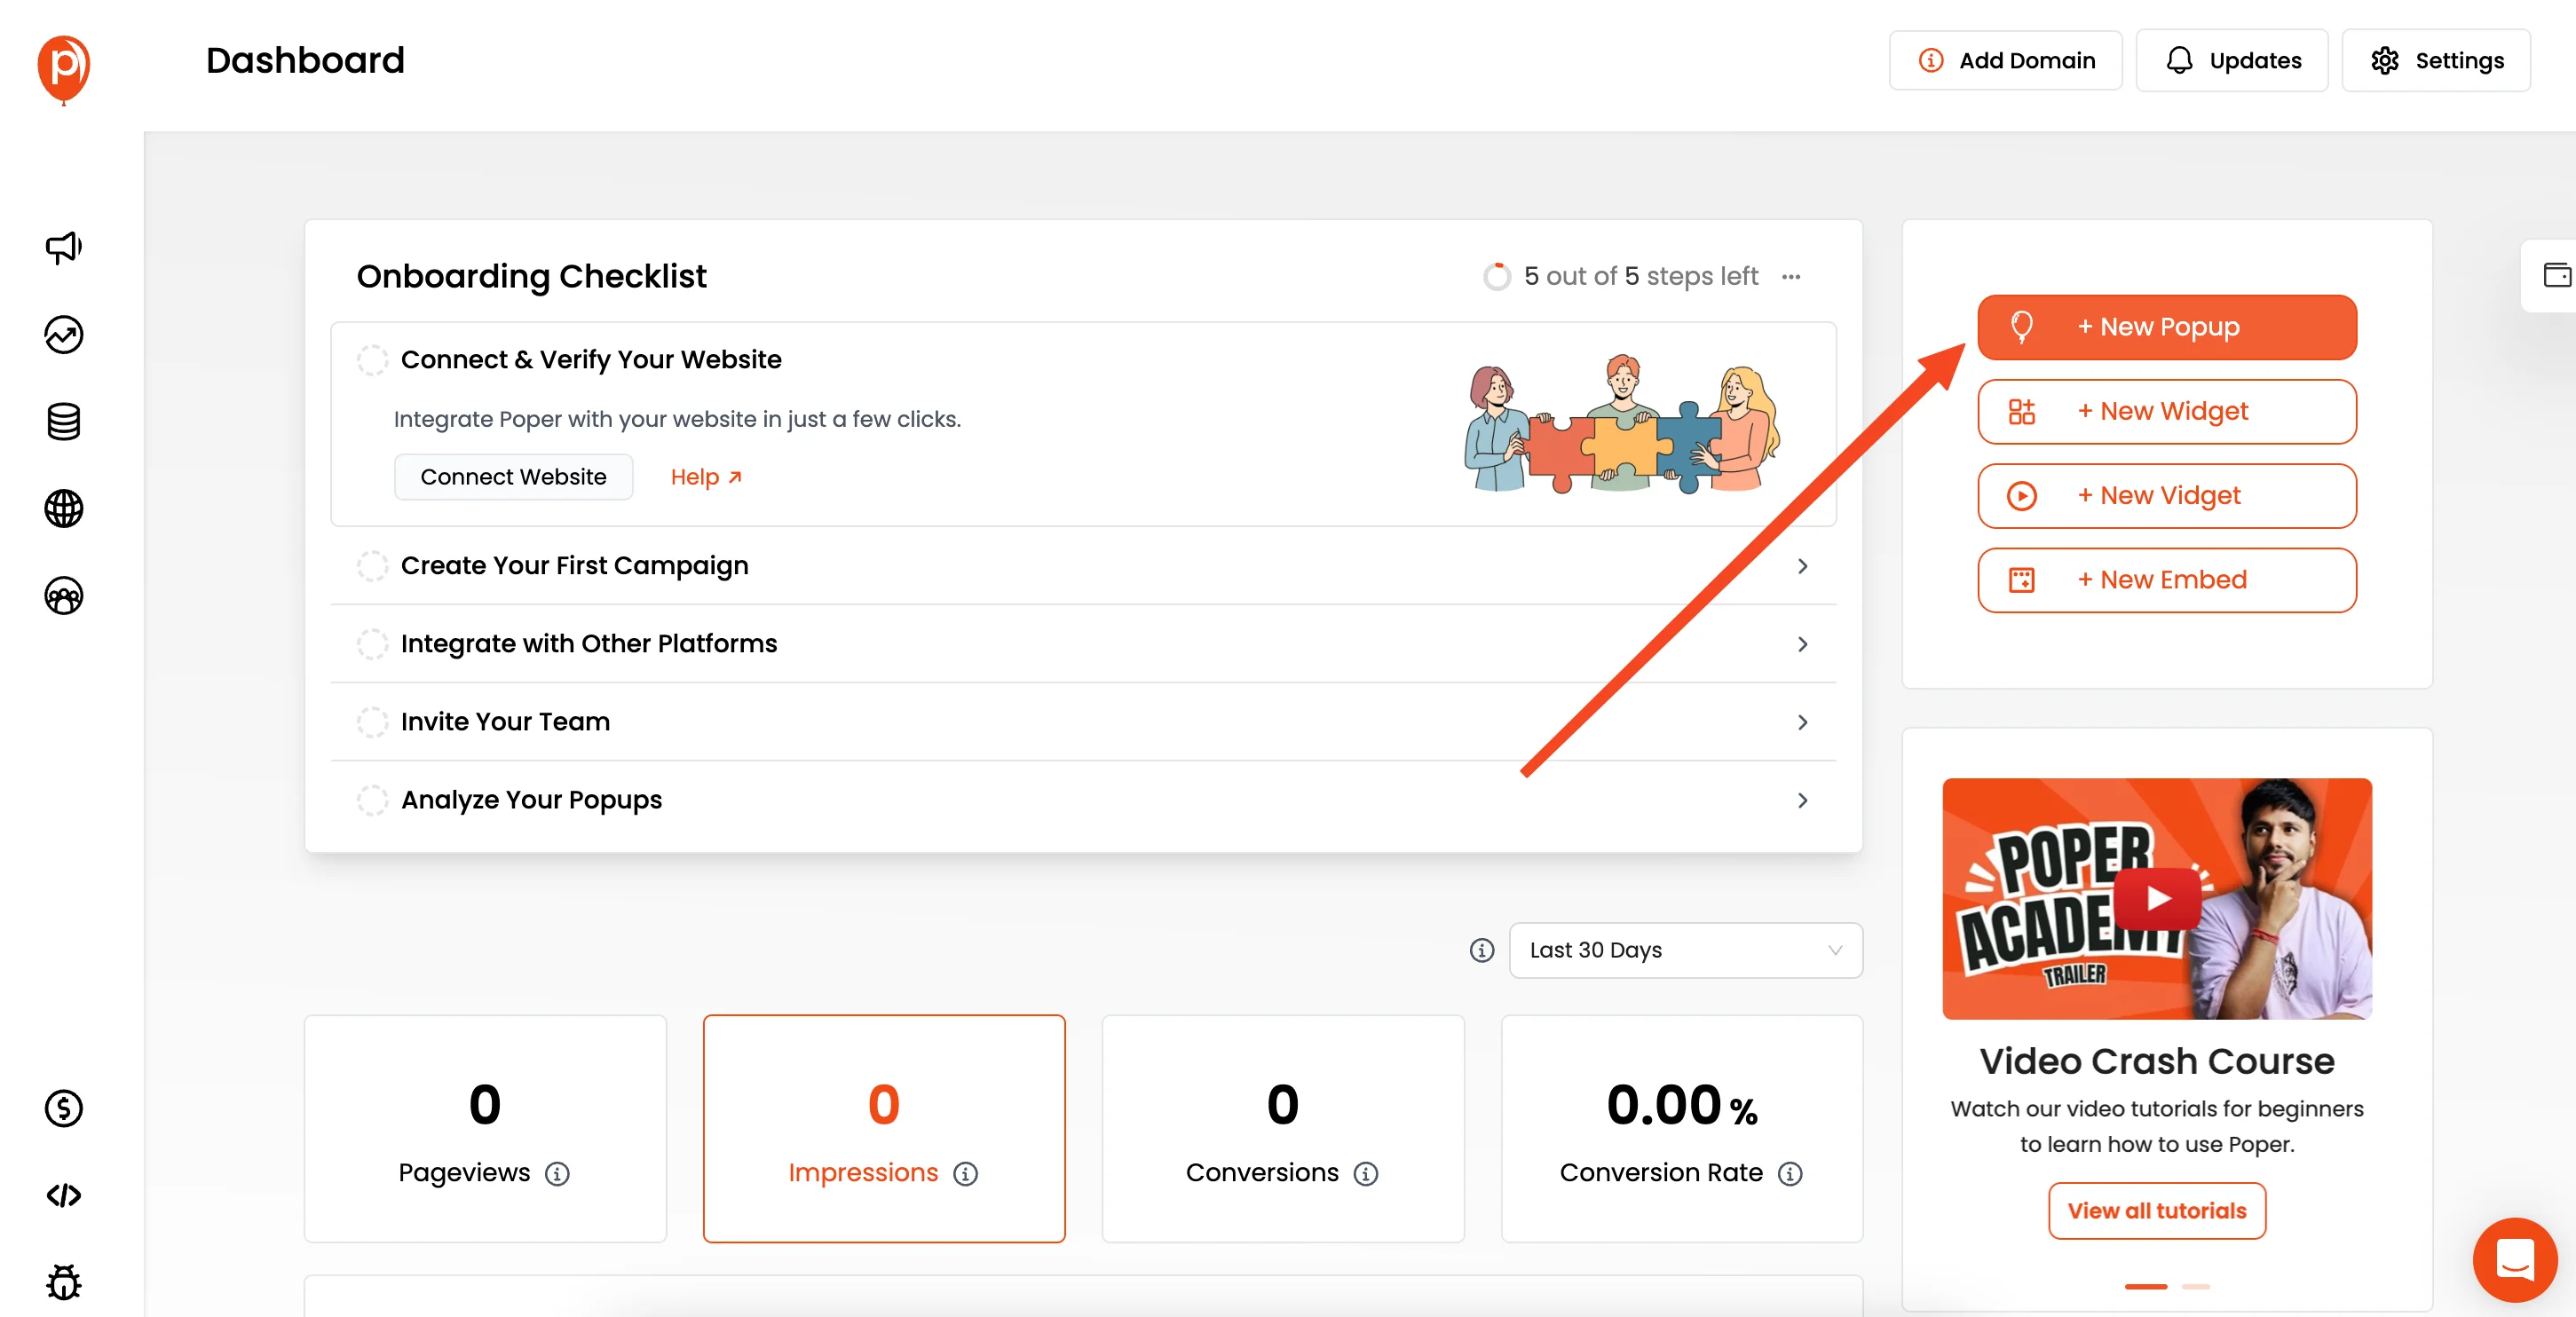
First things first, log into your Poper account. If you haven't added your website yet, go ahead and add your domain. Once that's done, click the "New Popup" button to start a new campaign.
Don't worry about the name—we designed Poper so you can easily switch the campaign type from a popup to an embed later on.
Step 2: Choose a Template Built for Signups
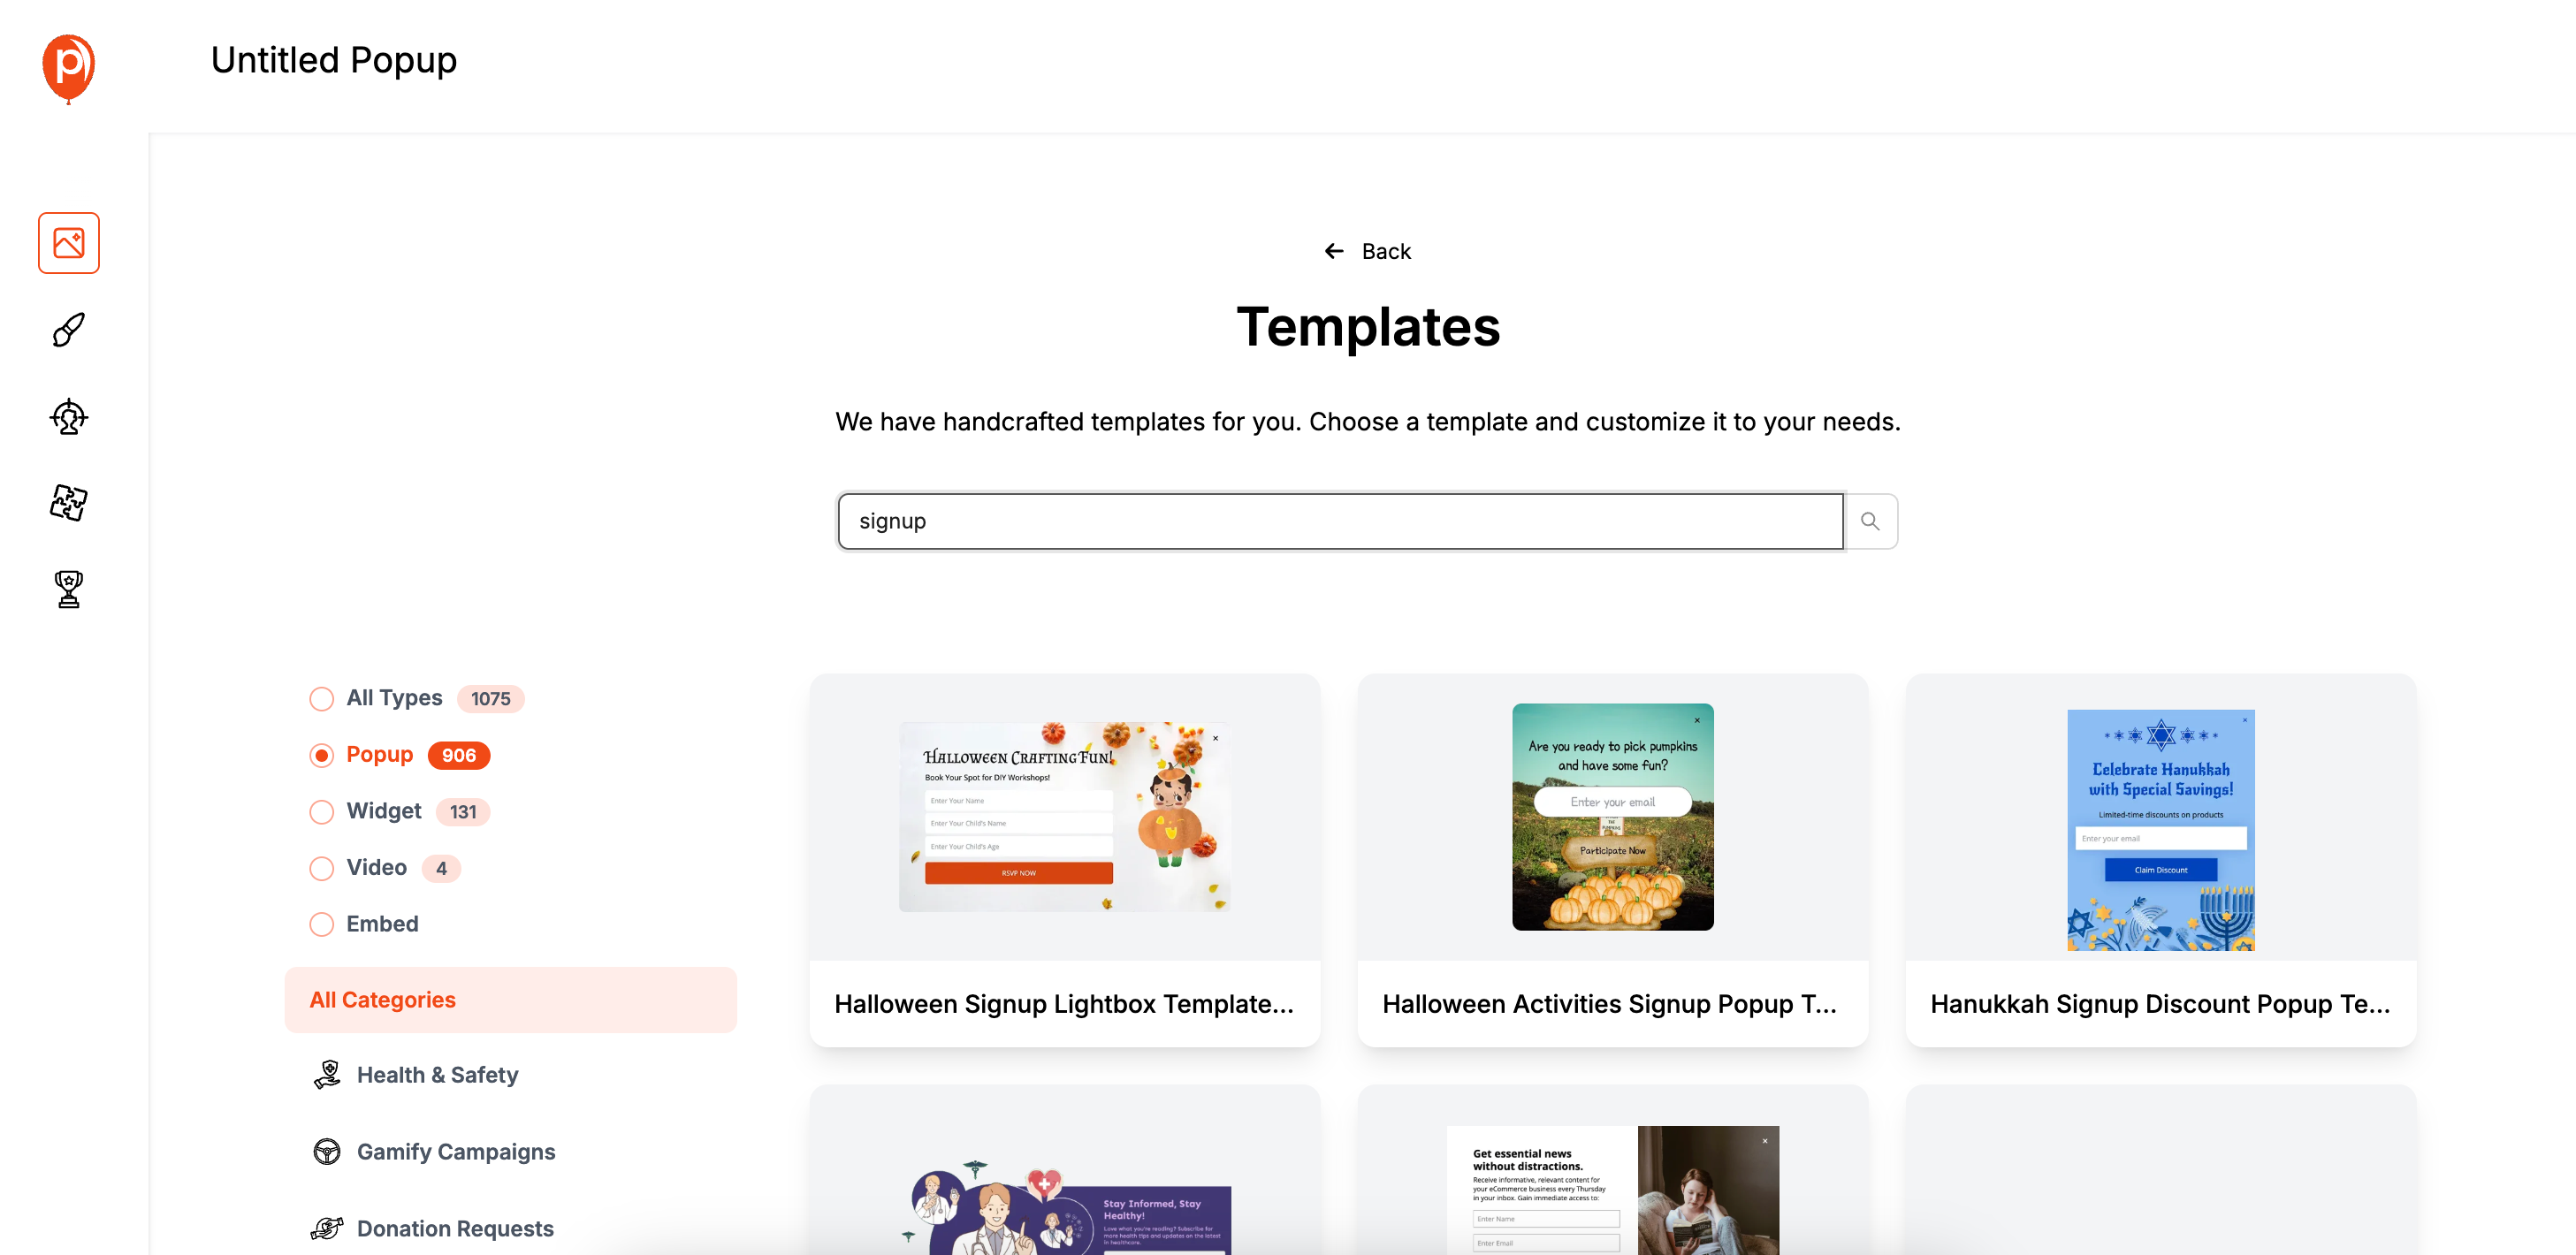
I always recommend starting with a template. It saves a ton of time and gives you a professional design from the get-go. Click "Choose from Templates" and use the search bar to look for "Form" or "Signup" to see designs made specifically for collecting leads. For more inspiration on using ready-made, effective popup templates, browse our popup template library. Pick one that has an email field and fits the general vibe of your brand.
Step 3: Customize the Form to Match Your Brand
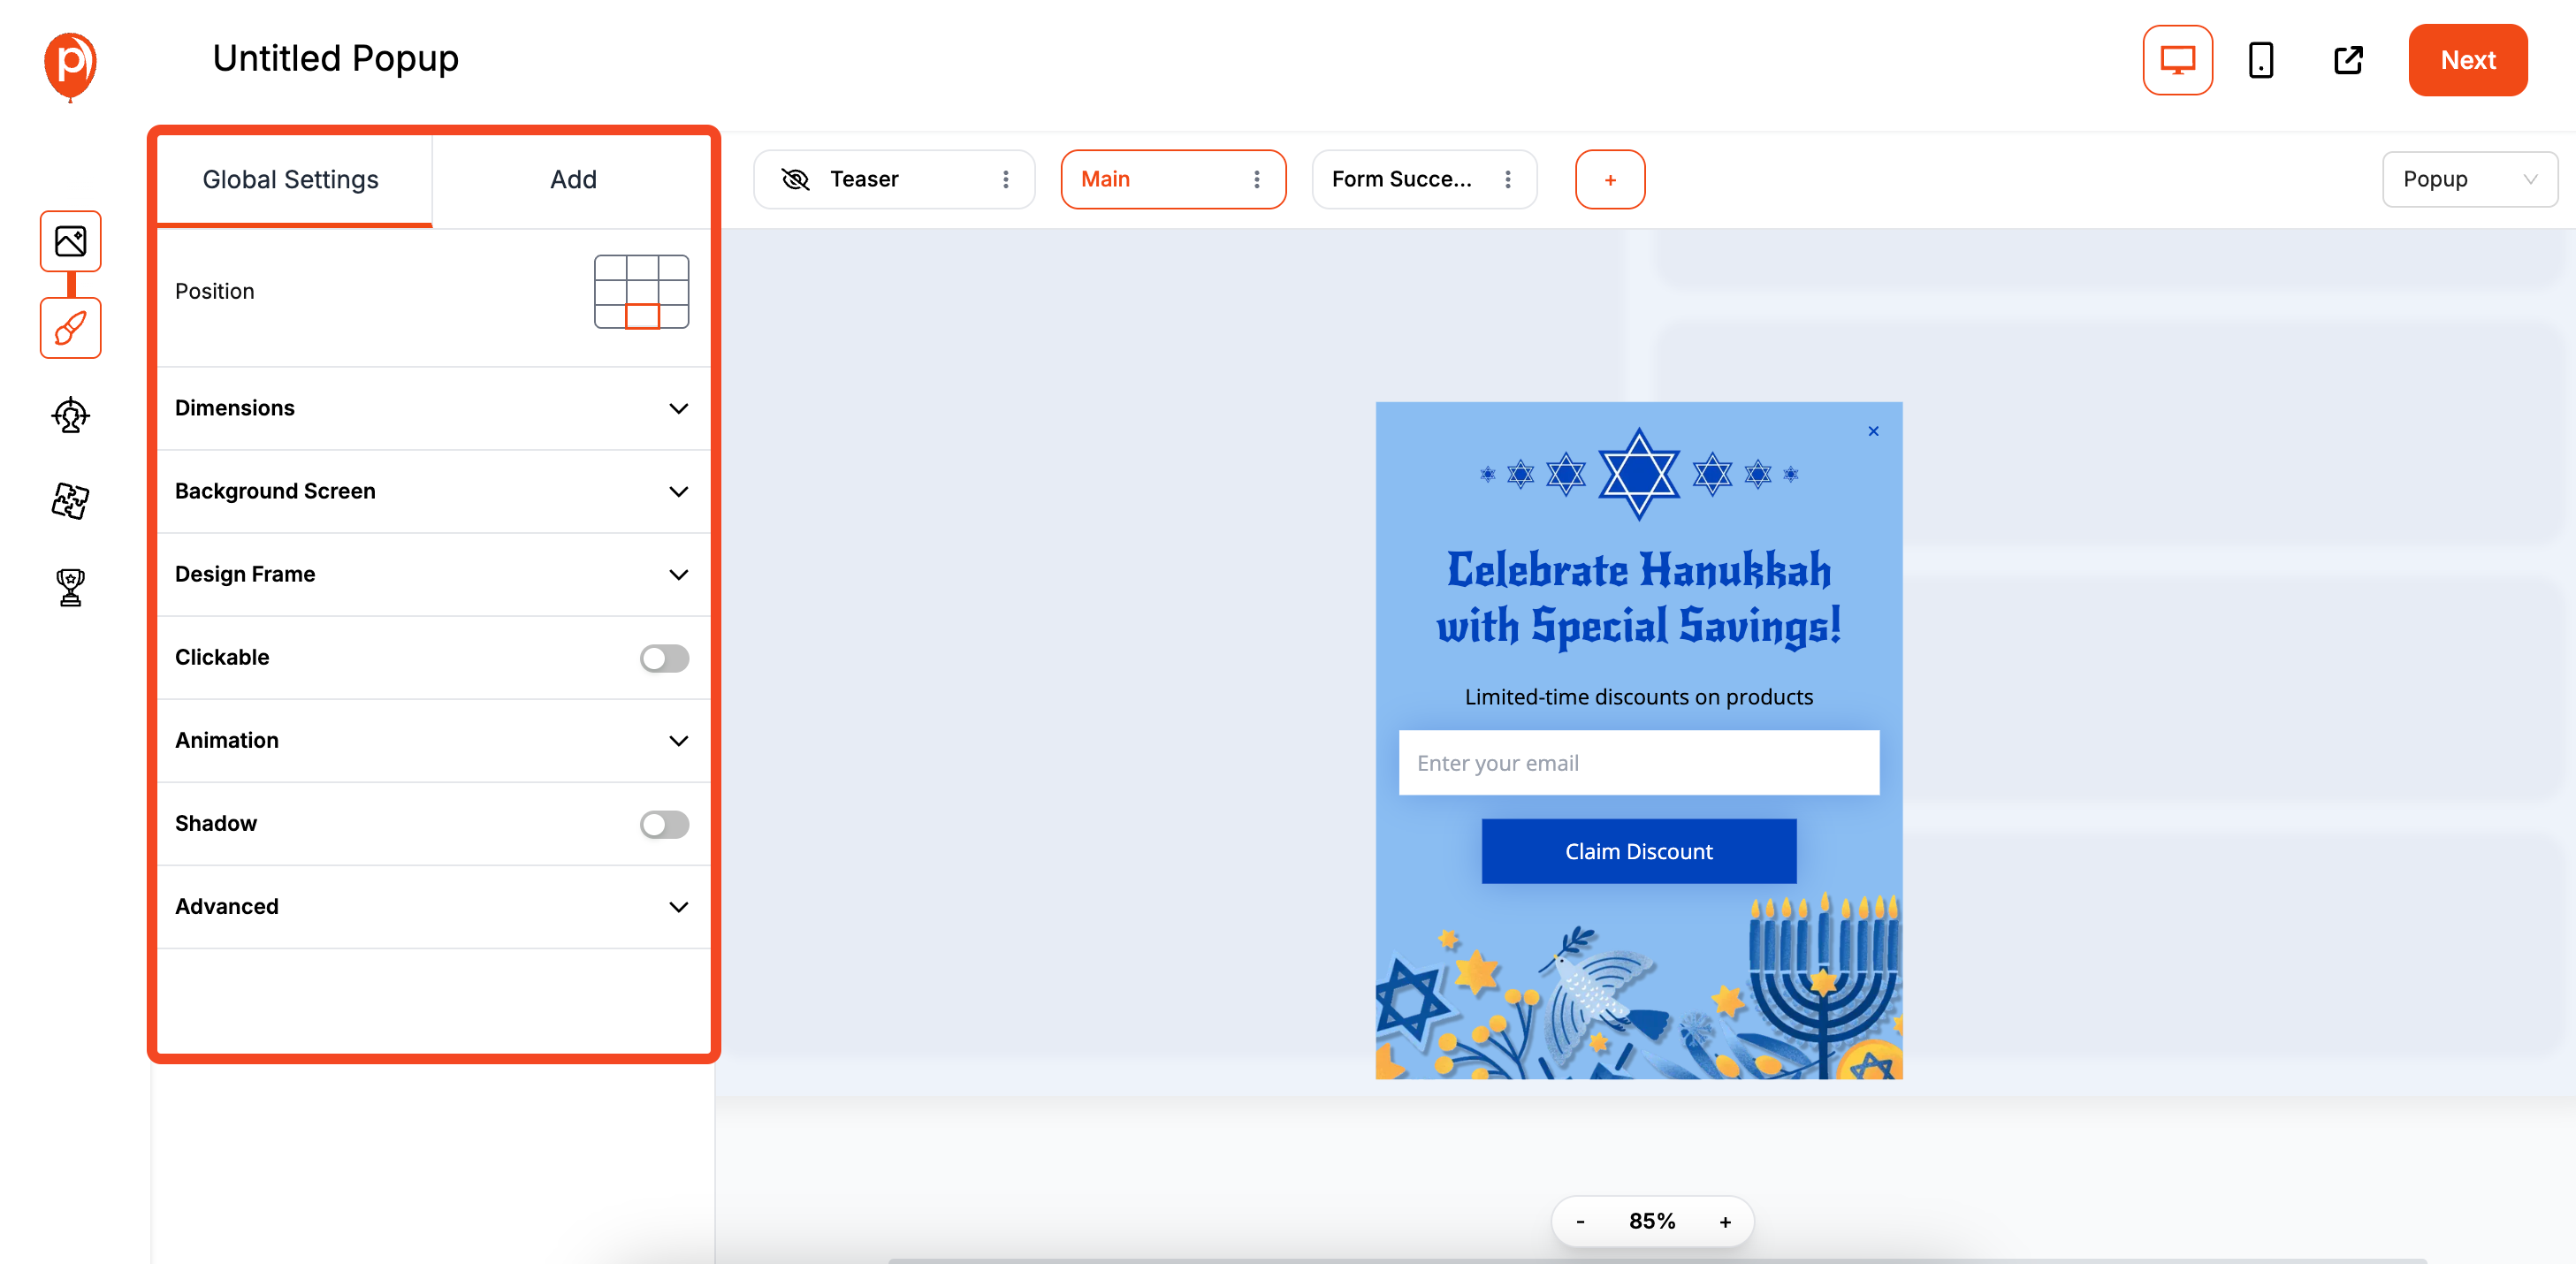
Now for the fun part. In our editor, you can change everything to make the form look like a natural part of your site. Adjust the text, fonts, and colors to match your brand’s style guide.
My advice? Keep it simple. A strong headline, a brief description, and a single email field are often all you need to get great results. When you’re happy with the look, click "Next."
Step 4: Switch Your Campaign Type to an Embed
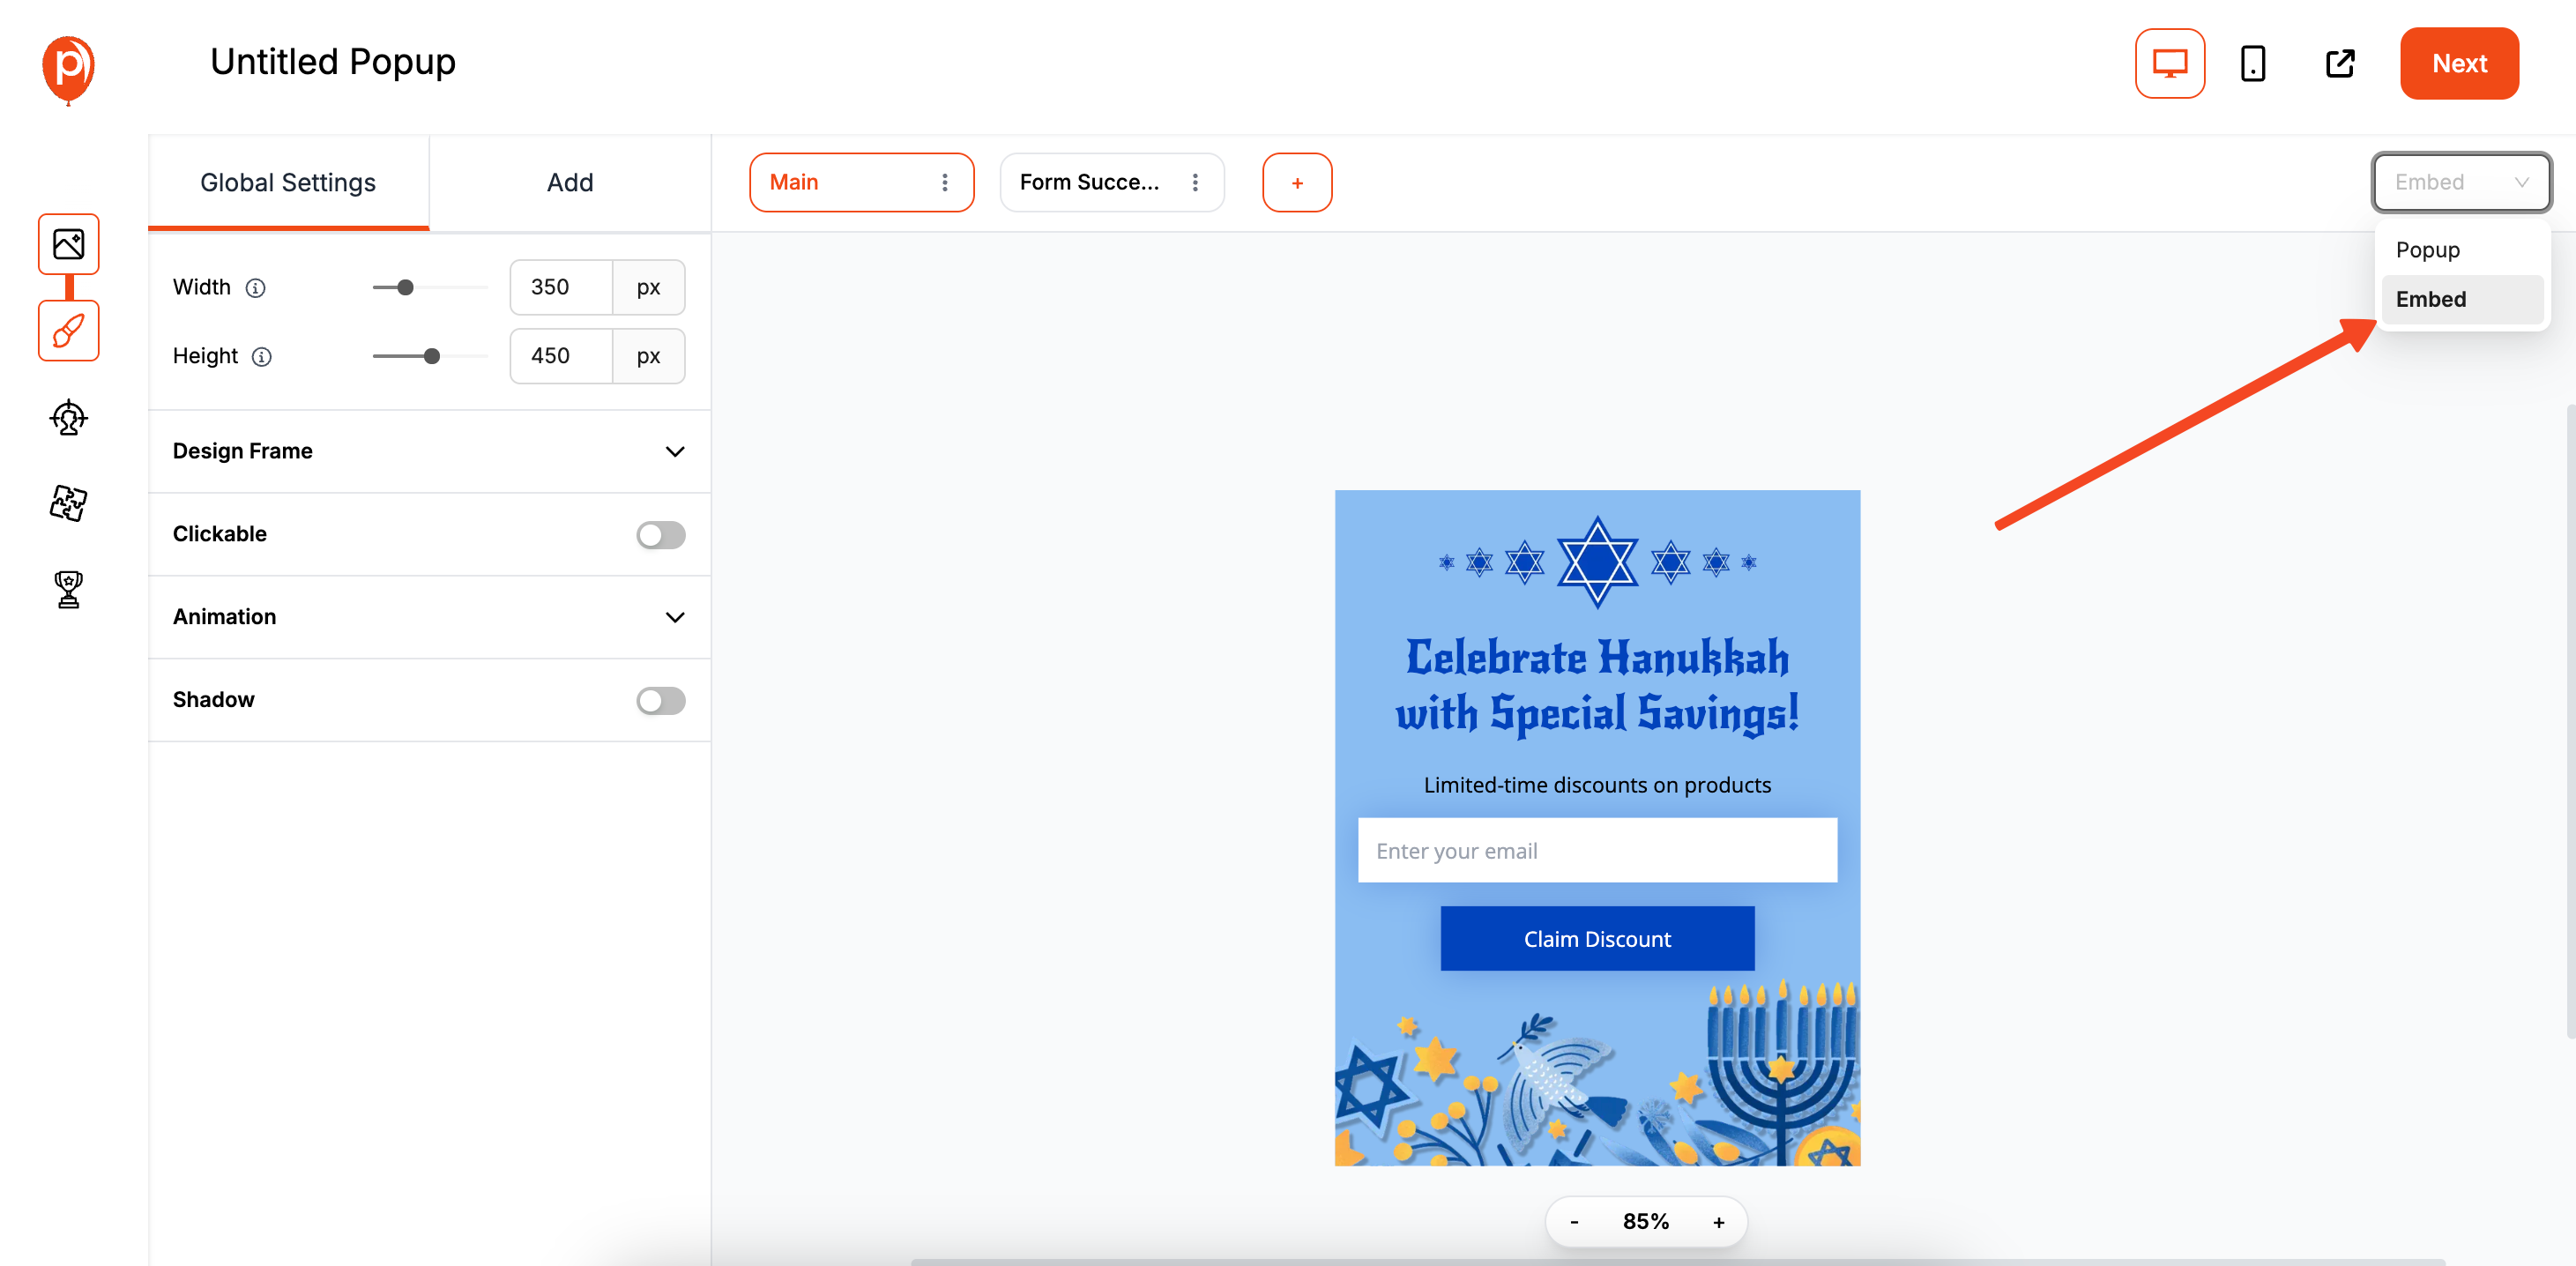
In the top right corner of the editor screen, you’ll see the campaign type switcher. Change it from "Popup" to "Embed." This is a key step. A popup appears over your website content, but an embed sits within it, like in a blog post or a sidebar. If you want more info about how popups work, visit our guide: What is a popup? An embed feels less intrusive and becomes a permanent part of your page.
Step 5: Position Your Embedded Form
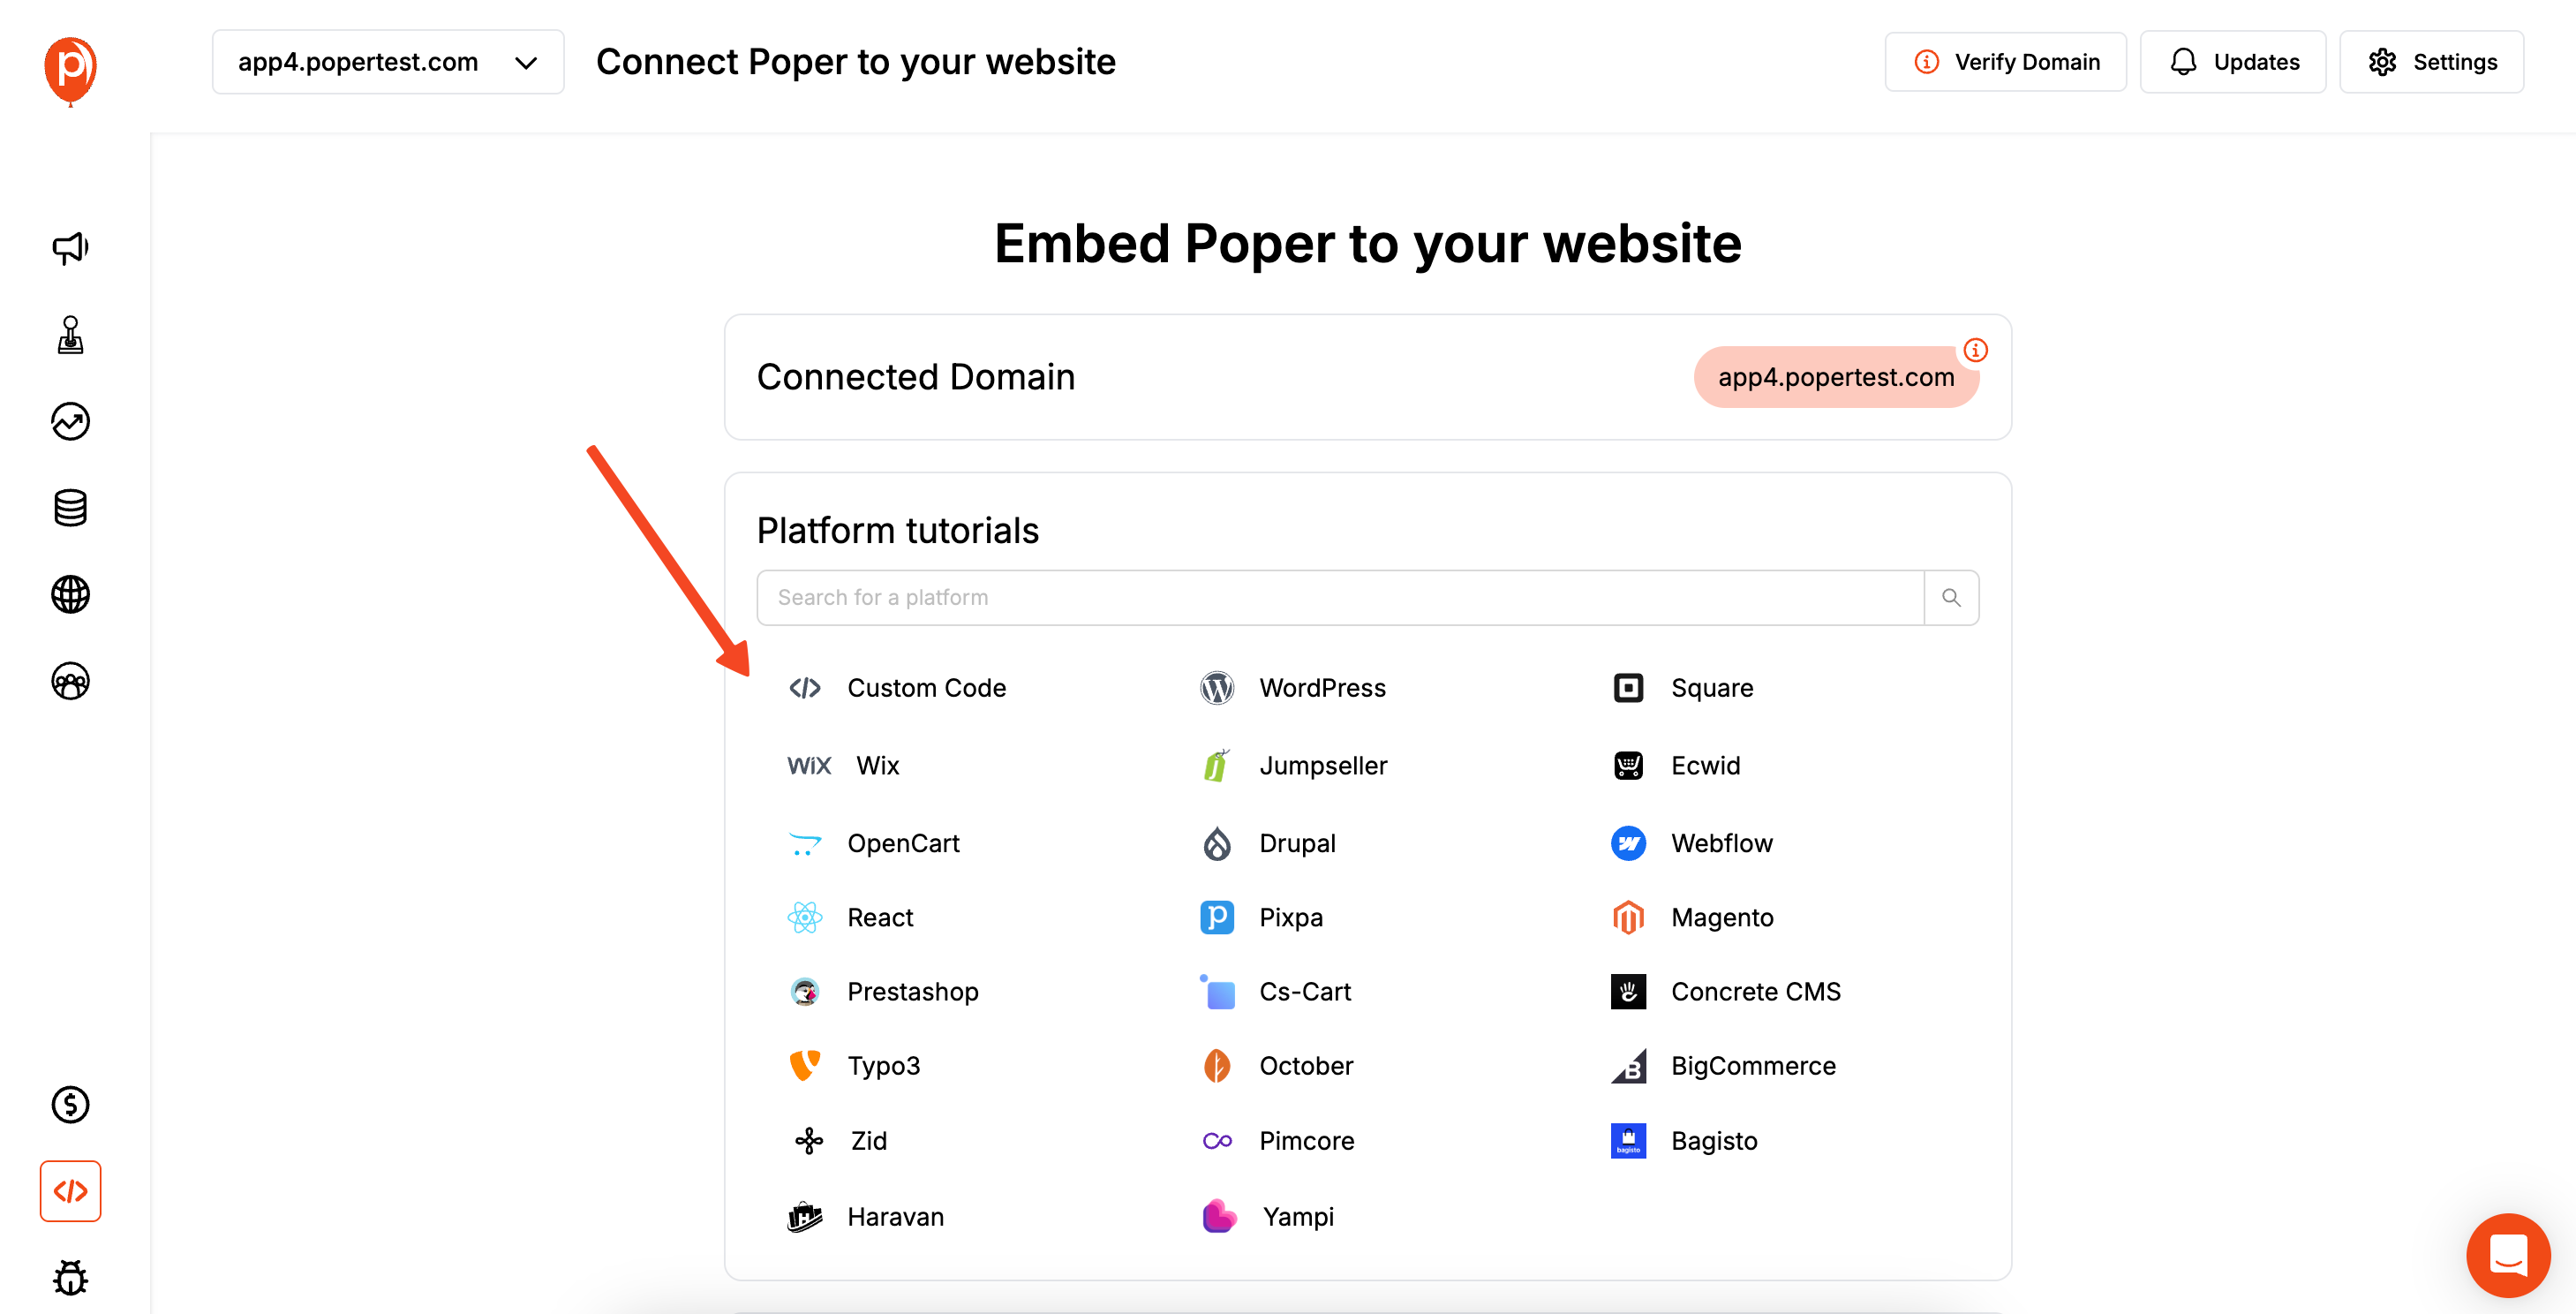
After switching to an embed, the "Display Conditions" page will look a bit different. Here, you'll find an "Embed Position" setting. This lets you use a CSS selector to tell Poper exactly where on your page the form should appear. You can also just grab the embed code provided on this page and paste it directly into your website’s HTML where you want the form to show up. If you're interested in more detailed tips on embed strategies, check our guide to embed vs imbed or our templates for embedded forms.
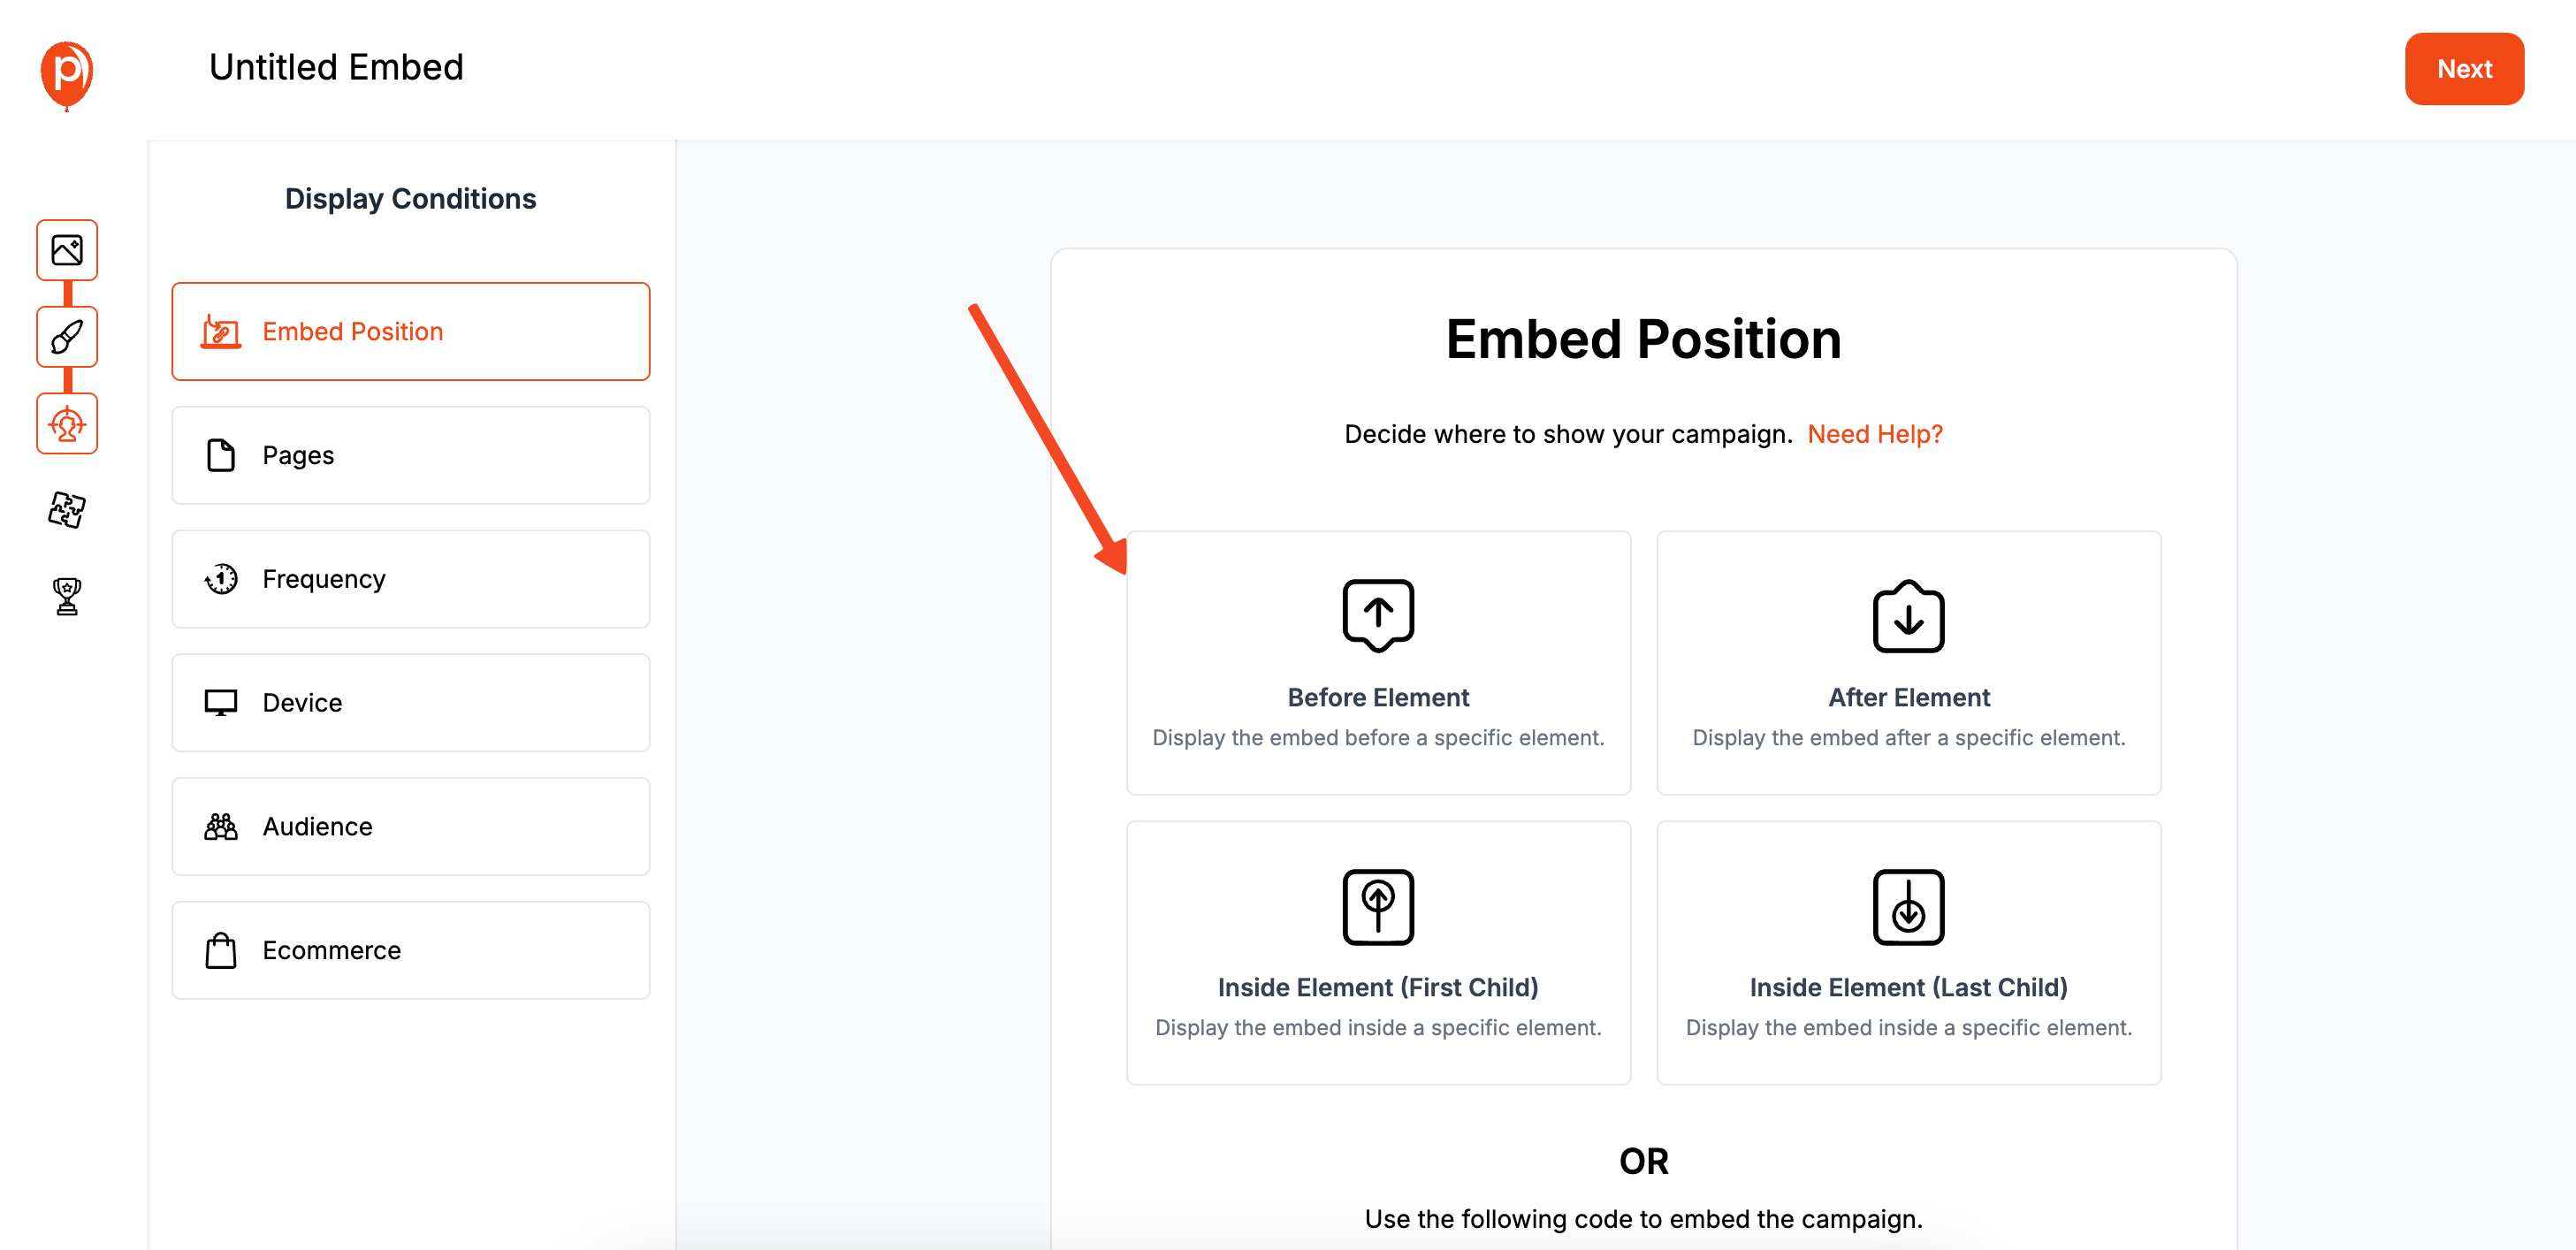
After switching to an embed, the "Display Conditions" page will look a bit different. Here, you'll find an "Embed Position" setting. This lets you use a CSS selector to tell Poper exactly where on your page the form should appear. You can also just grab the embed code provided on this page and paste it directly into your website’s HTML where you want the form to show up.
Step 6: Connect Poper to Your ConvertKit Account
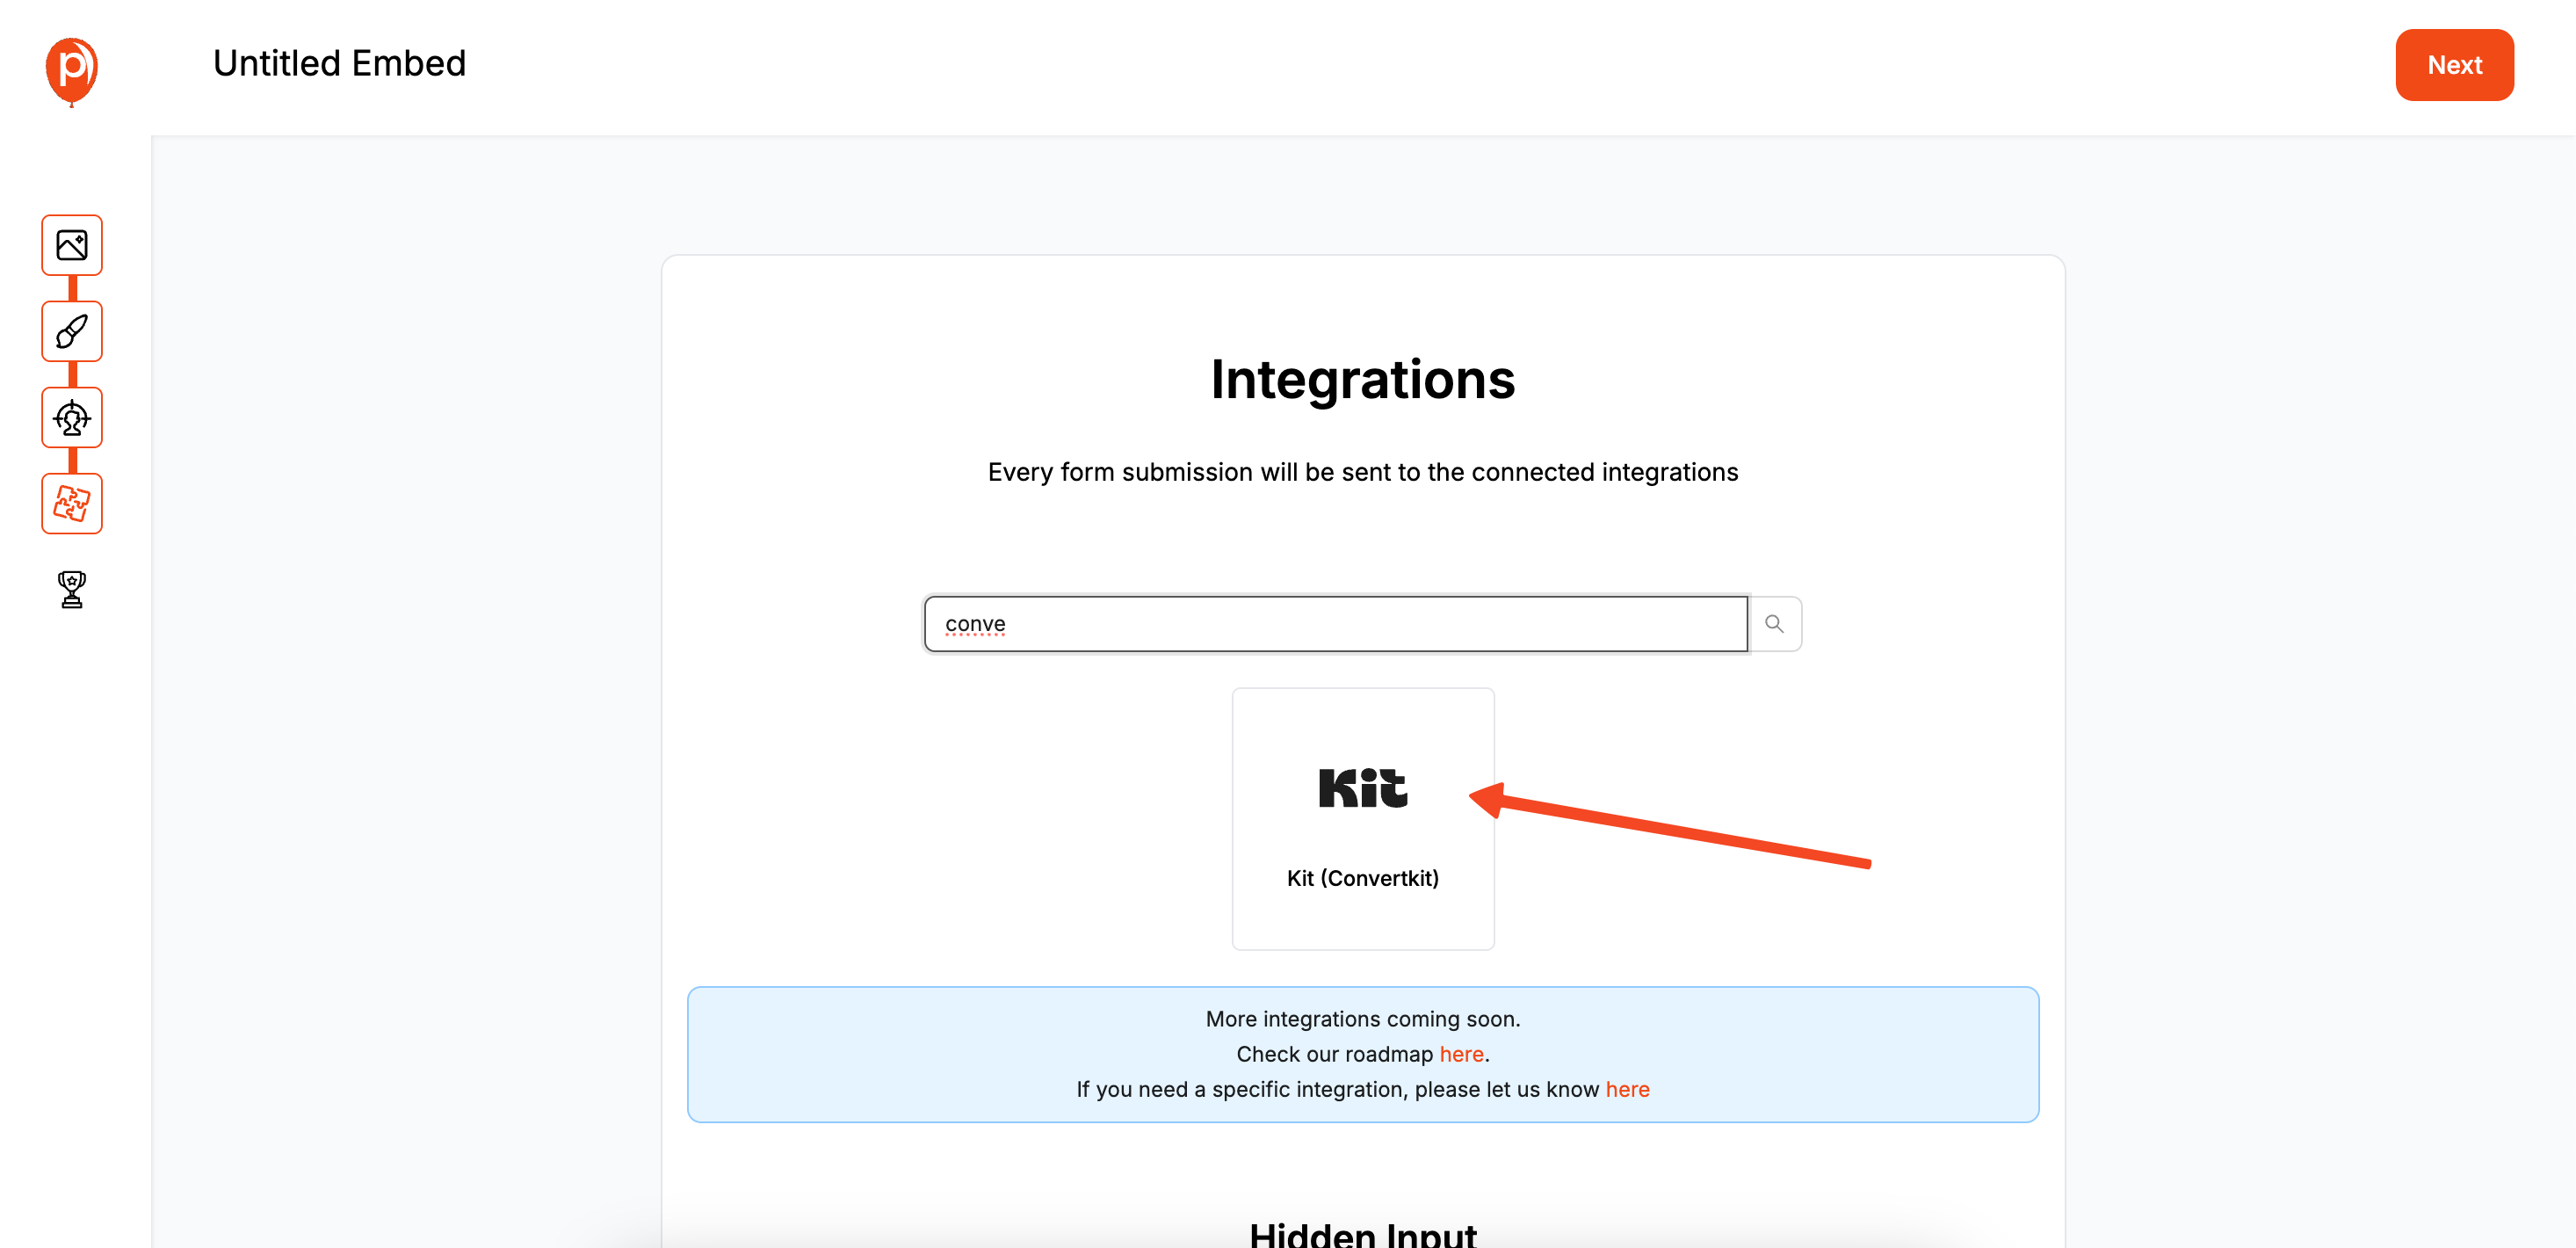
Click "Next" to move to the Integrations page. This is where the magic happens. Find ConvertKit in the list of services and select it. You’ll be prompted to enter an account name (just for your reference) and then log in to authorize the connection. I made sure this process is secure and straightforward.
Step 7: Map Your Form Fields to ConvertKit
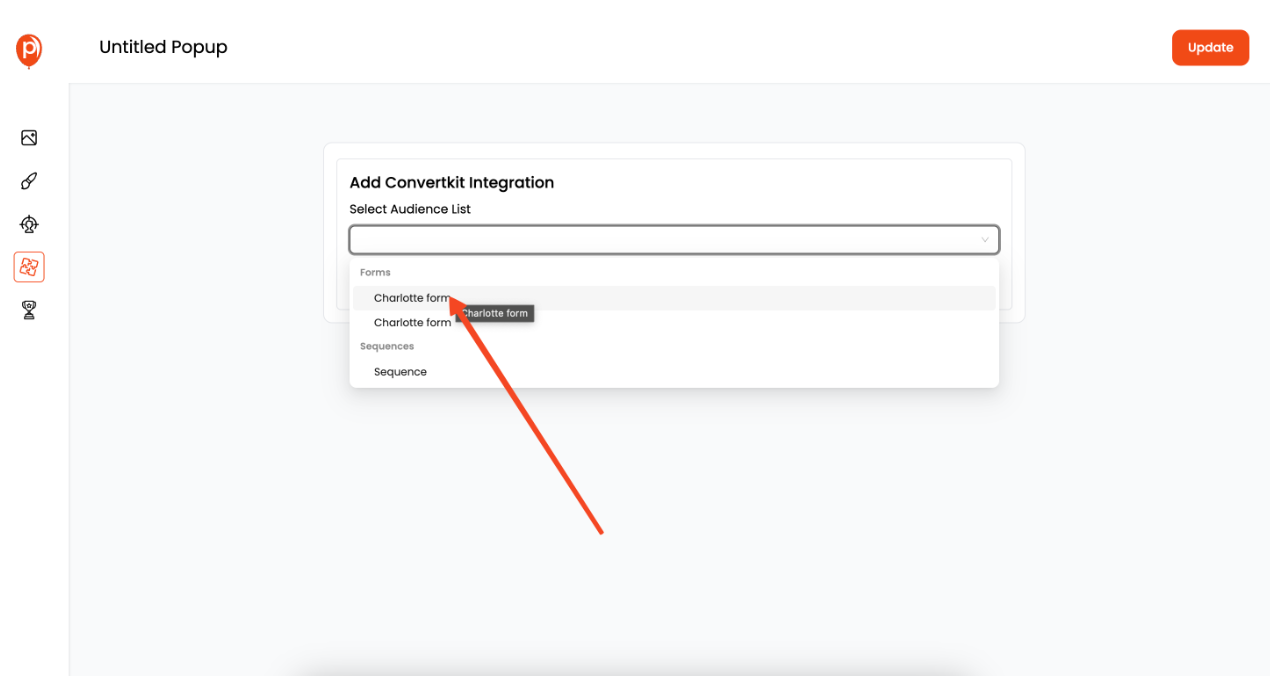
Once connected, you need to tell Poper where to send the data. Select the exact ConvertKit list or form you want new subscribers added to.
You can also assign tags right away to help you segment your audience from day one.
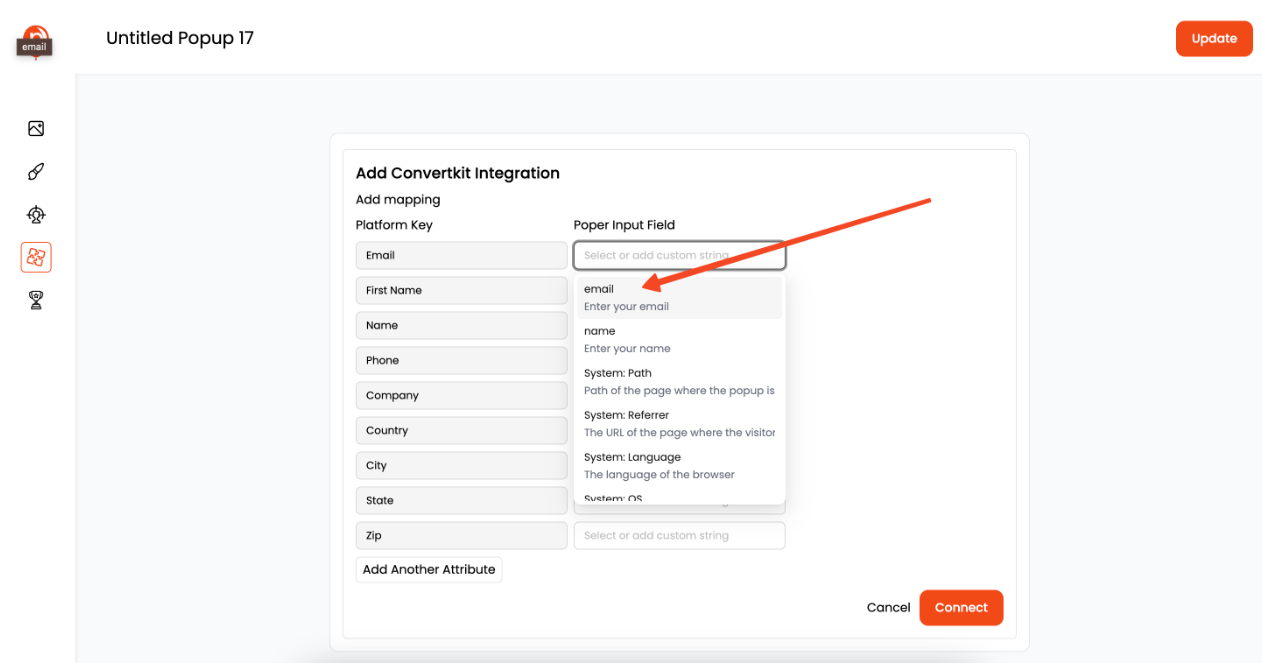
Next, you’ll map the fields—simply connect the "Email" field in your Poper form to the corresponding email field in ConvertKit.
For a deeper dive into all the mapping options, you can check out our detailed guide here: ConvertKit Integration Guide
Step 8: Install the Poper Code and Publish

After that, go back to your campaign and hit "Save & Publish." Your new embedded form is now live! I recommend visiting your website to see it in action and doing a quick test signup to make sure everything is flowing into ConvertKit perfectly.
Now for the final step. To make any of your campaigns work, you first need our main workspace code on your site. Go to the "Code Section" in the left navigation bar, copy the script provided, and paste it into the <head> section of your website’s HTML. You only need to do this once.
Method 2: Creating a Newsletter Sign Up Form Directly in ConvertKit
This is the most direct and tightly integrated method for ConvertKit users.
Step 1: Create a New Form in Your ConvertKit Account
Log into your ConvertKit account.
Navigate to Grow > Landing Pages & Forms from the top menu.
Click the "Create New" button, and then select "Form."
Step 2: Choose a Form Display Format
You will be asked to choose a format. For a newsletter sign-up, you can select "Inline," "Modal" (Popup), "Slide in," or "Sticky bar." For this example, let's proceed with an Inline or Modal form.
Step 3: Select a Template
ConvertKit offers a variety of clean, professional templates. Choose one that best matches your brand's aesthetic and the goal of your newsletter sign-up.
Step 4: Design and Customize Your Newsletter Form
You will be taken to ConvertKit's visual form editor.
Customize Content:
- Click on the text elements to edit the headline, description, and button text. Craft a compelling reason for someone to subscribe.
- Add or remove form fields. For a newsletter, "Email Address" is essential. "First Name" is also highly recommended for personalization.
Click on the text elements to edit the headline, description, and button text. Craft a compelling reason for someone to subscribe.
Add or remove form fields. For a newsletter, "Email Address" is essential. "First Name" is also highly recommended for personalization.
Customize Styles:
- Use the settings on the right-hand side to change colors, fonts, background images, and general styling to match your website.
Use the settings on the right-hand side to change colors, fonts, background images, and general styling to match your website.
Configure Form Settings:
- Click the "Settings" tab within the editor. Here you can define what happens after a user subscribes. You can show a success message or redirect them to a thank-you page.
- You can also choose to send an incentive email (like a lead magnet) directly from this form's settings.
Click the "Settings" tab within the editor. Here you can define what happens after a user subscribes. You can show a success message or redirect them to a thank-you page.
You can also choose to send an incentive email (like a lead magnet) directly from this form's settings.
Step 5: Configure Display Rules (for Modal and Slide-in Forms)
If you chose a Modal (Popup) or Slide-in form, you'll need to set its behavior:
Timing: Set the form to appear after a certain time delay or when the user scrolls to a certain percentage down the page.
Devices: Choose to show on desktop, mobile, or both.
Exit Intent (Modal only): ConvertKit's modal forms offer an exit-intent trigger, allowing you to show the form just as a visitor is about to leave your site.
Frequency: Control how often the same visitor sees the form.
URL Targeting: Specify which pages the form should or should not appear on.
Step 6: Get the ConvertKit Embed Code
Once you have saved your form, click the "Publish" button in the editor.
ConvertKit will provide you with the necessary code. There are a few options:
- JavaScript: A single script you install on your site once. It will automatically manage the display of all your modal, slide-in, and sticky bar forms based on their rules.
- HTML: A more raw HTML version.
- WordPress: ConvertKit has a dedicated WordPress plugin that makes embedding forms via shortcodes very easy.
JavaScript: A single script you install on your site once. It will automatically manage the display of all your modal, slide-in, and sticky bar forms based on their rules.
HTML: A more raw HTML version.
WordPress: ConvertKit has a dedicated WordPress plugin that makes embedding forms via shortcodes very easy.
For most websites, copying the JavaScript snippet is the best all-purpose option.
Step 7: Add the ConvertKit Code to Your Website Page
For JavaScript (Modal, Slide-in, Sticky Bar):
- Copy the JavaScript snippet.
- Paste this code into your website's HTML, usually right before the closing </body> tag. You only need to install this script once per site.
Copy the JavaScript snippet.
Paste this code into your website's HTML, usually right before the closing </body> tag. You only need to install this script once per site.
For Inline Forms:
- In addition to the main JavaScript, you'll get a specific <div> embed code. You must paste this second snippet directly into your page's content where you want the inline form to appear.
In addition to the main JavaScript, you'll get a specific <div> embed code. You must paste this second snippet directly into your page's content where you want the inline form to appear.
ConvertKit Native Forms vs. Poper for ConvertKit: Which to Choose?
| Feature | ConvertKit Native Forms | Poper Forms (ConvertKit Integrated) |
| Ease of Use | Very easy, all within the ConvertKit ecosystem | Easy, with a dedicated visual editor |
| Design Flexibility | Good, clean templates but structured | High, with total drag-and-drop control |
| Form/Popup Types | Inline, Modal, Slide-in, Sticky Bar | Wider range (Popups, Slide-ins, Bars, Embeds, Gamified) |
| Trigger/Targeting | Solid basics, including exit-intent | Very advanced, with more diverse rule options like Geo/Source |
| Integration | Seamlessly part of ConvertKit | Requires a one-time integration setup with ConvertKit |
| Platform Scope | Only for ConvertKit | Can send leads to ConvertKit and 100+ other tools |
Conclusion
For even more ideas on boosting sign-ups for your newsletter, you might want to read about popups for newsletters, which cover campaign strategies and inspiration. You can also find inspiration and ready-made designs in our newsletter signup popup templates.
When looking at how to create a newsletter sign up form in ConvertKit, you have two excellent paths: If you're weighing other options or want to compare with other email platforms, see how you can add a Flodesk popup to a page or embed a Mailchimp form for alternative approaches.
ConvertKit's native forms are powerful, beautifully designed, and tightly integrated. For most users who need inline forms, popups with standard triggers (including exit intent), or slide-ins, the native tools are the perfect place to start.
Specialized tools like Poper serve as an excellent enhancement if you need more advanced design control, a wider range of popup types (like gamified popups), more granular targeting rules, or the flexibility to be platform-agnostic.
By choosing the right tool for your specific needs, you can create high-converting sign-up forms that consistently attract the right subscribers and fuel your ConvertKit email marketing success. To further optimize your forms and boost conversions, check out our guide on how to increase popup conversion rate.
Frequently Asked Questions (FAQ)
Do I need the ConvertKit WordPress plugin to use their forms on WordPress?
While it's not strictly required (you can use the JavaScript embed code), the ConvertKit WordPress plugin makes it much easier to add forms to pages, posts, and sidebars using shortcodes without manually editing theme files.
Can I A/B test my ConvertKit sign-up forms?
Yes, ConvertKit has a built-in A/B testing feature for its forms, allowing you to test variations of your headline, copy, or design to see what performs best.
How do I offer a lead magnet (freebie) with a ConvertKit form?
In the form's "Settings," you can configure an "Incentive Email." This is an automated email that is sent immediately after a user subscribes via that form, and you can include the download link to your lead magnet in that email.
If I use Poper, can I still trigger ConvertKit automations?
Yes. The best way is to have Poper add subscribers to a specific ConvertKit form. Then, within ConvertKit, you can build an automation that is triggered "when a subscriber joins this form." Alternatively, you can have Poper add a tag, and the automation can trigger based on that tag being added.
What is the main advantage of using an inline form vs. a popup form?
* Inline Form: Is a less intrusive, permanent part of your page. It's great for footer signups or at the end of content where the user is already engaged and looking for the next step.
* Popup Form: Is a higher-impact, attention-grabbing method. It's better for presenting a special offer or capturing attention before a user clicks away.Q6: Can I have multiple ConvertKit forms on the same page?
You can have one popup/slide-in/sticky bar active per page, but you can have multiple inline forms on the same page. You can control which popups appear on which pages using ConvertKit's URL targeting rules.

