
One of my main goals is to help you connect with your customers in a simple, effective way. A common question I hear is, "How can I add a newsletter popup to my Wix site to grow my email list?" It’s a great question because building that list is key to driving sales and engagement. If you're interested in learning more ways to use popups to grow your email list, check out our detailed strategies.
Let's walk through how you can get a beautiful, high-converting newsletter popup running on your Wix site in just a few minutes. No complex code, I promise.
Adding a Popup to Your Wix Site
Step 1: Create a Poper Account and Add Your Site
First things first, you’ll need to sign up for a free Poper account. Once you’re logged in, the system will ask you to add your website's domain.
Go ahead and enter your Wix store’s address here. This step is important because it tells Poper where to display your popups later on.
Step 2: Create a New Popup from a Template
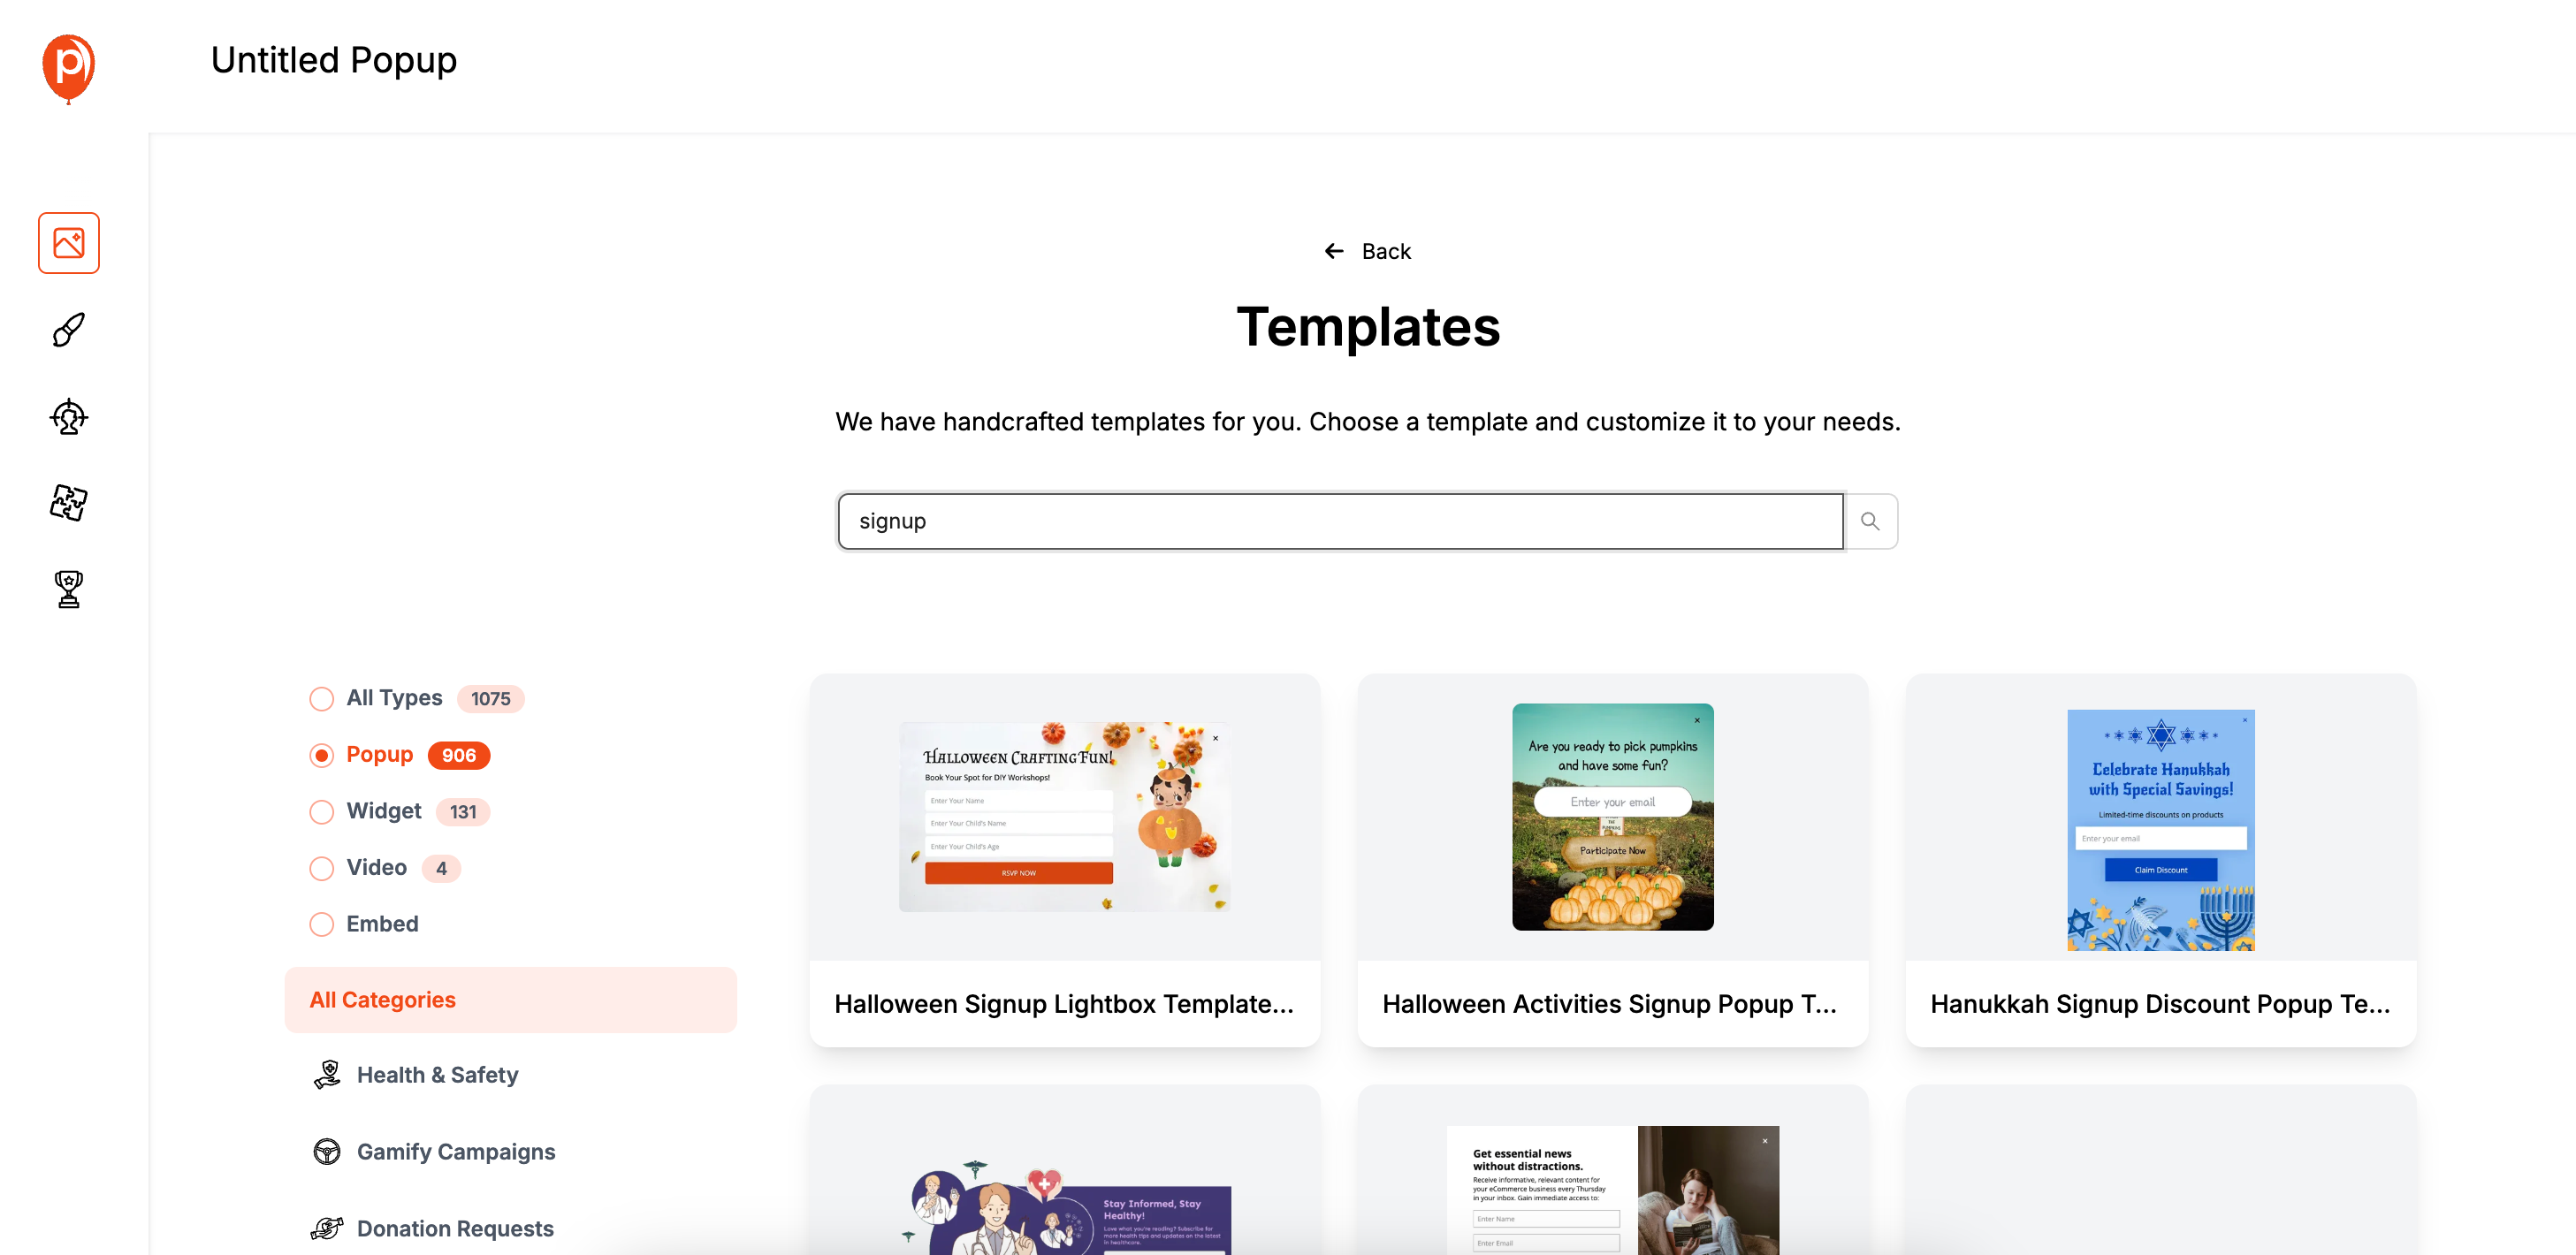
Now for the fun part. In your Poper dashboard, click the "New Popup" button and then select "Choose from Templates." I’ve designed our template library to give you a head start. Simply search for "newsletter," and you'll see dozens of options. Pick one that feels right for your brand’s style. You can also browse our Newsletter Popup Template Collection for more inspiration.
Using a template saves you time and ensures the design is already optimized to grab attention. For example, if you have a modern, clean-looking store, find a template with a similar minimalist feel.
Step 3: Customize the Popup to Match Your Brand
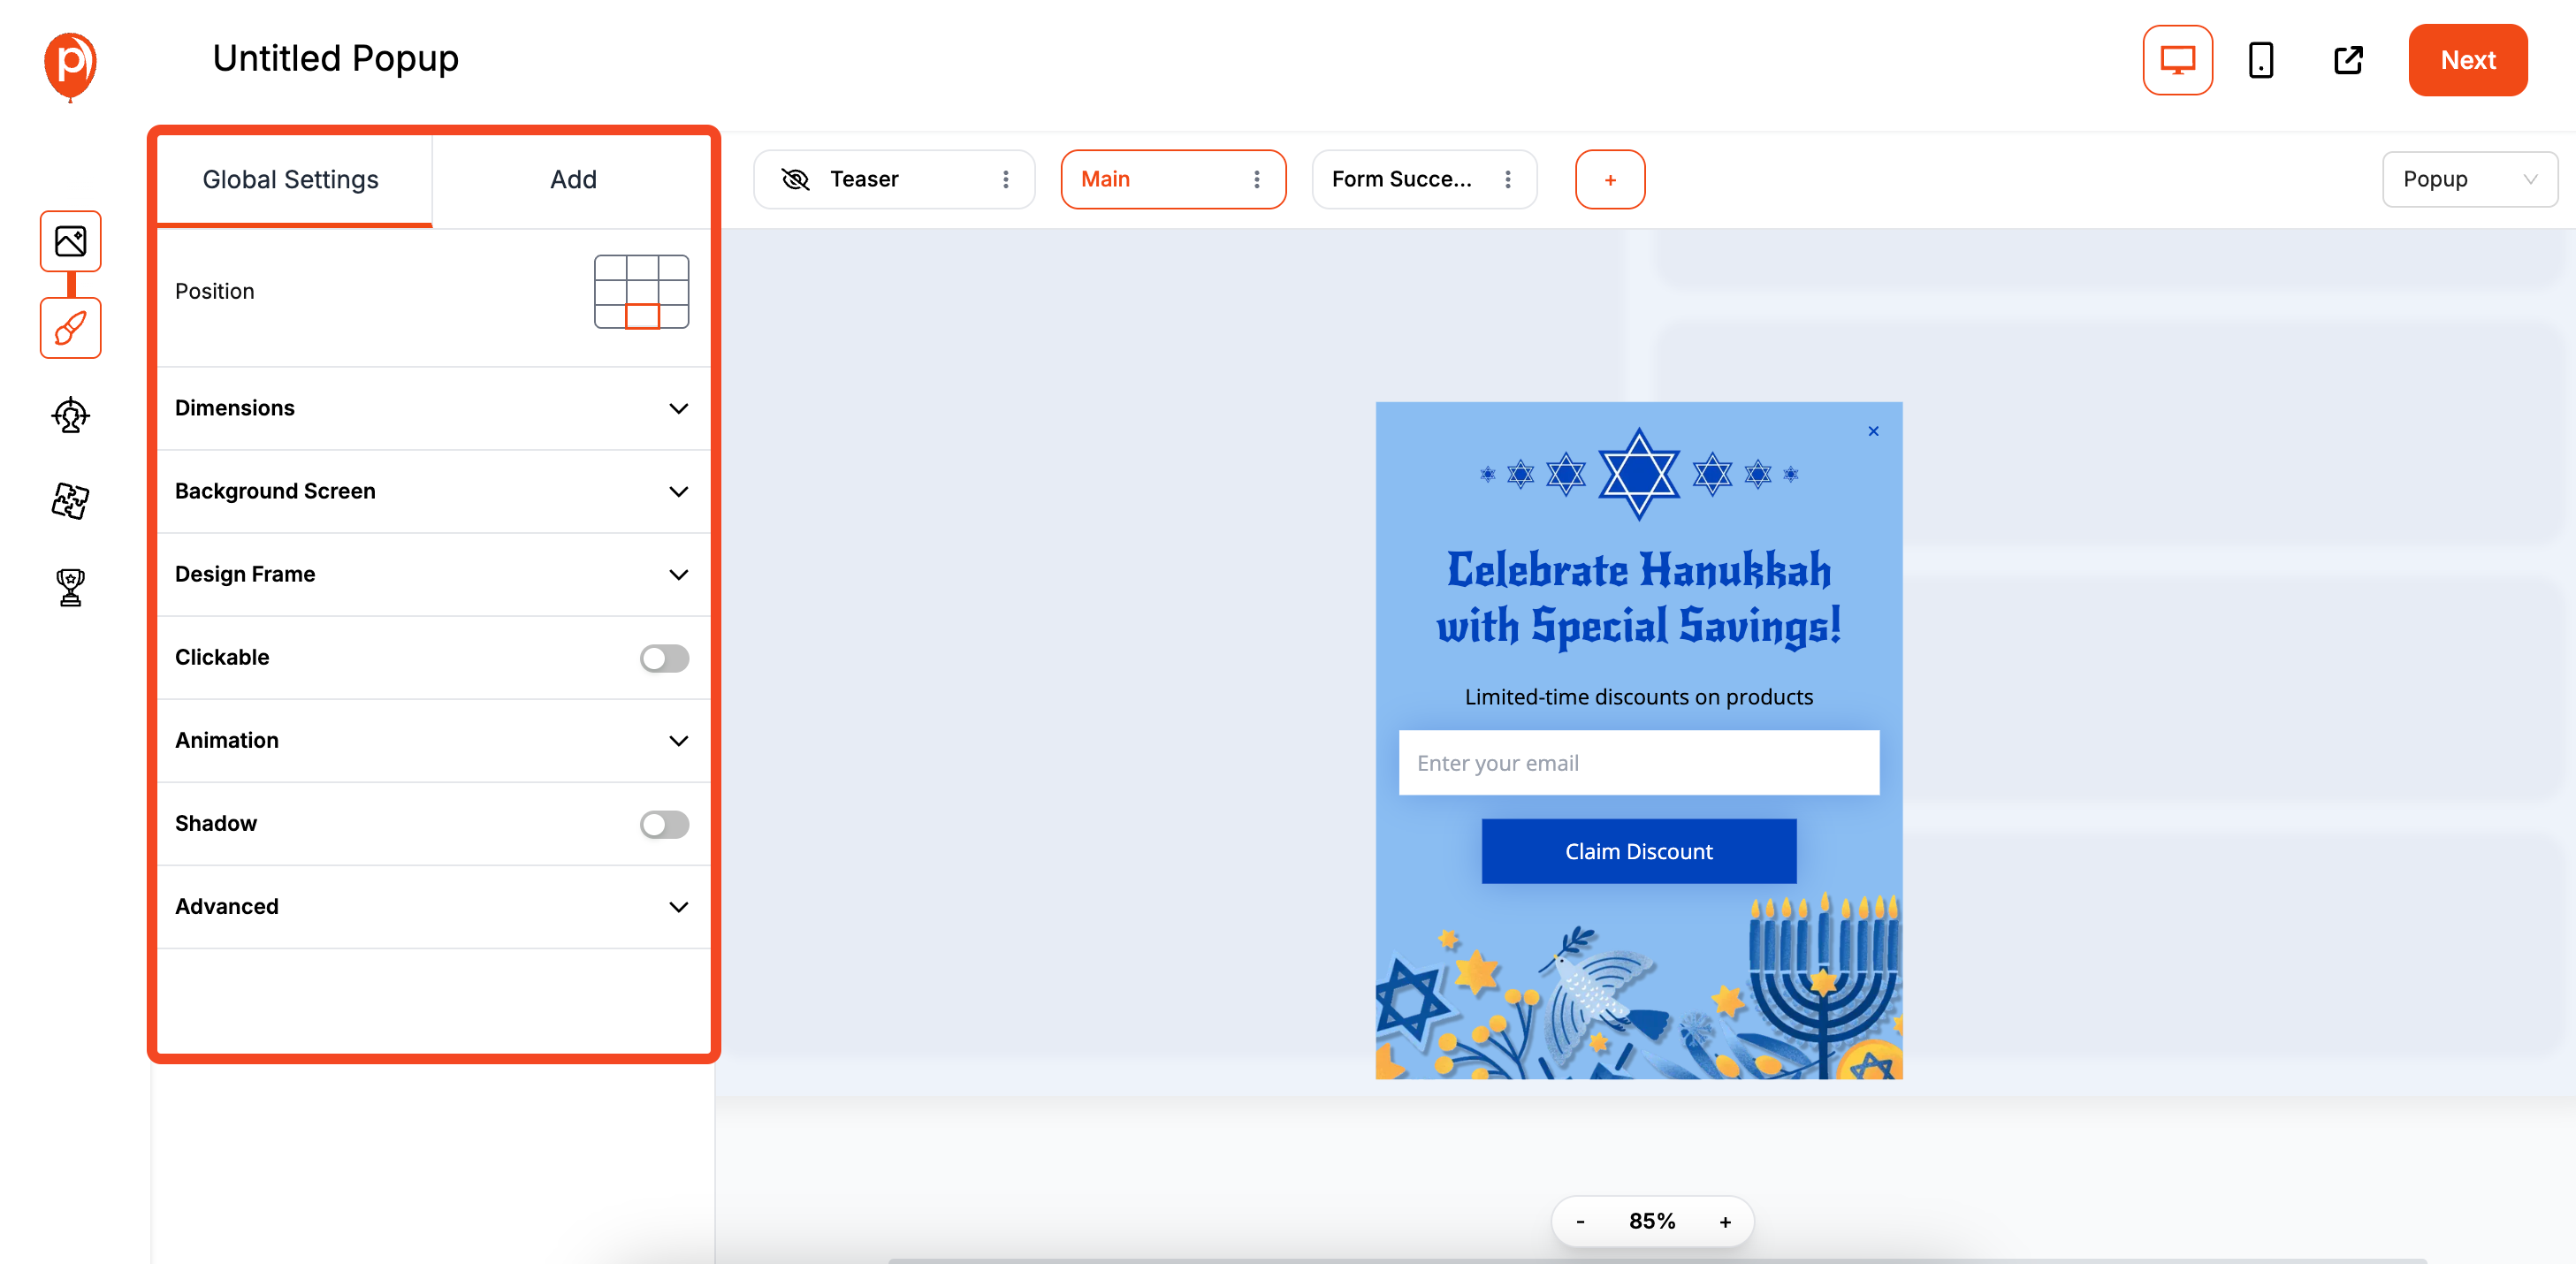
Once you select a template, it will open in our editor. Here, you can easily change the fonts, colors, text, and images to align with your brand. The goal is to make the popup feel like a natural part of your website, not a random ad.
A pro tip from my side: keep it simple. A catchy headline offering a discount for signing up, a single field for an email address, and a clear call-to-action button like "Get My 10% Off" is often all you need. For best results, see our tips for increasing popup conversion so your newsletter popup performs even better.
Step 4: Set Your Display Conditions
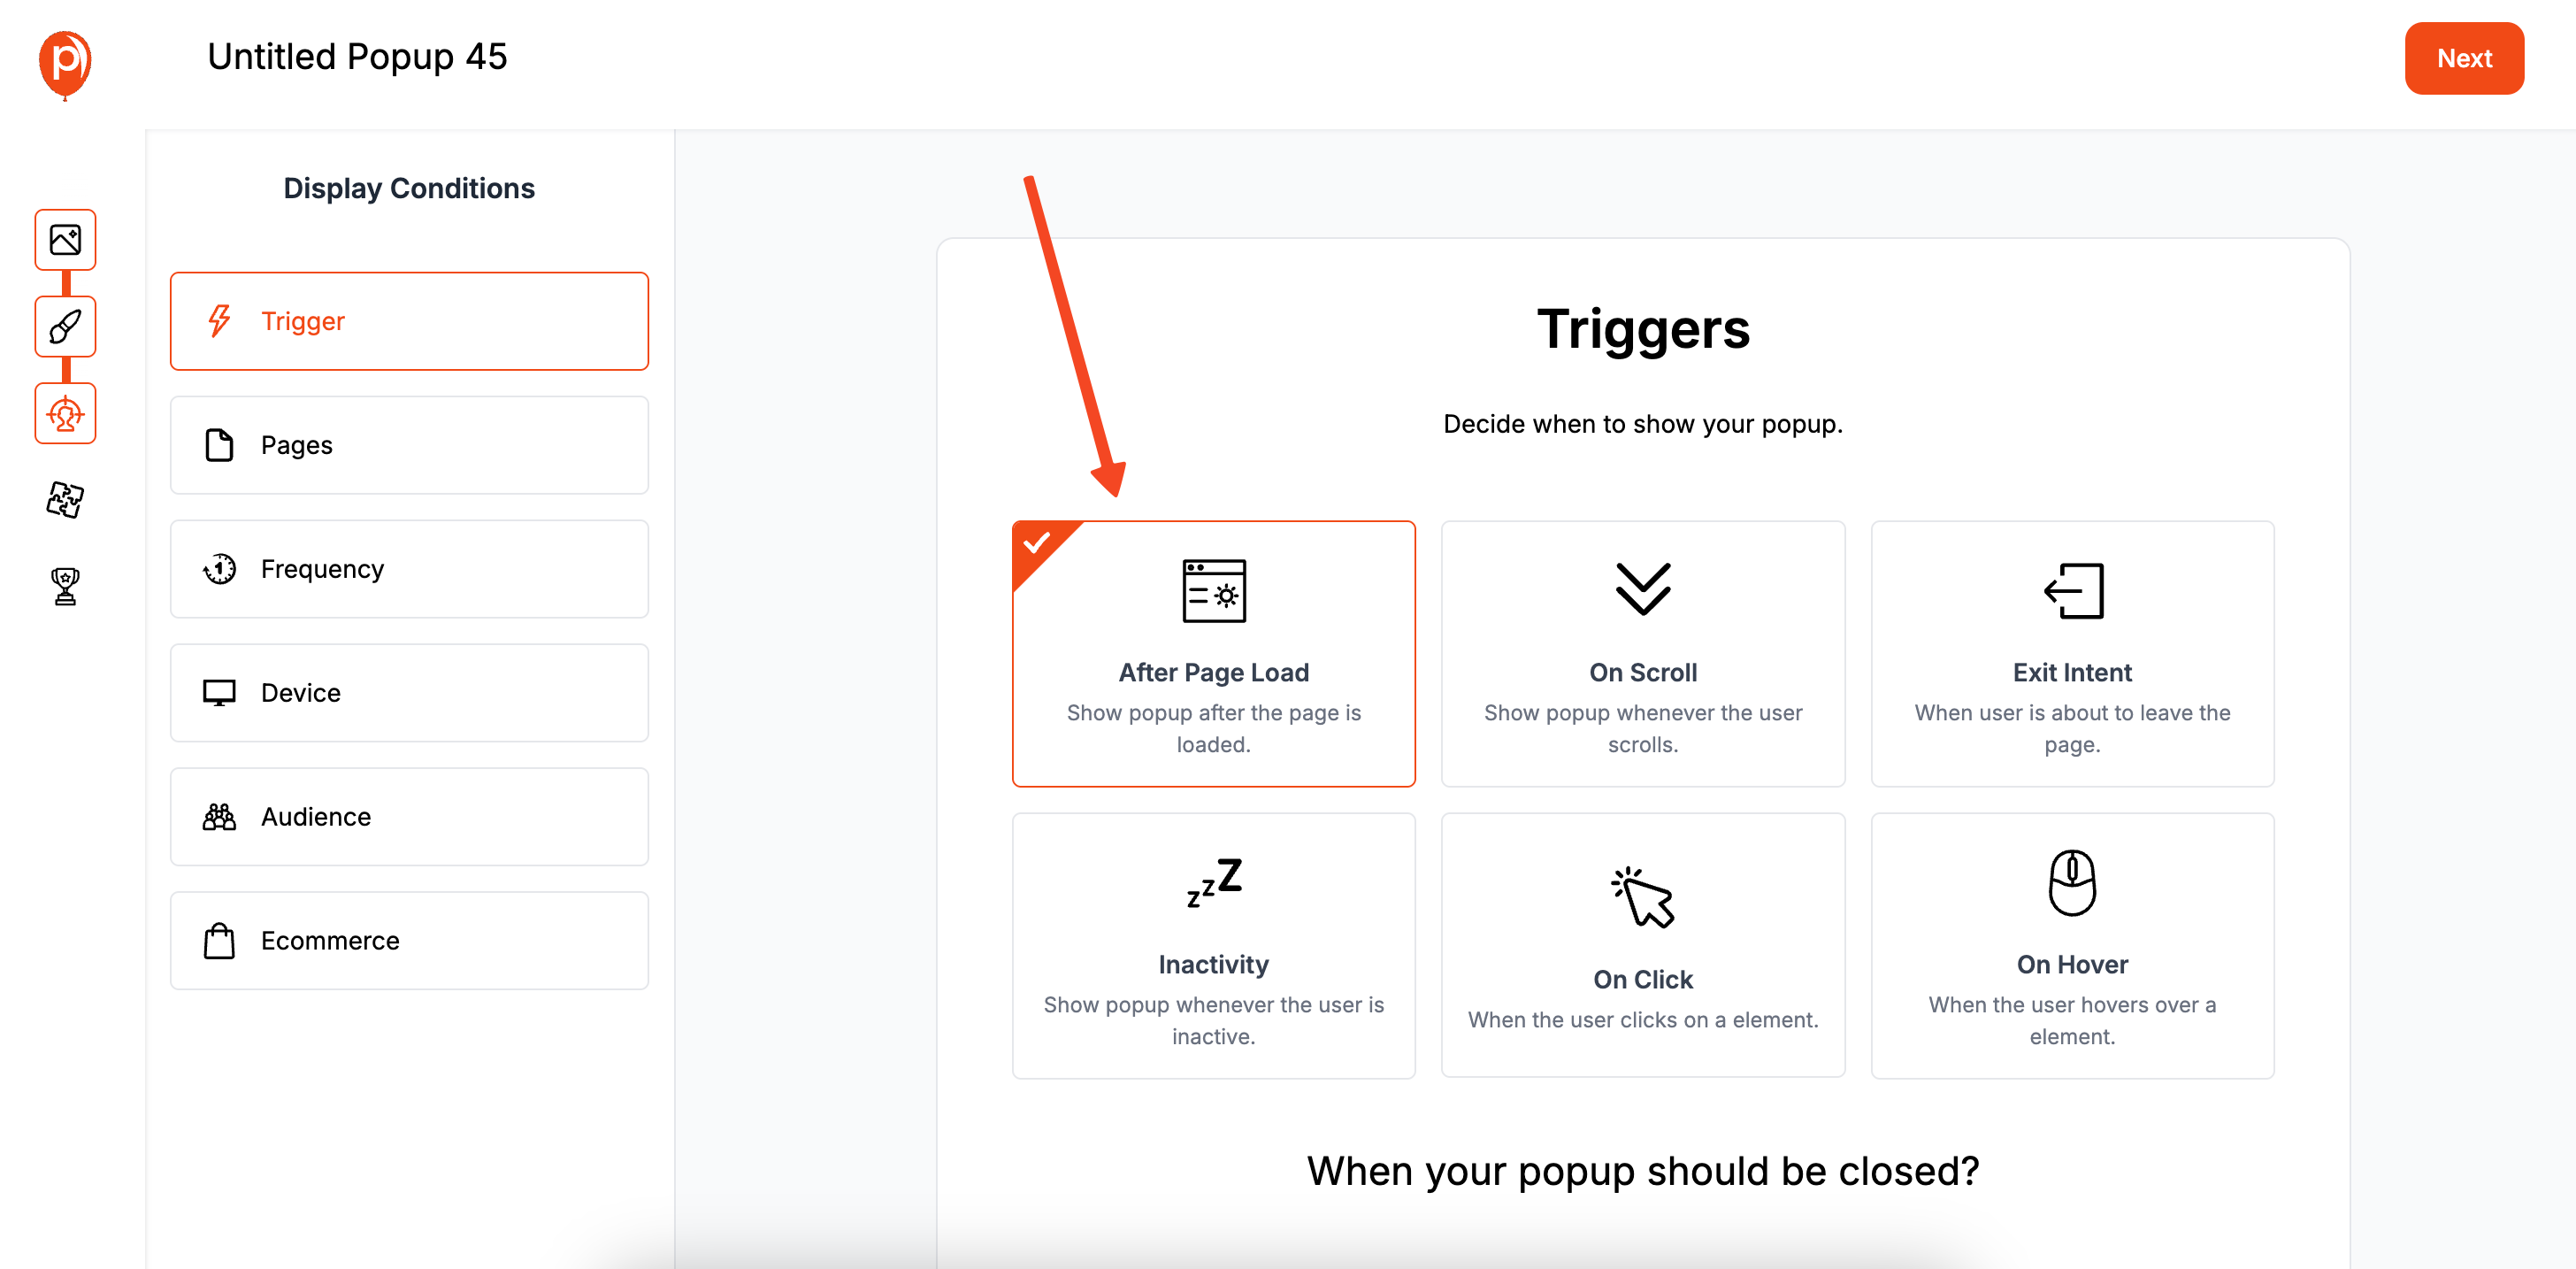
After you’re happy with the design, click "Next" to go to the "Display Conditions" screen. This is a powerful feature that lets you control exactly when and where your popup appears. You can choose to show it on specific pages, after a visitor has been on your site for a certain time, or even when they are about to leave.
I recommend starting with an "exit-intent" trigger. This shows the popup just as a visitor moves their mouse to close the tab, which is a great, non-intrusive way to capture their details before they go. To learn more about this method, read our article on exit-intent popups and how they work.
Step 5: Connect Your Favorite Email Tool
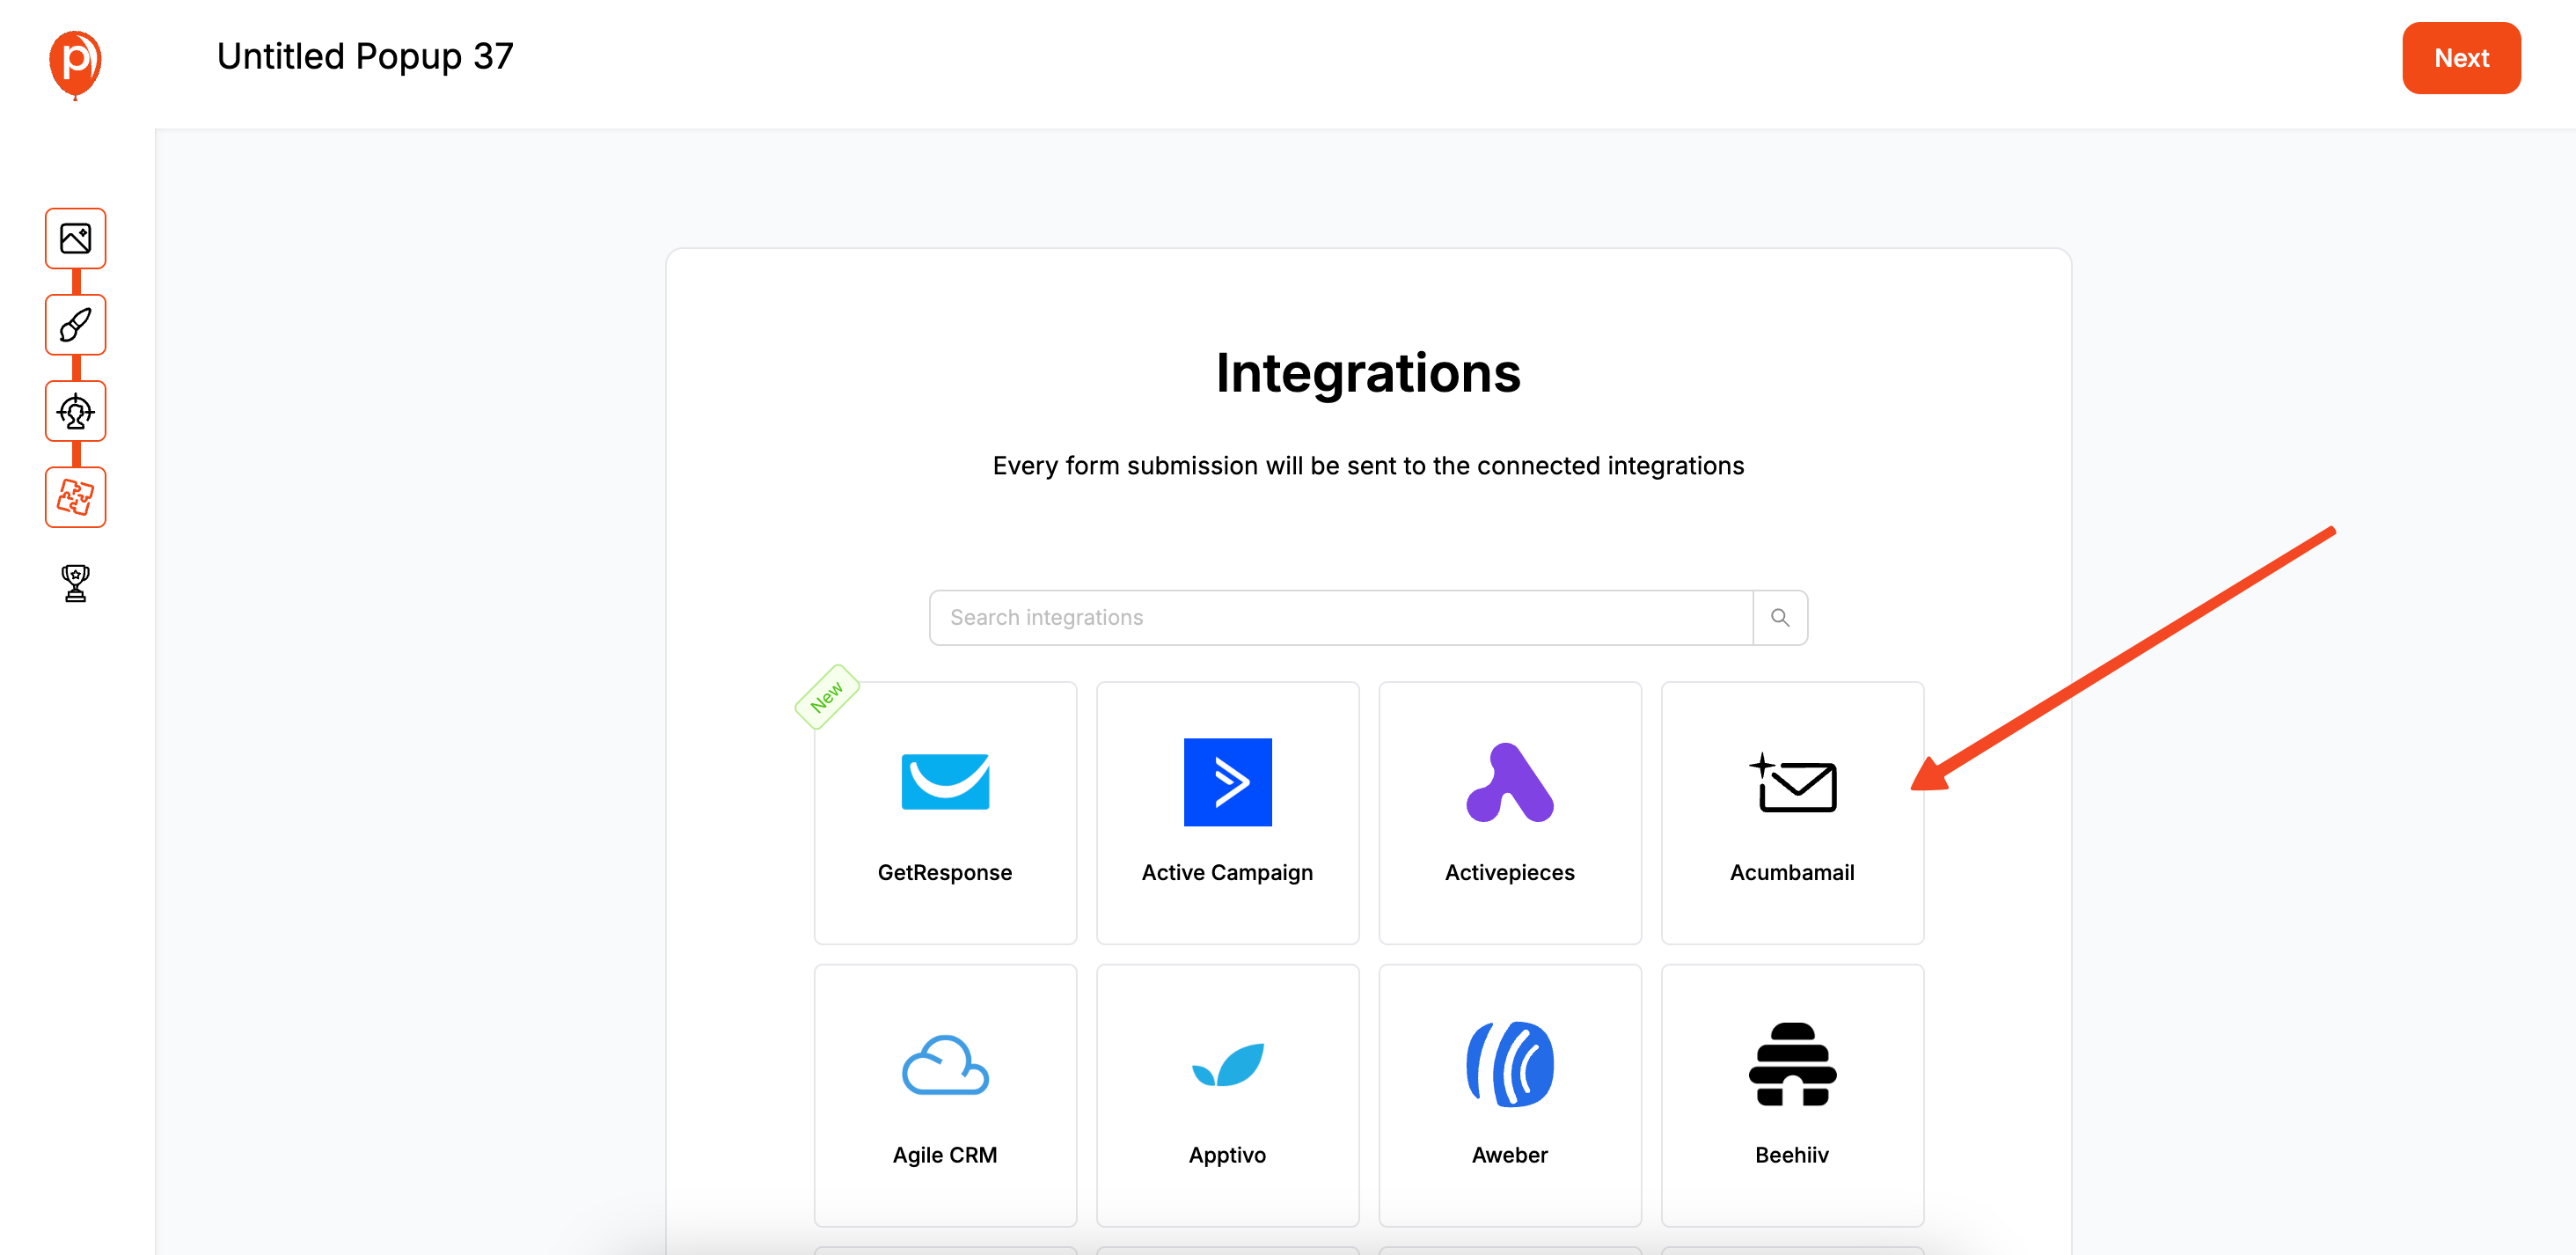
On the next screen, you’ll find our "Integrations." This is where you connect Poper directly to your email marketing platform, like Mailchimp, Klaviyo, or Omnisend. Following the simple on-screen steps will create a seamless link.
This is crucial because it ensures that every time someone signs up through your popup, their email is automatically added to your contact list. No manual exporting or importing is needed.

All that's left is to go back to your Poper dashboard and hit "Save & Publish" on the popup you designed.
Step 6: Install the Poper App on Wix and Publish
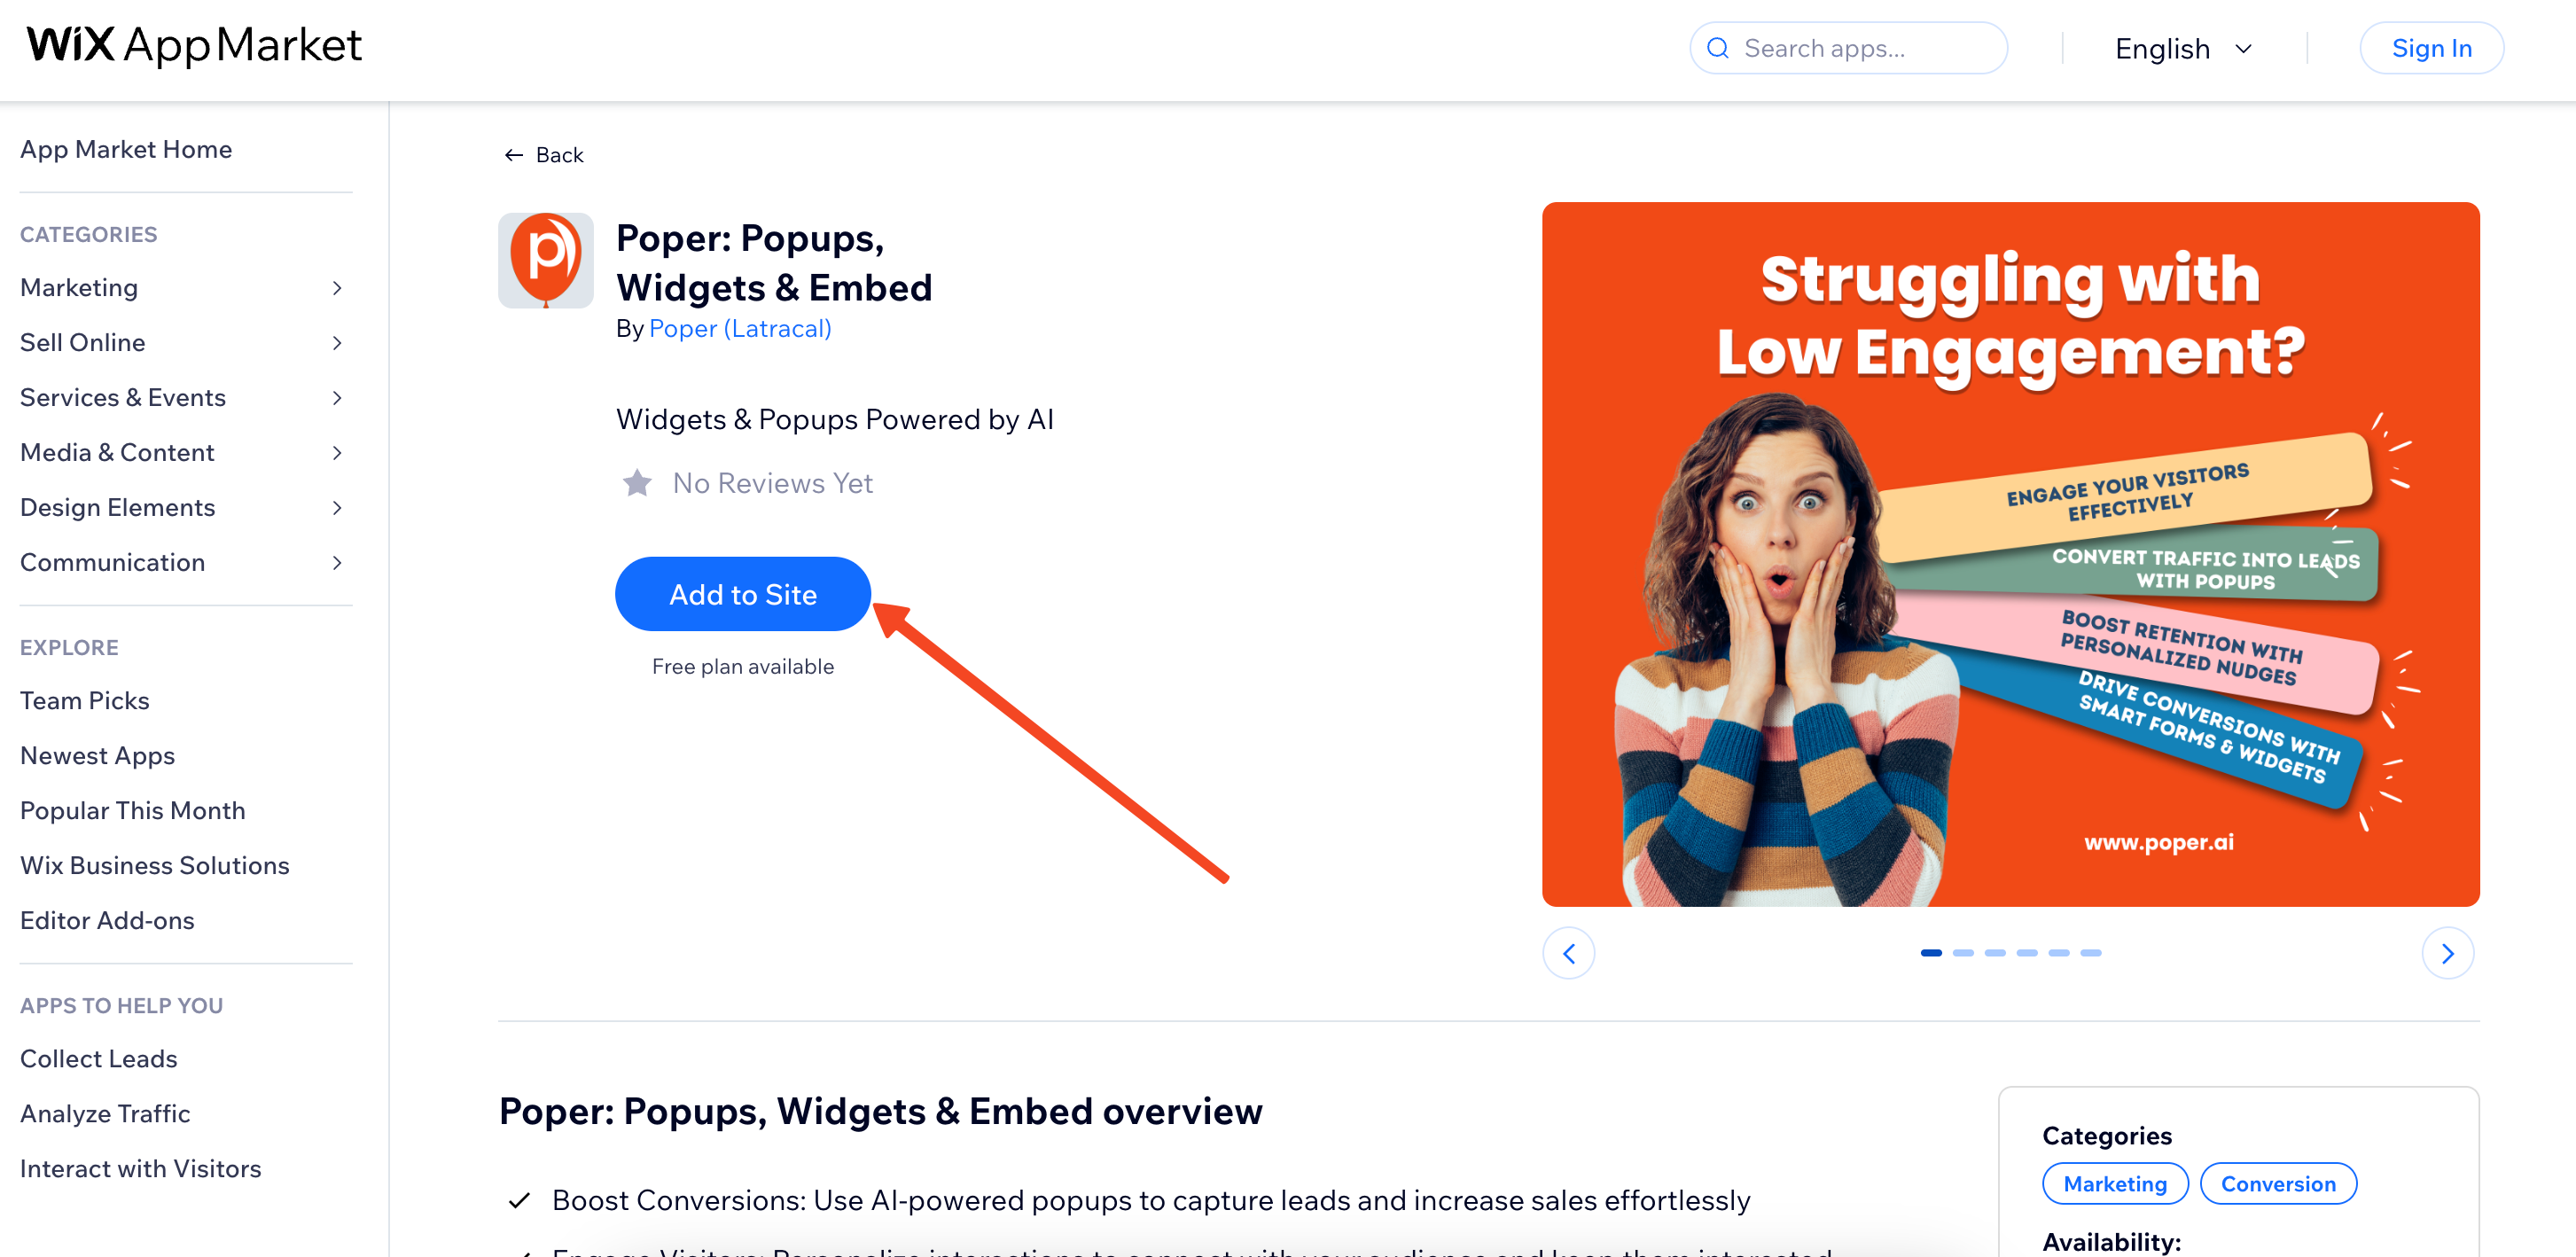
Now, let’s make the final connection. Head over to your Wix site editor, go to the Wix App Market, and search for "Poper."Click "Add to Site" and follow the prompts to connect the Poper account you just created. This automatically places our code on your site for you.
And that's it! Your popup is now live on your Wix website, ready to help you grow your audience.
Method 2: Using Wix's Native Lightboxes (The Built-in Method)
Wix's built-in tool for creating popups is called "Lightboxes." It's a versatile and tightly integrated feature that is perfect for most users' needs.
Step 1: Add a New Lightbox to Your Site
Open your website in the Wix Editor.
On the left-hand side menu, click the "Add Elements" (+) icon.
Navigate to "Interactive."
Under "Lightboxes," you'll see various categories like "Welcome," "Subscribe," "Promotion," and "Contact."
Browse through the professionally designed templates and click on one that best suits your goal. This will add the Lightbox to your site and open it in a special "Lightbox Mode" for editing.
Step 2: Design and Customize Your Lightbox
Once in Lightbox Mode, you can customize every aspect of your popup:
Edit Text and Images: Click on any element to change its content, font, color, and size.
Add Elements: You can add more elements to your Lightbox just like you would on a regular page, including forms, buttons, images, and videos. For a newsletter sign-up, you'll likely use the "Wix Forms" element.
Design the Overlay: Click on the overlay (the transparent background behind the Lightbox) and select "Change Overlay Background." You can adjust its color and opacity to control how much it obscures the main page content.
Add a Close Button: Ensure your Lightbox has a clear and visible 'X' (close) icon so users can easily dismiss it.
Step 3: Set the Lightbox Triggers and Behavior
This is where you control how and when your popup appears.
With your Lightbox selected, click "Set Triggers."
How does this lightbox open?
- Automatically: This is the most common option. The popup will appear automatically when a page loads.
- When a link is clicked: You can also set the Lightbox to open only when a user clicks a specific button, link, or image on your site.
Automatically: This is the most common option. The popup will appear automatically when a page loads.
When a link is clicked: You can also set the Lightbox to open only when a user clicks a specific button, link, or image on your site.
Name your Lightbox: Give it a descriptive name (e.g., "Homepage Welcome Popup").
Automatically display lightbox on pages:
- Choose which pages you want the popup to appear on. You can select "All Pages" or just specific ones, like the "Homepage."
Choose which pages you want the popup to appear on. You can select "All Pages" or just specific ones, like the "Homepage."
Set the Delay: If you chose "Automatically," you can set a time delay (e.g., show after 3 seconds). This is highly recommended to give visitors a moment to orient themselves.
Step 4: Publish Your Wix Site
Once you're happy with your design and triggers, exit Lightbox Mode by clicking "Exit Mode" at the top of the editor.
Click the "Publish" button in the top-right corner of the Wix Editor to make your changes live.
Test your live site to ensure the Lightbox appears according to the rules you set.
Wix's Native Lightboxes are powerful and sufficient for most users, offering good design control and essential triggers.
Wix Native Lightboxes vs. Poper App: Which to Choose?
| Feature | Wix Native Lightboxes | Poper App for Wix |
| Integration | Perfectly integrated, no extra steps | Seamless via Wix App, requires a Poper account |
| Ease of Use | Very easy, uses the familiar Wix Editor | Very easy, uses the Poper visual editor |
| Design | Good, uses Wix's templates and elements | High flexibility with Poper's templates & editor |
| Triggers | Basic (Time Delay, Click) | Advanced (Exit-Intent, Scroll, On-Click, etc.) |
| Targeting | Good (Page-level, some visitor info) | Very Advanced (Geo, Source, Device, etc.) |
| Cost | Included with your Wix plan | Poper has its own subscription plans (may have a free tier) |
Conclusion
When you need to add a popup on Wix, you have two excellent options:
For most users, Wix's native Lightboxes feature is the perfect tool. It's powerful, seamlessly integrated, easy to use, and comes included with your Wix plan. It provides all the essential features needed to create effective welcome, promotional, and subscription popups.
A third-party app like Poper is a fantastic choice if you need more advanced marketing triggers like exit intent, more granular audience targeting options (like by traffic source or location), or if you prefer Poper's specific design templates and editor.
Start with Wix's native Lightboxes to see if they meet your needs. If you find yourself wanting more advanced functionality, the Wix App Market makes it easy to add a specialized tool like Poper to take your popups to the next level.
Frequently Asked Questions (FAQ)
Q1: What is a "Lightbox" in Wix?
A: A Lightbox is Wix's term for a popup or overlay window. It's a box that appears on top of your webpage content.
Q2: Are Wix Lightboxes mobile-friendly?
A: Yes. When you're designing a Lightbox in the Wix Editor, you can switch to the mobile view to customize its appearance and layout specifically for mobile devices, ensuring a great experience for all visitors.
Q3: Can I trigger a Wix Lightbox when a user clicks a button?
A: Yes. When you set up the Lightbox trigger, instead of "Automatically," you can choose to have it open when a link is clicked. You would then link any button, text, or image on your site to that specific Lightbox.
Q4: Does Wix have an exit-intent trigger for its native Lightboxes?
A: Wix's trigger options are primarily based on time delay and which pages the Lightbox appears on. For advanced behavioral triggers like exit intent, you would typically use a third-party app from the Wix App Market, such as Poper.
Q5: How do I collect emails with a Wix Lightbox?
A: You would add a "Wix Forms" element to your Lightbox design. You can then configure this form to collect emails and other information. Submissions are stored in your Wix Contacts, and you can set up automations to respond to them. Need more options? See our guide on how to create website forms for popups and pages.

