
As the person who designed Poper, I’ve seen thousands of businesses struggle with one common problem: shopper hesitation. A customer lands on your site, loves a product, but decides to “think about it.” More often than not, they get distracted and never come back.
One of the most powerful tools I’ve built into Poper to solve this is the countdown timer. It’s a simple but incredibly effective way to create a sense of urgency and nudge visitors to take action now. It tells them the special offer, free shipping, or limited stock won’t last forever.
Today, I’m going to walk you through exactly how to set up a countdown timer for your BigCommerce store in just a few minutes.
Getting Started with Your Countdown Timer Campaign
The first step is deciding how you want to add the timer. I’ve made this flexible, so it fits right into your workflow.
Step 1: Choose Your Countdown Timer Method
You have two easy options here. If you want to get up and running as fast as possible, I recommend starting with a pre-made template.
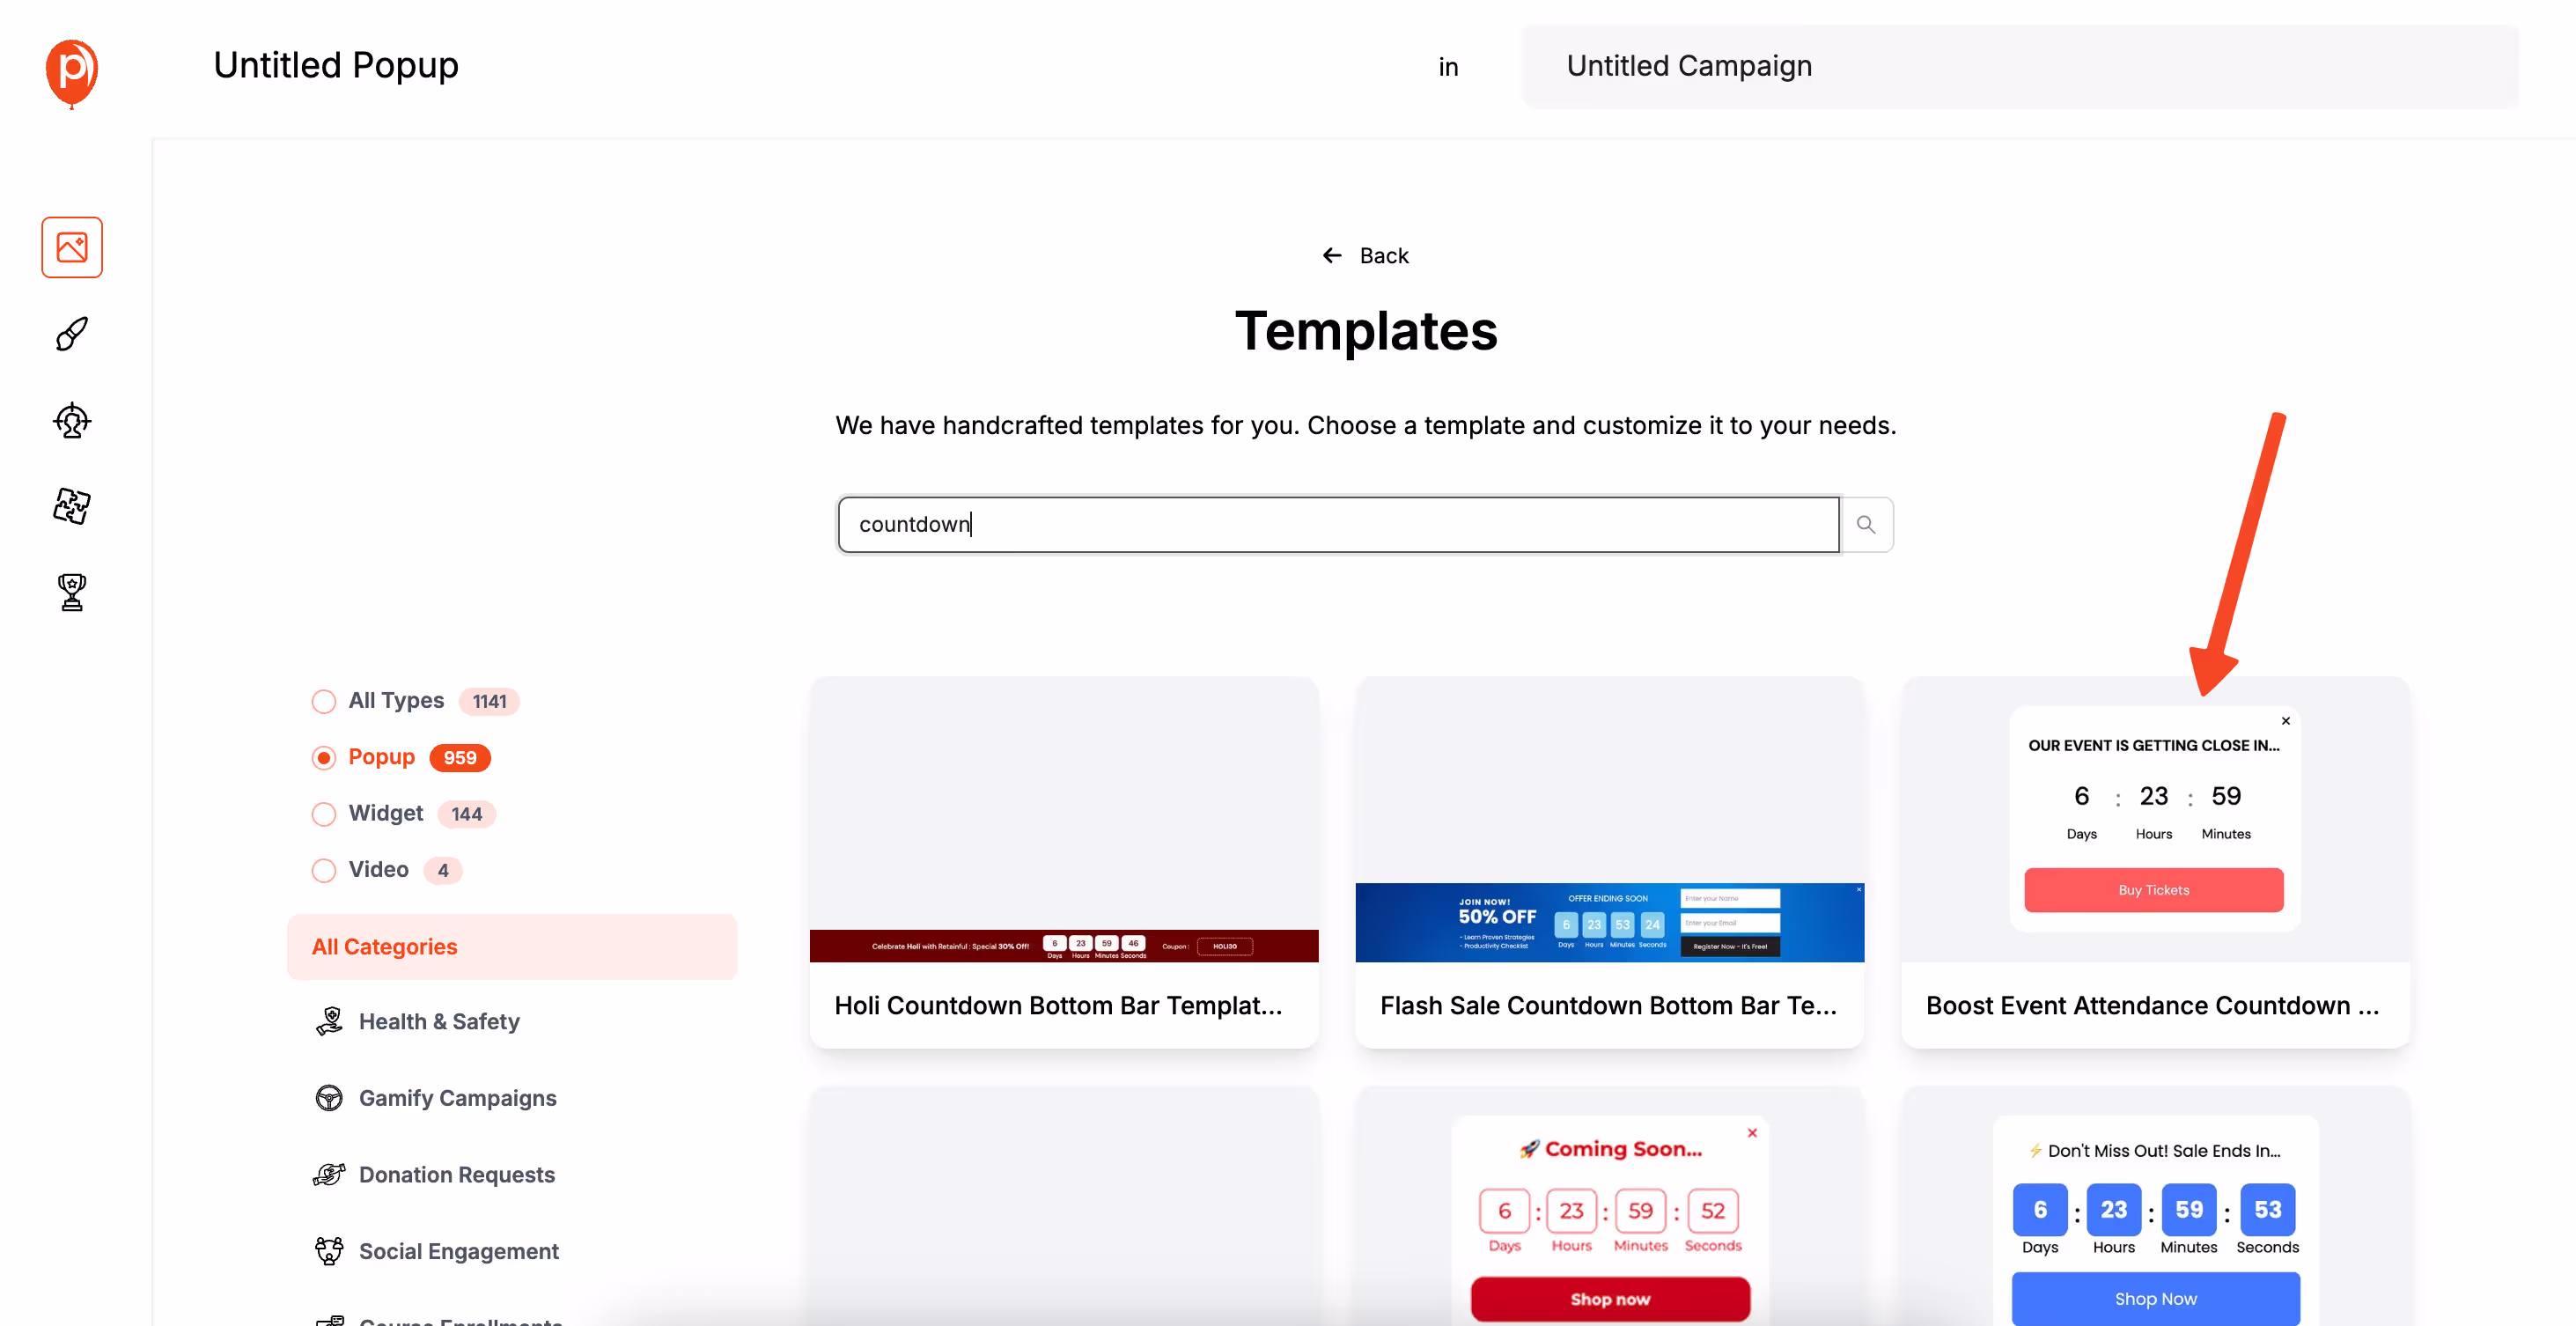
In the Poper dashboard, just search for "Countdown" or "Flash Sale" templates. You’ll find designs ready-made for events like holiday promotions or limited-time discounts.
Alternatively, you can add a countdown timer to any existing popup or a new design you’re building from scratch. In the editor, look at the left sidebar for the Add menu.
Just drag the Countdown element and drop it anywhere onto your popup canvas. This gives you total control over its placement.
Step 2: Set Up Your Timer’s End Date and Time
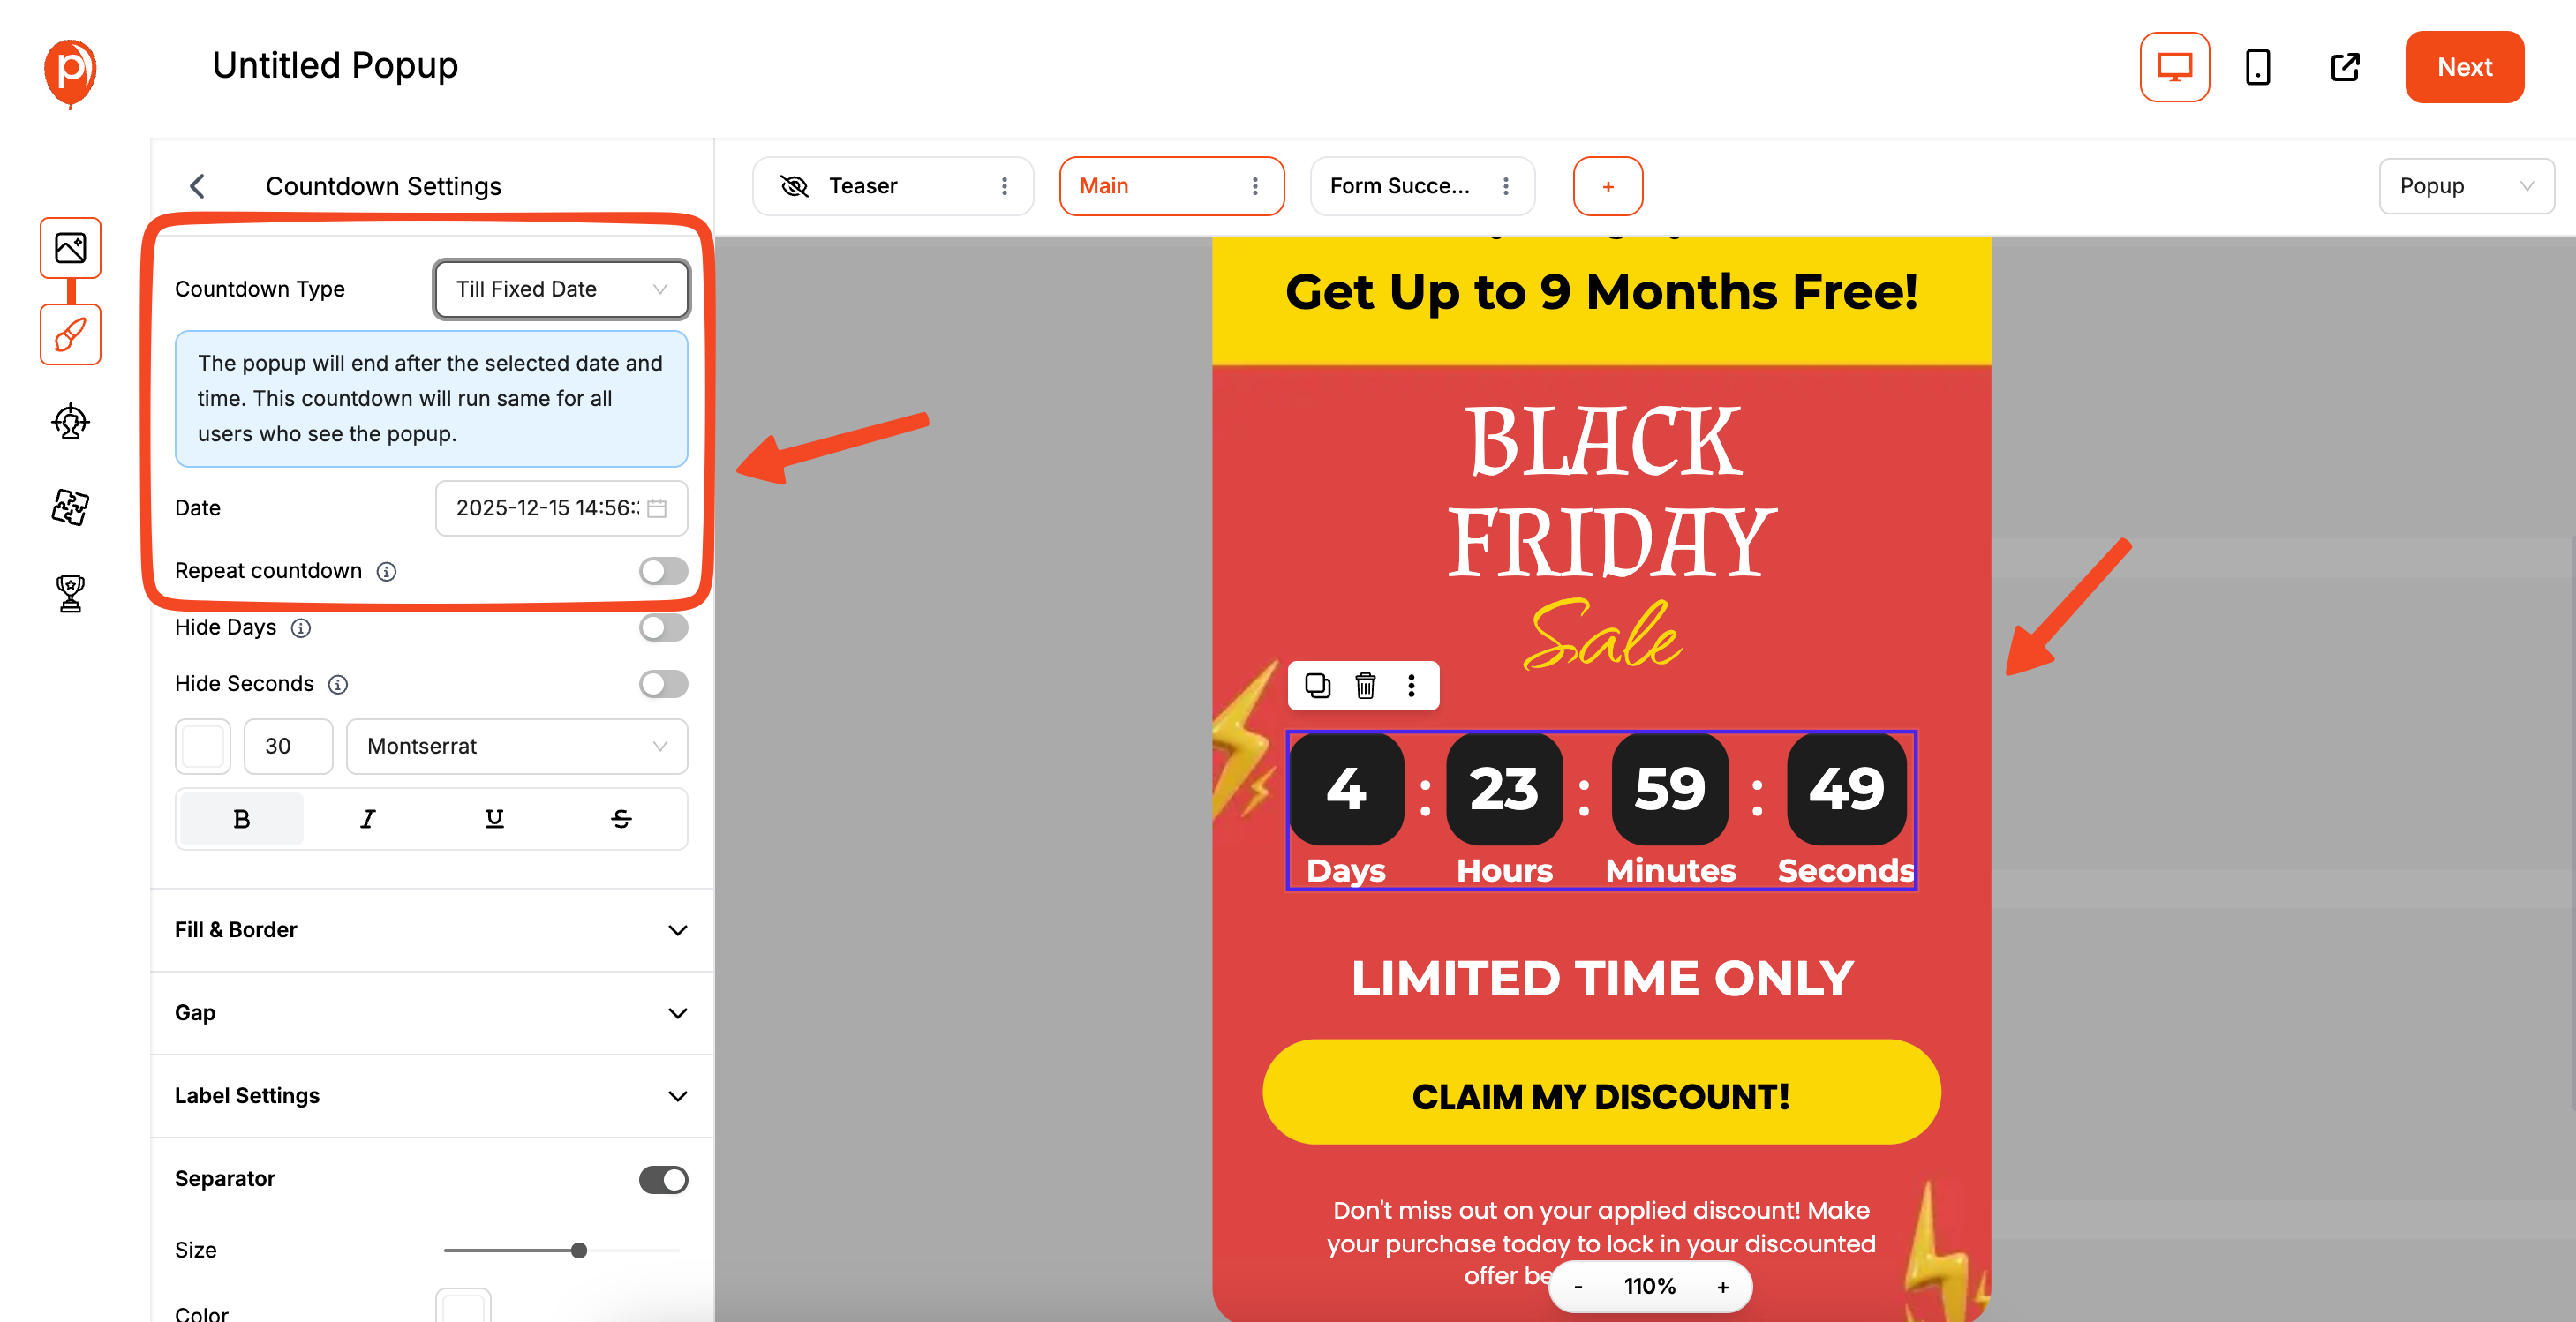
Once the countdown element is on your popup, click on it. The settings panel will appear on the left. This is where you tell the timer when to end. You can choose a Fixed Date, which is perfect for site-wide events like a Black Friday sale that ends on a specific day for everyone.
For a more personalized approach, you can select the Moving Date option. This starts the timer for each visitor individually when they first see the popup. For example, you can give every new visitor a 15-minute discount. This makes the offer feel exclusive and urgent just for them.
Step 3: Customize the Look and Feel
A timer needs to grab attention without being obnoxious. In the design settings, you can change the colors, fonts, and size to perfectly match your brand.
I always suggest using a color that contrasts with your popup’s background to make the timer pop.
You can also edit the labels under the numbers (e.g., "Days," "Hours," "Mins," "Secs"). Keeping it clean and simple is usually best. The goal is to build excitement, not create visual clutter that confuses your customer.
Targeting Your Countdown Offer for Maximum Impact
A great-looking timer is only effective if it shows up at the right moment. That’s where Poper’s targeting rules come in.
Step 4: Choose When and Where to Show Your Timer
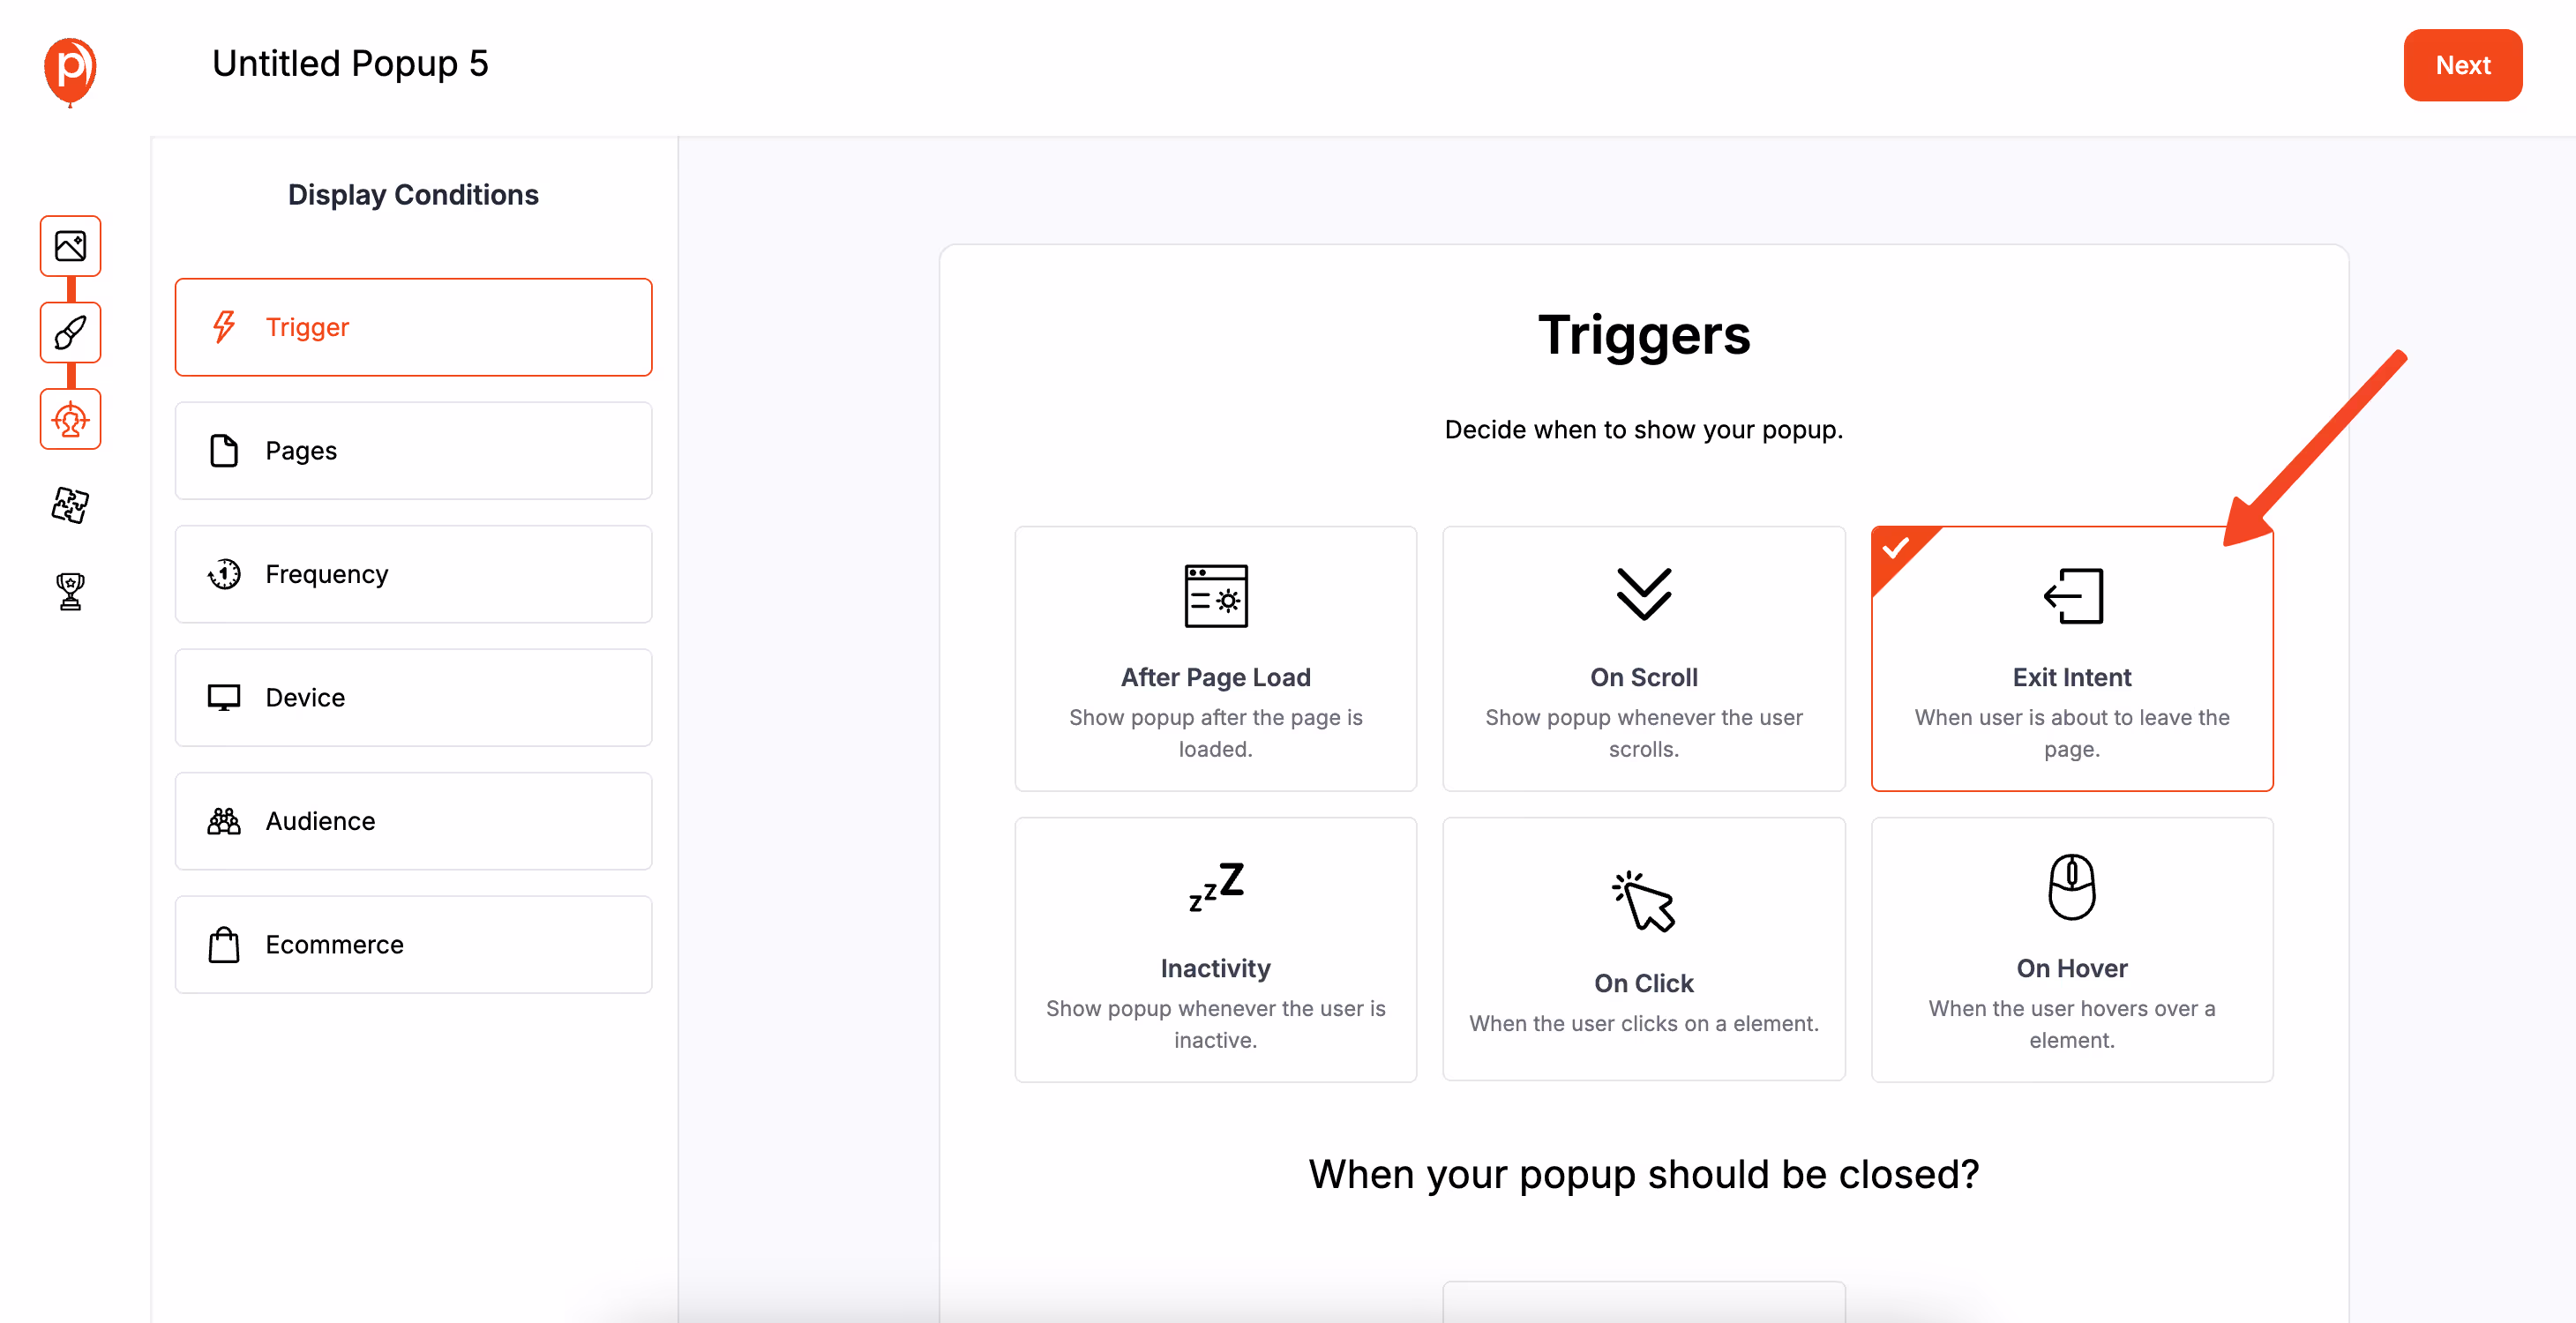
After you finish the design, head to the Targeting page. Here, you can decide what triggers your countdown popup. My personal favorite for saving a sale is Exit-Intent, which shows the timer right as a visitor is about to leave your store. It’s a powerful last-chance offer.
You can also set it to appear after a certain time on a page or when a user scrolls down. For BigCommerce stores, you can get even more specific. For instance, you could show a countdown timer only to customers who have more than $100 worth of products in their cart, encouraging them to check out immediately to secure their deal.
Step 5: Publish and Watch It Work
Once you're happy with your design and targeting rules, just hit Save & Publish. Your countdown timer is now live on your BigCommerce store.
I always recommend testing it yourself. Open your website in a new incognito window to see the popup as a new visitor would. Add items to your cart or move your mouse to exit the page to make sure your triggers are working exactly as you planned.
Why Countdown Timers Are So Effective
Countdown timers work because they tap into a core part of human psychology: the fear of missing out (FOMO). When a customer sees a clock ticking down, it makes the offer feel scarce and valuable, compelling them to make a decision instead of putting it off.
By adding this simple element, you can effectively reduce cart abandonment, increase conversion rates during sales, and create a more dynamic shopping experience. Go ahead and give it a try, I think you’ll be impressed with the results.

